How To Sharpen Planer Blades Video

If you have a planer, you know how important it is to keep the blades sharp. Dull blades not only result in rough and uneven cuts, but they also put unnecessary strain on the motor, reducing its lifespan. That’s why it’s crucial to regularly sharpen your planer blades to ensure optimal performance. In this video tutorial, we will show you step-by-step how to sharpen your planer blades effectively.
Firstly, it’s essential to gather the necessary tools and materials for the job. You will need a sharpening stone or sandpaper, honing oil, safety gloves, and a small brush or cloth for cleaning. Make sure to work in a well-ventilated area and wear protective goggles to prevent any accidents.
Start by removing the planer blades from the machine. Consult your planer’s manual for specific instructions on how to remove the blades safely. Once you have removed the blades, carefully inspect them for any nicks, dents, or chips. These imperfections can be easily fixed during the sharpening process.
Next, take your sharpening stone or sandpaper and secure it on a flat surface. Apply a few drops of honing oil to the stone or sandpaper to lubricate it. Holding the blade at a 20-degree angle, gently slide it back and forth across the stone or sandpaper. Focus on maintaining a consistent angle and applying light pressure. Repeat this motion several times until the blade’s edge is smooth and sharp.
After sharpening all your planer blades, carefully clean them with a small brush or cloth to remove any metal shavings or debris. Make sure to remove all the oil residue from the blades using a clean cloth. Reinstall the blades back into your planer following the manufacturer’s instructions, and you’re ready to enjoy precise and smooth cuts with your newly sharpened blades.

Remember to regularly inspect and sharpen your planer blades to ensure optimal performance and extend the lifespan of your planer. This video tutorial provides a simple and effective method for sharpening your planer blades, allowing you to achieve professional results with every woodworking project.
Why You Should Sharpen Planer Blades
Sharpening planer blades is an essential part of maintaining your woodworking tools. Whether you are a professional woodworker or just enjoy woodworking as a hobby, keeping your planer blades sharp is crucial for achieving clean and precise cuts.
Here are a few reasons why you should make sharpening your planer blades a regular part of your maintenance routine:
1. Improved Cutting Performance:
Sharp planer blades are more efficient and effective at cutting through wood. They create cleaner and smoother cuts, reducing the need for sanding and finishing work. By sharpening your planer blades, you can achieve professional-quality results.
2. Extended Tool Life:
Regularly sharpening your planer blades helps to extend their lifespan. Dull blades not only produce poor results but can also exert unnecessary strain on your planer motor. By keeping your blades sharp, you can avoid premature wear and tear on your tool.
3. Cost Savings:
Instead of replacing your dull planer blades with new ones, sharpening them can be a cost-effective solution. Sharpening your blades not only saves money but also reduces waste by reusing your existing blades. You can invest the saved money in other woodworking tools or materials.
4. Safety:

Dull planer blades can be dangerous as they require more force to cut through wood, increasing the risk of kickbacks or accidents. Sharp blades, on the other hand, provide a safer and more controlled cutting experience. Properly sharpened blades reduce the chance of mishaps and injuries in the workshop.
5. Personal Satisfaction:
Sharpening planer blades can be a rewarding process, especially when you see the improvement in your woodworking projects. Knowing that your tools are in optimal condition and producing precise results can boost your confidence and motivation to take on more challenging woodworking tasks.
Overall, sharpening your planer blades is a worthwhile investment of your time and effort. It not only enhances the quality of your woodworking but also saves you money in the long run. So, make sure to prioritize blade sharpening in your woodworking maintenance routine.
Step-by-Step Guide: Sharpening Planer Blades
Sharpening planer blades is a crucial step in maintaining the performance and longevity of your planer. Here is a step-by-step guide to help you effectively sharpen your planer blades:

Step 1: Safety First
Before you begin, make sure to put on safety goggles and gloves to protect yourself from any potential injuries. Additionally, ensure that the planer is turned off and unplugged.
Step 2: Remove the Blades
Using a wrench or socket set, remove the screws that secure the planer blades. Carefully take out the blades one by one, ensuring not to touch the sharp edges.
Step 3: Inspect the Blades
Closely examine each blade for any signs of nicks, chips, or dullness. If any blade is damaged beyond repair, consider replacing it with a new one. Otherwise, continue with the sharpening process.
Step 4: Prepare the Sharpening Tools
Gather the necessary tools for sharpening, including a honing guide, sharpening stones, and lubricating oil. Ensure that the sharpening stones are of the appropriate grit for your blades.
Step 5: Secure the Blade
Place one blade in the honing guide, ensuring that it is held firmly in place. The honing guide will help maintain the correct sharpening angle throughout the process.

Step 6: Begin Sharpening
Using the sharpening stones, start grinding the blade in a back-and-forth motion. Apply consistent pressure and make sure to cover the entire blade evenly. Repeat this process for each blade.
Step 7: Test Sharpness
After sharpening all the blades, carefully touch the edges to check their sharpness. If they still feel dull or rough, repeat the sharpening process until they are razor-sharp.
Step 8: Clean and Reassemble
Thoroughly clean each blade with a cloth to remove any metal filings or debris. Once clean, reassemble the blades in the correct order and securely tighten the screws.
Step 9: Final Inspection
Inspect the reinstalled blades to ensure they are properly aligned and tightened. Double-check that the planer is still turned off and unplugged before proceeding.
Step 10: Test the Planer
With everything securely in place, test the planer on a piece of scrap wood. If the planer operates smoothly and leaves clean, even cuts, your blades are successfully sharpened!

Remember to regularly inspect and sharpen your planer blades to maintain optimal performance and extend their lifespan. Follow this step-by-step guide whenever you need to sharpen your planer blades, and you’ll be able to achieve excellent results every time.
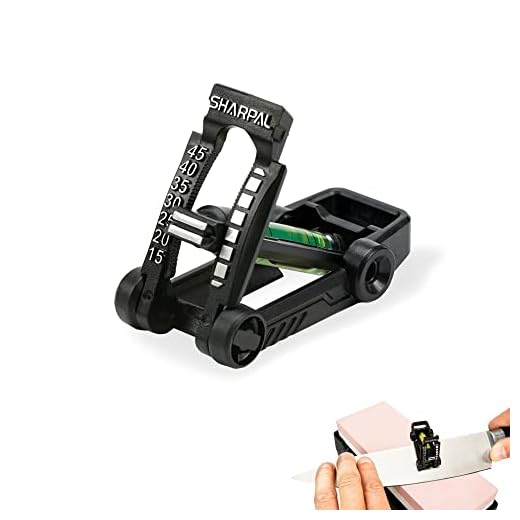
Tools and Materials Needed for Sharpening Planer Blades
When it comes to sharpening planer blades, you will need a few essential tools and materials to ensure a successful and efficient process. Here are some of the items you will need:
1. Bench Grinder
A bench grinder is a powerful tool that serves as the backbone of any sharpening process. It is essential for grinding and shaping the blades, removing any dull edges or nicks that may have accumulated over time. Make sure to use a high-quality grinder with a fine grit grinding wheel for optimal results.
2. Blade Jig or Holder
A blade jig or holder is a tool designed to securely hold the planer blades in place during the sharpening process. It ensures that the blades are positioned correctly and makes it easier to maintain a consistent angle while sharpening. There are various types of jigs available, so choose one that suits your specific planer blade size and design.
3. Honing Guide
A honing guide is used to maintain a consistent bevel angle while honing the planer blades. It acts as a guide and helps to achieve an even and accurate sharpening of the blade edges. Look for a honing guide that is compatible with your planer blade size and offers precise adjustment options.

4. Sharpening Stones
Sharpening stones are essential for the actual sharpening process. They come in various grit levels, ranging from coarse to fine. Start with a coarse grit stone to remove any burrs or major imperfections on the blades, and gradually work your way up to finer grit stones for a polished and razor-sharp edge.
5. Safety Gear
Lastly, don’t forget to prioritize safety while sharpening planer blades. Wear safety goggles to protect your eyes from sparks or debris that may fly off during the grinding process. Additionally, make sure to use gloves to protect your hands and a face mask to avoid inhaling any particles.
By having these tools and materials on hand, you’ll be well-equipped to effectively sharpen your planer blades and restore their cutting performance.
Preparation Before Sharpening Planer Blades
Before sharpening planer blades, it is important to properly prepare yourself and the tools you will be using. Taking the time to prepare will ensure that you have a safe and successful sharpening experience. Here are some steps to follow:
|
Gather the necessary tools:
|
Ensure a clean and well-lit workspace:
|
Inspect the planer blades:
Before sharpening, carefully examine the planer blades for any signs of damage, such as chips, cracks, or excessive wear. If any blades are damaged, they should be replaced before proceeding with the sharpening process.
Clean the planer blades:
Use a rust remover and a clean cloth to remove any dirt, debris, or rust from the planer blades. Ensuring that the blades are clean will allow for a more effective sharpening process.
Mark the blades:
Using a marker, mark the first blade you plan to sharpen. This will help you keep track of which blade has been sharpened and prevent any confusion during the process.
Safely secure the planer:
Depending on the type of planer you have, you may need to use a wrench or a screwdriver to secure the planer in place. This will prevent any movement or accidents while sharpening the blades.
By following these preparation steps, you will set yourself up for a successful planer blade sharpening. Remember to always prioritize safety and take your time to ensure a thorough and effective sharpening process.
Sharpening Techniques for Planer Blades
Keeping your planer blades sharp is essential for achieving smooth and precise cuts in your woodworking projects. Here are some techniques to help you sharpen your planer blades effectively:
1. Safety First
Before you start sharpening your planer blades, always prioritize safety. Make sure to wear safety goggles and gloves to protect yourself from any potential injuries.
2. Remove the Blades
Start by removing the planer blades from your planer. This will allow you to sharpen them more easily and safely. Follow the manufacturer’s instructions for removing the blades.
3. Clean the Blades
Before sharpening the blades, it’s important to clean them thoroughly. Use a stiff brush or a wire brush to remove any debris, resin, or rust that may be present on the blades.
4. Choose the Right Sharpening Method
There are several methods you can use to sharpen planer blades, including using a sharpening stone, a honing guide, or a bench grinder with a sharpening jig. Choose the method that you are most comfortable with and that suits your tools and skills.
5. Sharpening Angle
When sharpening the blades, maintain the original bevel angle. Refer to the manufacturer’s instructions or the blade specifications to determine the correct angle. A common angle for planer blades is around 25 degrees.
6. Start Sharpening
Depending on the method you chose, start sharpening the blades by following the appropriate technique. Take your time and apply consistent pressure while sharpening to ensure an even and sharp edge on the blades.
7. Check for Sharpness
After sharpening, carefully inspect the blades to ensure they are sharp. You can gently touch the edge with your finger, but be cautious as they can be extremely sharp. If needed, repeat the sharpening process until you achieve the desired sharpness.
8. Reinstall the Blades
Once the blades are sharpened and inspected, reinstall them back into the planer according to the manufacturer’s instructions. Make sure they are securely tightened to prevent any accidents during operation.
By following these sharpening techniques, you can maintain the sharpness of your planer blades, ensuring accurate and smooth cuts in your woodworking projects.
Tips for Maintaining Sharp Planer Blades
Maintaining sharp planer blades is essential for achieving clean and smooth cuts. Here are some tips to help you maintain the sharpness of your planer blades:
1. Proper Installation
Ensure that your planer blades are installed correctly and securely in the cutterhead. Loose or improperly installed blades can cause vibrations and decrease the overall cutting performance.
2. Regular Cleaning
After every use, clean your planer blades thoroughly to remove any debris, pitch, or resin buildup. Use a soft cloth or brush to wipe off any residue, ensuring that the blades are clean and free from any obstructions.
3. Avoid Hitting Hard Objects
When operating the planer, make sure to avoid hitting hard objects such as nails or screws. These can cause the blades to chip or dull, affecting the quality of your cuts. Inspect the material for any hidden objects before planing.
4. Use Sharp Blades
Regularly inspect your planer blades for signs of wear and tear. Dull blades can affect the cutting efficiency and produce rough surfaces. If you notice any signs of damage or dullness, replace the blades promptly to maintain optimal cutting performance.
5. Adjust Feeding Rate
Varying the feeding rate can help maintain sharp planer blades. Avoid forcing the material through the planer too quickly, as this can cause excessive stress on the blades. Instead, adjust the feeding rate to ensure a consistent and smooth cut.
6. Store Properly
When not in use, store your planer blades in a clean and dry area to prevent rust and corrosion. Consider using blade covers or protective cases to provide additional protection and extend the lifespan of your blades.
By following these tips, you can ensure that your planer blades stay sharp and deliver excellent cutting results. Regular maintenance and proper care will help prolong the life of your blades and save you time and money in the long run.
Benefits of Sharpening Planer Blades
Keeping planer blades sharp is essential for achieving smooth and precise woodworking results. Regular sharpening of planer blades offers a range of benefits for both professionals and hobbyists:
1. Improved Cutting Performance
Sharpened planer blades cut through wood more efficiently, resulting in cleaner and smoother cuts. Dull blades can leave behind tear-out or rough surfaces, which can be time-consuming to fix and may require extra sanding or finishing.
2. Reduced Material Waste
Sharp planer blades require less force to cut through wood, reducing the chance of tearing or splintering the material. This not only leads to less wasted wood but also helps save on replacement costs by extending the lifespan of the blades.
3. Time and Cost Savings
By maintaining sharp planer blades, woodworkers can save time and money. Sharp blades allow for faster stock removal, shortening the time spent in the workshop. Additionally, frequent blade replacement can be costly, making regular blade sharpening a cost-effective alternative.
4. Consistent Results
When planer blades are sharp, they ensure consistent thickness and a smooth finish across the entire wood surface. This is particularly important when working on larger projects or when multiple pieces of wood need to be dimensioned to the same size.
Overall, sharpening planer blades is a crucial practice that offers numerous benefits, including improved cutting performance, reduced material waste, time and cost savings, and consistent woodworking results. Regular maintenance and sharpening of planer blades are essential for achieving top-quality craftsmanship.
Questions and answers
What is the purpose of sharpening planer blades?
The purpose of sharpening planer blades is to restore their sharpness and effectiveness in cutting and shaping wood. Over time, planer blades can become dull and produce less-than-desirable results. Sharpening them ensures clean cuts and smoother finishes.
How often should I sharpen my planer blades?
The frequency of sharpening planer blades depends on how often you use them and the type of wood you work with. As a general rule, it is recommended to sharpen planer blades every 10-15 hours of use. However, if you notice that the blades are not cutting as effectively or producing rough surfaces, it may be time to sharpen them.
Is it difficult to sharpen planer blades?
Sharpening planer blades can be a straightforward process if you have the necessary tools and follow the proper technique. While it may require some practice and patience, it is not inherently difficult. There are various methods and tutorials available, including videos, that can guide you through the process.
What tools and materials are needed to sharpen planer blades?
To sharpen planer blades, you will need a few basic tools and materials, including a bench grinder, a blade-setting jig, a sharpening stone or sandpaper, and a honing guide. Additionally, you may need a marker or paint to mark the edges of the blades and ensure even sharpening.
Are there any safety precautions I should take while sharpening planer blades?
Absolutely! Sharpening planer blades involves working with sharp objects and power tools, so it is important to follow safety precautions. Some safety measures include wearing protective gloves and safety glasses, securing the blades properly, and using the tools in a well-ventilated area. Always refer to the user manual and instructions provided with the tools.


Meet Harrison Clayton, a distinguished author and home remodeling enthusiast whose expertise in the realm of renovation is second to none. With a passion for transforming houses into inviting homes, Harrison's writing at https://thehuts-eastbourne.co.uk/ brings a breath of fresh inspiration to the world of home improvement. Whether you're looking to revamp a small corner of your abode or embark on a complete home transformation, Harrison's articles provide the essential expertise and creative flair to turn your visions into reality. So, dive into the captivating world of home remodeling with Harrison Clayton and unlock the full potential of your living space with every word he writes.


