How To Set Up A Hand Wood Planer

If you’re a woodworking enthusiast, you know how crucial it is to have the right tools for the job. One of the most essential tools in any woodworker’s arsenal is a hand wood planer. This versatile tool allows you to smooth rough surfaces, flatten uneven boards, and create clean, precise edges. But before you can start using your hand wood planer, you need to set it up correctly.
The first step in setting up your hand wood planer is to ensure that the blades are sharp and properly aligned. Dull or misaligned blades can cause tear-outs and leave undesirable marks on your wood. To sharpen the blades, use a honing guide and a fine-grit sharpening stone. Make sure to follow the manufacturer’s instructions for sharpening and aligning the blades, as different planers may require different techniques.
Once your blades are sharp and aligned, you can proceed to adjust the depth of cut. The depth of cut determines how much material will be removed with each pass of the planer. To adjust the depth of cut, locate the adjustment knobs on your planer and turn them in the appropriate direction. It’s important to make small adjustments and test the planer on a scrap piece of wood until you achieve the desired depth.
After adjusting the depth of cut, it’s time to set the planer’s mouth opening. The mouth opening refers to the gap between the blades and the front sole of the planer. A narrow mouth opening will result in a smoother finish, while a wider opening will allow for more aggressive cuts. Use the adjustment knobs to position the blades closer or farther from the sole, depending on your desired outcome.
Now that your hand wood planer is properly set up, you’re ready to start using it. Remember to always work with the grain of the wood and make light, controlled passes. With practice, you’ll become more comfortable and proficient in using your hand planer, and you’ll be able to achieve professional-quality results in no time!

Choosing a Hand Wood Planer
When it comes to choosing a hand wood planer, there are several factors to consider. The right planer can make a significant difference in the quality of your woodworking projects. Here are a few key things to keep in mind:
| Factor | Description |
|---|---|
| Blade Type | Consider whether you prefer a high-speed steel (HSS) blade or a carbide-tipped blade. HSS blades are more affordable but may require more frequent sharpening, while carbide-tipped blades are more durable and stay sharp longer. |
| Planer Size | Different planer sizes are available, ranging from small handheld models to larger benchtop or stand-alone units. Consider the size of the projects you typically work on and choose a planer that suits your needs. |
| Planer Width | The width of the planer determines the maximum width of the wood it can handle. Make sure to choose a planer width that accommodates the size of the boards you typically use. |
| Adjustability | Look for a planer that offers easy adjustments for depth of cut and blade angle. This will allow you to achieve the desired thickness and smoothness in your wood surfaces. |
| Comfort and Control | Consider the ergonomics of the planer, such as the grip and handle. A comfortable and well-balanced planer will make it easier to use and reduce fatigue during extended use. |
| Price | Set a budget and compare prices to find a hand wood planer that offers a good balance of features and affordability. Remember, higher-priced planers may offer more advanced features and durability. |
By considering these factors, you can choose a hand wood planer that is well-suited to your woodworking needs and preferences. Remember to also read reviews and seek recommendations from other woodworkers to make an informed decision.
Preparing Your Workspace
Before you begin using a hand wood planer, it’s important to properly prepare your workspace. This will ensure a safe and efficient working environment. Here are some steps to follow:
1. Clear the area: Start by clearing your workspace of any clutter, tools, or materials that may get in your way. Having a clean and organized space will make it easier to maneuver the wood planer and avoid any accidents.
2. Check for stability: Ensure that your workbench or table is stable and secure. You don’t want any wobbling or movement while using the planer, as it can affect the accuracy and safety of your work. If necessary, consider attaching the planer to the work surface for added stability.

3. Set up lighting: Good lighting is crucial when working with hand tools. Make sure your workspace is well-lit, either by using natural light or by adding additional lighting fixtures. This will help you see the wood surface clearly and prevent any mistakes or injuries.
4. Gather necessary tools: Before you start using the hand wood planer, gather all the tools and accessories you will need. This may include safety goggles, ear protection, a dust mask, and any other personal protective equipment. Having everything within reach will save you time and ensure you can work without interruptions.
5. Install planer blades: If your wood planer requires blade installation, now is the time to do it. Follow the manufacturer’s instructions carefully to ensure proper installation and alignment. Pay attention to the blade’s sharpness and replace them when necessary for optimal performance.
By following these steps and adequately preparing your workspace, you can create a safe and efficient environment for using a hand wood planer. Remember to always prioritize safety and take necessary precautions to protect yourself and those around you.
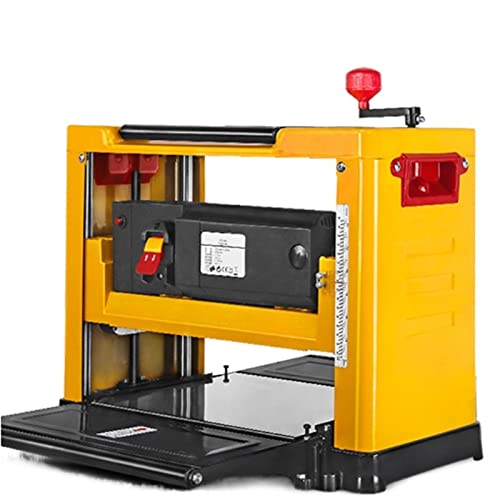
Understanding the Different Parts of a Hand Wood Planer
A hand wood planer is a versatile tool used for shaping and smoothing wooden surfaces. To effectively operate a hand wood planer, it’s important to understand its different parts. Let’s take a closer look at each part and its function.

The Blade
The blade is the most important part of a hand wood planer. It is a sharp, metal cutting edge that removes thin layers of wood as it is pushed over the surface. The blade needs to be sharp and well-maintained for optimal performance.
The Sole
The sole, also known as the base or bed, is the flat surface underneath the blade. It provides stability and support as the planer glides over the wood. The sole should be smooth and free of any imperfections to ensure even planing.
The Handle
The handle is the part of the planer that you hold and grip while using it. It is usually located on top of the planer and allows you to apply downward pressure and control the movement. A comfortable and ergonomic handle is essential for reducing fatigue during extended use.
The Depth Adjustment Knob
The depth adjustment knob allows you to control the depth of the cut made by the blade. By turning the knob, you can adjust the blade’s position relative to the sole, thereby determining the amount of material that will be removed with each pass.
The Chip Breaker
The chip breaker is a metal component located directly behind the blade. It helps break up the wood shavings or chips produced by the blade, preventing them from clogging the planer. Keeping the chip breaker clean and properly aligned is important for maintaining smooth operation.
By understanding the different parts of a hand wood planer, you can effectively utilize this tool for various woodworking tasks. Remember to always follow safety guidelines and maintain your planer properly to ensure its longevity and optimal performance.
Adjusting the Depth of Cut
One of the key steps in setting up a hand wood planer is adjusting the depth of cut. This refers to how much material the planer will remove with each pass. By adjusting the depth of cut, you can achieve the desired level of wood thickness and smoothness.
The depth of cut is usually adjusted using a knob or lever located on the side of the planer. Start by loosening the locking mechanism, which is often a screw or knob, to allow for adjustments. Then, carefully turn the depth adjustment knob to increase or decrease the depth of cut.
When adjusting the depth of cut, it’s important to consider the type of wood you’re planing and the desired outcome. For rough stock removal, a deeper cut may be necessary, while a shallower cut is often preferred for fine finishing work.
It’s recommended to make small incremental adjustments to the depth of cut and test the planer on a scrap piece of wood before moving on to your actual project. This allows you to fine-tune the settings and ensure the desired results.
Remember to always tighten the locking mechanism after making adjustments to prevent the depth of cut from changing inadvertently during use. This will help maintain consistency and safety while planing.
Overall, adjusting the depth of cut on a hand wood planer is an important step to achieve the desired results in your woodworking projects. Take your time, make small adjustments, and always prioritize safety and precision when using a planer.
Setting Up the Fence and Guide Rails
Setting up the fence and guide rails correctly is crucial for achieving accurate and consistent wood planing results. The fence helps to keep the wood steady and prevents it from moving while it is being planed, while the guide rails assist in guiding the wood through the planer.
Here is a step-by-step guide to properly set up the fence and guide rails:
1. Prepare the Planer
Before you start setting up the fence and guide rails, ensure that your hand wood planer is securely mounted or clamped to a sturdy workbench or surface. This will provide a stable base for your planing tasks.
2. Check the Alignment
Inspect the alignment of the fence and guide rails to ensure they are properly set up. If necessary, consult the user manual of your specific hand wood planer model for any specific instructions on aligning the fence and guide rails.
3. Adjust the Fence
Using the necessary tools, adjust the position of the fence according to your desired planing thickness. The fence should be parallel to the planing surface of the planer blades. Double-check the alignment to make sure it is accurate, as any misalignment can lead to uneven planing results.
4. Set the Guide Rails
Properly set up the guide rails on each side of the planer. These guide rails should be aligned parallel to each other and perpendicular to the fence. They should also be adjusted to the correct height to ensure the wood passes through the planer smoothly.
| Fence and Guide Rails Checklist: |
|---|
| ✓ Ensure secure mounting of the planer |
| ✓ Check alignment of the fence and guide rails |
| ✓ Adjust the fence for desired planing thickness |
| ✓ Set up guide rails parallel to each other and perpendicular to the fence |
| ✓ Adjust guide rails to the correct height |
By correctly setting up the fence and guide rails, you will significantly improve the accuracy and quality of your wood planing tasks. It is essential to regularly check and adjust the alignment to ensure optimal performance and achieve the desired planing results.
Testing and Fine-Tuning Your Hand Wood Planer
Once you have set up your hand wood planer, it is important to test and fine-tune it to ensure optimal performance. Here are some steps you can follow:

-
Check the blade alignment: Before testing your planer, make sure that the blades are aligned properly. Use a straightedge or a metal ruler to check if the blades are parallel to the planer’s base. If they are not aligned, make the necessary adjustments using the adjustment screws.
-
Test on a scrap piece of wood: Before planing your actual woodworking project, it is a good idea to test the planer on a scrap piece of wood. This will allow you to see if the planer is cutting smoothly and evenly. Adjust the depth of cut as needed to achieve the desired results.
-
Check for snipe: Snipe is when the planer cuts deeper at the beginning or end of a board, leaving a noticeable indentation. To check for snipe, plane a longer piece of wood and inspect the ends. If you notice snipe, try adjusting the pressure you apply to the boards as you feed them through the planer.
-
Inspect the finish: After planing a piece of wood, inspect the finish to ensure it is smooth and free from tear-out or rough spots. If you notice any imperfections, try adjusting the planer’s blades or the speed at which you feed the wood through the planer.
-
Make additional adjustments if necessary: If you are not satisfied with the results of the test run, you may need to make additional adjustments to your planer. This could include adjusting the blade depth, blade sharpness, or the planer’s feed rate. Take the time to fine-tune your planer until you achieve the desired results.
By testing and fine-tuning your hand wood planer, you can ensure that it performs at its best and produces high-quality results. Take the time to familiarize yourself with your planer’s capabilities and make any necessary adjustments before starting your woodworking projects.
Questions and answers
What is a hand wood planer?
A hand wood planer is a tool used for shaping and smoothing wood surfaces. It is a handheld tool with a sharp blade that shaves off small amounts of wood to create a smooth finish.
Can a hand wood planer be used on any type of wood?
A hand wood planer can be used on most types of wood, including softwood and hardwood. However, it’s important to adjust the blade depth and take into consideration the hardness of the wood to ensure optimal results.


Harrison Clayton
Meet Harrison Clayton, a distinguished author and home remodeling enthusiast whose expertise in the realm of renovation is second to none. With a passion for transforming houses into inviting homes, Harrison's writing at https://thehuts-eastbourne.co.uk/ brings a breath of fresh inspiration to the world of home improvement. Whether you're looking to revamp a small corner of your abode or embark on a complete home transformation, Harrison's articles provide the essential expertise and creative flair to turn your visions into reality. So, dive into the captivating world of home remodeling with Harrison Clayton and unlock the full potential of your living space with every word he writes.