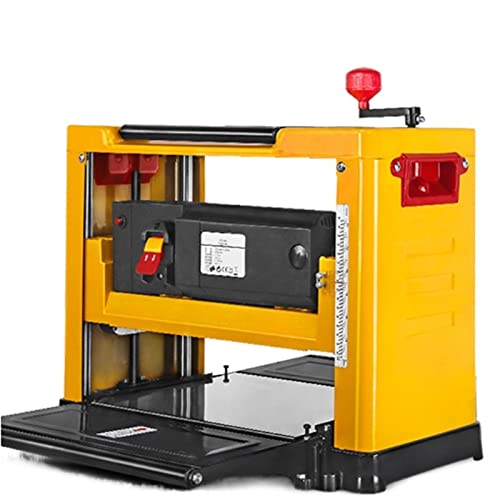
How To Use Makita Planer Thicknesser
When it comes to woodworking projects, having a planer thicknesser can make all the difference. Makita, a well-known and trusted brand in the industry, offers a range of high-quality planer thicknessers that can help you achieve smooth and precise finishes on your woodwork.
Using a Makita planer thicknesser may seem daunting at first, but with a little practice and understanding of the machine’s features, you will be able to achieve professional-level results in no time. In this article, we will guide you through the process of using a Makita planer thicknesser, from setting up the machine to creating perfectly planed and thicknessed boards.
First and foremost, it is essential to properly set up your Makita planer thicknesser. Start by ensuring that the machine is securely placed on a stable surface and that it is properly grounded to avoid any electrical hazards. Make sure the cutter block is clean and sharp, as this will significantly affect the quality of your cuts.
Once your Makita planer thicknesser is set up correctly, it’s time to prepare your wood. Begin by checking the wood for any defects or knots that could affect the planing process. It is recommended to mark any defects with a pencil, so that you can avoid them during planing. Additionally, ensure that your wood is properly sized and squared before feeding it into the machine.
Getting Started with Makita Planer Thicknesser
Using the Makita Planer Thicknesser can help you achieve precise and consistent results when planing and smoothing wooden surfaces. Whether you are a professional carpenter or a DIY enthusiast, this tool can help you save time and effort in your woodworking projects. Here are the basic steps to get started with the Makita Planer Thicknesser:
- Assemble the Planer Thicknesser: Start by assembling the various components of the planer thicknesser, such as the infeed and outfeed tables, the planer knives, and the dust collection system. Consult the user manual for detailed instructions on how to assemble the machine.
- Set the Cutting Depth: Before using the planer thicknesser, you need to set the desired cutting depth. This is done by adjusting the height of the planer knives. You can refer to the user manual for precise instructions on how to make this adjustment.
- Prepare the Workpiece: Ensure that the workpiece you plan to plane is securely fastened to the infeed table. This will prevent any unnecessary movement during the planing process and ensure consistent results.
- Power On the Machine: Connect the planer thicknesser to a power source and switch it on. Allow the machine to reach its full speed before feeding the workpiece into the planer.
- Feed the Workpiece: Slowly and steadily push the workpiece into the planer thicknesser, keeping a firm grip on it. Make sure to maintain a consistent feed rate throughout the process to achieve a smooth and even finish.
- Collect the Planed Material: The planer thicknesser will produce shavings and wood chips as it planes the workpiece. Ensure that you have a suitable dust collection system in place to collect these waste materials and maintain a clean working environment.
- Inspect and Repeat: Once you have finished planing one side of the workpiece, inspect the results to ensure they meet your desired specifications. If necessary, you can adjust the cutting depth and repeat the process on the other side of the workpiece for a uniform finish.
Remember to always follow safety guidelines and wear protective equipment, such as safety glasses and ear protection, when operating the Makita Planer Thicknesser. Additionally, regularly maintain and clean the machine to ensure optimal performance and longevity.
By following these steps, you can quickly become familiar with using the Makita Planer Thicknesser and achieve professional-quality results in your woodworking projects.
Understanding the Features of Makita Planer Thicknesser
The Makita planer thicknesser is a versatile woodworking tool that can greatly assist in achieving smooth and precise results when working with various types of wood. This powerful machine combines the functions of a planer and a thicknesser, allowing you to effortlessly reduce the thickness of wood and create smooth and even surfaces.
Easy-to-Use Controls
One of the standout features of the Makita planer thicknesser is its intuitive and user-friendly controls. The machine is equipped with clearly labeled buttons and knobs that allow you to adjust the cutting depth, feed speed, and other settings with ease. Whether you’re a beginner or an experienced woodworker, you’ll appreciate the simplicity and convenience of these controls.
Precision and Accuracy
When it comes to woodworking, precision and accuracy are essential. The Makita planer thicknesser excels in these areas, thanks to its precision machined components and advanced technology. The machine utilizes a powerful motor and a high-quality cutter head to ensure consistent and precise results. With this tool, you can confidently achieve the desired thickness and smoothness in your woodwork.
The Makita planer thicknesser also features adjustable infeed and outfeed tables, allowing you to achieve uniform thickness and minimize snipe. Snipe is a common issue in planing and thicknessing, where the ends of the wood piece are slightly thicker or thinner than the rest. With the adjustable tables, you can minimize snipe and achieve a flawless finish.
Dust Extraction System
Woodworking can create a lot of dust, which can be harmful to your health as well as affect the quality of your work. The Makita planer thicknesser comes with a built-in dust extraction system that efficiently removes dust and debris from the work area. This not only ensures a cleaner and healthier working environment but also helps to prevent clogging of the machine, resulting in smoother and more efficient operation.
Overall, the Makita planer thicknesser is a reliable and powerful tool that offers a range of features to enhance your woodworking projects. Whether you’re working on small or large-scale projects, this machine will help you achieve professional-quality results with ease. Invest in this tool, and you’ll experience the convenience and precision it brings to your woodworking endeavors.
Step-by-Step Guide to Using Makita Planer Thicknesser
If you have recently purchased a Makita planer thicknesser or are thinking about using one for a project, it’s important to know how to use it correctly. The Makita planer thicknesser is a versatile tool that can help you achieve precise and accurate woodwork. Follow these steps to get started:
Step 1: Safety Precautions
Before using the Makita planer thicknesser, it’s essential to prioritize safety. Always wear protective gear such as goggles, earplugs, and a dust mask. Ensure that the work area is well-ventilated and free from any obstructions. Familiarize yourself with the user manual and follow all safety instructions provided by the manufacturer.
Step 2: Preparation
Prepare the workpiece by inspecting it for any nails, screws, or other objects that may damage the planer or cause injury. Measure the thickness of the workpiece and set the desired thickness on the planer’s depth adjustment scale. Make sure to adjust the infeed and outfeed tables to the appropriate height for your project.
Step 3: Planing
Start by positioning the workpiece on the infeed table, ensuring that it is flat against the fence. Turn on the planer and feed the workpiece into the machine, applying steady pressure. Make sure to maintain a consistent feed rate to achieve an even and smooth surface. Repeat this process for each side of the workpiece until the desired thickness is achieved.
Step 4: Thicknessing
Once the planing is complete, you can use the planer thicknesser to achieve the desired thickness for your project. Adjust the planer’s thicknessing scale to the desired thickness and repeat the process of feeding the workpiece through the machine. Again, apply steady pressure and maintain a consistent feed rate to ensure a uniform thickness across the entire workpiece.
Step 5: Finishing
After achieving the desired thickness, you can now proceed with the finishing touches on your workpiece. Use sandpaper or a sander to smooth out any roughness or imperfections. You can also use other woodworking tools to chamfer or shape the edges if desired.
That’s it! By following these step-by-step instructions, you can confidently use your Makita planer thicknesser to achieve precise and professional results in your woodworking projects.
Safety Tips when Using Makita Planer Thicknesser
Using a Makita Planer Thicknesser can be a great way to achieve smooth and precise results in your woodworking projects. However, it is important to prioritize safety while operating this powerful tool. Here are some safety tips to consider when using a Makita Planer Thicknesser:
| Safety Tip | Description |
|---|---|
| Read the Manual | Before using the Makita Planer Thicknesser, thoroughly read the instruction manual provided by the manufacturer. Familiarize yourself with the machine’s safety features, operating procedures, and maintenance guidelines. |
| Wear Protective Gear | Always wear appropriate personal protective equipment (PPE) when operating the machine. This includes safety glasses, hearing protection, and sturdy work gloves. |
| Secure the Workpiece | Ensure that the workpiece is properly secured and stable before feeding it into the machine. This will prevent it from shifting or causing kickbacks during operation. |
| Maintain a Clean Workspace | Keep the area around the machine clean and free from clutter. This will reduce the risk of accidents and ensure smooth operation. |
| Use a Push Stick | When feeding smaller or narrower workpieces into the planer thicknesser, use a push stick or other appropriate device to maintain a safe distance between your hands and the machine. |
| Never Force the Material | Do not exert excessive force when feeding the material through the machine. Let the planer thicknesser do the work at its own pace to prevent kickbacks and other accidents. |
| Disconnect Power | Before performing any maintenance or blade changes, make sure to disconnect the power source and wait for the machine to come to a complete stop. This will prevent accidental startup and reduce the risk of injuries. |
| Properly Store the Tool | When not in use, store the Makita Planer Thicknesser in a clean and dry area, away from children and unauthorized users. Follow the manufacturer’s instructions for proper storage and maintenance to prolong the machine’s lifespan. |
By following these safety tips, you can ensure a safe and efficient woodworking experience with your Makita Planer Thicknesser. Remember to always prioritize safety and take necessary precautions to protect yourself and others in the workshop.
Maintenance and Care for Makita Planer Thicknesser
Maintaining and caring for your Makita planer thicknesser is essential to prolong its lifespan and ensure optimal performance. Here are some important maintenance tips to keep in mind:
1. Regular Cleaning:
After each use, make sure to clean the machine thoroughly. Use a soft brush or cloth to remove any dust, debris, or wood chips from the cutter head, feed rollers, and all other areas of the planer thicknesser.
2. Lubrication:
Apply a lubricant recommended by Makita to the moving parts of the planer thicknesser. This will help reduce friction and ensure smooth operation. Check the manufacturer’s instructions for the appropriate lubrication points.
3. Blade Inspection and Replacement:
Regularly inspect the blades for any signs of wear or damage. If they are dull or chipped, replace them as necessary. Dull blades can lead to poor cutting performance and can put added strain on the motor.
4. Belt Tension:
Check the tension of the drive belt regularly. A loose belt can cause slipping and affect the planer thicknesser’s performance. Adjust the tension according to the manufacturer’s guidelines if necessary.
5. Dust Collection:
Ensure proper dust collection by connecting a vacuum or dust extraction system to the planer thicknesser. This will help keep your work area clean and prevent the buildup of sawdust, which can affect the machine’s performance and accuracy.
Note: Before performing any maintenance or cleaning, always disconnect the planer thicknesser from the power source to ensure safety.
By following these maintenance and care guidelines, you can ensure that your Makita planer thicknesser remains in top condition and delivers reliable performance for years to come.
Questions and answers
What is a Makita Planer Thicknesser and what is it used for?
A Makita Planer Thicknesser is a woodworking machine used to plane and thickness wood. It is used to smooth the surface of the wood and make it even or to adjust the thickness of the wood piece.
Can I use the Makita Planer Thicknesser for both softwood and hardwood?
Yes, the Makita Planer Thicknesser can be used for both softwood and hardwood. It has adjustable settings that allow you to adjust the cutting depth and feed rate to suit different types of wood.


Harrison Clayton
Meet Harrison Clayton, a distinguished author and home remodeling enthusiast whose expertise in the realm of renovation is second to none. With a passion for transforming houses into inviting homes, Harrison's writing at https://thehuts-eastbourne.co.uk/ brings a breath of fresh inspiration to the world of home improvement. Whether you're looking to revamp a small corner of your abode or embark on a complete home transformation, Harrison's articles provide the essential expertise and creative flair to turn your visions into reality. So, dive into the captivating world of home remodeling with Harrison Clayton and unlock the full potential of your living space with every word he writes.