How To Sharpen Blades On Ryobi Planer

If you own a Ryobi planer, you know how important it is to keep the blades sharp for efficient and smooth operation. Blunt blades can result in uneven cuts, tear-outs, and a decrease in overall performance. In this article, we will guide you through the step-by-step process of sharpening the blades on your Ryobi planer, ensuring that you get the most out of your tool.
Firstly, it is crucial to ensure your safety while working on the blades. Make sure the planer is unplugged and remove the blades from the cutter head. Use the appropriate tools to detach the blades carefully, taking note of their positioning.
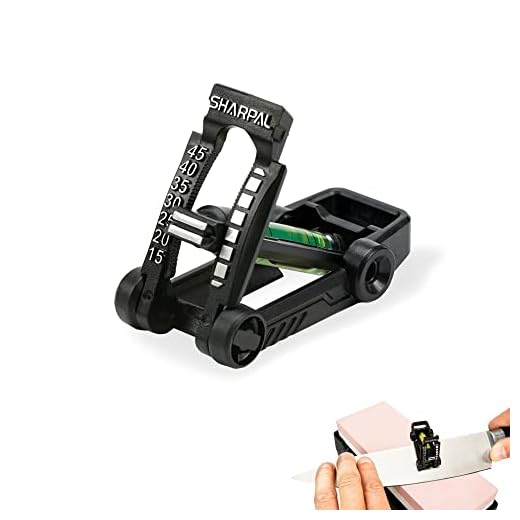
Next, with the blades in hand, you can begin the sharpening process. You can choose to sharpen them manually using a sharpening stone or with the help of a power tool such as a bench grinder. Whichever method you prefer, it is important to maintain a consistent angle while sharpening to ensure the best results.
Using a sharpening stone, start by wetting it with water or honing oil to lubricate the surface. Hold the blade at the correct angle and run it along the stone, applying even pressure. Repeat this motion several times until you achieve a sharp edge on the blade. Alternatively, if you opt for a bench grinder, carefully guide the blade against the grinding wheel, ensuring that you do not overheat or damage the blade.
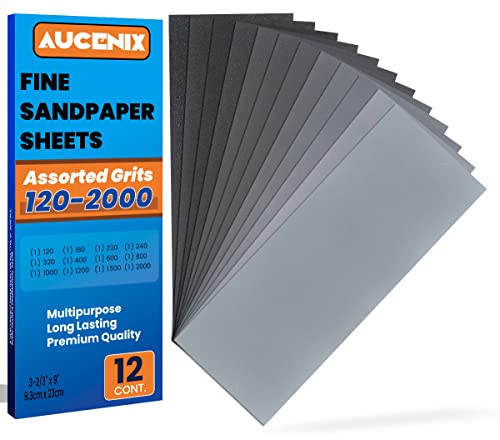
Once you have sharpened the blades to your satisfaction, check them for any nicks or burrs. Use a fine-grit sandpaper or honing steel to remove these imperfections and achieve a smooth, clean edge. Finally, reinstall the blades into the cutter head, ensuring that they are correctly aligned and secure.

By following these simple steps, you can easily sharpen the blades on your Ryobi planer and restore its cutting performance. Remember to take your time, maintain the proper angle, and prioritize safety throughout the process. With sharp blades, you will be able to achieve precise and clean cuts, allowing you to tackle any woodworking project with ease.
Preparation for Blade Sharpening
Before you start sharpening the blades on your Ryobi planer, there are a few things you need to do to ensure a successful and safe sharpening process. Follow these steps to properly prepare for blade sharpening:
- Disconnect the planer from the power source: Safety should always be your top priority when working with power tools. Before beginning any maintenance or repair tasks, make sure the planer is completely unplugged.
- Remove the blades from the planer: In order to sharpen the blades, you will need to remove them from the planer. Refer to your planer’s user manual for instructions on how to safely remove the blades.
- Clean the blades: Once the blades are removed, it’s important to clean them thoroughly. Use a soft brush or cloth to remove any debris, dust, or residue from the blades. This will help ensure a smooth sharpening process and prevent any damage to the blades.
- Inspect the blades for damage: Before sharpening the blades, take a close look at them to check for any signs of damage or wear. If you notice any chips, cracks, or uneven edges, it may be necessary to replace the blades instead of sharpening them.
- Gather the necessary tools and equipment: To sharpen the blades on your Ryobi planer, you will need a sharpening stone or a blade sharpener. Make sure you have the appropriate tools and equipment before you begin the sharpening process.
By following these preparation steps, you can ensure that your blade sharpening process goes smoothly and safely. Once you have completed these steps, you will be ready to sharpen the blades on your Ryobi planer and restore its cutting performance.
Removing and Cleaning Blades
Before you can sharpen the blades on your Ryobi planer, you will need to remove them from the machine. Follow these steps to safely remove and clean the blades:
1. Disconnect the power: Turn off and unplug the planer to ensure safety while working on the blades.

2. Locate the blade housing: Find the blade housing on the side of the planer. It is usually held in place by screws.
3. Remove the screws: Use a screwdriver to carefully remove the screws that secure the blade housing in place.
4. Take out the blade housing: Gently pull the blade housing away from the planer once the screws are removed. Be cautious not to damage the blades or the planer.
5. Clean the blades: Use a soft cloth or brush to remove any debris or residue from the blades. Make sure to remove all dirt and build-up to ensure a clean surface for sharpening.
6. Inspect the blades: Check the blades for any signs of damage or excessive wear. Replace any blades that are bent, chipped, or worn beyond repair.

7. Reassemble the planer: Once the blades are clean and inspected, carefully place the blade housing back into position and secure it with the screws.
8. Test the planer: Plug in the planer and turn it on to ensure that the blades are properly aligned and functioning correctly.
By following these steps, you can successfully remove and clean the blades on your Ryobi planer in preparation for sharpening.
Sharpening the Blades
Properly sharpening the blades on your Ryobi planer is essential for achieving smooth and accurate results. Here is a step-by-step guide to help you get the best performance out of your blades.
1. Remove the Blades
Before you can sharpen the blades on your Ryobi planer, you will need to remove them from the machine. Make sure the planer is turned off and unplugged. Locate the blade lock or clamp on the side of the planer and engage it to secure the blades in place. Use a wrench to remove the bolts or screws that hold the blades in position.
2. Prepare the Blades
Once the blades are removed, carefully clean them with a brush and a solvent to remove any dirt or debris. Inspect the blades for any signs of damage or excessive wear. If the blades are severely damaged or worn, it may be time to replace them with new ones.
3. Sharpen the Blades
There are several methods you can use to sharpen the blades on your Ryobi planer. You can either use a sharpening stone, a bench grinder, or a specialized sharpening tool designed for planer blades. Follow the manufacturer’s instructions for the specific sharpening method you choose.
If you are using a sharpening stone, make sure to apply a lubricant or honing oil to the stone to prevent overheating and to achieve a smooth sharpening motion. Hold the blade at the correct angle and run it along the stone, applying even pressure. Repeat this process until the blade is sharp and free of nicks.
If you are using a bench grinder, use caution and ensure that the blade is secured properly. Gently run the blade against the grinder wheel, ensuring that you maintain a consistent angle and apply even pressure. Keep the blade cool by dipping it into water periodically.
If you are using a specialized sharpening tool, follow the manufacturer’s instructions carefully. These tools typically require you to insert the blades into a holder or guide and then run them against a rotating abrasive surface.

4. Reinstall the Blades
After sharpening the blades, carefully reinstall them onto your Ryobi planer. Make sure the blades are aligned properly and securely tightened using the wrench. Take care not to overtighten the bolts or screws, as this could damage the blades or the planer.
Once the blades are reinstalled, disengage the blade lock or clamp and turn on the planer. Test the planer on a scrap piece of wood to ensure that the blades are cutting smoothly and evenly.
By regularly sharpening the blades on your Ryobi planer, you can ensure that it continues to perform at its best. Follow these steps to keep your blades sharp and your planer functioning effectively.
Replacing and Testing the Blades
When the blades on your Ryobi planer become dull or damaged, it’s important to replace them to ensure optimal performance. Here’s a step-by-step guide on how to replace and test the blades.
1. Gather the necessary tools and materials
Before you begin, make sure you have all the tools and materials you need. This includes a replacement set of blades, a screwdriver, a blade-setting gauge, and a workbench or sturdy surface to work on.

2. Remove the old blades
Start by disconnecting your planer from any power source to prevent accidents. Then, use the screwdriver to remove the screws securing the old blades in place. Carefully take out the old blades and set them aside.
3. Install the new blades
Take the new blades and align them with the slots in the planer, ensuring they are facing the correct direction. Use the screwdriver to secure the blades in place by tightening the screws. Make sure the blades are snug and properly seated before proceeding.
4. Properly set the blade height
Using a blade-setting gauge or a similar measuring tool, adjust the height of the blades to the manufacturer’s recommended setting. This is crucial for achieving accurate and consistent planing results.
5. Test the planer
Now that the new blades are installed and properly set, it’s time to test the planer. Connect it to a power source and run a piece of scrap wood through the machine. Observe the quality of the planed surface and listen for any abnormal sounds. If everything looks and sounds good, your blades are now ready for use.
Remember to regularly check and maintain the sharpness of your blades to ensure optimum performance and longevity. With proper care, your Ryobi planer will continue to deliver smooth and precise results for many projects to come.

Questions and answers
What is a Ryobi planer?
A Ryobi planer is a power tool used for smoothing and reducing the thickness of wood or other materials.
Why would I need to sharpen the blades on my Ryobi planer?
You would need to sharpen the blades on your Ryobi planer to ensure the best performance and quality of work. Dull blades can result in rough or uneven cuts.
How often should I sharpen the blades on my Ryobi planer?
The frequency of blade sharpening depends on usage. However, it is generally recommended to sharpen the blades every three to six months if you use the planer frequently.
What do I need to sharpen the blades on my Ryobi planer?
To sharpen the blades on your Ryobi planer, you will need a blade sharpening kit, safety goggles, a bench grinder, and a vice to hold the blades securely.
Can I replace the blades on my Ryobi planer instead of sharpening them?
Yes, you can replace the blades on your Ryobi planer with new ones instead of sharpening them. Replacement blades are available for purchase from Ryobi or various online retailers. It is important to make sure you get the correct blades for your specific model.

Meet Harrison Clayton, a distinguished author and home remodeling enthusiast whose expertise in the realm of renovation is second to none. With a passion for transforming houses into inviting homes, Harrison's writing at https://thehuts-eastbourne.co.uk/ brings a breath of fresh inspiration to the world of home improvement. Whether you're looking to revamp a small corner of your abode or embark on a complete home transformation, Harrison's articles provide the essential expertise and creative flair to turn your visions into reality. So, dive into the captivating world of home remodeling with Harrison Clayton and unlock the full potential of your living space with every word he writes.


