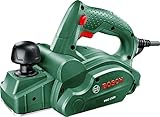
How To Change Elctric Planer Blades

If you own an electric planer, you know that one of the most important maintenance tasks is changing the blades. Whether your old blades are worn out or you simply want to upgrade to a sharper set, knowing how to change the blades correctly will ensure that your planer continues to work effectively.
To start, you will need a few tools and materials. First and foremost, make sure to wear protective gloves and goggles to prevent any potential injuries. You will also need an Allen wrench or a screwdriver, depending on the type of planer you have. Additionally, it’s a good idea to have a sharpening stone or a replacement set of blades on hand.
Once you have all your materials ready, begin by unplugging the planer from the power source. Safety should always be your top priority. Then, locate the screws or bolts that hold the blades in place. Use the Allen wrench or screwdriver to carefully loosen and remove these fasteners.
With the fasteners removed, gently wiggle the old blades out of their slots. Be cautious not to damage the blade slots or the surrounding parts. If you plan to reuse the blades, take this opportunity to sharpen them using a sharpening stone. Otherwise, you can simply replace them with a new set of blades.
Align the new or sharpened blades with the slots and carefully slide them back into place. Make sure they are securely seated and positioned correctly. Then, tighten the screws or bolts to hold the blades firmly in position. Double-check that everything is tightened securely before proceeding.

Finally, before using your planer again, take a moment to clean any debris or shavings that may have accumulated during the blade replacement process. This will help to ensure smooth operation and prevent any potential damage to your workpieces.
Now that you know the steps to change electric planer blades, you can confidently maintain your planer and achieve smooth, precise results with every use. Remember to follow the manufacturer’s instructions and exercise caution throughout the process to ensure your safety and the longevity of your planer.
Choosing the Right Electric Planer Blades
When it comes to changing electric planer blades, selecting the right ones for your specific needs is crucial. The quality and type of blades you choose can greatly impact the performance and results of your planer. Here are some factors to consider when choosing the right electric planer blades:
- Material: Electric planer blades are typically made from high-speed steel (HSS) or carbide. HSS blades are more affordable and suitable for general woodworking tasks, while carbide blades are more durable and ideal for working with hardwoods and other tough materials.
- Blade Size: Electric planers come in various sizes, and it’s important to select blades that match the size and model of your planer. Using the wrong size blades can result in poor performance and can potentially damage your planer.
- Cutting Angle: Planer blades have different cutting angles, such as 30 degrees or 45 degrees. The cutting angle affects the smoothness and finish of the wood surface. A higher cutting angle generally produces a smoother finish, but it may require more frequent sharpening.
- Number of Blades: Electric planers can have either single or double blades. Single blades are easier to maintain and replace, while double blades can provide a smoother finish. Consider your woodworking needs and preferences when deciding on the number of blades for your planer.
- Budget: Blades are available at various price points, so it’s important to consider your budget. While it may be tempting to opt for cheaper blades, investing in higher-quality blades can often lead to better results and longer blade life.
Remember to follow the manufacturer’s instructions when changing planer blades and always prioritize safety by wearing protective gear. By choosing the right electric planer blades for your specific needs, you can ensure optimal performance and achieve the desired results in your woodworking projects.
Tips for selecting the best blades for your planer
When it comes to finding the right blades for your planer, there are a few factors to consider. The quality of the blades will directly impact the performance and outcome of your woodworking projects, so it’s important to make an informed decision. Here are some tips to help you select the best blades for your planer:

1. Material
The type of material used for the blades is crucial. The most common materials for planer blades include high-speed steel (HSS), carbide, and bi-metal. HSS blades are a popular choice due to their affordability and ability to handle a variety of wood types. Carbide blades, on the other hand, offer superior durability and are ideal for harder woods or frequent use. Bi-metal blades combine the benefits of both HSS and carbide, providing a balance between affordability and longevity.
2. Blade Size
The size of the blades should correspond to the specifications of your planer. Different planers have different blade sizes, so it’s essential to check the manufacturer’s recommendations or consult your planer’s manual. Using the wrong blade size can result in poor performance and potential damage to your planer.
3. Number of Blades
The number of blades on your planer can affect the quality of the finish and the smoothness of the operation. Planers typically come with either two or three blades. While two blades are suitable for most woodworking projects, three blades provide a smoother finish and can reduce the likelihood of snipe, which is when the board dips at the beginning or end of the cut. Consider your specific needs and budget when deciding on the number of blades.
4. Blade Sharpness
Sharp blades are essential for achieving clean and precise cuts. Before purchasing new blades, check if they come pre-sharpened or if you need to sharpen them yourself. Some blades can be resharpened multiple times, which can save you money in the long run. Additionally, consider investing in a sharpening kit or a professional sharpening service to maintain the blades’ sharpness over time.
5. Budget
Lastly, consider your budget when selecting planer blades. While it’s important to invest in high-quality blades that will last, you don’t want to overspend. Compare prices from different suppliers and consider the long-term value of the blades. Sometimes it’s worth paying a bit more upfront to avoid frequent replacements or subpar performance.

By considering these tips and factors, you can select the best blades for your planer and ensure optimal performance and results in your woodworking projects.
Step-by-Step Guide for Changing Electric Planer Blades
Replacing the blades on your electric planer is an essential maintenance task that ensures the tool’s optimal performance. Follow this step-by-step guide to change the blades on your electric planer:
Step 1:
Begin by unplugging the electric planer from the power source to prevent any accidental activation during the blade change process.
Step 2:

Locate the blade lock button on the planer. Press and hold this button to lock the blades in place and prevent them from rotating during the replacement.
Step 3:
Using an appropriate sized Allen wrench, loosen and remove the screws that secure the blade cover or blade clamp. Set these screws aside in a safe place.
Step 4:
Gently slide the blade cover or blade clamp off the planer, exposing the old blades. Take note of the blade orientation to ensure proper installation of the new blades.
Step 5:
Using a pair of gloves, carefully remove the old blades from the planer. Be cautious of their sharp edges to avoid accidental injury. Place the old blades in a designated disposal container.
Step 6:
Position the new blades securely in place, aligning them with the grooves or guides provided in the planer. Make sure the blades are sitting flat and flush against the surface.
Step 7:

Slide the blade cover or blade clamp back onto the planer, ensuring it is properly aligned. Reinsert and tighten the screws using the Allen wrench, making sure not to overtighten.
Step 8:
Release the blade lock button to allow the new blades to rotate freely. This step is crucial for the planer’s proper operation.
Step 9:
Plug in the electric planer and test the blades’ rotation by turning on the power. Listen for any unusual noises or vibrations, which may indicate improper installation.

Step 10:
Once you have confirmed that the new blades are functioning correctly, you can proceed to use the electric planer for your desired woodworking projects.
Note: It is recommended to consult the manufacturer’s manual or contact customer support if you encounter any issues or have specific questions regarding your electric planer model.
Easy instructions for replacing blades on your planer
Step 1: Safety first
Before you start replacing the blades, make sure to unplug the planer from the power source. This will prevent any accidental injury while working on the tool.
Step 2: Remove the old blades
Using a wrench or an appropriate tool, loosen and remove the screws that hold the old blades in place. Be careful not to damage the screws or the blade holders in the process.
Step 3: Clean the blade holders
Once the old blades are removed, take a moment to clean the blade holders using a dry cloth or compressed air. This will remove any debris or buildup that may affect the performance of the new blades.
Step 4: Install the new blades
Take the new blades and place them in the blade holders, making sure they are aligned correctly. Once in position, hand-tighten the screws to hold the blades securely in place. Avoid overtightening, as it can cause damage to the blade holders or the blades themselves.
Step 5: Test and adjust
Before using the planer again, turn it on and check if the blades are spinning freely without any unusual vibrations or noises. If there are any issues, make necessary adjustments or consult the planer’s manual for troubleshooting guidance.
Step 6: Dispose of old blades responsibly
Remember to dispose of the old blades safely and responsibly. Check with your local recycling center or metal recycling facility for the correct disposal method.
By following these simple instructions, you can easily replace the blades on your planer and ensure that it continues to deliver smooth and precise results for your woodworking projects.
Maintaining and Extending the Lifespan of Electric Planer Blades
Electric planer blades are essential tools when it comes to working with wood. They efficiently remove material, leaving a smooth finish on the surface. To ensure that your electric planer blades continue to work effectively and provide optimal performance, it is crucial to maintain and extend their lifespan. Here are some tips on how to do that:
- Regular cleaning: After each use, it is important to clean the blades properly. Use a clean, dry cloth to remove any debris or shavings that may have accumulated. This will prevent the build-up of dirt and maintain the sharpness of the blades.
- Check for damage: Inspect the blades for any signs of damage or wear. If you notice any chips or dullness, it may be time to replace them. Continuing to use damaged blades can lead to poor performance and potential accidents.
- Sharpening: Over time, the blades will naturally become dull. Sharpening them regularly will ensure that they continue to cut smoothly and efficiently. There are various methods for sharpening electric planer blades, including using a sharpening stone or a specialized blade sharpener. Follow the manufacturer’s instructions for the best results.
- Proper storage: When not in use, it is important to store the electric planer blades correctly. Keep them in a dry and clean environment, away from excessive moisture or dust. Storing them properly will prevent corrosion and maintain their quality.
- Replace when necessary: Despite proper maintenance, there will come a time when the electric planer blades need to be replaced. Be aware of any decrease in performance, such as difficulty cutting or a rough finish. When this occurs, it is time to invest in new blades to continue working efficiently.
By following these tips, you can ensure that your electric planer blades remain in optimal condition, providing you with smooth and precise cuts. Regular maintenance and proper care will not only extend their lifespan but also contribute to the overall quality of your woodworking projects.
Questions and answers
How often do electric planer blades need to be changed?
The frequency of blade changes for electric planers depends on several factors, including the type and amount of wood being planed and the overall usage of the planer. In general, it is recommended to inspect the blades regularly and change them when they become dull or damaged. Some professionals may change their blades every few months, while hobbyists may only need to change them once a year. Pay attention to the quality of the planed surface and any signs of blade wear, such as tearing or chipping of the wood. It’s important to remember that using dull blades can result in poor planer performance and can even increase the risk of accidents.


Harrison Clayton
Meet Harrison Clayton, a distinguished author and home remodeling enthusiast whose expertise in the realm of renovation is second to none. With a passion for transforming houses into inviting homes, Harrison's writing at https://thehuts-eastbourne.co.uk/ brings a breath of fresh inspiration to the world of home improvement. Whether you're looking to revamp a small corner of your abode or embark on a complete home transformation, Harrison's articles provide the essential expertise and creative flair to turn your visions into reality. So, dive into the captivating world of home remodeling with Harrison Clayton and unlock the full potential of your living space with every word he writes.


