Replacing an Air Conditioner Compressor: Step-by-Step Guide

Is your air conditioner not cooling your home like it used to? One possible culprit could be a faulty compressor. The compressor is a crucial component of an air conditioner and is responsible for changing the refrigerant gas into a high-pressure gas, which then flows through the system to remove heat and cool the air. Over time, compressors can wear out or become damaged, resulting in reduced cooling efficiency or complete system failure.
If you suspect that your air conditioner compressor needs to be replaced, don’t panic! This step-by-step guide will walk you through the process of replacing the compressor and getting your air conditioner back up and running. Keep in mind that this is a complex task that requires some technical knowledge and skill, so if you’re not confident in your abilities, it’s best to hire a professional technician.
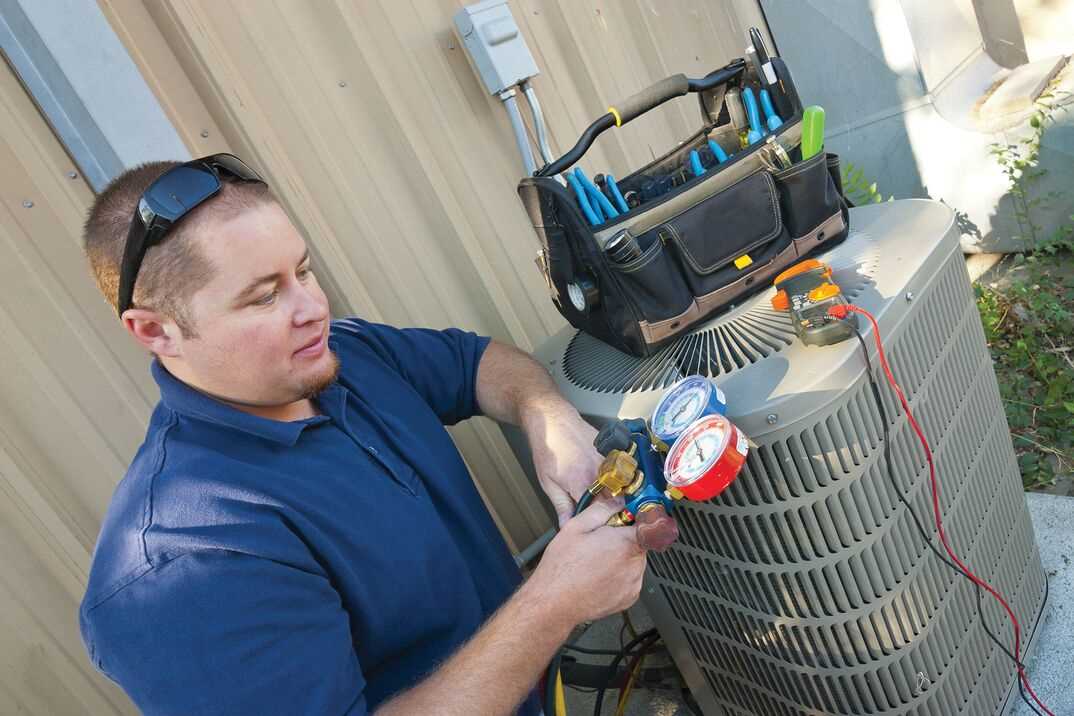
Before starting the replacement process, gather all the necessary tools and equipment, such as refrigerant recovery system, gauges, wrenches, and a new compressor. It’s also essential to ensure that the power is disconnected and the refrigerant is properly recovered from the system. Once you have everything ready, follow these steps to replace the air conditioner compressor:
- Step 1: Remove the outer casing of the air conditioner unit to gain access to the compressor. This may involve removing screws or latches depending on the model.
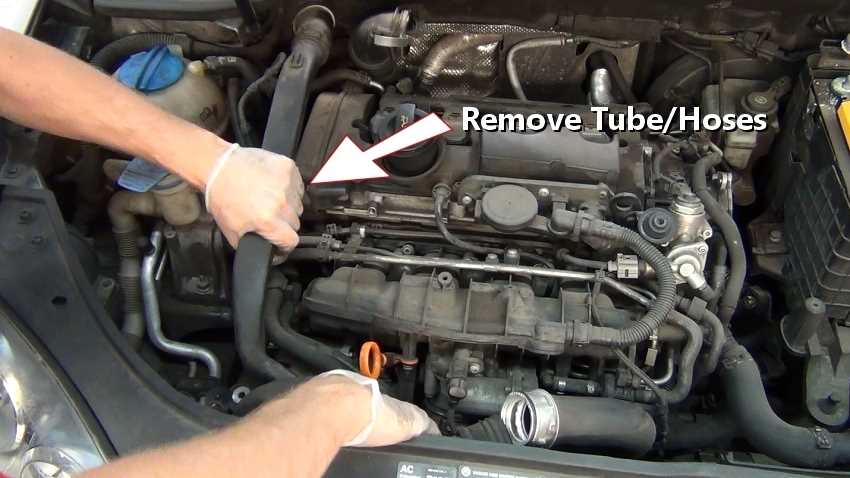
- Step 2: Disconnect any electrical connections and refrigerant lines attached to the compressor. Take note of their positions and connections to ease the reinstallation process later.
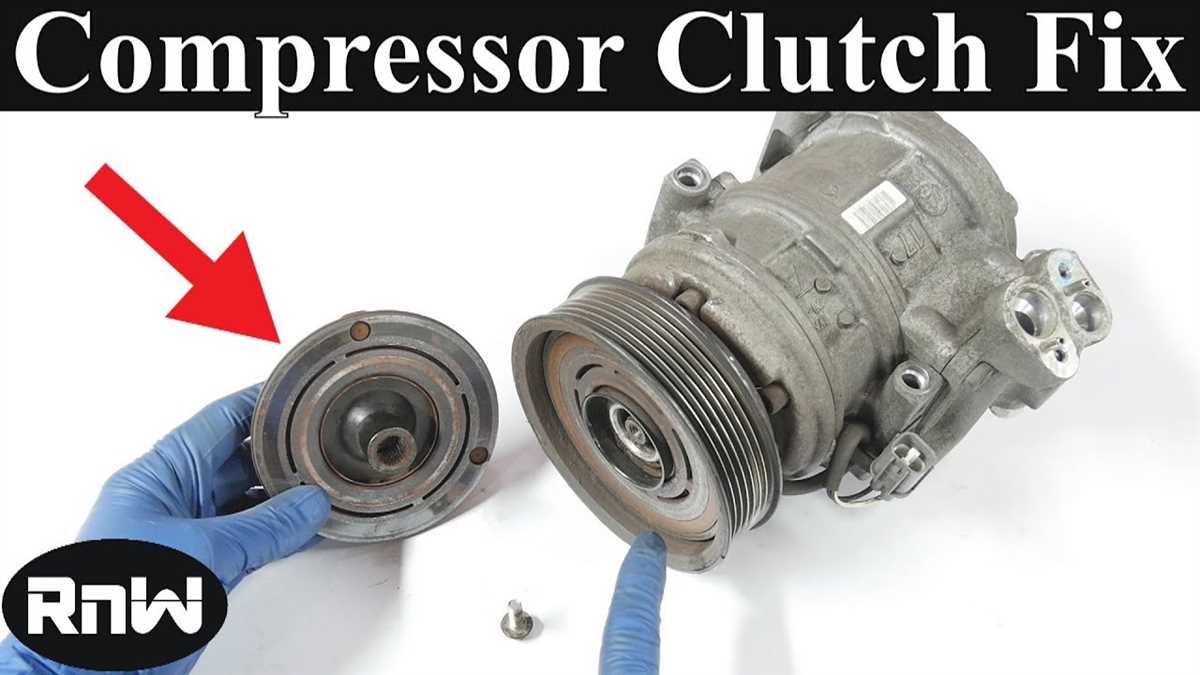
- Step 3: Use a wrench to loosen and remove the mounting bolts that secure the compressor to the unit. Carefully lift the compressor out of the unit, taking care not to damage any surrounding components.
- Step 4: Clean the mounting area and inspect the surrounding components for any signs of damage or wear. Replace or repair any damaged parts as necessary to prevent future issues.
- Step 5: Install the new compressor in the unit, aligning it correctly with the mounting holes. Make sure to tighten the mounting bolts securely to ensure proper stability.
- Step 6: Reconnect the electrical and refrigerant lines, following the notes made during the disconnection process. Double-check all connections to ensure they are tight and properly sealed.
- Step 7: Replace the outer casing of the air conditioner unit and secure it with screws or latches.
- Step 8: Finally, connect the power and test the air conditioner to ensure it is functioning properly. Monitor for any unusual noises or leaks, and make any necessary adjustments.
By following these steps and taking the necessary precautions, you can replace your air conditioner compressor and restore the cooling performance of your unit. Remember, if you’re unsure or uncomfortable with any part of the process, it’s always best to call a professional technician to ensure the job is done correctly and safely.
Safety Precautions before Replacing the Compressor
1. Turn off the power

Before starting any work on the air conditioner compressor, it is crucial to turn off the power to the unit. This can be done by flipping the appropriate breaker switch in the electrical panel or by unplugging the unit from the power source. This step is essential to avoid the risk of electric shock while working on the compressor.
2. Wear personal protective equipment
When working with any electrical component, it is important to wear personal protective equipment to protect yourself from potential hazards. This includes wearing safety glasses to protect your eyes from debris or flying parts, gloves to protect your hands, and closed-toe shoes to protect your feet from falling objects. Additionally, it is recommended to wear a face mask to avoid inhaling any dust or debris during the replacement process.
3. Properly discharge the system
Before removing the compressor, it is necessary to properly discharge the system to release any built-up pressure. This can be done by using a pressure gauge and slowly releasing the refrigerant. It is important to follow the manufacturer’s instructions or consult a professional technician to ensure safe and proper discharge of the system. Failure to discharge the system correctly can result in injury or damage to the unit.
4. Use proper tools and equipment
When replacing the compressor, it is important to use the proper tools and equipment to ensure a safe and successful installation. This may include wrenches, screwdrivers, a refrigerant recovery machine, and a vacuum pump. Using the correct tools will help prevent accidents, such as slippage or incorrect connections, and ensure that the replacement process is performed accurately and efficiently.
5. Follow safety guidelines and instructions
Lastly, it is essential to follow all safety guidelines and instructions provided by the manufacturer or outlined in the user manual. This includes understanding and adhering to the proper procedures for disconnecting and reconnecting electrical connections, handling refrigerant, and securing the compressor. It is recommended to consult a professional technician or seek guidance from a qualified expert if you are unsure about any step of the replacement process to ensure a safe and successful installation.

Overall, taking proper safety precautions before replacing the air conditioner compressor is crucial to prevent accidents, injuries, and damage to the unit. By following these steps and prioritizing safety, you can confidently proceed with the replacement process and ensure the longevity and efficiency of your air conditioning system.
Tools Required for Replacing an Air Conditioner Compressor
Screwdriver:
A screwdriver is an essential tool for replacing an air conditioner compressor. It is used to remove screws and fasteners that hold the compressor in place.
Adjustable Wrench:
An adjustable wrench is needed to loosen and tighten the nuts and bolts that connect the compressor to the rest of the air conditioning system.
Socket Set:
A socket set is necessary for removing and replacing the electrical connections on the compressor. It allows for easy and secure removal and installation of the wires.
Refrigeration Gauges:
Refrigeration gauges are used to measure and monitor the pressure and temperature of the refrigerant during the compressor replacement process. They provide valuable information for ensuring the proper functioning of the air conditioning system.

Refrigerant Recovery Machine:
A refrigerant recovery machine is required if the old compressor contains refrigerant. It safely removes and stores the refrigerant, preventing its release into the environment.
Vacuum Pump:
A vacuum pump is used to remove air and moisture from the system after replacing the compressor. It helps create a vacuum in the air conditioning system, which is necessary for proper functioning and preventing damage to the new compressor.
Tubing Cutter:
A tubing cutter is used to cut and shape the refrigerant lines that connect the compressor to the rest of the air conditioning system. It ensures clean and accurate cuts, allowing for a proper fit and efficient operation.
Flaring Tool:
A flaring tool is needed to create flare fittings on the refrigerant lines. These fittings ensure a secure connection between the compressor and the rest of the air conditioning system, preventing leaks and maintaining the system’s performance.
Leak Detection Solution:
A leak detection solution is used to identify any refrigerant leaks that may occur during and after the compressor replacement. It helps locate and fix leaks, ensuring the proper functioning of the air conditioning system.

Safety Equipment:
When replacing an air conditioner compressor, it is essential to have safety equipment such as gloves, safety glasses, and a face mask. These protect the technician from potential hazards, including sharp edges, refrigerant leaks, and harmful chemicals.
Steps to Remove the Old Compressor
1. Turn off the Power
Before starting any work on the air conditioner compressor, make sure to turn off the power supply. This will prevent any accidents or electric shocks during the removal process.
2. Disconnect the Refrigerant Lines
Locate the refrigerant lines connected to the old compressor. Using a refrigerant line wrench, carefully disconnect the lines. Be cautious of any refrigerant that might be released during this process and make sure to capture it in a proper container.
3. Disconnect Electrical Connections
Next, disconnect all the electrical connections to the compressor. These connections include the power supply wires, control wires, and any other connections specific to your air conditioning system. Label the wires or take a picture to ensure proper reconnection later.
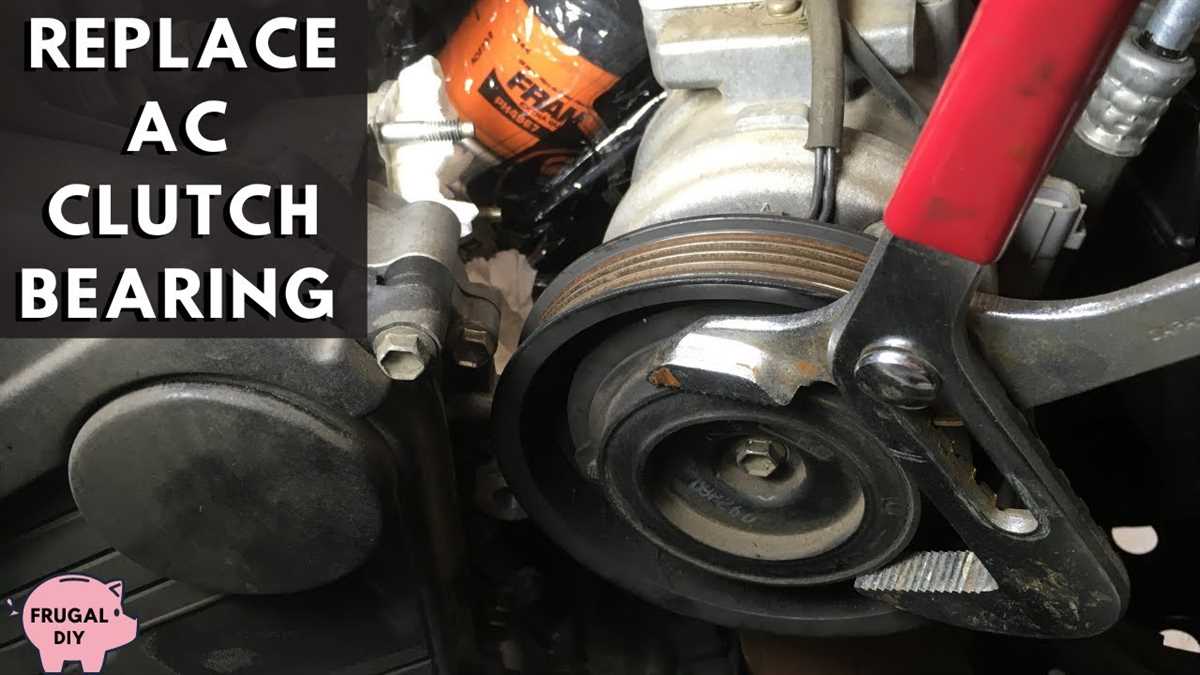
4. Remove the Compressor Mounting Bolts
Using an appropriate wrench, remove the mounting bolts that secure the compressor to the air conditioning unit. Make sure to keep the bolts in a safe place to prevent them from getting lost during the removal process.

5. Lift and Remove the Old Compressor

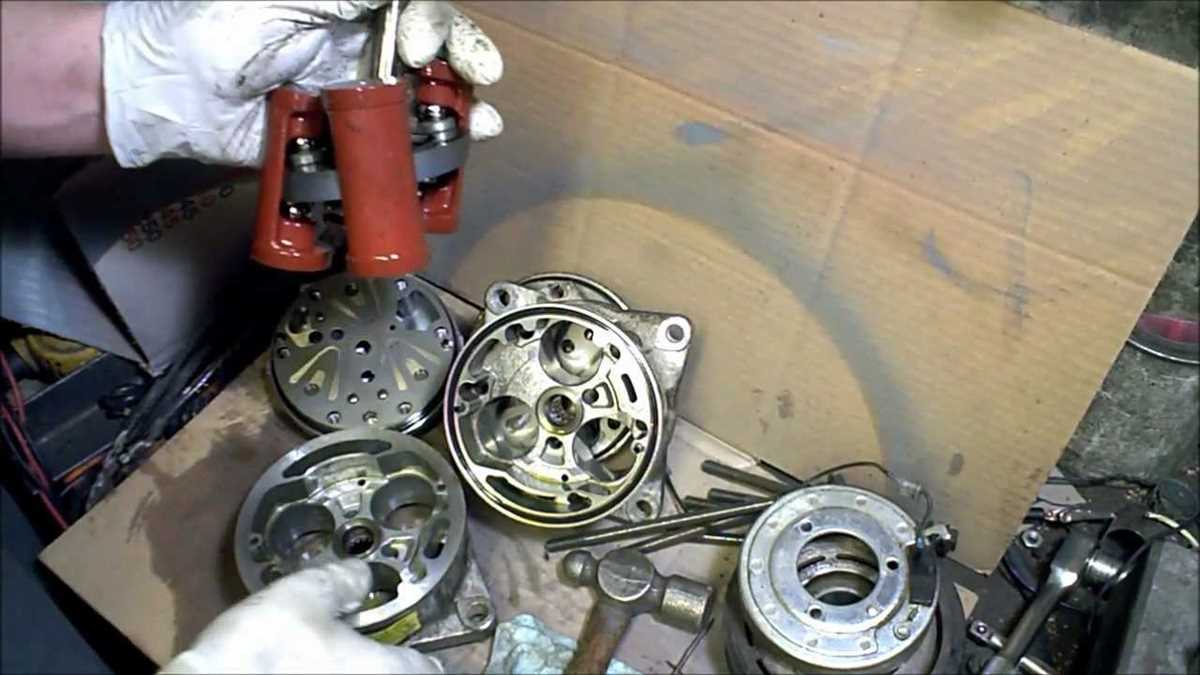
With the mounting bolts removed, carefully lift the old compressor out of the air conditioning unit. Take care not to damage any other components or the surrounding area. Place the old compressor in a safe location for proper disposal or recycling.
6. Clean the Area
After removing the old compressor, take the time to clean the area where it was installed. Remove any debris, dust, or dirt that may have accumulated. This will ensure a clean and proper installation for the new compressor.
7. Inspect and Prepare for the New Compressor Installation
Before installing the new compressor, inspect the area and ensure that all connections and mounting points are in good condition. Replace any damaged or worn components as necessary. Ensure that you have the proper tools and equipment for the installation.
Following these steps will allow for the safe and efficient removal of the old air conditioner compressor, preparing the system for the installation of a new one.
Preparing the New Compressor for Installation
Before installing the new compressor, there are a few important steps that need to be taken to ensure a successful installation process.
1. Check for Compatibility:
First, it is crucial to check the specifications of the new compressor to ensure that it is compatible with the existing HVAC system. This includes checking the voltage requirements, refrigerant type, and size of the compressor.
2. Gather the Necessary Tools:
Next, gather all the necessary tools for the installation process. This may include wrenches, screwdrivers, a vacuum pump, refrigerant lines, and any other specific tools recommended by the manufacturer.
3. Prepare the Work Area:
Clear the work area of any obstacles or debris that may interfere with the installation process. Ensure that there is enough space to maneuver and access the compressor easily.
4. Wear Proper Safety Gear:
Before starting any work, it is important to prioritize safety. Wear appropriate safety gear, such as gloves, safety glasses, and protective clothing, to protect yourself from any potential hazards.
5. Disconnect Power Supply:
Prior to working on the compressor, it is essential to disconnect the power supply to the HVAC system. This can be done by turning off the main circuit breaker or switching off the power at the electrical panel.
6. Drain the Old Compressor:
If the old compressor still contains refrigerant, it must be properly drained before removal. This can be done by connecting a recovery machine to the system and following the manufacturer’s instructions.
7. Remove the Old Compressor:
Once the refrigerant has been drained, carefully remove the old compressor from its mounting brackets or supports. Take note of the connections and wiring that need to be disconnected.
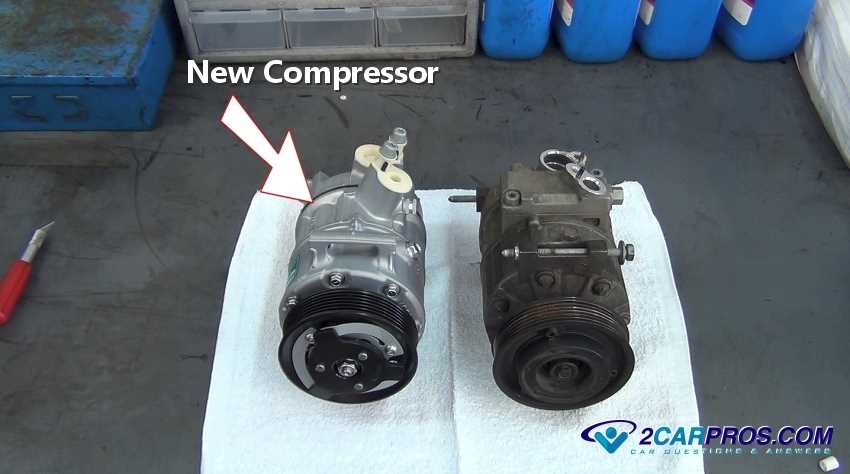
8. Inspect the New Compressor:
Before installing the new compressor, inspect it for any visible damage or defects. Check the packaging to ensure that all necessary components and parts are included.
9. Transfer Components:
If necessary, transfer any components from the old compressor to the new one. This may include electrical connectors, mounting brackets, or any other parts needed for proper installation.
By following these steps and adequately preparing the new compressor for installation, you can ensure a smooth and successful replacement process.
Installing the New Compressor
Installing a new compressor in an air conditioner requires precision and careful attention to detail. Follow these steps to ensure a successful installation:
1. Prepare the Work Area
Before beginning the installation process, make sure the work area is clear and well-lit. Remove any clutter or obstacles that may interfere with the installation. It is also important to wear protective gear, such as gloves and safety glasses, to avoid any injuries.
2. Disconnect Power and Refrigerant Lines
Prior to removing the old compressor, turn off the power to the air conditioner unit. This can be done by switching off the circuit breaker that supplies power to the unit. Additionally, disconnect the refrigerant lines using a wrench. Ensure that no refrigerant is leaking or escaping during this process.
3. Remove the Old Compressor
Use a wrench or socket set to remove the bolts or screws that secure the old compressor to the unit. Carefully detach any electrical connections to the compressor, taking note of their positions for reconnection later.
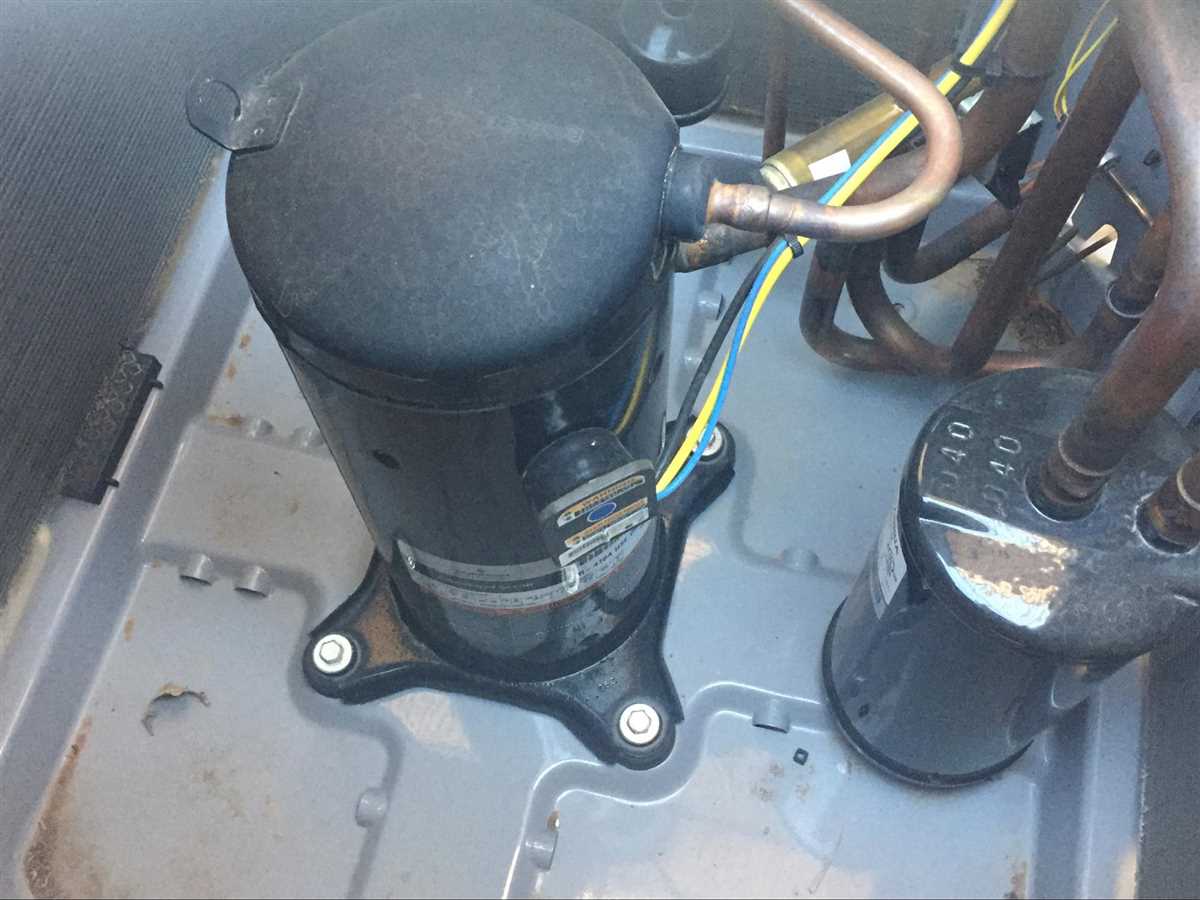
4. Install the New Compressor
Place the new compressor into the mounting brackets, ensuring that it is properly aligned. Use new bolts or screws to secure the compressor in place. Reconnect the electrical connections, following the notes taken during the removal process. Double-check that all connections are secure.
5. Reconnect Refrigerant Lines
Once the new compressor is securely installed, reconnect the refrigerant lines. Use a wrench to tighten the fittings, ensuring a proper seal. If necessary, add new refrigerant to the system according to the manufacturer’s specifications.
6. Test the New Compressor
After completing the installation, turn on the power to the air conditioner unit. Allow the compressor to run for a few minutes and monitor its performance. Ensure that the air conditioner is cooling effectively and that there are no unusual noises or leaks.
Following these steps will help you successfully install a new compressor in your air conditioner, ensuring efficient cooling and optimal performance. If you are unsure about any step or encounter any difficulties, it is recommended to consult a professional HVAC technician.
Testing the Air Conditioner after Compressor Replacement
After replacing the air conditioner compressor, it is important to test the system to ensure it is functioning properly. This step is crucial to ensure that the new compressor is working correctly and that the system is cooling effectively.
1. Check for Proper Air Flow
Begin by checking the air flow from the vents. Make sure that the air is coming out strong and that the temperature is cool. If the air flow is weak or the temperature is not cooling as it should, there may be an issue with the new compressor or another part of the system.
2. Monitor System Performance
Observe the air conditioner as it runs and monitor its performance. Pay attention to any strange noises, vibrations, or fluctuations in the system. These could indicate a problem with the new compressor or other components. Additionally, take note of how quickly the system is able to cool the space and whether it reaches the desired temperature.
3. Use a Thermometer
Using a thermometer, measure the temperature of the air coming out of the vents. Compare this temperature to the desired temperature set on the thermostat. The air should be cooling to the set temperature within a reasonable amount of time. If there is a significant difference in temperature or if the system takes too long to reach the desired temperature, there may be an issue with the compressor or another part of the system.
4. Check for Leaks
Inspect the area around the new compressor for any signs of refrigerant leaks. Look for oily spots or residue, which can indicate a leak. Additionally, use a leak detection tool or solution to check for any leaks in the refrigerant lines. If a leak is detected, it will need to be repaired immediately to prevent further damage to the system.
5. Schedule a Professional Inspection
While performing these tests can help identify some issues, it is also recommended to schedule a professional inspection of the air conditioner system after replacing the compressor. A professional technician will have the expertise and tools necessary to thoroughly assess the system and ensure it is working correctly.
By testing the air conditioner after compressor replacement, you can ensure that the system is functioning properly and that the new compressor is working as it should. Taking the time to test the system can help prevent any future issues and ensure optimal cooling performance.
Tips for Maintaining a New Air Conditioner Compressor
Proper maintenance of a new air conditioner compressor is essential to ensure its long-term performance and efficiency. Here are some tips to help you maintain your new compressor:
1. Regularly inspect the compressor
Inspect the compressor on a regular basis to check for any signs of damage or wear. Look for leaks, loose connections, or unusual noises. If you notice any issues, contact a professional HVAC technician to address them promptly.
2. Keep the compressor clean
Keep the compressor clean by removing any debris, such as leaves or dirt, that may accumulate around it. Use a soft brush or cloth to gently clean the exterior of the compressor. Avoid using water or harsh chemicals, as they can damage the unit.
3. Change the air filter regularly
Regularly change the air filter in your HVAC system, including the one in the compressor. Dirty filters can restrict airflow and put additional strain on the compressor, reducing its efficiency and lifespan. Follow the manufacturer’s guidelines for filter replacement.
4. Schedule regular professional maintenance
Schedule regular professional maintenance for your HVAC system, including the compressor. A qualified technician can inspect and clean the compressor, lubricate moving parts, and check refrigerant levels to ensure optimal performance.
5. Maintain proper airflow
Maintain proper airflow by keeping the area around the compressor clear of obstructions. Avoid placing objects near the unit that could block airflow. Ensure that vents and registers are not blocked by furniture or other items.
6. Monitor the compressor’s performance
Monitor the compressor’s performance and keep track of its energy consumption. If you notice a significant increase in energy usage or a decrease in cooling efficiency, it may indicate a problem with the compressor. Contact a professional technician for a thorough inspection.
By following these tips and maintaining your new air conditioner compressor properly, you can extend its lifespan and enjoy efficient cooling for many years to come.
FAQ:
How often should I replace my air conditioner compressor?
On average, an air conditioner compressor can last anywhere from 10 to 15 years. However, this can vary depending on factors such as usage, maintenance, and environmental conditions. It is important to regularly check for signs of wear and tear and consult with a professional to determine when replacement is necessary.
What are the signs that my air conditioner compressor needs to be replaced?
There are several signs that indicate a faulty air conditioner compressor. These include unusual noises, such as grinding or rattling, weak airflow, warm air coming from the vents, and frequent on/off cycling of the compressor. If you notice any of these signs, it is recommended to have a professional inspect your compressor and determine if replacement is needed.
Can I replace the air conditioner compressor myself?
Replacing an air conditioner compressor is a complex task that requires specialized knowledge and skills. It is not recommended for inexperienced individuals to attempt this DIY project. It is best to hire a professional HVAC technician who has the necessary tools and expertise to safely and correctly replace the compressor.
How much does it cost to replace an air conditioner compressor?
The cost of replacing an air conditioner compressor can vary depending on factors such as the type and size of the unit, the brand, and the location. On average, the cost can range from $1,500 to $2,500, including parts and labor. It is recommended to obtain quotes from multiple HVAC companies to get an accurate estimate for your specific situation.
Can I extend the lifespan of my air conditioner compressor?
Yes, there are several steps you can take to extend the lifespan of your air conditioner compressor. Regular maintenance, such as cleaning or replacing air filters, checking and cleaning coils, and keeping the unit free of debris can help improve its efficiency and longevity. Additionally, scheduling annual professional inspections and addressing any issues promptly can prevent major problems and prolong the life of the compressor.
Video:


Meet Harrison Clayton, a distinguished author and home remodeling enthusiast whose expertise in the realm of renovation is second to none. With a passion for transforming houses into inviting homes, Harrison's writing at https://thehuts-eastbourne.co.uk/ brings a breath of fresh inspiration to the world of home improvement. Whether you're looking to revamp a small corner of your abode or embark on a complete home transformation, Harrison's articles provide the essential expertise and creative flair to turn your visions into reality. So, dive into the captivating world of home remodeling with Harrison Clayton and unlock the full potential of your living space with every word he writes.


