Step-by-step guide: Installing bike pedals without a pedal wrench

Installing bike pedals without a pedal wrench can be a daunting task, especially for beginners. However, with the right tools and a step-by-step guide, it is possible to install bike pedals without needing a pedal wrench. This guide will walk you through the process and provide you with tips and tricks to make the installation process smooth and successful.
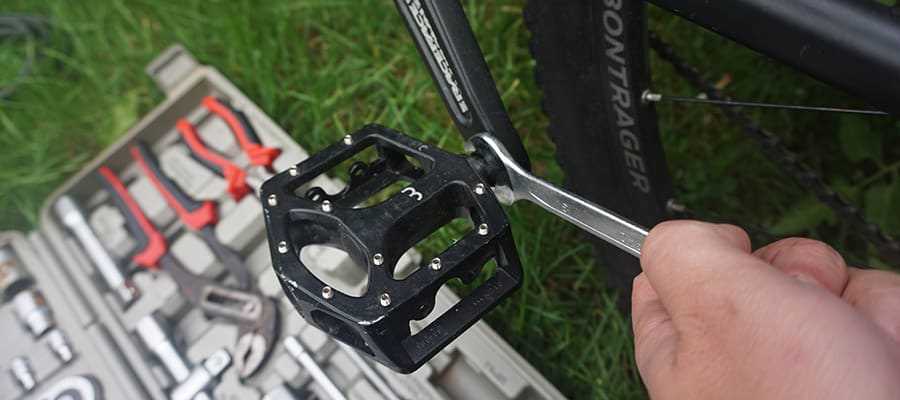
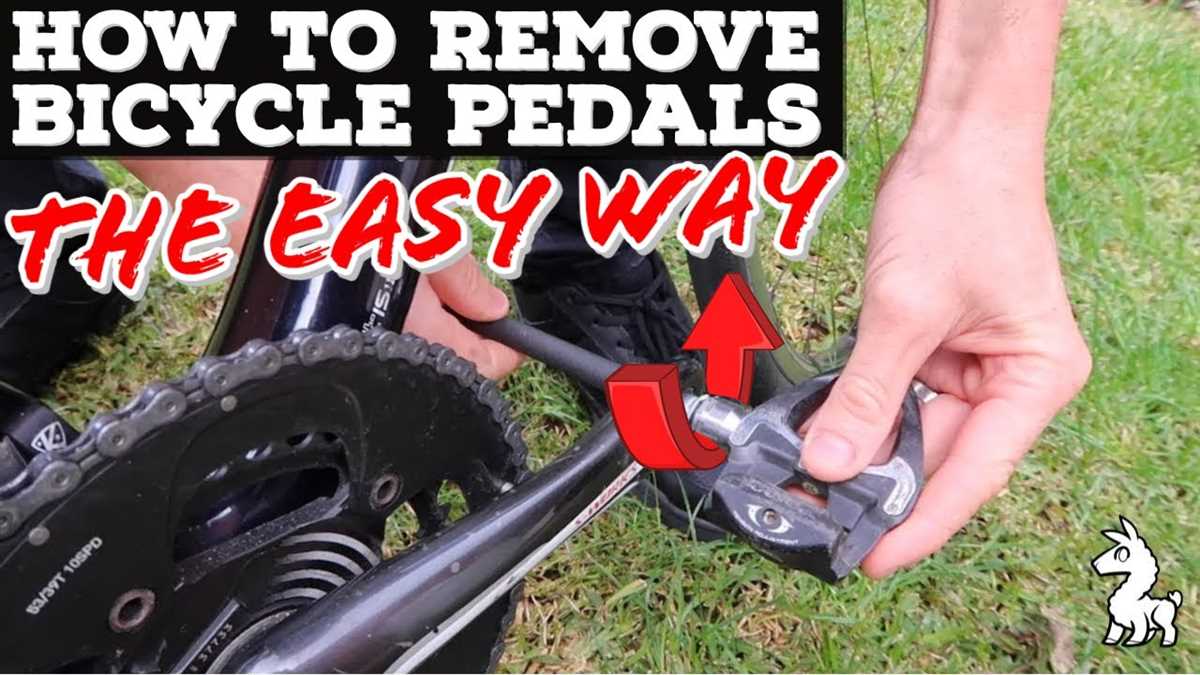
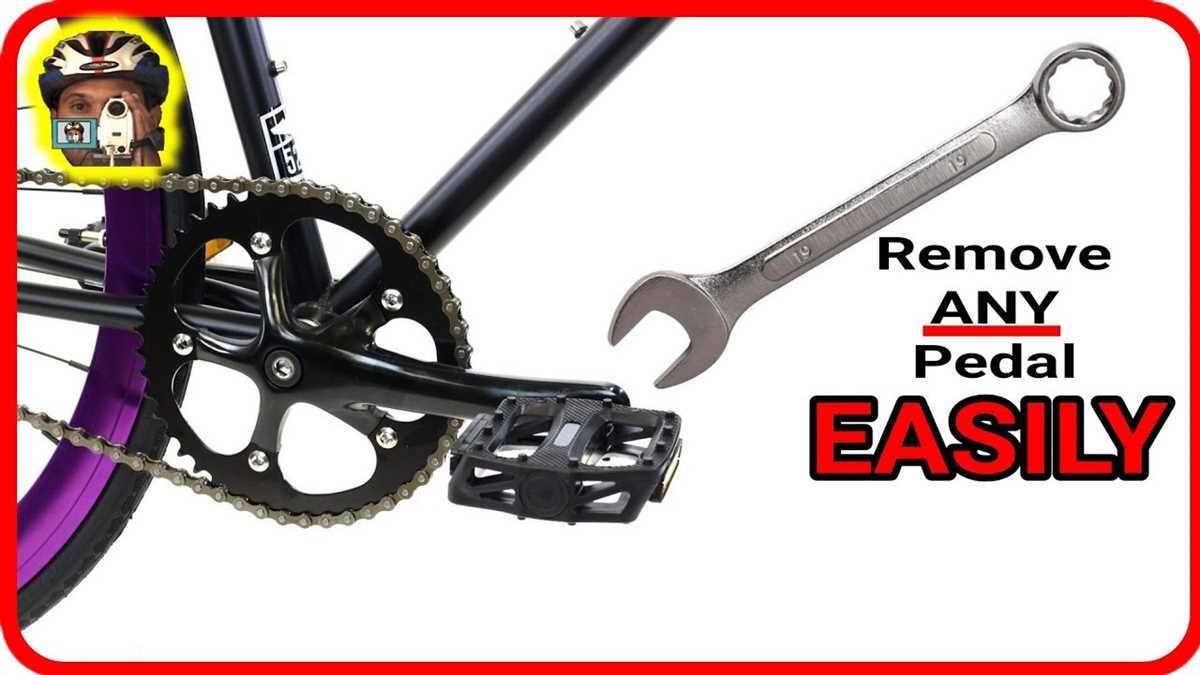
Firstly, it’s important to gather the necessary tools for the job. While a pedal wrench is the traditional tool for installing bike pedals, there are alternative tools that can be used. One such tool is an adjustable wrench, which can be used to grip the pedals and tighten or loosen them. Additionally, a 6-millimeter Allen key can also be used to remove and install pedals, if they have a hex socket on the spindle.
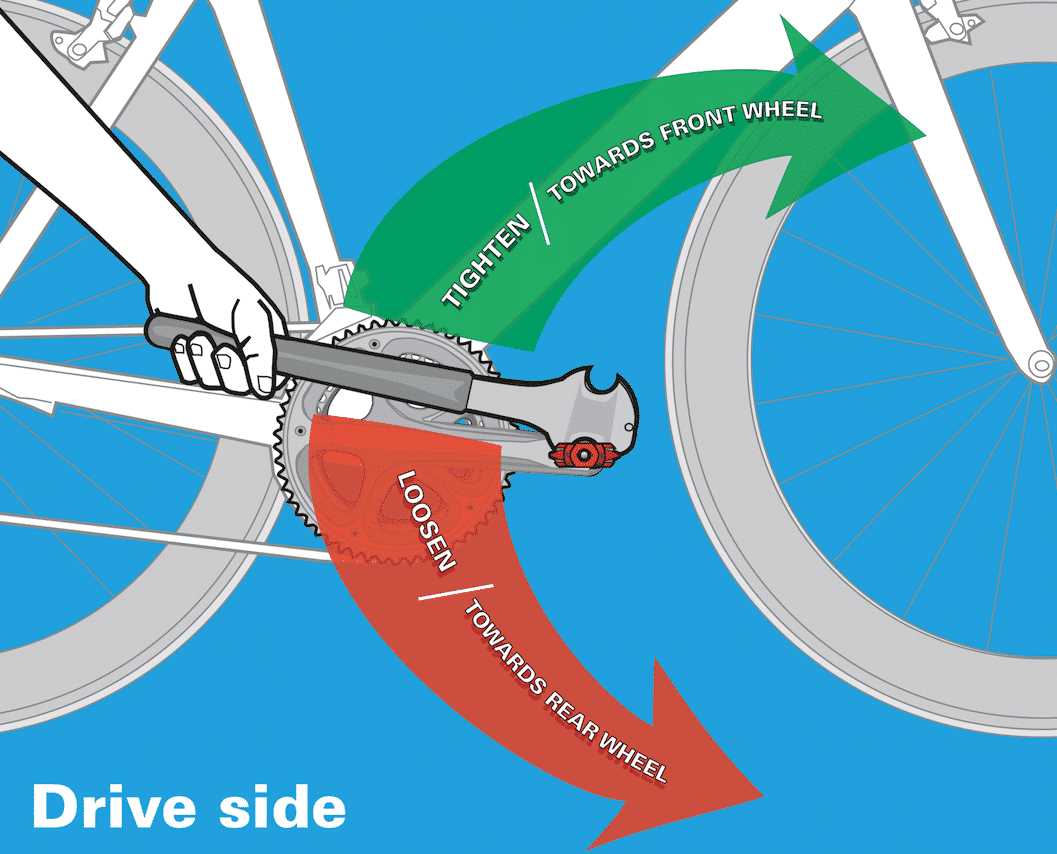
Once you have the appropriate tools, begin by loosening the old pedals on your bike. To do this, turn the left pedal counterclockwise and the right pedal clockwise. It’s important to remember that the left pedal has reverse threads, so it will tighten in the opposite direction. Apply some force to loosen the pedals, using the adjustable wrench or Allen key as needed.
After the old pedals have been loosened, it’s time to remove them. Continue turning the pedals until they are completely unscrewed from the crank arms. Once the pedals are removed, inspect the threads on the crank arms and clean them if necessary. This will ensure a smooth installation of the new pedals.
Now, it’s time to install the new pedals. Start by applying a small amount of grease to the threads of the new pedals. This will help prevent them from seizing in the crank arms and make future removal easier. Align the new pedal with the crank arm and begin turning it clockwise, using the adjustable wrench or Allen key. Make sure to tighten the pedal securely, but be careful not to overtighten, as this can damage the threads.

Repeat the installation process for the other pedal, remembering to turn the left pedal clockwise and the right pedal counterclockwise. Once both pedals are installed and tightened, give them a final check to ensure they are secure. Test the pedals by giving them a few rotations to make sure they spin freely and smoothly.
By following this step-by-step guide, you can successfully install bike pedals without a pedal wrench. Remember to gather the necessary tools, loosen and remove the old pedals, inspect and clean the crank arm threads, apply grease to the new pedals, and securely tighten them. With a little patience and the right tools, you’ll have your bike pedals installed and ready for your next ride in no time!
Preparing the tools and workspace
Before you start installing your bike pedals without a pedal wrench, it’s important to make sure you have all the necessary tools and set up your workspace properly. Here’s what you’ll need:
Tools:
- Adjustable wrench or pedal wrench
- Allen wrench (if your pedals use an Allen key)
- Grease or lubricant
Workspace:
- Find a flat and stable surface to work on. It’s best to use a workbench or table, but if you don’t have one, you can also use the ground.
- Clear the area around your bike, ensuring that there’s enough space for you to move around comfortably.
- Make sure you have good lighting to see what you’re doing. If needed, use a portable light or position the bike near a window.
Having all the necessary tools ready and creating a safe and well-lit workspace will make the installation process easier and more efficient. Now that everything is set up, you’re ready to move on to the next step.

Removing the old pedals
- Begin by locating the pedals on your bicycle.
- Identify the right pedal and the left pedal; they are typically labeled with “R” and “L” respectively.
- If your pedals have dust caps, use a suitable tool, such as an Allen wrench, to remove them.
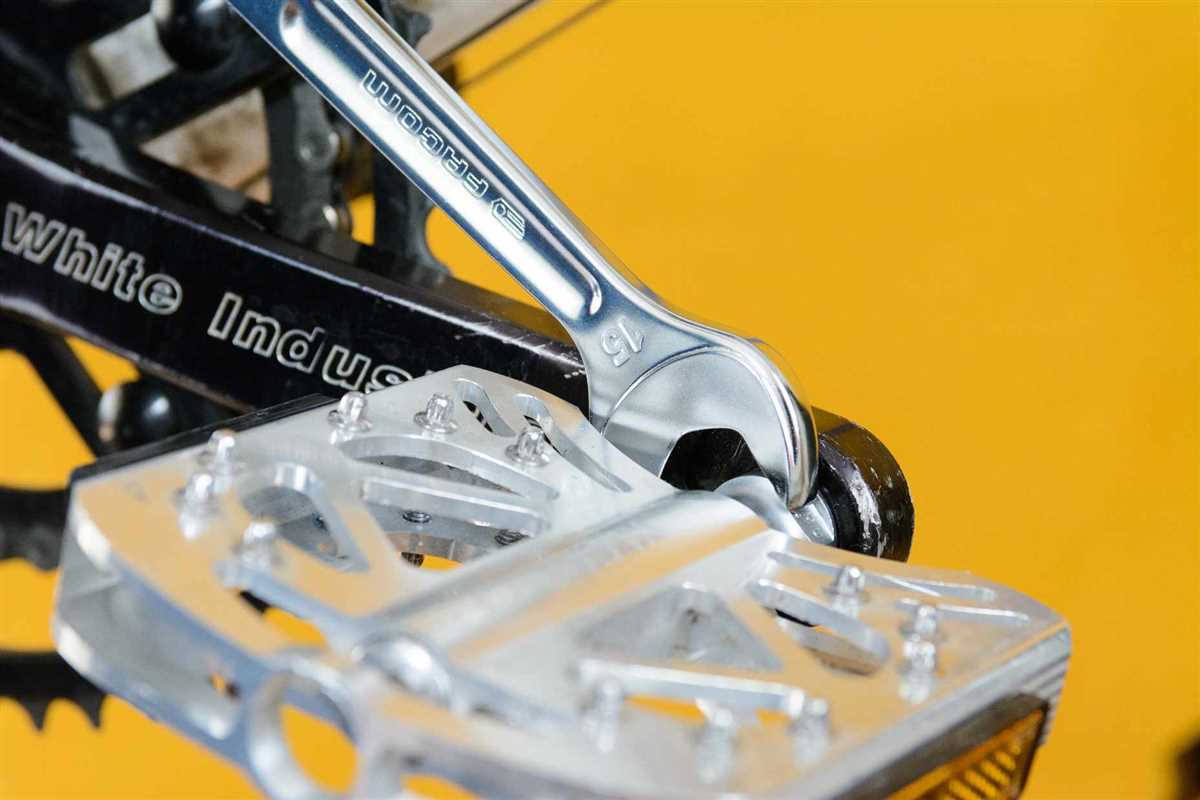
- Using a pedal wrench or a 15mm wrench, turn the pedal in the direction opposite to your bike’s forward motion.
- For the right pedal, turn it counterclockwise; for the left pedal, turn it clockwise.
- If the pedals are difficult to loosen, use a pedal removal tool or apply a penetrating oil to the threads to help loosen them.
- Once the pedal is loose, continue unscrewing it until you can remove it by hand.
- Repeat the same process for the other pedal.
- Inspect the pedals and the crank arms for any signs of damage or wear.
- If necessary, clean the pedal threads or apply grease to ensure smooth installation of the new pedals.
Checking the new pedals
Before installing the new pedals, it’s important to check them for any defects or damage. This will ensure that they are safe to use and will perform effectively. Here are the steps to check the new pedals:
- Inspect the threads: Carefully examine the threads on both the pedal and the crankarm. Make sure they are clean and undamaged. Damaged threads can prevent the pedal from properly attaching to the crankarm.
- Check the bearings: Spin the pedal axle by hand and listen for any unusual sounds or grinding sensations. The pedals should spin smoothly without any resistance. If you notice any issues, the bearings may need to be serviced or replaced.
- Look for cracks or damage: Inspect the pedal body for any cracks or visible damage. A damaged pedal can pose a risk of failure while riding. If you notice any cracks or significant damage, it’s best to replace the pedal.
If everything looks good during the inspection, you can proceed with the installation process. However, if you encounter any issues or concerns, it’s recommended to consult with a professional mechanic or contact the manufacturer for further assistance.
Applying lubricant
Before installing the bike pedals, it is recommended to apply lubricant to the pedal threads. This will help prevent the pedals from getting stuck or difficult to remove in the future.
Here’s how to apply lubricant to the pedal threads:
- Make sure the pedal threads are clean and free from any dirt or debris. Use a clean cloth or brush to remove any dirt.
- Apply a small amount of grease or lubricant to the threads of the bike pedal. You can use a specialized bike grease or any general-purpose lubricant that is suitable for metal-to-metal contact.
- Spread the lubricant evenly over the threads of the pedal. You can use your fingers or a small brush to ensure the lubricant covers the entire thread surface.
- Wipe off any excess lubricant from the pedal threads. This will prevent the excess grease from attracting dirt or causing the pedals to slip.
Once you have applied the lubricant to the pedal threads, you can proceed to install the bike pedals onto the crank arms. Make sure to tighten them securely using either a pedal wrench or an adjustable wrench.

Aligning the pedals
Once you have securely attached the pedals to your bike, it is important to make sure they are aligned properly. This will help provide a more comfortable and efficient pedaling experience.
Follow these steps to align the pedals:
- Position your bike upright: Find a flat surface and stand your bike upright. This will make it easier to align the pedals.
- Locate the pedals: Identify the right pedal and the left pedal. The right pedal is usually labeled with an ‘R’, while the left pedal is labeled with an ‘L’ or does not have any markings.
- Identify the correct side for each pedal: The right pedal should be installed on the right side of the bike, and the left pedal should be installed on the left side of the bike. If you are unsure, remember that the threads of the pedal should be tightened by turning clockwise.
- Check the alignment: Look at the pedals from a side view. Both pedals should be aligned parallel to the ground. If one pedal is higher or lower than the other, you will need to adjust the position.
- Adjust the pedals: If the pedals are not aligned, you can use an adjustable wrench or a pedal wrench to loosen the pedals and make the necessary adjustments. Make sure to tighten them back securely once you have adjusted their position.
By aligning the pedals correctly, you can ensure a more comfortable and efficient pedaling experience while riding your bike.
Tightening the pedals
- Once the pedals are properly aligned and threaded onto the crank arms, you will need to tighten them securely to ensure they do not come loose while riding.
- Using a 15mm pedal wrench or an adjustable wrench, rotate the wrench clockwise to tighten the right pedal (the one with the letter “R” marked on the axle) and counterclockwise to tighten the left pedal (the one with the letter “L”).
- Make sure to tighten each pedal until it is snug, but be careful not to overtighten, as this can damage the crank arms or the pedal threads.
- If you want to get the job done more efficiently, you can also use a 6mm allen wrench to tighten the pedals. Most modern pedals have an allen wrench fitting on the inside of the spindle.
- After tightening the pedals with the wrench, use your hands to check if they are securely fastened. Give each pedal a firm tug to ensure there is no movement or wobbling.
- If you notice any looseness or play in the pedals, you may need to go back and re-tighten them. It’s important to have the pedals securely tightened to prevent accidents or damage to your bike.
- Once you are confident that the pedals are tight and secure, your bike is ready to be ridden. Enjoy your ride!
Testing the pedals
Once you have successfully installed the bike pedals, it is important to test them before going for a ride. Testing the pedals will ensure that they are securely fastened and will not come loose while cycling.

To test the pedals, follow these steps:
- Stand next to the bike and place one foot on a pedal.
- Press down firmly on the pedal with your foot and apply some weight.
- Repeat this process with the other pedal.
While testing the pedals, pay attention to any unusual sounds or vibrations. If you notice anything out of the ordinary, stop testing and check the pedal installation again.
If the pedals feel secure and there are no issues during the test, you can confidently go for a ride knowing that your pedals are properly installed.
Maintenance tips
1. Regular cleaning

Keeping your bike pedals clean is essential for their proper functioning. Make sure to regularly clean your pedals with a mild detergent and water. Use a soft brush or cloth to remove any dirt or debris from the pedal surface and the threads.
2. Lubrication
Applying a lubricant to the pedal threads will help reduce friction and prevent them from seizing. Use a bike-specific lubricant and apply it to the threads before installing the pedals. Be careful not to apply too much lubricant, as it can attract dirt and cause the pedals to become slippery.
3. Check for damage
Before installing your pedals, inspect them for any signs of damage or wear. Look for cracks, loose parts, or worn-out bearings. If you notice any issues, it may be time to replace your pedals.
4. Tighten pedals properly
When installing your pedals, make sure to tighten them securely. Use a pedal wrench or an Allen key to tighten them until they are snug. Avoid over-tightening, as it can damage the pedal or the crank arm threads.
5. Check pedal tension regularly
After installing your pedals, it’s important to check their tension regularly. Over time, the pedals can become loose due to vibration and normal wear. Use a pedal wrench or Allen key to check and tighten them if necessary.
6. Periodic maintenance
In addition to regular cleaning, it’s a good idea to perform periodic maintenance on your pedals. This can include lubrication, bearing adjustment, and overall inspection for any signs of wear or damage. Consult your bike’s user manual or take it to a professional bike shop for more detailed maintenance instructions.
7. Replace worn-out pedals
If your pedals are worn-out or damaged beyond repair, it’s important to replace them. Worn-out pedals can affect your riding performance and safety. Choose pedals that are compatible with your bike and riding style.
8. Store your bike properly
When not in use, store your bike in a dry and secure place. Avoid exposing it to extreme temperatures or prolonged sunlight, as it can cause damage to the pedals and other components. Additionally, consider using a bike cover or storing it in a bike bag for added protection.
FAQ
What tools do I need to install bike pedals without a pedal wrench?
To install bike pedals without a pedal wrench, you will need an adjustable wrench or a hex wrench, as well as some grease or lubricant for the pedal threads.
Can I use a regular wrench instead of a pedal wrench to install bike pedals?
Yes, you can use a regular adjustable wrench or a hex wrench to install bike pedals if you don’t have a pedal wrench. Just make sure the wrench fits the pedal flats properly so you can apply enough torque to tighten the pedals securely.
Do I need to grease the threads of the bike pedals before installation?
Yes, it is recommended to apply some grease or lubricant to the pedal threads before installation. This will make it easier to tighten the pedals and also help prevent them from seizing or getting stuck in the future.
How do I remove the old bike pedals before installing new ones?
To remove the old bike pedals, you will need a pedal wrench or an adjustable wrench. Insert the wrench onto the pedal flats and turn it counterclockwise to loosen and remove the pedals. Make sure to hold onto the opposite crank arm to prevent the bike from turning while you remove the pedals.
Can I install the bike pedals without any tools?
No, you will need some tools to install bike pedals. While a pedal wrench is the most specific tool for this job, you can also use an adjustable wrench or a hex wrench to tighten the pedals securely.
Is it difficult to install bike pedals without a pedal wrench?
Installing bike pedals without a pedal wrench is slightly more challenging, but it is still doable with the right tools and technique. It may take a bit more time and effort, but following a step-by-step guide can help simplify the process.
Video

How to fit a door latch

Meet Harrison Clayton, a distinguished author and home remodeling enthusiast whose expertise in the realm of renovation is second to none. With a passion for transforming houses into inviting homes, Harrison's writing at https://thehuts-eastbourne.co.uk/ brings a breath of fresh inspiration to the world of home improvement. Whether you're looking to revamp a small corner of your abode or embark on a complete home transformation, Harrison's articles provide the essential expertise and creative flair to turn your visions into reality. So, dive into the captivating world of home remodeling with Harrison Clayton and unlock the full potential of your living space with every word he writes.


