How to Use a Basin Wrench: Step-by-Step Guide

A basin wrench is a specialized tool that is used to tighten or remove nuts and bolts in hard-to-reach areas, particularly those found underneath sinks or basins. It consists of a long handle with a pivoting head and a hook-shaped jaw. This allows it to grip onto the nut or bolt securely and apply torque to loosen or tighten it. If you’re a DIY enthusiast or a homeowner looking to tackle a plumbing project, learning how to use a basin wrench can save you time and frustration.
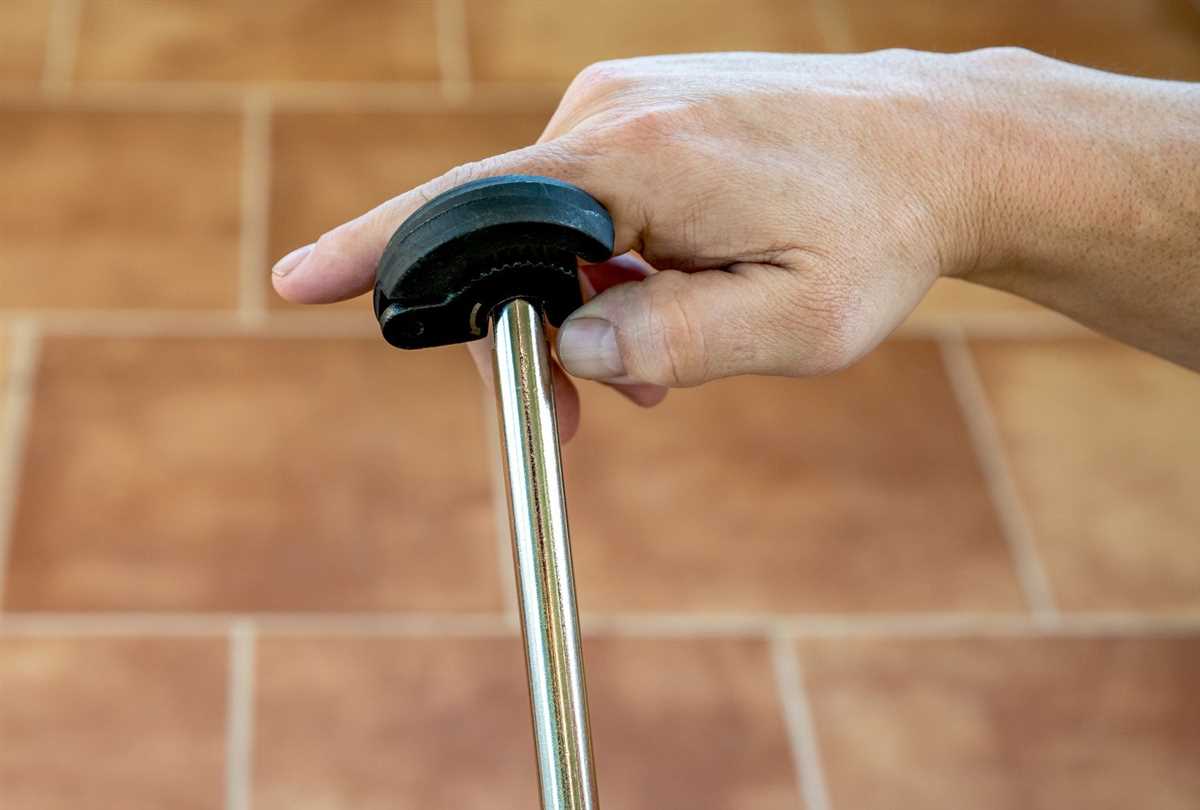
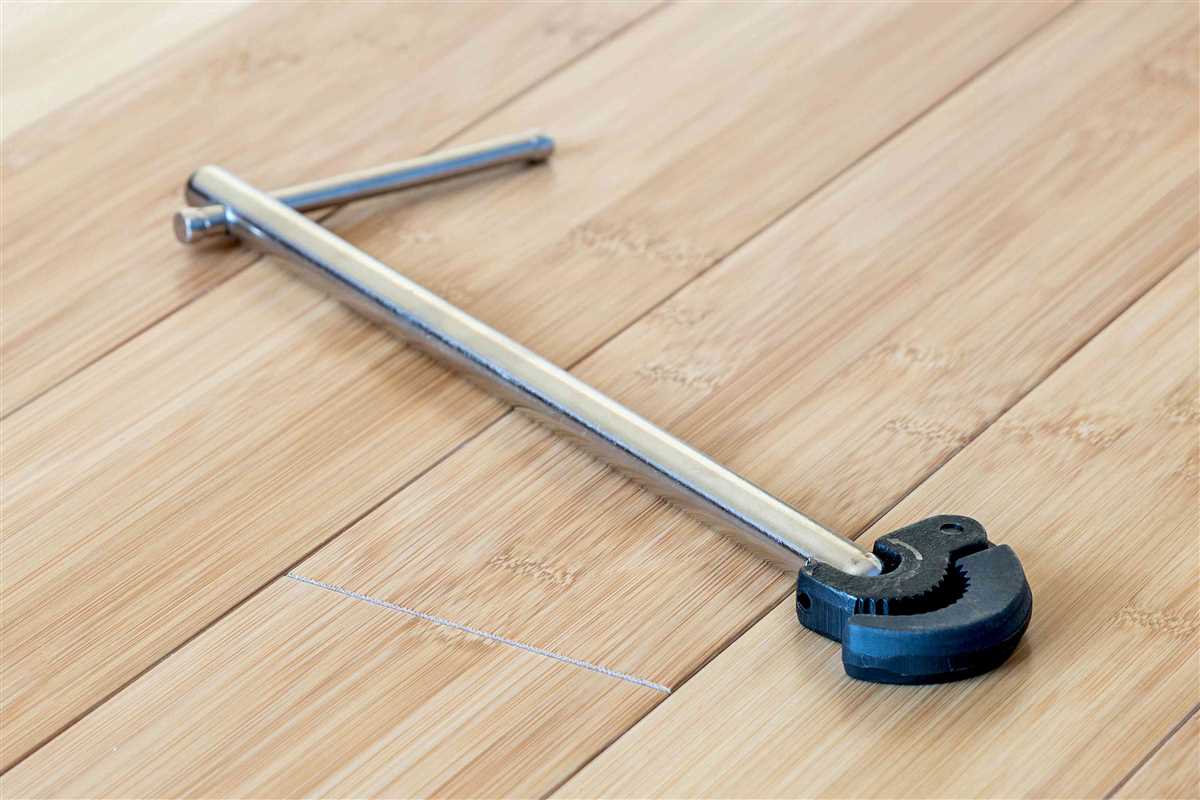
Step 1: Familiarize yourself with the basin wrench. The long handle is used to provide leverage, while the pivoting head allows for different angles of access. The hook-shaped jaw is adjustable and can fit various sizes of nuts and bolts. It’s important to ensure that the wrench is in good working condition before starting your project.
Step 2: Prepare your workspace. Clear out any clutter underneath the sink or basin to create a clear and safe working area. Use a flashlight to better see the area you’ll be working on. If there is any water or moisture present, make sure to dry it thoroughly to avoid slipping.
Step 3: Assess the nut or bolt you need to tighten or remove. Determine which direction is required to loosen or tighten the fastener. Most nuts and bolts turn to the left to loosen and to the right to tighten. Knowing this will ensure that you use the basin wrench correctly.
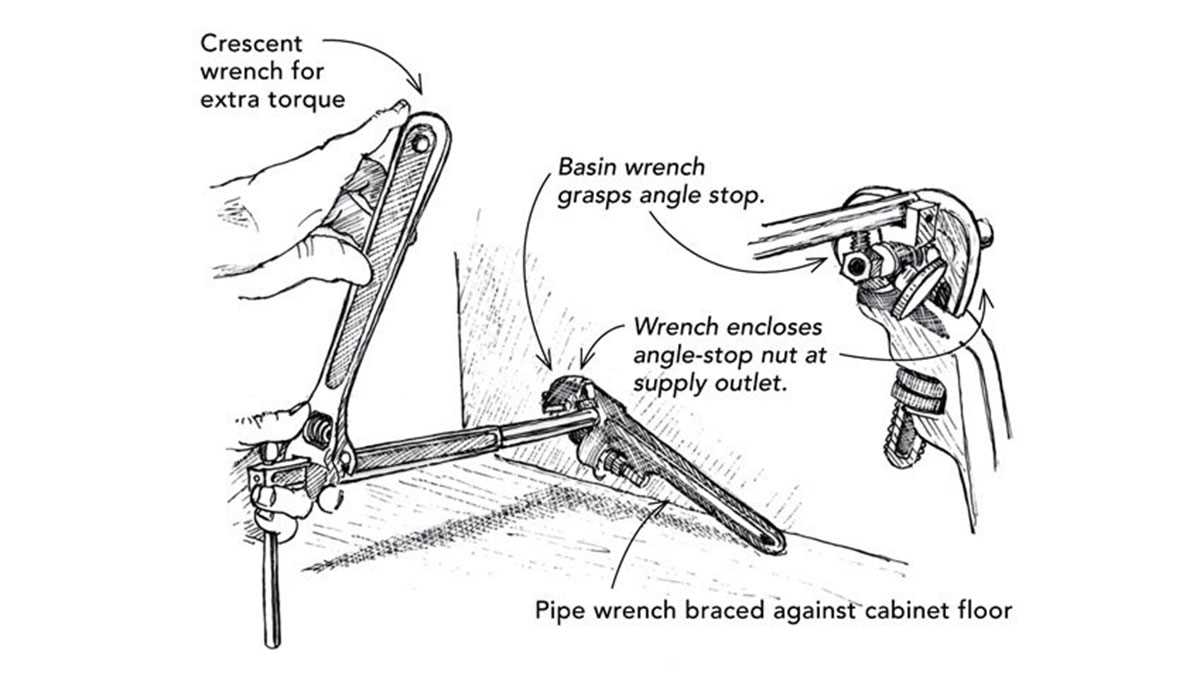
Step 4: Position the basin wrench. Hold the handle of the basin wrench firmly and position the hook-shaped jaw around the nut or bolt. The pivoting head can be adjusted to allow for different angles of access. Make sure the wrench is securely locked onto the fastener before applying any pressure.

Step 5: Turn the basin wrench. Using the long handle, apply pressure in the appropriate direction to loosen or tighten the nut or bolt. The length of the handle gives you leverage, making it easier to turn the fastener. Remember to be careful not to apply too much force as it could damage the nut, bolt, or the surrounding plumbing.
Step 6: Repeat the process if necessary. If you’re removing a nut or bolt, continue turning the basin wrench until it’s completely removed. If you’re tightening a nut or bolt, ensure that it’s secure but be cautious not to overtighten, as this could cause damage.
By following these steps, you can effectively use a basin wrench to tackle plumbing projects and make adjustments to your sink or basin. Remember to always exercise caution and take your time to ensure the job is done correctly and safely.
Choosing the Right Basin Wrench
When it comes to using a basin wrench, one of the most important steps is choosing the right tool for the job. Here are some factors to consider when selecting a basin wrench:
Type of Basin

The first thing to consider is the type of basin or fixture you will be working on. Different basins may have different sizes and configurations, so it’s important to choose a basin wrench that is compatible.
Reach
Another important factor to consider is the reach of the basin wrench. You want to make sure that the wrench can reach the nuts or fittings that you need to loosen or tighten. Measure the distance between the nuts and choose a wrench with a reach that matches or exceeds this measurement.
Adjustability
Some basin wrenches are adjustable, allowing you to change the size and angle of the jaws. This can be helpful if you are working in a tight space or on basins with hard-to-reach fittings. Look for a wrench with adjustable jaws for added versatility.
Comfort and Grip
Since using a basin wrench requires some physical exertion, it’s important to choose a wrench that feels comfortable in your hand and offers a good grip. Look for a wrench with ergonomic handles and a non-slip surface to prevent fatigue and ensure a secure grip.

Quality and Durability

Lastly, consider the quality and durability of the basin wrench. Investing in a high-quality tool can save you money in the long run, as it will last longer and perform better. Look for wrenches made from sturdy materials like steel and with a reputation for durability.
| Factor | Considerations |
|---|---|
| Type of Basin | Ensure compatibility |
| Reach | Measure distance between nuts |
| Adjustability | Consider tight spaces and hard-to-reach fittings |
| Comfort and Grip | Look for ergonomic handles and non-slip surface |
| Quality and Durability | Invest in sturdy materials and reputable brands |
By considering these factors and choosing the right basin wrench, you can ensure a smoother and more efficient plumbing experience.
Preparing for the Job
Before you begin using a basin wrench, there are a few things you need to do to prepare for the job. Here are the steps to follow:

- Gather the necessary tools: Basin wrench, adjustable wrench, pliers, and a bucket or towel to catch any dripping water.
- Turn off the water supply: Locate the shut-off valves under the sink and turn them clockwise to shut off the water supply. If there are no shut-off valves, you may need to shut off the main water supply to your home.
- Empty the sink: Remove any objects, dishes, or utensils from the sink to create a clear workspace.
- Protect the surrounding area: Place a towel or bucket underneath the area where you will be working to catch any water that may leak or drip.
- Have a plan: Take a moment to assess the situation and plan your approach. Look at how the faucet and pipes are connected and make a mental note of the steps you will need to take to remove them.
Once you have completed these preparations, you are ready to begin using the basin wrench to remove the faucet or pipes.
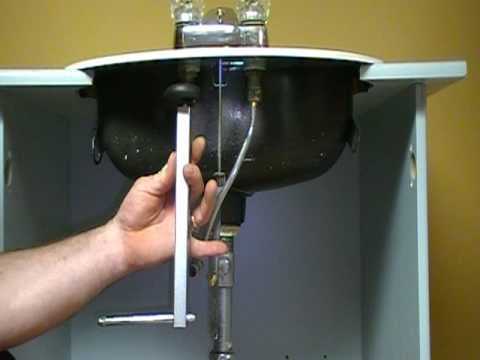
Locating the Nut to Loosen
Before you begin using a basin wrench, you need to locate the nut that you need to loosen. This nut is typically found underneath the sink where the water supply lines connect to the faucet. Here are the steps to help you find the nut:
- Start by positioning yourself underneath the sink so you have a clear view of the water supply lines.
- Use a flashlight if needed to better see the area.
- Identify the water supply lines that are connected to the faucet. They are usually made of flexible tubing and may be either metal or plastic.
- Follow the water supply lines to where they connect to the faucet.
- Locate the mounting nuts that hold the faucet in place. These nuts may be plastic or metal and are usually located on either side of the faucet.
- The nut you need to loosen is the one that secures the water supply line to the faucet. It is typically located behind or underneath the mounting nuts.
Once you have identified the nut, you can proceed to use the basin wrench to loosen it and remove the water supply line.
Adjusting the Basin Wrench
Before using a basin wrench, it’s important to adjust it to fit the size of the nuts or bolts you’ll be loosening or tightening. Here are the steps to adjust the basin wrench:

- Start by locating the adjusting nut on the basin wrench. This nut is typically found near the head of the wrench and is used to adjust the size of the jaws.
- Use your fingers to loosen the adjusting nut by turning it counterclockwise. This will allow the jaws to slide more easily.
- Once the adjusting nut is loosened, position the jaws of the basin wrench around the nut or bolt you need to work with. Ensure that the jaws are securely gripping the nut or bolt.
- Tighten the adjusting nut by turning it clockwise. This will tighten the jaws around the nut or bolt, providing a secure grip.
- Test the grip of the basin wrench by gently trying to move the nut or bolt. If there is any slippage or looseness, adjust the jaws further until you have a tight and secure grip.
Remember, it’s important to adjust the basin wrench properly to avoid any damage or injury while using it. Take your time to ensure that the jaws are properly adjusted before starting any work.
Positioning the Basin Wrench
When using a basin wrench, positioning is key to ensuring a successful and efficient job. Follow these steps to properly position the basin wrench:
- Locate the nut or fastener that needs to be tightened or loosened. This could be located underneath the sink or behind the toilet.
- If the nut is located in a tight or hard-to-reach area, you may need to remove any obstacles or objects that could hinder your access to the nut.
- Hold the basin wrench with one hand and extend the handle fully to create more leverage.
- Insert the jaw of the basin wrench over the nut, making sure it sits securely.
- Position the head of the basin wrench at the right angle to easily grip and turn the nut. This may require adjusting the angle of the handle or rotating your body as necessary.
Note: It is important to position the basin wrench properly to ensure a tight and secure grip on the nut. If the wrench slips or does not grip the nut firmly, it may lead to damaged or stripped fasteners, making the job more difficult.
Following these steps for positioning the basin wrench will help you gain better control and leverage, making your plumbing tasks easier to complete.
Loosening the Nut
Once you have positioned yourself in front of the nut that needs to be loosened, follow these steps:
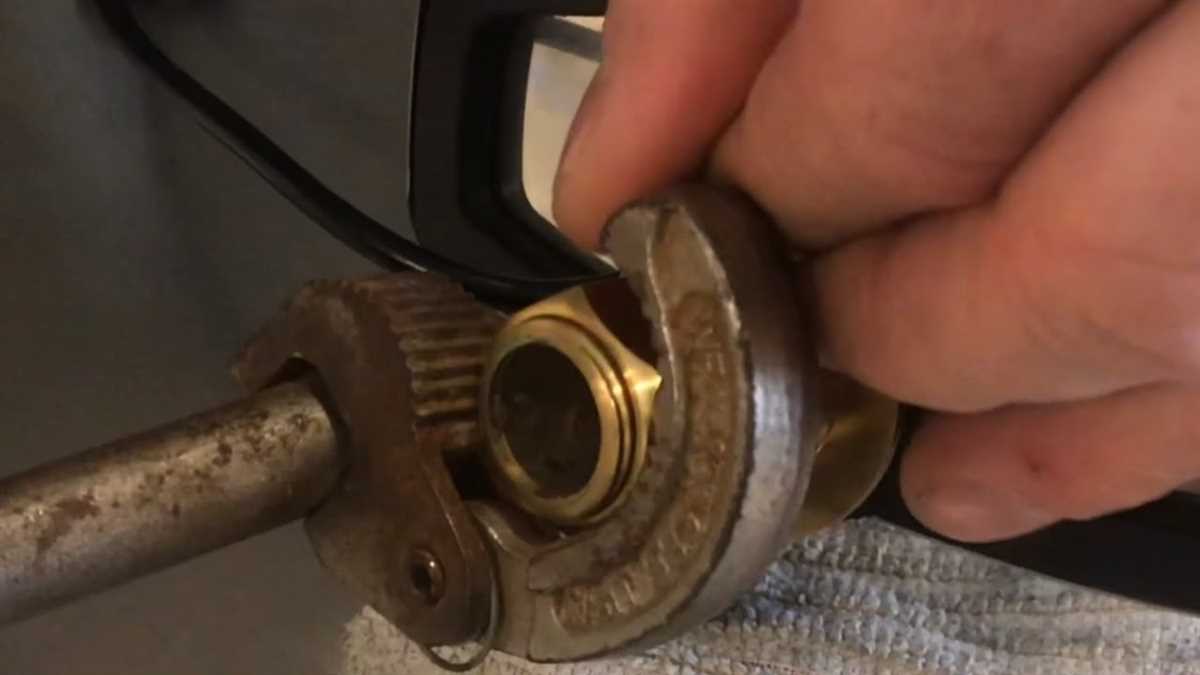
- Choose the appropriate jaw size: Select the correct jaw size on the basin wrench by adjusting the movable jaw. Ensure that the jaw is snugly fit around the nut.
- Apply pressure: Hold the basin wrench firmly with one hand, while using your other hand to turn the T-handle. Apply steady pressure in a counterclockwise direction to loosen the nut. The basin wrench’s long handle will provide leverage for easier turning.
- Turn the nut: Use the T-handle to rotate the nut counterclockwise. Keep applying pressure until the nut starts to loosen. If the nut is stubborn, you may need to exert more force, but be careful not to overtighten and damage the nut or the surrounding plumbing connections.
- Remove the nut: Once the nut is loosened, you can use your fingers to remove it the rest of the way. If the nut is too tight to remove by hand, you can continue using the basin wrench to spin it off completely.
Remember to work slowly and methodically, taking care not to damage any surrounding pipes or fittings. It may also be helpful to have a bucket or towel nearby to catch any water that may leak from the pipes during this process.
Removing the Old Fixture
Before you can install a new fixture, you’ll need to remove the old one. Follow these steps to safely remove the old fixture:
- Turn off the water supply: Locate the shut-off valves under the sink and turn them clockwise to shut off the water supply. If there are no shut-off valves, you may need to shut off the main water supply to your home.
- Remove any excess water: Use a bucket or towel to catch any remaining water in the pipes. This will help prevent leakage and water damage during the removal process.
- Disconnect the water supply lines: Use an adjustable wrench to loosen and remove the nuts connecting the water supply lines to the faucet. Be sure to hold onto the lines to prevent them from falling back into the wall.
- Disconnect the drain pipe: Loosen and remove the nut connecting the drain pipe to the bottom of the sink. Again, be prepared to catch any excess water that may come out.
- Disconnect the mounting nuts: Locate the mounting nuts that secure the faucet to the sink. Use a basin wrench or adjustable wrench to loosen and remove these nuts. Carefully lift the old fixture away from the sink.
- Inspect the area: Once the old fixture is removed, take a moment to inspect the area for any signs of damage or wear. Clean the surface of the sink to prepare for the installation of the new fixture.
Now that you have successfully removed the old fixture, you are ready to install the new one. Refer to the manufacturer’s instructions for your specific fixture to ensure a proper installation.
Installing the New Fixture
Step 1: Prepare the new fixture
Before installing the new fixture, make sure you have all the necessary parts and tools. Carefully unpack the fixture and check for any damage or missing parts. Read the manufacturer’s instructions to ensure you understand the installation process.
Step 2: Shut off the water supply

Locate the water shut-off valves for the fixture you are replacing. Turn the valves clockwise to shut off the water supply. If there are no shut-off valves, you will need to turn off the main water supply to your house.
Step 3: Disconnect the old fixture
Use a basin wrench to loosen the nuts that hold the old fixture in place. Start with the hot and cold water supply lines, and then move on to the mounting nuts. Carefully remove the old fixture, taking care not to damage any surrounding surfaces or pipes.
Step 4: Prepare the area
Clean the area where the new fixture will be installed. Remove any old sealant or debris to ensure a clean and smooth surface for the installation. If necessary, apply plumber’s putty to the base of the new fixture to create a watertight seal.
Step 5: Install the new fixture
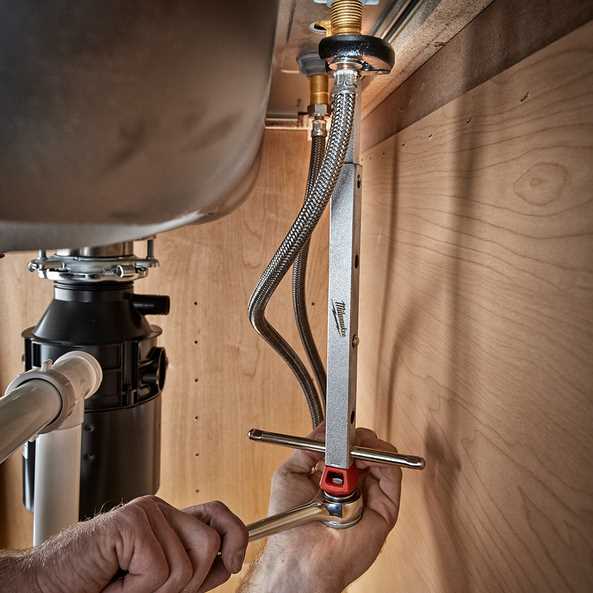
Position the new fixture in place, aligning the mounting holes with the corresponding holes in the sink or countertop. Use a basin wrench to tighten the mounting nuts, making sure the fixture is secure. Connect the hot and cold water supply lines, ensuring they are tight but not over-tightened to avoid damage.
Step 6: Test the new fixture
Turn on the water supply and check for any leaks. Run both hot and cold water to make sure everything is functioning properly. If you notice any leaks, tighten the connections or replace the faulty parts as necessary.
Step 7: Reassemble and clean up
Once you have confirmed that the new fixture is installed correctly and there are no leaks, reassemble any additional parts such as handles or decorative trim. Clean up any excess sealant or debris, and enjoy your newly installed fixture!
FAQ
What is a basin wrench?
A basin wrench is a special tool used for tightening or loosening nuts in hard-to-reach areas behind sinks and basins.
How do I use a basin wrench?
To use a basin wrench, first adjust the length of the handle to fit the space behind your sink. Then, position the jaws of the wrench around the nut you want to tighten or loosen. Finally, apply pressure and turn the wrench clockwise or counterclockwise to achieve the desired result.
Can I use a basin wrench for other plumbing tasks?
Yes, a basin wrench can be used for various plumbing tasks that involve working in confined spaces. It is especially useful for tight spaces such as those behind sinks and basins.
Do I need any special maintenance for my basin wrench?
It is recommended to clean your basin wrench after each use to remove any debris and prevent corrosion. Additionally, lubricating the moving parts periodically can help keep the wrench in good working condition.
Video


Meet Harrison Clayton, a distinguished author and home remodeling enthusiast whose expertise in the realm of renovation is second to none. With a passion for transforming houses into inviting homes, Harrison's writing at https://thehuts-eastbourne.co.uk/ brings a breath of fresh inspiration to the world of home improvement. Whether you're looking to revamp a small corner of your abode or embark on a complete home transformation, Harrison's articles provide the essential expertise and creative flair to turn your visions into reality. So, dive into the captivating world of home remodeling with Harrison Clayton and unlock the full potential of your living space with every word he writes.


