Learn How to Bend a Wrench Like a Pro – Step by Step Guide

Have you ever found yourself in a situation where a standard wrench just won’t cut it? Maybe you need to reach a bolt in a tight space or apply more torque than your regular wrench can handle. That’s where bending a wrench comes in handy. Bending a wrench allows you to modify its shape to better suit your needs, making it a valuable skill for any aspiring DIYer.
But how exactly does one go about bending a wrench like a pro? Don’t worry, we’ve got you covered. In this step by step guide, we’ll walk you through the process of bending a wrench in a safe and effective way.
To start, you’ll need a few essential tools and materials. First and foremost, you’ll need a sturdy wrench that you’re willing to modify. It’s best to choose a wrench made of high-quality steel, as it will be more resistant to bending. Additionally, you’ll need a heat source, such as a torch or a propane burner, to heat the wrench and make it more pliable. Lastly, you’ll need a vice or clamps to hold the wrench in place while you bend it.
Once you have all your materials ready, it’s time to get started. The first step is to heat the wrench using your chosen heat source. Be sure to heat the entire wrench evenly, as this will make it easier to bend. Once the wrench is sufficiently heated, use your gloves to protect your hands and carefully position it in the vice or clamps.
Important note: Be sure to take all necessary safety precautions when using heat and working with metal. Always wear protective gear such as gloves and eye goggles, and work in a well-ventilated area.
Now that the wrench is securely held in place, use a piece of metal pipe or a cheater bar to apply pressure and bend the wrench to the desired angle. Remember to always take your time and apply gradual pressure, as rushing the process can lead to an uneven or weak bend. Once you’ve achieved the desired angle, remove the wrench from the vice or clamps and allow it to cool down.

And there you have it! With these simple steps, you can bend a wrench like a pro. Whether you’re a DIY enthusiast or a professional mechanic, knowing how to bend a wrench can be a valuable skill that allows you to tackle a wider range of projects with ease.
Remember, practice makes perfect, so don’t be discouraged if your first attempt doesn’t turn out exactly as planned. Keep refining your technique, and soon you’ll be bending wrenches with precision and confidence.
Step 1: Choosing the Right Wrench for Bending
Before you begin bending a wrench, it’s important to choose the right wrench for the job. Here are some factors to consider when selecting a wrench:
Size and Type
The size and type of wrench you choose will depend on the specific task you’re trying to accomplish. Different wrenches are designed for different purposes, such as loosening or tightening bolts, nuts, or pipes. Make sure to select a wrench that matches the size and type of the object you’ll be manipulating.
Material
The material of the wrench can play a significant role in its durability and flexibility. Wrenches are typically made from steel or alloy, with some higher-end options made from chrome or vanadium. Consider the material of the wrench and choose one that is sturdy enough to withstand the bending process.

Flexibility
When bending a wrench, you need a tool that is flexible enough to bend without breaking. Look for wrenches with a slight amount of flexibility, especially in the handle, as this will allow for easier bending without risking damage to the wrench.
Grip
A good grip is essential for bending a wrench effectively. Look for a wrench with a comfortable and secure grip that won’t slip out of your hand as you apply force. Wrenches with rubberized or textured handles can provide better grip and control.
Budget
Consider your budget when selecting a wrench, as prices can vary depending on the brand, quality, and features. While it’s important to choose a high-quality wrench for durability and reliability, you don’t necessarily need to invest in the most expensive option if you’ll only be using it occasionally.
By considering these factors, you can choose the right wrench for bending and ensure a successful bending process with minimal risk of damage to the tool or yourself.
Step 2: Preparing the Wrench for Bending
Gather the necessary materials
Before you start bending the wrench, make sure you have all the required materials at hand:

- A wrench
- A heat source
- A pair of heat-resistant gloves
- A bucket of water
- A bench vise
- Protective eyewear
Put on safety gear
Work safety should always be a top priority. Before you begin, put on your heat-resistant gloves and protective eyewear to protect yourself from any potential hazards.
Loosen any fasteners or screws

Check the wrench for any fasteners or screws that may be securing its jaws or movable parts. Loosen or remove them to ensure that the wrench is fully adjustable and ready for bending.
Secure the wrench in a bench vise
Place the wrench securely into the jaws of a bench vise. Tighten the vise to hold the wrench firmly in place, ensuring that the section you want to bend is sticking out and easily accessible.
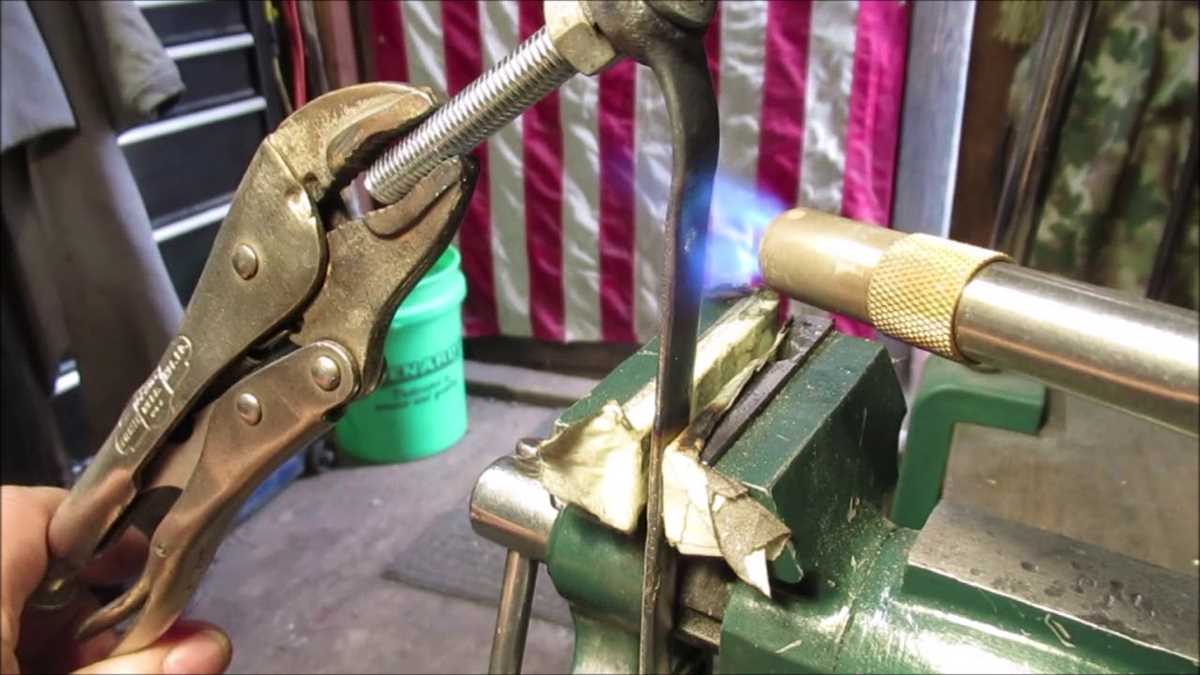
Apply heat
Using a heat source, such as a blowtorch or heat gun, apply heat evenly to the section of the wrench you want to bend. Move the heat source back and forth along the area to distribute heat uniformly and avoid overheating a specific spot.
![Making Pipe Cleaner Pets (Design Originals) Learn How to Twist, Bend, and Shape 23 Cute Dog Breeds - Terriers, Spaniels, Chihuahuas, Labrador Retrievers, Schnauzers, Pugs, Corgis, and More [BOOK ONLY]](https://m.media-amazon.com/images/I/51dNyzgzO5L._SS520_.jpg)
Heat until cherry red
Continue applying heat until the section of the wrench you want to bend becomes cherry red. This indicates that the metal has reached its optimal temperature for bending.
Quench in water
Once the desired temperature is reached, carefully remove the wrench from the heat source and fully immerse it in a bucket of water. This rapid cooling process, called quenching, helps to harden the metal and retain its new shape.
Inspect and test the wrench
After quenching, remove the wrench from the water and inspect it for any signs of damage or warping. Test the movable parts to ensure that they are still adjustable and function properly. If any issues are detected, repeat the process or seek professional assistance.
Now that the wrench is properly prepared, you are ready to move on to the next step of the bending process.
Step 3: Applying Heat to the Wrench
Applying heat to the wrench is a crucial step in bending it. Heating the metal makes it easier to manipulate and prevents it from cracking or breaking during the bending process. Follow these steps to apply heat to the wrench:

Materials Needed:
- Propane torch or blowtorch
- Fire-resistant work gloves
- Fire extinguisher (for safety)
Instructions:
- Put on the fire-resistant work gloves to protect your hands from the heat.
- Make sure you are working in a well-ventilated area or outdoors to avoid inhaling any fumes.
- Check that the propane tank or blowtorch is securely connected and in good working condition.
- Hold the wrench firmly with the hand not holding the torch, making sure to grip it near the area where you want to make the bend.
- Turn on the torch and adjust the flame to a medium-high heat setting.
- Direct the flame onto the desired area of the wrench, moving it back and forth to evenly distribute the heat.
- Continue heating the wrench for about 1-2 minutes, or until the metal becomes visibly red-hot.
Caution: Avoid overheating the wrench, as this can weaken the metal and cause it to lose its structural integrity. It’s better to heat it gradually than to risk damaging it with excessive heat.
Once the wrench is heated to the desired temperature, you are ready to proceed to the next step of bending it.
Step 4: Bending the Wrench with Precision
Now that you have prepared the wrench and secured it properly, it’s time to bend it with precision. This step requires careful attention to detail and steady hands, so make sure you are focused and ready to tackle the task.
1. Determine the exact point of the bend
Take a moment to visualize where exactly you want to make the bend on the wrench. This will depend on your specific needs and preferences. Use a marker or a piece of tape to mark the spot where the bend should start.
2. Apply steady pressure at the marked spot
Using both hands, firmly grasp the wrench near the marked spot. Apply steady pressure in the opposite direction of where you want to create the bend. This will help prevent any unwanted movement or flexing of the wrench.
3. Gradually increase the pressure
Slowly increase the pressure on the wrench, keeping it steady and controlled. You can use a vise or a clamp to help you maintain the desired angle during the bending process. Take your time and make small adjustments as needed.
4. Use a bending tool or leverage
If you’re finding it difficult to bend the wrench with your bare hands, you can use a bending tool or leverage for extra force. These tools are specifically designed to help apply pressure at specific points without damaging the wrench.
5. Check the progress regularly
Stop periodically to check the progress of the bend. Use a measuring tool to ensure that you are achieving the desired angle and degree of bend. This will help you make any necessary adjustments before proceeding further.
6. Repeat the process if needed
If you need to create multiple bends or adjust the bend further, repeat the above steps until you achieve the desired shape. Take your time and be patient, as rushing can lead to mistakes or damage to the wrench.
7. Inspect for any cracks or damage
Once you have completed the bending process, carefully inspect the wrench for any cracks, fractures, or other signs of damage. If you notice any issues, it’s best to stop using the wrench and acquire a new one to ensure your safety.
By following these steps with precision and attention to detail, you can bend a wrench like a pro. Remember to always prioritize safety and take your time during the bending process. With practice, you’ll be able to achieve the perfect bend for your needs.
Step 5: Cooling and Inspecting the Bent Wrench
After you have successfully bent your wrench to the desired angle, it’s important to let it cool down before using it. This will help prevent any potential deformation or damage to the metal.
Cooling the Bent Wrench
Once you have finished bending the wrench, place it in a container filled with cool water. You can also use a wet cloth or towel to wrap around the bent area. The cool water or damp cloth will help dissipate the heat and cool down the metal more quickly.
Allow the wrench to cool for at least 5-10 minutes before removing it from the water or taking off the wet cloth. This will ensure that the metal has fully cooled down and stabilized.
Inspecting the Bent Wrench
After the wrench has cooled down, carefully inspect the bent area to ensure that it is straight and without any cracks or deformations. Use a light source, such as a flashlight, to check for any irregularities.
If you notice any issues with the bent area, such as cracks or deformations, it is important to discard the wrench and start over with a new one. Using a faulty wrench can lead to accidents or injuries.
However, if the bent area looks good and without any issues, you can proceed to the next step of the wrench bending process.
Step 6: Testing the Bent Wrench for Strength and Flexibility
After successfully bending the wrench, it is important to test its strength and flexibility before using it for any heavy-duty tasks. This step will ensure that the wrench can withstand the necessary force without breaking or causing any damage.
Testing for Strength
To test the strength of the bent wrench, follow these steps:
- Choose a sturdy surface or workbench to perform the test.
- Select a piece of scrap metal or other hard object that simulates the type of material you would be working with.
- Position the bent wrench on top of the scrap metal, with the bent section facing downwards.
- Apply gradual and increasing force to the wrench by placing weight or applying pressure on the free end.
- Observe the bent section of the wrench for any signs of deformation, cracking, or breaking.
If the bent wrench shows no signs of damage, it can be considered strong enough for regular use. However, if any deformation or cracks are noticed, it is recommended to discard the wrench and start the bending process again with a new one.
Testing for Flexibility
Flexibility is essential for a bent wrench to be effective in accessing tight spaces. To test the flexibility of the bent wrench, follow these steps:
- Identify narrow or confined areas that require the use of the bent wrench.
- Insert the bent section of the wrench into the identified area.
- Move the wrench around to ensure that it can reach all angles and positions needed for the task.
- Check if the bent section of the wrench hinders its ability to turn or apply force in any direction.
If the bent wrench proves to be flexible and can maneuver easily in tight spaces, it is suitable for use. However, if it is too rigid or obstructs movement in any way, adjustments may need to be made to the bending angle or shape of the wrench.
By thoroughly testing the bent wrench for both strength and flexibility, you can ensure its reliability and effectiveness in your future tasks. Remember to prioritize safety and always use proper techniques and tools when working with mechanical equipment.
Step 7: Maintaining and Caring for your Bent Wrench
Once you’ve successfully bent your wrench, it’s important to take proper care of it to ensure its longevity and continued usefulness. Here are some tips for maintaining and caring for your bent wrench:
1. Clean it regularly
After each use, make sure to clean your bent wrench to remove any dirt, grease, or debris that may have accumulated on it. Use a rag or a brush to wipe off the surface of the wrench, paying special attention to the bent area.
2. Store it properly
When you’re not using your bent wrench, store it in a dry and secure place. Avoid leaving it exposed to moisture or extreme temperatures, as these conditions can cause rust or damage to the tool.
3. Inspect for damage
Regularly check your bent wrench for any signs of damage or wear. Look for cracks, bends, or any other issues that may compromise the tool’s integrity. If you notice any problems, it’s important to address them promptly to prevent further damage.
4. Keep it lubricated
Apply a light layer of lubricant or oil to your bent wrench to prevent rust and keep the moving parts functioning smoothly. This is especially important if you live in a humid or damp environment.
5. Use it correctly
While your bent wrench may have some added flexibility, it’s important to remember its limitations. Avoid using excessive force or exerting it in positions it wasn’t designed for, as this can lead to breakage or further bending.
6. Consider professional maintenance
If you’re unsure about how to properly maintain your bent wrench or you notice any significant damage, it may be best to consult a professional. They can provide guidance on repairs or replacements if necessary.
By following these tips, you can ensure that your bent wrench remains in good condition and continues to serve you well for years to come.
FAQ
What is the purpose of bending a wrench?
The purpose of bending a wrench is to create a custom tool that can be used for specific tasks. Bending a wrench allows you to reach tight spaces or awkward angles where a regular wrench might not fit.
Is it difficult to bend a wrench?
Bending a wrench can be a bit challenging, especially if you are not familiar with the process. However, with the right tools and techniques, it is definitely doable for anyone, even if you are not a professional mechanic.
What tools do I need to bend a wrench?
To bend a wrench, you will need a few essential tools: a vice, a torch, a hammer, and safety gear such as gloves and goggles. These tools will help you heat the metal and shape it into the desired angle.
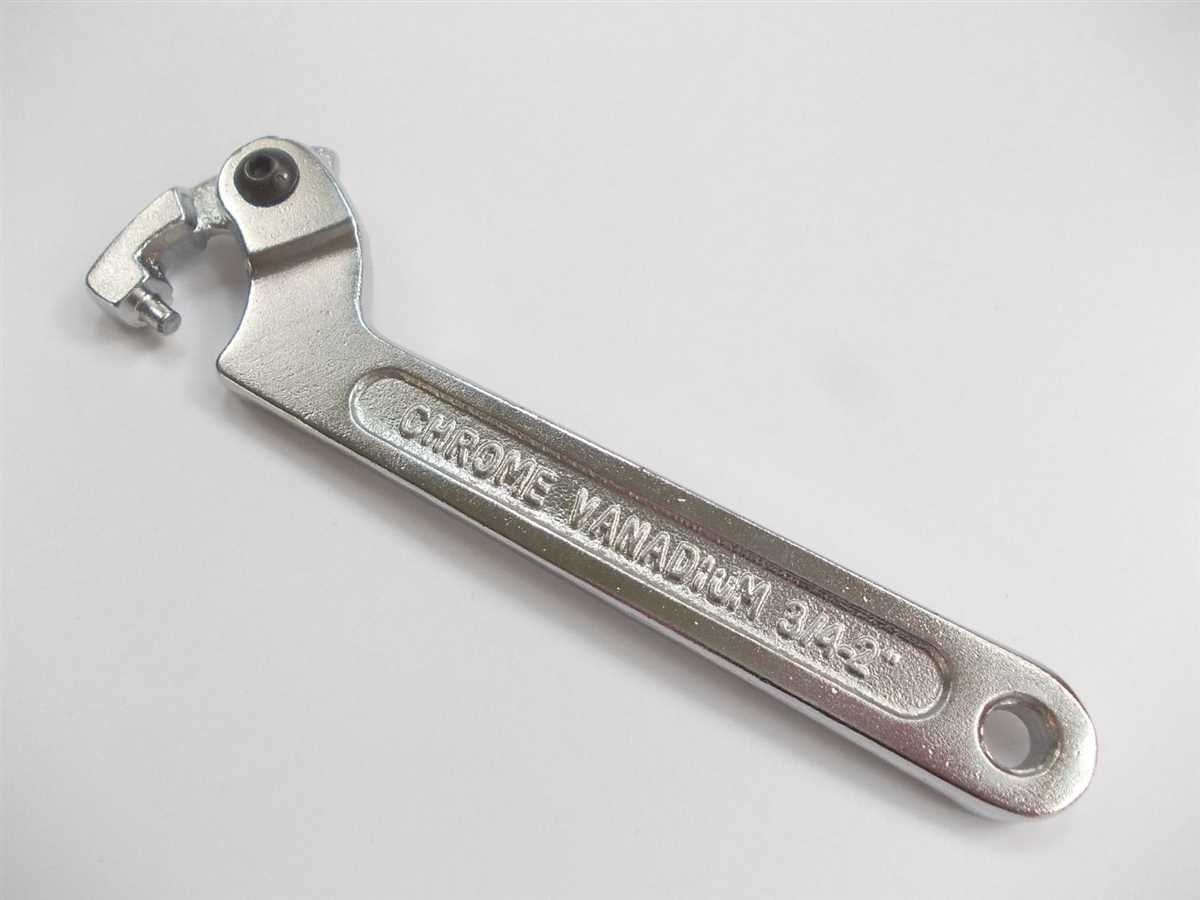
Can I use any type of wrench for bending?
Not all types of wrenches are suitable for bending. It is best to use a wrench made from a softer metal, such as chrome vanadium or alloy steel. These materials are more malleable and easier to bend without causing damage.
Video

Best Gress Shears

Meet Harrison Clayton, a distinguished author and home remodeling enthusiast whose expertise in the realm of renovation is second to none. With a passion for transforming houses into inviting homes, Harrison's writing at https://thehuts-eastbourne.co.uk/ brings a breath of fresh inspiration to the world of home improvement. Whether you're looking to revamp a small corner of your abode or embark on a complete home transformation, Harrison's articles provide the essential expertise and creative flair to turn your visions into reality. So, dive into the captivating world of home remodeling with Harrison Clayton and unlock the full potential of your living space with every word he writes.