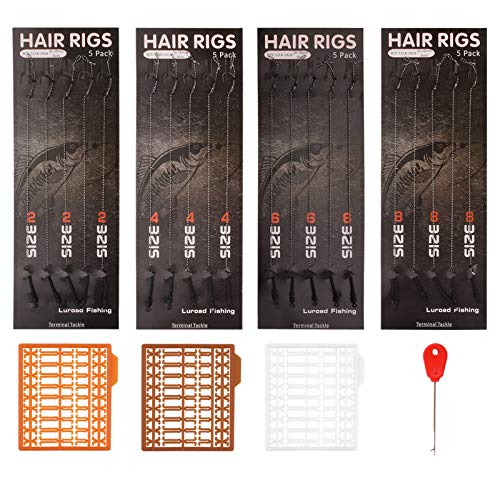
How to tie a hair rig
Do you love fishing for carp? If you do, then you need to learn the art of tying a hair rig. This rig has revolutionized carp fishing and is an important technique in your angling arsenal. A hair rig allows you to present your bait in a way that makes it almost impossible for the carp to detect that there is a hook attached.
So, what exactly is a hair rig? A hair rig is a type of fishing rig where the bait is mounted on a separate piece of line and positioned away from the hook. By doing this, the carp can suck in the bait without feeling the weight of the hook. This results in a higher success rate as the carp are more likely to take the bait effectively and get caught on the hook.
Tying a hair rig is not difficult, but it requires some basic skills and knowledge of the technique. You will need a few essential items, including a fishing hook, rig tubing, and a length of hair rig material. In this article, we will guide you through the step-by-step process of tying a hair rig, including important tips and tricks along the way.
Mastering the hair rig can give you a significant advantage in carp fishing. With this technique, you can increase your chances of hooking a carp and landing a big catch. Whether you are a beginner angler or an experienced carp fisherman looking to improve your skills, learning how to tie a hair rig is a valuable skill that should not be overlooked.
Understanding the Hair Rig
The hair rig is a popular angling technique used for carp fishing. It involves attaching a baited hook to a length of hair instead of directly to the end of the fishing line. This allows the carp to take the bait without feeling the resistance of the line, resulting in better hook-ups and more successful catches.

Advantages of the Hair Rig
The hair rig offers several advantages over traditional fishing methods. Firstly, it allows for a more natural presentation of the bait. The baited hook hangs freely, mimicking the way fish feed in their natural environment.
The hair rig also improves hooking efficiency. With the bait positioned away from the hook, the carp is less likely to detect any resistance when taking the bait. This increases the chances of a solid hook-up and reduces the risk of the fish dropping the bait.
Additionally, the hair rig provides flexibility in bait options. Different types of bait can be easily attached and changed without retying the entire rig, saving time and effort on the angler’s part.
Components of a Hair Rig
There are a few key components that make up a hair rig. These include:
- Hook: The hook is chosen based on the size of the bait and the type of fish being targeted.
- Bait: The choice of bait is crucial and depends on the feeding habits and preferences of the fish species being targeted.
- Hair: The hair is a length of monofilament line or specialized braided material that is attached to the hook. It can be adjusted to suit the size and presentation of the bait.
- Stop Knot: A stop knot is tied on the hair to prevent the bait from sliding off or moving too far away from the hook during casting and retrieve.
- Swivel: A swivel is often used to attach the hair rig to the main fishing line, allowing for easy attachment and removal.
Understanding the hair rig and its various components is essential for any angler looking to improve their carp fishing skills. By utilizing this technique, anglers can increase their chances of hooking and landing carp successfully.

Gathering the Necessary Materials
Before beginning the process of tying a hair rig, it’s important to gather all the necessary materials. Here’s a list of items you’ll need:
1. Hook
A good quality hook is essential for tying a hair rig. Choose a size and style that suits the type of fish you’ll be targeting.
2. Baiting Needle
A baiting needle is used to thread the bait onto the hair rig. It’s a small needle-like tool with a hole at one end and a handle at the other.
3. Bait
Select the bait you want to use on your hair rig. Popular options include boilies, pellets, and corn.
4. Hair stops
Hair stops are small pieces of plastic or rubber that hold the bait securely on the hair rig. They prevent it from falling off during casting or when fish tugs.

5. Hair Rig Material
In addition to the necessary components, you’ll need a hair rig material. This can be fishing braid or a specialized rig material designed for this purpose. Select a material that is strong and durable.
Be sure to have all these materials ready before attempting to tie a hair rig. Having everything prepared in advance will make the process quicker and more efficient.
Tying the Hair Rig Knot
The hair rig knot is an essential part of rigging your fishing setup. It allows for the bait to sit away from the hook, enticing the fish to bite without feeling the resistance of the hook. Follow these simple steps to tie the hair rig knot:
Step 1: Prepare the Hooklink
Start by cutting a length of hooklink material, preferably a braid or a monofilament line. The length of the hooklink will depend on your fishing setup and preferences. Attach the hook to one end of the hooklink using a standard knot.
Step 2:Position the Bait
Thread the bait onto the hooklink, making sure it sits nicely on the hair. The hair length can vary depending on the type of bait you are using, but a good rule of thumb is to have the hair length slightly longer than the bait itself.

Step 3: Create a Loop
Take the loose end of the hooklink and create a small loop around 1.5 centimeters from the end of the hook. Hold the loop in place with your finger and make three or four turns around the main hooklink, just above the loop.
Step 4: Tighten the Knot
Moisten the loop with saliva or water to lubricate the knot, then slowly and gently pull the loose end of the hooklink to tighten the knot. Make sure the knot is secure but not overly tight to avoid any damage to the hooklink material.
Note: Some anglers prefer to use a baiting needle to thread the bait onto the hair rig, while others prefer to use hair stops or bands. Experiment with different methods to find what works best for you.
Now you know how to tie the hair rig knot! Practice tying it a few times before your fishing trip to ensure you are confident and efficient in tying this essential rigging knot.
Remember: Always check your rigging for any signs of wear or damage before casting out. It’s important to maintain robust and reliable setups for successful fishing sessions.

Securing the Hair Rig to the Hook
Once you have set up your hair rig, it is important to secure it properly to the hook to ensure that it functions effectively. Follow these steps to secure the hair rig to the hook:
| Step 1 | Begin by threading the hair rig loop onto the shank of the hook. Make sure the loop is on the same side as the hook’s point. |
| Step 2 | Once the loop is threaded onto the shank, pull the loop tight against the eye of the hook. This will ensure that the hair rig stays securely in place during casting and retrieving. |
| Step 3 | To further secure the hair rig, use a bait stop or boilie stop. These small plastic stops can be pushed onto the hair rig, against the hook, to prevent the bait from sliding off during casting or while in the water. This is particularly useful when using soft or semi-soft baits. |
| Step 4 | If you are using a hair rig with multiple baits, such as a hair-rigged bunch of maggots, you can use a baiting needle to thread the baits onto the hair rig. This will ensure that the baits are secure and prevent them from falling off. |
| Step 5 | Once everything is secured, check that the hair rig is balanced and hanging properly under the hook. The length of the hair should be such that the bait is just covering the hook’s point, allowing for better hooking efficiency. |
By following these steps and properly securing the hair rig to the hook, you can increase your chances of successfully hooking and landing fish when using this rig.
Tips for Using the Hair Rig
Using a hair rig can be a highly effective technique for catching fish, but it requires some skill and knowledge to use it effectively. Here are some tips to help you master the art of using a hair rig:
1. Use the Right Line
When using a hair rig, it is important to select the right line. Choose a line that is strong enough to handle the weight of the fish you are targeting, but also thin enough to be inconspicuous in the water. Many anglers prefer to use a braided line for hair rigs as it is both strong and thin, allowing for maximum sensitivity.
2. Select the Right Hook
The choice of hook is crucial when using a hair rig. Use a hook that is sharp, strong, and suited to the type and size of fish you are targeting. The size of the hook should match the size of the bait you are using. A good rule of thumb is to use a hook that is just large enough to conceal the bait.

3. Properly Attach the Bait
One of the key advantages of the hair rig is that it allows you to present your bait in a natural and lifelike way. When attaching the bait, make sure it is secured firmly on the hair so that it does not come off easily. Play around with different bait and rigging techniques to find what works best for you and the fish you are targeting.
4. Stay Patient
Using a hair rig can sometimes require a bit of patience. It may take some time for the fish to become interested in your rig and take the bait. Resist the temptation to constantly check your bait or move it around. Instead, stay patient and wait for the fish to make a move. The hair rig can be incredibly effective, but it may require some time for the fish to take the bait.
In conclusion, the hair rig is a versatile and effective method for catching fish. By using the right line, hook, and bait, and exercising patience, you can increase your chances of success with the hair rig. So next time you hit the water, give the hair rig a try and see what you can catch!

Meet Harrison Clayton, a distinguished author and home remodeling enthusiast whose expertise in the realm of renovation is second to none. With a passion for transforming houses into inviting homes, Harrison's writing at https://thehuts-eastbourne.co.uk/ brings a breath of fresh inspiration to the world of home improvement. Whether you're looking to revamp a small corner of your abode or embark on a complete home transformation, Harrison's articles provide the essential expertise and creative flair to turn your visions into reality. So, dive into the captivating world of home remodeling with Harrison Clayton and unlock the full potential of your living space with every word he writes.


