How To Put Sanding Disc On Rotary Tool

When it comes to working on woodworking projects or tackling DIY tasks, having a rotary tool can be incredibly handy. These versatile tools can be used for a variety of purposes, and one common attachment that many people find useful is a sanding disc. Sanding discs can help smooth and refine surfaces, making them perfect for projects that require a finished, polished look.
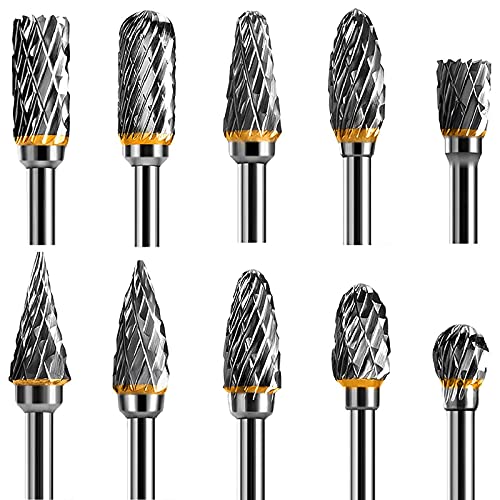
Putting a sanding disc on a rotary tool may seem like a simple task, but it’s important to do it correctly to ensure optimal performance and safety. The first step is to choose the right sanding disc for your project. They come in various sizes and grits, so make sure to select the one that suits your needs.
Once you have your sanding disc, start by turning off and unplugging your rotary tool. This step is crucial for safety reasons. Then, locate the spindle lock on your rotary tool. The spindle lock is typically located on the side or the front of the tool, and it’s used to hold the spindle in place while you change attachments. Hold down the spindle lock button and rotate the collet nut counterclockwise to loosen it. Once the nut is loose, remove it completely.
What is a Rotary Tool and Why is it Important?
A rotary tool is a versatile and powerful handheld device that is used for a wide range of tasks, including sanding, polishing, grinding, cutting, and drilling. It consists of a small, high-speed motor that rotates a variety of interchangeable attachments or accessories.
One of the key features of a rotary tool is its compact size, which allows for easy handling and maneuverability in tight spaces. This makes it an essential tool for both amateur DIY enthusiasts and professional craftsmen.

Rotary tools are incredibly versatile and can be used for a wide variety of applications. They are commonly used for tasks such as sanding wood and metal, cutting through materials like plastic and drywall, polishing surfaces, engraving, and even carving intricate designs.
The ability to switch between different attachments and accessories makes a rotary tool highly adaptable to different tasks. Whether you need to remove rust from metal, shape and smooth wood, or even trim your pet’s nails, a rotary tool can do it all.
Another advantage of a rotary tool is its variable speed control, which allows you to adjust the speed of the tool to match the specific requirements of the task at hand. This gives you greater control and precision, especially when working with delicate materials.
In addition to its versatility and functionality, a rotary tool is also portable and easy to store. Its compact size and lightweight design make it convenient to carry around, whether you need to take it to a job site or simply move it around your workshop.
Overall, a rotary tool is an essential tool for any DIY enthusiast or professional craftsman. Its versatility, compact size, and wide range of applications make it a valuable addition to any toolkit.

Choosing the Right Sanding Disc
When it comes to using a rotary tool for sanding, it is crucial to choose the right sanding disc. The right disc can make all the difference in achieving the desired finish and efficiency. Here are some factors to consider when selecting the appropriate sanding disc:
- Grit Size: The grit size of the sanding disc determines how coarse or fine the abrasive material is. For rough sanding and removal of material, a lower grit size like 40 or 60 is suitable. For fine finishing and smoothing, a higher grit size such as 120 or 180 is recommended.
- Disc Size: The size of the sanding disc should match the size of the rotary tool. Most rotary tools typically use sanding discs with a diameter of 2 inches or 3 inches. Ensure that the disc you choose is compatible with your rotary tool.
- Abrasive Material: Sanding discs are available in various abrasive materials, including aluminum oxide, silicon carbide, and zirconia alumina. Each material has different properties and is suitable for specific applications. Aluminum oxide is a versatile choice for general-purpose sanding, while silicon carbide is ideal for harder surfaces. Zirconia alumina offers high durability and is suitable for heavy-duty tasks.
- Backing Material: The backing material of the sanding disc affects its strength and durability. Common options include fiber, cloth, and paper. Fiber discs are durable and ideal for metalworking, while cloth discs are flexible and suitable for contour sanding. Paper discs are cost-effective and suitable for general woodworking tasks.
- Attachment Method: There are two common attachment methods for sanding discs – adhesive backing and hook-and-loop (Velcro) backing. Adhesive backing requires applying adhesive to the disc and attaching it to the rotary tool. Hook-and-loop backing allows for quick and easy disc changes. Choose the attachment method that is compatible with your rotary tool and offers convenience.
Taking these factors into account while selecting a sanding disc will ensure that you achieve optimal results with your rotary tool. Remember to follow the manufacturer’s instructions and safety guidelines when using the sanding disc for your specific application.
Step by Step Guide
Follow these simple steps to properly put a sanding disc on your rotary tool:
-
Gather the necessary tools and materials
Before you begin, make sure you have the following items:
- Rotary tool
- Sanding disc
- Collet
- Collet nut
-
Prepare the rotary tool
Ensure that your rotary tool is turned off and unplugged. This will prevent any accidents while you are handling the tool.
-
Choose the right sanding disc
Consider the type of material you will be sanding and choose a sanding disc that is suitable for that material. Different sanding discs have different grit sizes and are designed for specific materials.
-
Attach the collet
Insert the collet into the chuck of the rotary tool and tighten it securely. The collet will hold the sanding disc in place.
-
Mount the sanding disc
Place the sanding disc onto the collet, aligning the center hole of the disc with the collet stud.
-
Secure the sanding disc
Hold the sanding disc in place with one hand and use the collet nut to tighten it onto the collet. Make sure it is securely fastened.
-
Test the sanding disc
Turn on the rotary tool at a low speed and check if the sanding disc is properly attached. If it wobbles or feels loose, turn off the tool and repeat steps 4-6.
-
Start sanding
Once the sanding disc is securely attached, you are ready to start sanding. Be sure to follow all safety guidelines and use appropriate protective gear.
Remember to always exercise caution when handling power tools and make sure to read the manufacturer’s instructions before using your rotary tool.
Gathering the Materials
Before you can start putting a sanding disc on your rotary tool, you will need to gather a few materials. Make sure you have the following items:

- Sanding Disc: Choose a sanding disc that is compatible with your rotary tool. It should be the appropriate size and have the correct attachment mechanism.
- Rotary Tool: Ensure that you have a rotary tool that is capable of accepting sanding discs. Check the manufacturer’s instructions or product specifications to confirm compatibility.
- Protective Equipment: It is important to wear safety glasses and a dust mask to protect your eyes and lungs from any debris or dust that may be generated during the sanding process.
- Additional Tools: Depending on the attachment mechanism of the sanding disc, you may need additional tools such as a wrench or screwdriver to attach it securely.
Once you have gathered all the necessary materials, you are ready to begin the process of putting the sanding disc on your rotary tool.
Securing the Rotary Tool
When using a rotary tool, it is important to properly secure it before attaching the sanding disc. This will ensure your safety and prevent any accidents or injuries.
To secure the rotary tool, follow these steps:
- Turn off the power: Before securing the tool, make sure it is turned off and unplugged from the power source. This will prevent any accidental activation while handling the tool.
- Inspect the tool: Check the rotary tool for any signs of damage or wear. Make sure all components are in good working condition and there are no loose parts.
- Attach the chuck: If your rotary tool has a chuck, insert the sanding disc into the chuck and tighten it securely. Ensure that the disc is centered and aligned correctly.
- Use the arbor: If your rotary tool uses an arbor system, insert the arbor into the hole in the sanding disc. Then, tighten the screw or nut on the arbor to secure the disc in place.
- Tighten the collet: For rotary tools with a collet system, insert the sanding disc into the collet and tighten it by turning the collet nut clockwise. Make sure the disc is held securely in place.
Once the sanding disc is securely attached to the rotary tool, you can proceed with using it for your sanding or grinding tasks. Always keep a firm grip on the tool and avoid applying excessive pressure to prevent any accidents.
Remember, safety should always be your top priority when using power tools. Take the time to secure your tools properly and follow all safety precautions to ensure a safe and successful project.

Attaching the Sanding Disc
Attaching a sanding disc to your rotary tool is a simple process that can be completed in a few easy steps:
- Ensure that your rotary tool is turned off and unplugged.
- Inspect the sanding disc and make sure it is in good condition without any tears or damage.
- Locate the small screw at the top of the rotary tool’s spindle.
- Using a screwdriver, loosen the screw to create enough space for the sanding disc to be inserted.
- Take the sanding disc and align the center hole with the spindle of the rotary tool.
- Push the sanding disc onto the spindle until it is securely in place.
- Tighten the small screw with the screwdriver to secure the sanding disc.
After attaching the sanding disc, always double-check that it is properly secured before turning on the rotary tool. It is important to ensure that the sanding disc is securely fastened to prevent any accidents or damage while using the tool.
Adjusting the Disc and Starting the Rotary Tool
Once you have securely attached the correct sanding disc to your rotary tool, it’s important to adjust the disc properly before starting it. This will ensure that the tool runs smoothly and efficiently during your sanding project.
First, make sure the rotary tool is turned off and unplugged from the power source for safety. Then, locate the disc guard or depth control knob on your tool. This feature allows you to adjust the height of the sanding disc, controlling the amount of material that is removed during sanding.
To adjust the disc, rotate the disc guard or turn the depth control knob in either direction, depending on your tool’s design. Start with the disc raised slightly above the sanding surface, and gradually lower it as needed. You can check the height by eye or use a ruler or depth gauge for more precise measurements.

When adjusting the disc, be sure to keep your fingers away from the moving parts and avoid touching the sanding surface. Always handle the tool with care and follow the manufacturer’s instructions.
Once the disc is properly adjusted, you can plug in the rotary tool and turn it on. Start with a low speed setting and gradually increase the speed as needed for your sanding application. Be sure to hold the tool securely with both hands and maintain a firm grip throughout the sanding process.
Keep in mind that different sanding projects may require different speeds and techniques. Take your time and practice on scrap material before working on your main project to get a feel for the tool and find the best approach.
Remember to always wear protective gear, such as safety glasses and a dust mask, when using a rotary tool. This will help keep you safe and protect your eyes and lungs from any debris that may be generated during sanding.
By adjusting the disc properly and starting the rotary tool with caution, you can ensure a successful and efficient sanding experience. Take your time, follow the proper safety precautions, and enjoy the benefits of using a rotary tool for your sanding needs.

Troubleshooting Tips
If you are having trouble putting the sanding disc on your rotary tool, here are a few tips to help you troubleshoot the issue:
1. Check the Compatibility
Ensure that the sanding disc you are trying to attach is compatible with your rotary tool. Different models and brands may have specific requirements, so read the user manual or check the manufacturer’s instructions to ensure compatibility.
2. Clean the Spindle
If the sanding disc is not sliding onto the spindle smoothly, it may be due to dirt or debris obstructing the connection. Clean the spindle thoroughly using a soft brush or compressed air to remove any particles. This should help the disc attach more easily.
3. Remove the Adapter
Some rotary tools come with a removable adapter that allows you to use different types of accessories. If you have an adapter installed, try removing it and attaching the sanding disc directly to the spindle. The adapter may be causing interference with the attachment process.
4. Check the Disc Size
Ensure that the sanding disc you are trying to install is the correct size for your rotary tool. If the disc is too large or too small, it may not fit properly, making it difficult to attach. Refer to the user manual or check the manufacturer’s instructions for the recommended disc size.

5. Apply Even Pressure
When attaching the sanding disc, apply even pressure to ensure a secure fit. If you are only pushing on one side or corner, the disc may not attach properly. Use your fingers or a wrench if necessary to evenly tighten the disc onto the spindle.
6. Replace the Disc
If all else fails, it is possible that the sanding disc itself is defective or damaged. Try using a different disc to see if the issue persists. If the new disc attaches successfully, the problem may lie with the original disc, and you should consider replacing it.
| Problem | Possible Solution |
|---|---|
| The sanding disc won’t slide onto the spindle. | Clean the spindle to remove dirt or debris obstructing the connection. |
| The disc doesn’t fit properly on the spindle. | Check the disc size and ensure it is compatible with the rotary tool. |
| The disc keeps falling off during use. | Apply even pressure and make sure the disc is securely tightened onto the spindle. |
Questions and answers
What is a rotary tool?
A rotary tool is a handheld power tool that rotates a variety of attachments at high speed, making it versatile for various tasks such as grinding, polishing, sanding, and drilling.
How do I put a sanding disc on a rotary tool?
To put a sanding disc on a rotary tool, first, make sure the tool is turned off and unplugged. Then, locate the spindle lock button on the rotary tool and press it to lock the spindle in place. Next, remove the collet nut by turning it counterclockwise and slide the existing attachment off the spindle. Take the sanding disc and place it onto the spindle, aligning the holes on the disc with the protrusions on the spindle. Finally, secure the sanding disc by tightening the collet nut clockwise.
Are there any safety precautions I should take when using a rotary tool with a sanding disc?
Yes, when using a rotary tool with a sanding disc, it is important to wear safety goggles to protect your eyes from flying debris. Additionally, consider wearing a dust mask to prevent inhalation of fine particles. It is also advisable to work in a well-ventilated area to minimize the buildup of dust. Make sure to read and follow the manufacturer’s instructions and safety guidelines for your specific rotary tool model.

Meet Harrison Clayton, a distinguished author and home remodeling enthusiast whose expertise in the realm of renovation is second to none. With a passion for transforming houses into inviting homes, Harrison's writing at https://thehuts-eastbourne.co.uk/ brings a breath of fresh inspiration to the world of home improvement. Whether you're looking to revamp a small corner of your abode or embark on a complete home transformation, Harrison's articles provide the essential expertise and creative flair to turn your visions into reality. So, dive into the captivating world of home remodeling with Harrison Clayton and unlock the full potential of your living space with every word he writes.