How To Attach Sanding Disc To Rotary Tool

Rotary tools are versatile power tools that can be used for a variety of tasks, such as cutting, engraving, grinding, and sanding. When it comes to sanding, attaching a sanding disc to a rotary tool is essential for achieving a smooth and polished surface.
Attaching a sanding disc to a rotary tool may seem like a simple task, but it requires proper technique and attention to detail. Here’s a step-by-step guide on how to attach a sanding disc to your rotary tool:
Step 1: Before attaching the sanding disc, make sure that your rotary tool is turned off and unplugged for safety.
Step 2: Locate the spindle on your rotary tool. The spindle is the part that the sanding disc will attach to. It is typically located at the front of the tool.
Step 3: Many rotary tools come with a small wrench or a key that is used to loosen and tighten the spindle. If your rotary tool has one, use it to loosen the spindle.

Step 4: Once the spindle is loose, slide the sanding disc onto the spindle. Make sure that the disc is centered and that the holes on the disc line up with the holes on the spindle.
Step 5: Use the wrench or key to tighten the spindle and secure the sanding disc in place. Make sure that it is tightened properly to avoid any accidents or damage.
Step 6: Once the sanding disc is attached, double-check that it is secured tightly. Give it a gentle tug to ensure that it won’t come loose during use.
Now that you have successfully attached the sanding disc to your rotary tool, you are ready to start sanding. Remember to always wear safety goggles and to work in a well-ventilated area. Happy sanding!
What You Need to Attach Sanding Disc to Rotary Tool
Attaching a sanding disc to a rotary tool is a simple process that requires a few essential tools. By gathering the following items, you can seamlessly attach the sanding disc and start your woodworking or other DIY projects:

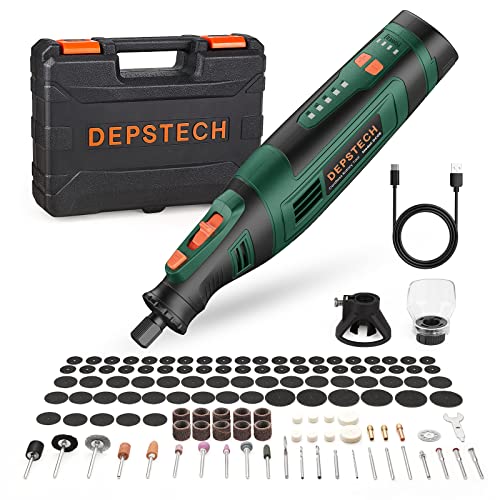
- A rotary tool – Ensure you have a compatible rotary tool with a spindle that fits the sanding disc you plan to use.
- Sanding disc – Choose the appropriate sanding disc for your project, considering the grit and diameter needed.
- Collet or mandrel – The collet or mandrel is needed to secure the sanding disc to the rotary tool. Check the size and compatibility.
- Wrench or screwdriver – Depending on the rotary tool model, you may need a wrench or screwdriver to loosen or tighten the collet or mandrel.
- Safety goggles and gloves – Always prioritize safety by wearing goggles to protect your eyes from dust and debris and gloves to prevent any accidental injuries.
Step-by-Step Instructions:
- Ensure the rotary tool is turned off and unplugged before attaching the sanding disc.
- If needed, use a wrench or screwdriver to loosen the collet or mandrel by turning it counterclockwise.
- Place the sanding disc over the collet or mandrel, ensuring it is centered and in contact with the spindle.
- If necessary, adjust the sanding disc’s position to align it properly with the collet or mandrel.
- Tighten the collet or mandrel by turning it clockwise using a wrench or screwdriver. Ensure it is secured firmly.
- Double-check that the sanding disc is properly attached and tightened before operating the rotary tool.
Once you have successfully attached the sanding disc to your rotary tool, you can confidently start your sanding or smoothing tasks. Remember to always follow safety precautions and use appropriate sanding techniques for optimal results.
Rotary Tool: Choosing the Right Tool for Sanding Disc Attachment
When it comes to attaching a sanding disc to a rotary tool, it is important to choose the right tool for the job. The rotary tool you select will determine the type and size of sanding disc that can be used, as well as the speed and efficiency of the sanding process.
One of the most common types of rotary tools used for sanding disc attachment is the rotary sander. These tools typically feature a small, handheld design and are powered by electricity or compressed air. Rotary sanders are known for their versatility and can be used for a wide range of sanding applications.
Another popular option is the rotary grinder, which is specifically designed for heavy-duty sanding tasks. These tools are generally more powerful than rotary sanders and can be used to remove material quickly and efficiently. However, they may be more difficult to handle and control, especially for beginners.
When choosing a rotary tool for sanding disc attachment, consider the following factors:

- Type of Sanding: Determine the type of sanding you will be doing. If you need to remove a lot of material or work on larger surfaces, a rotary grinder may be the best choice. For lighter sanding tasks or working in tight spaces, a rotary sander may be more suitable.
- Disc Compatibility: Check the specifications of the rotary tool to ensure it is compatible with the size and type of sanding disc you plan to use. Different tools may have different size requirements, so it is important to double-check before making a purchase.
- Power and Speed: Consider the power and speed settings of the rotary tool. Higher power and variable speed options can provide more control and efficiency during the sanding process. Additionally, some tools may offer adjustable speed settings to accommodate different sanding tasks.
- Ease of Use: Evaluate the ergonomics and design of the rotary tool. Look for features like comfortable grips, easily accessible controls, and lightweight designs. These factors can significantly impact your comfort and productivity while sanding.
- Budget: Lastly, consider your budget when selecting a rotary tool. Rotary sanders are generally more affordable than rotary grinders, but investing in a higher-quality tool can provide better performance and durability in the long run.
By carefully considering these factors, you can choose the right rotary tool for sanding disc attachment that suits your specific needs and preferences. Remember to always follow the manufacturer’s instructions for proper installation and use of sanding discs with your chosen rotary tool.
Sanding Disc: Selecting the Appropriate Disc for the Job
When it comes to using a rotary tool for sanding, selecting the right sanding disc is crucial for achieving the desired results. With various types of sanding discs available in the market, choosing the appropriate disc for the job requires some consideration. Here are a few factors to keep in mind when selecting a sanding disc:
Type of Material:
The first thing to consider is the type of material you will be working with. Sanding discs are available in various grits and materials, such as aluminum oxide, silicon carbide, and zirconia alumina. Each material has its specific properties and is suitable for different materials – aluminum oxide discs are perfect for general-purpose sanding, while silicon carbide discs are ideal for working on harder materials like stone or glass.
Grit Size:
The grit size of the sanding disc determines its coarseness or fineness. Lower grit numbers like 40 or 60 are best for heavy material removal, such as shaping or smoothing rough surfaces. Higher grit numbers like 120 or 220 are suitable for finer sanding tasks and achieving a smooth finish. For best results, it is recommended to start with a lower grit disc and progressively move to higher grits for a refined finish.
It’s worth noting that sanding discs with a larger diameter cover a larger surface area and are more efficient for sanding larger workpieces. However, smaller diameter discs provide more precise control and are ideal for detailed or intricate sanding work.

Tip: It’s important to ensure the sanding disc size matches the size of your rotary tool. Most rotary tools have a specific disc size range they can accommodate, so check the tool’s specifications before purchasing sanding discs.
In conclusion, selecting the appropriate sanding disc for your rotary tool is essential for achieving optimal sanding results. Consider the type of material you will be working with, the grit size needed, and the size of the sanding disc. By choosing the right disc, you can achieve a smooth and polished finish on your workpieces.
Installing the Sanding Disc on the Rotary Tool
Attaching a sanding disc to a rotary tool is a straightforward process that requires just a few simple steps. Follow these instructions to securely install the sanding disc on your rotary tool:
Step 1: Before getting started, make sure that your rotary tool is turned off and unplugged to avoid any accidental injuries.
Step 2: Locate the spindle on your rotary tool. The spindle is the metal rod that protrudes from the front of the tool.

Step 3: Place the sanding disc on the spindle, making sure that the center hole in the disc lines up with the spindle. The sanding disc should fit snugly onto the spindle.
Step 4: Press the sanding disc firmly onto the spindle while holding onto the edges of the disc to avoid touching the abrasive surface.
Step 5: Once the sanding disc is securely attached to the spindle, locate the tool’s spindle lock button. This button is typically located on the side of the tool near the spindle.
Step 6: Press and hold the spindle lock button while using a wrench or another tool to tighten the nut or screw that secures the sanding disc in place. Make sure to tighten it securely to prevent the disc from coming loose during use.
Step 7: After tightening the nut or screw, release the spindle lock button and give the sanding disc a gentle tug to ensure it is securely attached.

Step 8: You can now plug in and turn on your rotary tool to begin sanding or smoothing surfaces with the newly installed sanding disc.
Note: It’s always a good idea to refer to the manufacturer’s instructions for your specific rotary tool to ensure proper attachment of the sanding disc. Additionally, make sure to wear safety goggles and protective gloves when working with a rotary tool and sanding discs.
Tips for Proper Use and Maintenance of Sanding Disc on Rotary Tools
Rotary tools are versatile machines that can be used for a variety of tasks, including sanding. When using a sanding disc on a rotary tool, it is important to follow these tips for proper use and maintenance to ensure the best results:
Choose the Right Sanding Disc
There are different types of sanding discs available, such as sandpaper discs, flap discs, and abrasive grinding discs. It is important to choose the right disc for your project. Sandpaper discs are great for sanding wood and metal surfaces, while flap discs are ideal for removing rust and paint. Abrasive grinding discs are best for grinding and shaping hard materials like concrete and stone.
Attach the Sanding Disc Properly
Before attaching the sanding disc to your rotary tool, make sure it is compatible with the spindle size of the tool. Most rotary tools come with a collet or a chuck that allows you to secure the disc in place. Follow the manufacturer’s instructions to attach the disc securely, ensuring it is centered and tight.

Tip: It is recommended to wear protective gloves and eyewear when attaching or removing sanding discs to prevent any potential injuries.
Once the disc is attached, test it briefly to ensure it is rotating smoothly and without any wobbling or vibrations. If you notice any issues, stop the tool immediately and readjust the disc.
Proper Technique
When using a sanding disc on a rotary tool, it is important to apply gentle and even pressure to the surface being sanded. Avoid excessive pressure, as it can lead to uneven sanding and excessive wear on the disc. Let the disc do the work and guide the tool along the surface being sanded.
Tip: It is best to start with a lower speed setting and gradually increase it as needed. This will prevent overheating of the disc and ensure a smoother sanding process.
Maintenance and Cleaning
After each use, it is important to clean the sanding disc to remove any dust, debris, or buildup that may have accumulated. This can be done by gently tapping the disc against a hard surface or using compressed air to blow away the particles. Avoid using water or solvents, as they can damage the adhesive on the disc.
If the sanding disc becomes dull or worn out, it is time to replace it. Continuing to use a worn-out disc can lead to poor results and increase the risk of accidents.
By following these tips for proper use and maintenance, you can ensure the longevity and effectiveness of your sanding disc on your rotary tool.
Questions and answers
What is a rotary tool and what is it used for?
A rotary tool is a handheld power tool that is versatile and can be used for various tasks such as sanding, grinding, cutting, carving, and polishing. It is commonly used in woodworking, metalworking, and DIY projects.
Can I attach a sanding disc to a rotary tool?
Yes, you can attach a sanding disc to a rotary tool. Rotary tools usually come with a spindle or arbor that can hold different attachments, including sanding discs.
How do I attach a sanding disc to a rotary tool?
To attach a sanding disc to a rotary tool, first make sure the tool is turned off and unplugged. Then, locate the spindle lock on the tool and engage it to secure the spindle in place. Next, insert the sanding disc onto the spindle, making sure it aligns with the holes on the disc. Finally, release the spindle lock and tighten the disc by hand or using a wrench, depending on the type of rotary tool you have.
Are there different types and sizes of sanding discs for rotary tools?
Yes, there are different types and sizes of sanding discs available for rotary tools. The most common types of sanding discs include abrasive discs for general sanding, flap discs for smoother finishes, and diamond-coated discs for cutting or grinding hard materials. The sizes of sanding discs can vary, but the most common sizes are 4.5 inches and 5 inches in diameter.
Can I use adhesive to attach a sanding disc to a rotary tool?
No, it is not recommended to use adhesive to attach a sanding disc to a rotary tool. Rotary tools are designed to securely hold attachments using a spindle or arbor, and using adhesive can cause the disc to become loose during operation, leading to potential accidents or damage to the tool. Always follow the manufacturer’s instructions and use the proper method to attach sanding discs to your rotary tool.


Meet Harrison Clayton, a distinguished author and home remodeling enthusiast whose expertise in the realm of renovation is second to none. With a passion for transforming houses into inviting homes, Harrison's writing at https://thehuts-eastbourne.co.uk/ brings a breath of fresh inspiration to the world of home improvement. Whether you're looking to revamp a small corner of your abode or embark on a complete home transformation, Harrison's articles provide the essential expertise and creative flair to turn your visions into reality. So, dive into the captivating world of home remodeling with Harrison Clayton and unlock the full potential of your living space with every word he writes.