How To Turn A Drill Into A Polisher

Drills are versatile power tools that can be used for a variety of tasks. One of the ways you can maximize the use of your drill is by turning it into a polisher. Polishing is a great way to remove scratches, restore shine, and give a smooth finish to various surfaces.
So how can you transform your drill into a polisher? It’s actually quite simple! All you need is a few basic materials and a bit of know-how.
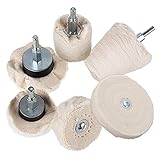
To start, you’ll need a polishing pad or bonnet that is compatible with your drill. There are different types of pads available, including foam and wool pads. Foam pads are softer and are better for delicate surfaces, while wool pads are more abrasive and are suitable for heavier polishing jobs.
Next, you’ll need a polishing compound or wax. This substance helps to remove scratches and imperfections and leaves a shiny finish. There are various types of compounds available, so choose the one that is suitable for the surface you’re polishing.
Basics of a Drill
A drill is a versatile power tool that is commonly used in construction, woodworking, and DIY projects. It is designed to create holes or drive screws into various materials, such as wood, metal, or plastic.

The basic components of a drill include:
| Chuck: | The chuck is the part of the drill that holds the drill bit securely in place. It is typically adjustable to accommodate different sizes of drill bits. |
| Trigger: | The trigger is the part of the drill that allows you to control the speed of the drill. Depending on how much you pull the trigger, the speed of the drill can be increased or decreased. |
| Handle: | The handle is the part of the drill that you hold onto while operating it. It provides stability and control during drilling or screwdriving tasks. |
| Battery or Power Cord: | Some drills are cordless and powered by a rechargeable battery, while others are corded and need to be plugged into a power outlet. Cordless drills offer more portability, while corded drills provide a continuous power supply. |
| Forward/Reverse Switch: | The forward/reverse switch allows you to change the direction of rotation of the drill bit. This is useful when drilling or screwdriving in tight spaces or when removing screws. |
Understanding the basics of a drill is essential before attempting to convert it into a polisher. By having a good understanding of how the drill works, you will be better equipped to modify and use it for different tasks.
Benefits of Turning a Drill into a Polisher
Turning a drill into a polisher can offer a variety of benefits. Whether you are a DIY enthusiast or a professional woodworker, this conversion can help improve your polishing projects and make them more efficient. Below are some key advantages of using a drill as a polisher:
1. Cost-effective Solution
Converting a drill into a polisher provides a cost-effective solution, especially if you already own a drill. Instead of investing in a separate polisher, you can save money by using your existing drill and purchasing a polishing attachment or adapter. This allows you to expand the functionality of your drill without breaking the bank.
2. Versatility
A drill-polisher combination offers versatility in terms of uses and applications. You can use it for a variety of polishing tasks, such as buffing out scratches on car surfaces, shining up metal fixtures, or giving a glossy finish to furniture. With the right polishing pads and compounds, you can achieve professional-quality results on different surfaces and materials.

| Material | Surface | Benefits |
|---|---|---|
| Wood | Furniture, wooden floors | Restores shine and removes imperfections |
| Metal | Car surfaces, metal fixtures | Removes scratches and brings out a mirror-like shine |
| Plastic | Car headlights, household items | Removes oxidation and restores clarity |
3. Time-saving
By using a drill as a polisher, you can save valuable time on your polishing projects. The high-speed rotation of the drill allows for quick and efficient polishing, reducing the amount of time and effort required compared to manual polishing. This is especially useful when working on larger surfaces or multiple items that need polishing.
4. Enhanced Control
A drill-polisher conversion provides enhanced control and precision during polishing. The variable speed settings on drills allow you to adjust the polishing speed according to the task at hand and the surface material. This level of control helps prevent damage to delicate surfaces and ensures a consistent and high-quality finish.
In conclusion, transforming a drill into a polisher offers cost-saving benefits, versatility in applications, time-saving advantages, and enhanced control over the polishing process. Consider this conversion to maximize the potential of your drill and achieve professional polishing results.
Materials Needed
Before you begin turning your drill into a polisher, you’ll need to gather a few essential materials. Here’s what you’ll need:
- A power drill – make sure it’s in good working condition and has adjustable speed settings.
- A polishing pad or bonnet – this will be attached to the drill and used to apply and buff the polish.
- Polishing compound – choose a compound that suits the type of material you’ll be polishing.
- Microfiber cloths – these are used to wipe away excess polish and bring out a shine.
- Painter’s tape or masking tape – this will help protect any areas you don’t want to accidentally polish.
- A clean, flat surface to work on – this could be a workbench or a sturdy table.
- Safety goggles and gloves – protect your eyes and hands while working.
- A well-ventilated area – polishing can create dust and fumes, so it’s important to work in a well-ventilated space.
Once you have all these materials ready, you’ll be well-prepared to turn your drill into a polisher and achieve those shiny, polished surfaces you desire.
Step-by-step Guide
Follow these simple steps to turn your drill into a polisher:
Step 1: Gather the Materials
Before you begin, make sure you have all the necessary materials. You will need a drill, a polishing pad attachment, a polishing compound, and a microfiber cloth. These items can easily be found at your local hardware store.
Step 2: Attach the Polishing Pad
Take the polishing pad attachment and securely attach it to the drill. Make sure it is properly aligned and tightened so that it doesn’t come loose during the polishing process.
Step 3: Apply the Polishing Compound
Put a small amount of the polishing compound onto the polishing pad. You don’t need to use a lot, as a little goes a long way. Spread the compound evenly over the pad to ensure consistent polishing.
Step 4: Start Polishing
Turn on the drill and begin polishing the surface. Start with a low speed setting and gradually increase the speed as needed. Use gentle, circular motions to evenly distribute the polishing compound and achieve the desired shine.

Step 5: Check the Progress
Periodically stop and check your progress. Wipe away the excess compound with a microfiber cloth and examine the surface. If it still needs more polishing, continue with the process. If you are satisfied with the results, move on to the next surface.
Step 6: Clean Up
Once you have finished polishing all the desired surfaces, turn off the drill and clean up your work area. Remove the polishing pad attachment from the drill and clean it thoroughly. Store all the materials in a safe place for future use.
By following these steps, you can easily turn your ordinary drill into a powerful polisher and achieve professional-looking results for various projects.
Questions and answers
What materials do I need to turn a drill into a polisher?
You will need a drill with variable speed control, a polishing pad attachment, polishing compound, and a microfiber cloth.
Can any type of drill be used to create a polisher?
No, it is necessary to use a drill with variable speed control in order to adjust the polishing speed and avoid damaging the surface being polished.

How do I attach a polishing pad to my drill?
First, remove the drill’s chuck and replace it with a backing plate attachment. Then, velcro the polishing pad onto the backing plate.
What is the purpose of a polishing compound?
A polishing compound is used to remove scratches, swirls, and other imperfections on the surface being polished, leaving a smooth and shiny finish.
Are there any safety precautions I should take when using a drill as a polisher?
Yes, it is important to wear safety goggles and gloves to protect your eyes and hands from flying debris. Additionally, make sure to secure the workpiece and work in a well-ventilated area to avoid inhaling any harmful fumes from the polishing compound.


Harrison Clayton
Meet Harrison Clayton, a distinguished author and home remodeling enthusiast whose expertise in the realm of renovation is second to none. With a passion for transforming houses into inviting homes, Harrison's writing at https://thehuts-eastbourne.co.uk/ brings a breath of fresh inspiration to the world of home improvement. Whether you're looking to revamp a small corner of your abode or embark on a complete home transformation, Harrison's articles provide the essential expertise and creative flair to turn your visions into reality. So, dive into the captivating world of home remodeling with Harrison Clayton and unlock the full potential of your living space with every word he writes.


