How To Hold A Rottary Polisher

Using a rotary polisher can be a great way to achieve a high level of shine and finish on your car’s paint. However, it’s crucial to know the proper way to hold and handle the machine to ensure safety and get the best possible results.
First and foremost, it’s important to have a firm grip on the handle of the rotary polisher. This will allow you to have more control over the machine and reduce the risk of it slipping and causing damage.
When holding the rotary polisher, make sure to hold it with both hands. Place one hand on the handle and the other hand on the body of the machine just behind the handle. This will provide stability and balance while using the polisher.
It’s also important to position your body correctly when using a rotary polisher. Stand with your feet shoulder-width apart and bend your knees slightly to maintain balance. Keep your body weight centered and avoid leaning too heavily on the polisher. This will prevent strain on your back and arms while allowing for better control of the machine.
Remember to always wear protective gear, such as safety glasses and gloves, when using a rotary polisher. This will protect you from any debris or chemicals that may fly off during the polishing process.

In conclusion, holding a rotary polisher correctly is essential for achieving optimal results and ensuring your safety. By following these guidelines, you’ll be able to confidently and effectively use a rotary polisher to enhance the appearance of your car’s paintwork.
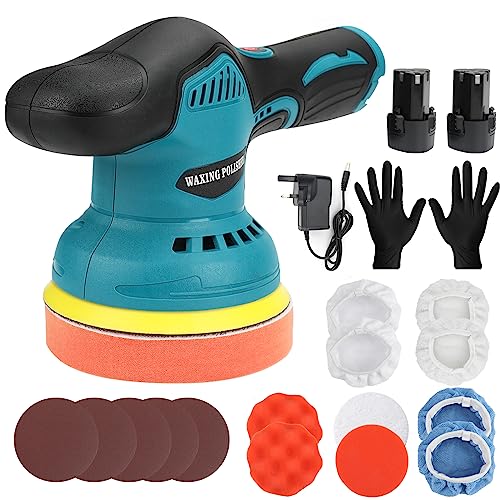
Choosing the Right Rottary Polisher
Choosing the right rotary polisher for your needs is crucial to achieve professional results and avoid damage to your vehicle’s paintwork. Here are some key factors to consider when selecting a rotary polisher:
Type of Rotary Polisher
There are two main types of rotary polishers: direct-drive and gear-driven. Direct-drive polishers have the polishing pad attached directly to the motor shaft and provide maximum power and torque. Gear-driven polishers, on the other hand, use a gear mechanism to reduce the speed of the polishing pad, making them more suitable for beginners or delicate surfaces.
Speed Settings
Look for a rotary polisher with adjustable speed settings. Different paint surfaces and polishing tasks require different speeds. Being able to control the speed of the polisher allows you to work efficiently and safely.
Size and Weight
Consider the size and weight of the polisher. A compact and lightweight machine is easier to handle and maneuver, especially when working on large surfaces or tight areas. It also reduces fatigue during long polishing sessions.

Power Source
Rotary polishers can be powered by electricity, battery, or air. Electric polishers are the most common and provide consistent power output. Battery-powered polishers offer portability and flexibility but may have limited run-time. Air-powered polishers are more powerful but require an air compressor.
In conclusion, selecting the right rotary polisher involves considering the type of polisher, speed settings, size and weight, and power source. By choosing a polisher that suits your specific needs, you can achieve professional results and ensure the long-term preservation of your vehicle’s paintwork.
Understanding the Different Types
When it comes to rotary polishers, it’s important to understand that there are different types available on the market. Each type has its own unique features and advantages, so it’s crucial to choose the right one for your specific needs.
Single Speed Polishers: These are the most basic type of rotary polishers and are generally recommended for beginners. They have a fixed speed setting, typically between 1,000 to 2,000 RPM (rotations per minute). Single speed polishers are relatively easy to maneuver and control, making them a great choice for simple polishing tasks.
Variable Speed Polishers: As the name suggests, variable speed polishers allow you to adjust the rotation speed according to your preferences and requirements. They typically have a range of speeds, often starting from around 1,200 RPM and going up to 5,000 RPM or more. Variable speed polishers are ideal for more advanced users who need more flexibility and control over their polishing projects.
![SI FANG 2 Inch Pneumatic Mini Orbital Sander Right Angle Air Die Grinder, Surface Prep Rotary Tool Polisher Kit with Various Quick Change Roll Lock Sanding Discs [Upgraded Polishing and Grinding]](https://m.media-amazon.com/images/I/51MLxBHknUL._SL160_.jpg)
Orbital (Dual Action) Polishers: Orbital polishers are a popular choice among professionals and enthusiasts alike. They combine rotary and orbital motions, which result in a random orbit pattern. This combination helps to reduce the risk of swirl marks and holograms on the surface being polished. Orbital polishers are known for their versatility and ability to handle a wide range of polishing tasks.
Gear-Driven Polishers: Gear-driven polishers are designed for heavy-duty polishing applications. They use a gear mechanism to transfer power more efficiently from the motor to the polishing pad, allowing for more aggressive polishing actions. These polishers are commonly used in professional auto detailing and paint correction shops.
Long-Throw Polishers: Long-throw polishers have a larger orbit size compared to other types of rotary polishers. This larger orbit size allows for more efficient polishing and faster results. Long-throw polishers are often preferred by professionals who need to complete large polishing projects quickly.
It’s important to consider your specific needs and experience level when choosing a rotary polisher. If you’re a beginner, a single speed or variable speed polisher may be the best option. If you’re more experienced and need greater control, an orbital or gear-driven polisher may be more suitable. Long-throw polishers are ideal for professionals who require high efficiency and speed.
Factors to Consider
When using a rotary polisher, there are several factors to consider to ensure you achieve the best results:

- Speed setting: Adjust the speed setting of the rotary polisher according to the task at hand. Lower speeds are generally recommended for polishing delicate surfaces, while higher speeds are suitable for removing stubborn scratches or oxidation.
- Pressure: Apply consistent pressure on the polisher while working on the surface. Too much pressure can cause damage, while too little pressure may not yield the desired results.
- Correct pad selection: Choose the appropriate polishing pad for the type of paint or surface you are working on. Different pads have different levels of aggression and cut, so selecting the right pad will help achieve the desired finish.
- Technique: Use proper technique when maneuvering the rotary polisher. Keep the polisher moving in straight lines or overlapping patterns to evenly distribute the polishing compound and avoid creating swirl marks.
- Work area: Work on a clean and well-lit surface. Removing any debris or obstructions from the area will minimize the risk of damaging the surface or the polisher.
- Safety precautions: Wear appropriate personal protective equipment, such as safety goggles and gloves, to protect yourself from any potential hazards. Also, ensure the power cord is not tangled or obstructed during operation.
By considering these factors and implementing them in your rotary polishing process, you can achieve professional results while ensuring the safety of both yourself and the surface you are working on.
Preparing Your Surface
Before you start polishing with a rotary polisher, it’s important to properly prepare your surface. This will ensure that you achieve the best possible results.
First, make sure to thoroughly clean the surface you will be working on. Remove any dirt, grime, or debris that may be present. This can be done using a mild soap and water solution or a dedicated automotive cleaner. Use a microfiber cloth or sponge to gently scrub the surface and remove any contaminants.
Next, inspect the surface for any scratches, swirl marks, or other imperfections. If necessary, you may need to perform a paint correction process to remove these flaws before polishing. This can be done using a compound or polish specifically designed for paint correction. Apply the product to a foam pad or microfiber towel and work it into the surface in a circular motion.
Once the surface is clean and free of imperfections, you can apply a fine polishing compound or polish. This will help to enhance the shine and clarity of the surface. Apply a small amount of the product to a foam pad or polishing pad and work it into the surface using the rotary polisher. Keep the polisher moving in a slow and controlled manner to prevent any damage to the surface.

Finally, after polishing, make sure to remove any residue that may be left behind. Use a clean microfiber cloth to gently buff the surface and remove any excess product.
By properly preparing your surface before polishing with a rotary polisher, you can achieve professional-quality results and ensure the longevity of your paint finish.
Cleaning and Removing Contaminants
Before starting to use a rotary polisher, it’s important to ensure that the surface you will be working on is clean and free from contaminants. This will help achieve the best possible results and prevent any damage to the surface.
Here are some steps to follow for cleaning and removing contaminants before using a rotary polisher:
1. Wash the surface
Start by washing the surface with a mild car shampoo or soap and water. Use a soft sponge or wash mitt to gently scrub the surface, removing any dirt, dust, or debris. Rinse thoroughly with clean water and dry the surface completely using a microfiber towel.

2. Clay bar treatment
Next, consider using a clay bar to remove any embedded contaminants such as tar, sap, or industrial fallout. Lubricate the surface with a clay bar lubricant and gently glide the clay bar over the surface in a back-and-forth motion. The clay bar will help pull out any contaminants, leaving the surface feeling smooth and ready for polishing.
3. Inspection and spot cleaning
After claying the surface, inspect it closely for any remaining contaminants or spots. Use a detailing spray and a microfiber towel to spot clean any stubborn contaminants that weren’t removed with the clay bar. Pay attention to areas such as emblems, trim, and crevices where contaminants may accumulate.
Note: If there are any deep scratches or imperfections on the surface, it’s advisable to address them before using a rotary polisher. This may involve paint correction techniques such as wet sanding or using a compound to remove the imperfections.
By thoroughly cleaning and removing contaminants before using a rotary polisher, you’ll be able to achieve better polishing results and protect the surface from further damage.
Masking and Protecting Surfaces
When using a rotary polisher, it is important to take precautions to prevent damage to surrounding surfaces. Masking and protecting surfaces can help prevent accidental scratches or marks on areas that you do not intend to polish.

Choosing the Right Tape
There are various types of tape available that can be used for masking surfaces. It is important to select the right tape for the job to ensure maximum protection. Some factors to consider when choosing tape include:
| 1 | Type of Surface | Select a tape that is suitable for the surface you are masking. For delicate surfaces, such as automotive paint, consider using a low-tack tape that is less likely to leave adhesive residue. |
| 2 | Tape Width | Choose a tape width that is suitable for the size of the area you need to mask. For smaller areas, a narrow tape may be more convenient. |
Proper Application of Tape
When applying tape to surfaces, there are a few tips to keep in mind to ensure proper adhesion and protection:
- Clean and dry the surface before applying tape to ensure that it adheres properly.
- Avoid stretching the tape too tightly, as this can cause it to lift or leave adhesive residue.
- Apply the tape along the edges of the area you want to protect, ensuring that it overlaps slightly with the surface you want to mask.
- Use a plastic squeegee or your hands to firmly press down on the tape, ensuring good adhesion.
- After polishing, remove the tape slowly and carefully to avoid any damage to the freshly polished surface.
By taking the time to properly mask and protect surfaces, you can minimize the risk of accidental damage and ensure a more professional finish when using a rotary polisher.
Using the Rottary Polisher
When using a rotary polisher, it is important to follow proper techniques to ensure the best results. Here is a step-by-step guide on how to effectively use a rotary polisher:
- Prepare the surface: Clean the surface you will be working on to remove any dust, dirt, or debris. This will help prevent scratches and swirl marks during the polishing process.
- Select the appropriate pad and polish: Choose the right pad and polish for the type of surface and the level of correction required. There are different pads available for cutting, polishing, and finishing.
- Apply the polish: Apply a small amount of polish onto the pad. Be cautious not to use too much polish, as it can fling off and create a mess. Spread the polish evenly on the pad before starting the machine.
- Start on a low speed: Begin polishing at a low speed setting to prevent any potential damage. Gradually increase the speed as you become more comfortable with the machine.
- Work in small sections: Divide the surface into smaller sections and work on one section at a time. This will ensure thorough coverage and better control of the polisher.
- Keep the polisher moving: Keep the polisher moving in a slow and steady motion. Do not hold the polisher in one spot for too long, as this can cause heat build-up and damage the paint surface.
- Apply moderate pressure: Apply moderate pressure on the polisher, allowing it to make contact with the surface without exerting too much force. Let the machine do the work for you.
- Overlap each pass: Overlap each pass by approximately 50% to ensure even polishing coverage across the entire section. This will help eliminate any visible lines or inconsistencies in the finish.
- Inspect the results: After completing a section, inspect the results to determine if further polishing is needed. Repeat the process as necessary until the desired level of gloss and clarity is achieved.
- Clean the pad: Clean the pad regularly during the polishing process to remove any build-up of polish residue. This will help maintain optimal performance and prevent any contamination.
- Protect the polished surface: Once the polishing is complete, apply a quality paint sealant or wax to protect the newly polished surface. This will help maintain the shine and prevent future deterioration.
Remember to practice proper safety measures, such as wearing protective eyewear and gloves, when using a rotary polisher. With the right technique and practice, you can achieve professional-level results and bring out the true beauty of your vehicle’s paintwork.
Questions and answers
What is a rotary polisher?
A rotary polisher is a power tool used for polishing and buffing surfaces, particularly automotive paint. It has a rotating disc or pad that applies friction to the surface, removing scratches and imperfections, and leaving a smooth, glossy finish.
Is it easy to hold a rotary polisher?
While holding a rotary polisher may seem simple, it requires proper technique and grip to effectively and safely operate the tool. Without the correct hold, it can lead to less than desirable results, or even cause damage to the surface being polished.
What is the correct way to hold a rotary polisher?
The correct way to hold a rotary polisher is to grip it firmly with both hands. The dominant hand should hold the handle on the top of the machine, while the other hand supports the weight and helps guide the polisher. Using both hands provides better control and reduces fatigue during extended use.
Are there any tips for holding a rotary polisher?
Yes, here are some tips for holding a rotary polisher: 1. Maintain a relaxed grip to minimize fatigue. 2. Keep the polisher level and parallel to the surface being polished. 3. Apply even pressure to the polisher, letting the machine do the work. 4. Do not push down too hard, as it can lead to swirl marks. 5. Move the polisher in overlapping motions for consistent results. Following these tips will help you achieve professional-looking results with your rotary polisher.


Harrison Clayton
Meet Harrison Clayton, a distinguished author and home remodeling enthusiast whose expertise in the realm of renovation is second to none. With a passion for transforming houses into inviting homes, Harrison's writing at https://thehuts-eastbourne.co.uk/ brings a breath of fresh inspiration to the world of home improvement. Whether you're looking to revamp a small corner of your abode or embark on a complete home transformation, Harrison's articles provide the essential expertise and creative flair to turn your visions into reality. So, dive into the captivating world of home remodeling with Harrison Clayton and unlock the full potential of your living space with every word he writes.