How To Make A Polisher Ans

Do you have items at home that have lost their shine over time? Want to give them a new lease on life? A polisher can be the perfect solution. And the best part? You don’t need to spend a fortune on buying one – you can easily make your own polisher right at home!
What is a polisher, you may ask? It’s a device that helps restore the shine and luster to various surfaces, such as metal, wood, or even glass. Whether it’s your favorite jewelry, antique furniture, or kitchen utensils, a polisher can bring back the sparkle they once had.
To make your own polisher, you’ll need a few simple ingredients. Start by gathering some baking soda, white vinegar, and a soft cloth. Baking soda is a gentle abrasive that can help remove dirt and stains, while white vinegar is known for its cleaning and disinfectant properties. Together, they make a powerful combination for shining your prized possessions.
Now, let’s get to the making process. Mix a small amount of baking soda with some white vinegar to form a paste-like consistency. It’s important to note that you don’t need a lot of either ingredient – a little goes a long way. Once you have the paste ready, take your soft cloth and dip it into the mixture. Gently rub the cloth onto the surface of the item you want to polish, using circular motions.
What is a Polisher Ans?
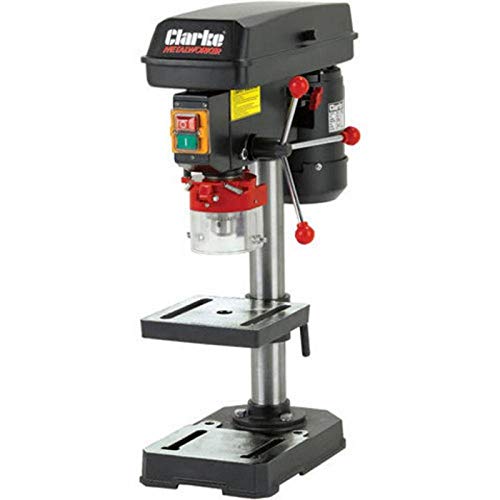
A polisher ans is a device used to polish and buff various surfaces to achieve a smooth and shiny finish. It is commonly used in automotive detailing, woodworking, and metalworking industries.

The polisher ans typically consists of a handheld machine with a rotating pad or disc that spins at high speeds. The pad or disc is usually made of a soft material, such as foam or wool, which is designed to effectively remove imperfections and apply polishing compounds or waxes.
Polisher ans are versatile tools that can be used on a wide range of materials, including paint, metal, wood, and plastic. They are commonly used to remove scratches, swirl marks, and oxidation from surfaces, leaving them looking brand new.
Using a polisher ans requires some skill and technique. It is important to start with a clean surface and use the appropriate pad and polishing compound for the material being worked on. The machine should be held at the correct angle and moved in a slow and controlled manner to avoid causing damage.
Overall, a polisher ans is a valuable tool for achieving professional-grade results in various industries. Whether you are a professional or a DIY enthusiast, having a polisher ans can greatly enhance the appearance and quality of your finished work.
Section 1: Benefits
Using a polisher can provide several benefits for both professionals and DIY enthusiasts. Whether you are a homeowner looking to improve the appearance of your floors or a professional in need of a reliable tool for polishing jobs, a polisher can be a valuable addition to your toolkit.

1. Efficiency
A polisher allows you to achieve exceptional results in a shorter amount of time compared to traditional manual methods. The rotating polishing pads or brushes on a polisher can cover larger surface areas quickly and efficiently, making it easier to complete polishing tasks faster.
By using a polisher, you can save valuable time and effort, allowing you to take on more projects or spend your time on other tasks.
2. Improved Results
A polisher is designed to provide a consistent and professional finish to various surfaces. Whether you are polishing hardwood floors, tiles, or even metal surfaces, a polisher can help achieve a smooth and glossy finish.
The polishing pads or brushes on a polisher help to remove minor imperfections, scratches, or marks, resulting in a polished surface that looks brand new. This professional finish can enhance the appearance of your floors or surfaces, making them stand out.
Additionally, using a polisher can help restore the luster and shine to old or worn-out surfaces, improving the overall aesthetic value of your space.

Using a polisher provides an effective way to achieve professional-level results, enhancing the beauty of your floors or surfaces.
3. Versatility
Polishers come in different models and are suitable for various applications. From handheld models for smaller projects to larger floor polisher machines for commercial purposes, there is a wide range of options available.
Furthermore, many polishers offer adjustable speed settings, allowing you to customize the polishing process based on the type of surface and your desired results. This versatility makes a polisher a versatile tool that can be used on different materials, including wood, concrete, stone, and more.
With a polisher, you can tackle a wide range of projects with ease, from floor polishing to restoring the shine on your car.
In conclusion, using a polisher provides several benefits, including increased efficiency, improved results, and versatility. Whether you are a professional or a DIY enthusiast, a polisher can help you achieve exceptional results and save time on your polishing tasks.

The Importance of a Polisher Ans
A polisher ans is an essential tool for maintaining the shine and beauty of various surfaces. Whether it is used for automotive detailing, furniture restoration, or metal polishing, a polisher ans can significantly enhance the appearance of the material.
One of the primary benefits of using a polisher ans is its ability to remove scratches, swirl marks, and other imperfections on the surface. The rotating motion of the polisher ans combined with the appropriate polishing pads and compounds can effectively erase these blemishes, resulting in a smooth and flawless finish.
In addition to restoring the appearance of the material, a polisher ans can also improve its durability. By eliminating scratches and other damages, the polisher ans helps to prevent further wear and tear. This is particularly important for automotive detailing, where the exterior surfaces are exposed to various environmental factors such as UV rays, dirt, and debris.
Furthermore, using a polisher ans can save time and effort compared to manual polishing. The machine’s powerful motor and consistent motion allow for faster and more efficient polishing. This is especially beneficial for professionals who need to complete their tasks quickly and consistently achieve high-quality results.
Another advantage of using a polisher ans is its versatility. It can be used on a wide range of materials, including metal, plastic, glass, and wood. This makes it a valuable tool for different industries and applications.

Overall, a polisher ans is a valuable investment for anyone who wants to maintain the appearance and condition of various surfaces. Its ability to remove imperfections, improve durability, save time and effort, and cater to different materials make it an essential tool for achieving a professional and polished finish.
| Benefits of a Polisher Ans: |
|---|
| – Removes scratches and imperfections |
| – Improves durability |
| – Saves time and effort |
| – Versatile application |
Section 2: Tools and Materials
Before you can start making your own polisher, you’ll need to gather some tools and materials. Here’s a list of what you’ll need:
Tools:
- Drill with variable speed control
- Sanding pads and polishing pads
- Backing plate
- Screwdrivers
- Clamps
- Measuring tape
- Masking tape
- Safety goggles
Materials:
- Polishing compound
- Sanding discs of various grits
- Microfiber cloths
- Rubbing alcohol
- Plastic spray bottle
- Water
Make sure you have all of these tools and materials on hand before you start. Having everything ready will make the process much smoother and ensures you won’t have to stop and search for something in the middle of your project.
Estimated time: 30 minutes
What You Need to Make a Polisher Ans
To make a polisher ans, you will need the following materials:

- A small and sturdy container with a lid
- A motor, preferably DC, with a power rating suitable for the polishing task
- A spindle or shaft to attach the polishing wheel
- A polishing wheel, made of cotton or a specific material suitable for the type of polish being used
- A power supply for the motor, such as batteries or an AC adapter
- A switch to control the on/off operation
- Wires for electrical connections
- A variable resistor or speed control module to adjust the polishing speed
- Screws, nuts, and washers for assembling the components
- Insulating tape or heat shrink tubing for insulating electrical connections
- A safety goggles and gloves to protect yourself while operating the polisher
Optional Accessories
Depending on your specific polishing needs, you may also require the following accessories:
- Various polishing compounds or materials for different types of surfaces
- Additional polishing wheels or pads
- A dust collector or vacuum cleaner attachment to minimize dust and debris
- A polishing stand or holder for easier polishing
- A polishing cloth or brush for applying the polish
Assembly Instructions
Once you have gathered all the necessary materials, follow these steps to assemble your polisher ans:
- Prepare the container by making holes for the motor shaft and switch.
- Attach the motor to the container using screws and nuts.
- Connect the wires from the motor to the switch and power supply.
- Attach the spindle or shaft to the motor shaft.
- Securely attach the polishing wheel to the spindle or shaft.
- Connect the power supply to the switch and motor.
- Insulate the electrical connections with tape or heat shrink tubing.
- Mount the variable resistor or speed control module if desired.
- Secure the lid on the container.
Remember to follow safety precautions and double-check all connections before operating your polisher ans. Enjoy your DIY project and make sure to clean and maintain your polisher for optimal performance.
Section 3: Step-by-Step Instructions
Follow these step-by-step instructions to build your own polisher at home:
- Gather all the necessary materials and tools:
- Electric motor
- Rubber wheel
- Steel shaft
- Wooden base
- Switch
- Wires
- Screws
- Drill
- Sandpaper
- Wood glue
- Safety goggles
- Prepare the wooden base:
- Measure and mark the desired size for the base.
- Using a saw, cut the wooden board according to the measurements.
- Sand the edges and the surface of the base until smooth.
- Attach the motor:
- Position the motor on the wooden base.
- Mark the spots for the screw holes.
- Drill pilot holes at the marked spots.
- Secure the motor to the base using screws.
- Connect the wires of the motor to the switch.
- Attach the rubber wheel and steel shaft:
- Fit the rubber wheel onto the steel shaft.
- Secure the shaft to the motor’s shaft using screws.
- Secure the switch:
- Drill a hole in the wooden base for the switch.
- Insert the switch into the hole and secure it with screws.
- Finalize the polisher:
- Double-check all the connections and tighten any loose screws.
- Apply wood glue to reinforce any weak joints.
- Allow the glue to dry completely.
- Test the polisher:
- Put on safety goggles.
- Connect the polisher to a power source.
- Switch on the power and observe if the polisher spins smoothly.
- If everything is working properly, your polisher is ready to use!
Remember to handle the polisher with care and always wear safety goggles when using it. Follow safety guidelines to prevent accidents or injuries.

How to Make a Polisher Ans in 5 Easy Steps
Making a polisher ans can be a fun and rewarding project. With just a few simple supplies and some basic knowledge, you can create your own polisher ans in no time. Follow these 5 easy steps to get started:
Step 1: Gather Your Supplies
The first step in making a polisher ans is to gather all the necessary supplies. You will need a motor or power source, a spindle or shaft, a polishing wheel or pad, and any other accessories you want to include, such as a speed controller or dust collection system.
Step 2: Assemble the Motor and Spindle
Next, you need to assemble the motor and spindle. Attach the spindle to the motor, ensuring a secure connection. This will serve as the base for your polisher ans.
Step 3: Attach the Polishing Wheel or Pad
Once the motor and spindle are assembled, it’s time to attach the polishing wheel or pad. Make sure it is secure and properly aligned with the spindle to ensure smooth operation.
Step 4: Add Any Additional Accessories
If desired, this is the step where you can add any additional accessories to enhance the functionality of your polisher ans. This may include a speed controller to adjust the rotation speed or a dust collection system to keep your work area clean.
Step 5: Test and Adjust
Finally, test your polisher ans to ensure everything is working properly. Turn on the power and check the rotation of the polishing wheel or pad. Make any necessary adjustments to the speed or alignment before using your polisher ans on your desired project.
By following these 5 easy steps, you can create your own polisher ans and enjoy the satisfaction of using a tool that you built yourself. Be sure to always prioritize safety and follow any manufacturer guidelines or instructions that come with your specific supplies.
Section 4: Tips and Tricks
Here are some tips and tricks to help you get the most out of your homemade polisher:
- Use the right polishing compound for the task at hand. Different materials and surfaces may require different polishers, so choose wisely.
- Always start with a clean and dry surface. Remove any dirt, dust, or debris before applying the polisher.
- Apply the polisher in small sections and work in circular motions. This will help to evenly distribute the polish and achieve a smooth finish.
- Use light pressure when polishing. Too much pressure can cause damage or create swirl marks on the surface.
- Wear protective gloves and eyewear to avoid any potential accidents or injuries while working with the polisher.
- Regularly clean and maintain your polisher to ensure optimum performance. Follow the manufacturer’s instructions for cleaning and storage.
- Experiment with different techniques and polishing pads to find what works best for your specific needs.
- Practice on small, inconspicuous areas before attempting to polish larger surfaces. This will help you gain confidence and refine your technique.
- Take breaks when needed. Polishing can be a tedious task, so give yourself time to rest and recharge.
- Lastly, be patient. Achieving a perfect polish may take time and practice, but the end result will be worth it.
By following these tips and tricks, you can create a high-quality homemade polisher that will leave your surfaces looking clean and polished.
Questions and answers
What is a polisher and how does it work?
A polisher is a tool used for polishing and buffing various surfaces. It works by using a motor to spin a pad or a brush at high speed, which creates friction and heat. This friction and heat help to remove imperfections and scratches from the surface, leaving it with a smooth and shiny finish.
Can I use a polisher on any surface?
No, you should only use a polisher on surfaces that are suitable for polishing. For example, you can use a polisher on car paint, marble, granite, and other hard surfaces. However, you should avoid using a polisher on delicate surfaces like glass or wood, as it can cause damage. Always check the manufacturer’s instructions and recommendations before using a polisher on a specific surface.
What are the safety precautions I should take when using a polisher?
When using a polisher, it is important to take certain safety precautions. First, always wear protective gear such as safety goggles, gloves, and a dust mask to protect your eyes, hands, and lungs from any debris or chemicals that may be present. Second, make sure that the polisher is turned off and unplugged before attaching or removing any pads or brushes. Lastly, be mindful of your surroundings and avoid using the polisher near flammable materials or in wet conditions to prevent accidents.

Meet Harrison Clayton, a distinguished author and home remodeling enthusiast whose expertise in the realm of renovation is second to none. With a passion for transforming houses into inviting homes, Harrison's writing at https://thehuts-eastbourne.co.uk/ brings a breath of fresh inspiration to the world of home improvement. Whether you're looking to revamp a small corner of your abode or embark on a complete home transformation, Harrison's articles provide the essential expertise and creative flair to turn your visions into reality. So, dive into the captivating world of home remodeling with Harrison Clayton and unlock the full potential of your living space with every word he writes.


