Mastering the Art of Dip Powder with a Nail Drill

Are you tired of spending hours in the nail salon, waiting for your dip powder manicure to dry? Are you ready to take your nail game to the next level? Look no further – the nail drill is here to save the day!
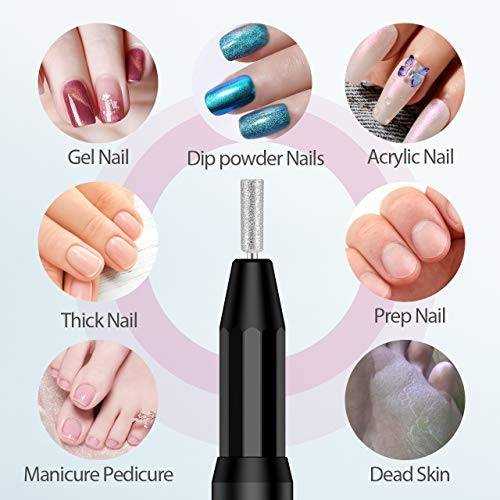
Using a nail drill in combination with dip powder can help you achieve flawless nails in no time. The nail drill is a versatile tool that allows you to shape, buff, and smooth your nails with ease. Whether you’re a professional nail technician or a DIY enthusiast, mastering the art of dip powder with a nail drill is a skill worth acquiring.
One of the biggest advantages of using a nail drill is the time-saving factor. With a nail drill, you can quickly remove any excess dip powder, shape your nails to perfection, and create a smooth surface for the powder to adhere to. This not only speeds up the application process but also ensures a longer-lasting manicure.
However, it’s important to note that using a nail drill requires proper technique and practice. It’s essential to start with a low-speed setting and gradually increase it as you become more comfortable. Additionally, using a light touch and maintaining a steady hand will help prevent any damage to your nails.
Tip: Before using a nail drill on your natural nails, it’s recommended to apply a layer of protective base coat to minimize any potential harm.
In conclusion, incorporating a nail drill into your dip powder routine can elevate your nail game to new heights. With its ability to shape, buff, and smooth your nails, the nail drill is a game-changer for both professionals and DIY enthusiasts. Remember to practice proper technique and use a light touch to achieve stunning results. So why wait? Grab your nail drill and master the art of dip powder today!

Revolutionizing Nail Care: The Art of Dip Powder
The art of dip powder has revolutionized the way we care for our nails. This innovative technique has gained popularity for its durability, ease of use, and stunning results. Unlike traditional nail polish or gel manicures, dip powder nails provide a long-lasting, chip-resistant finish that can last up to three weeks.
Dip powder nails are created by applying a base coat, dipping the nails into a powder, and sealing it with a top coat. The powder is available in a wide range of colors and finishes, allowing for endless creativity and customization. Whether you prefer a classic nude or a bold, vibrant shade, you will find a dip powder to suit your style.
One of the key advantages of dip powder nails is the minimal damage to the natural nails. Unlike acrylic nails, which can be harsh on the nail bed, dip powder nails do not require drilling or filing. This makes them a healthier alternative for those looking to maintain the strength and integrity of their natural nails.
Another benefit of dip powder nails is the ease of removal. Unlike gel manicures that require soaking in acetone or filing down the gel, dip powder nails can be easily removed by soaking in warm water. This gentle removal process helps to minimize any potential damage to the nails.
Dip powder nails also offer a quicker application time compared to other manicure methods. With the use of a nail drill, the process becomes even faster and more efficient. A nail drill can be used to shape, smooth, and refine the nail surface, ensuring a flawless finish. It also allows for easy removal of any excess powder or rough edges, resulting in a professional-looking manicure.

To master the art of dip powder with a nail drill, it is important to invest in high-quality tools and products. A good nail drill should have adjustable speed settings and different drill bits to accommodate various nail treatments. Additionally, using a nail drill requires practice and patience. It is important to start with low speed and gradually increase as you become more comfortable and skilled.
In conclusion, the art of dip powder has revolutionized nail care, providing a durable and customizable manicure option. With the use of a nail drill, the application process becomes even more efficient, allowing for a flawless and professional finish. Whether you are a nail technician or a DIY enthusiast, mastering the art of dip powder with a nail drill will elevate your nail care game.
Unleashing the Power of Dip Powder for Perfect Nails
Dip powder nails have become increasingly popular in recent years as a long-lasting, durable alternative to traditional nail polish. This innovative technique involves dipping your nails into a pigmented powder, which is then sealed with a clear top coat to create a flawless finish that can last up to four weeks. If you want to achieve perfect nails that are chip-resistant and don’t require frequent touch-ups, dip powder is the answer.
The Benefits of Dip Powder
- Durability: Dip powder nails are known for their exceptional durability. The powder provides a strong and resilient coating that resists chipping and cracking, making it ideal for those who lead an active lifestyle.
- Easy application: Unlike traditional nail polish, dip powder is easy to apply. The process involves a series of dipping your nails into a colored powder and sealing it with a top coat. This makes it a convenient option for both DIY enthusiasts and professional nail technicians.
- Long-lasting color: Dip powder nails offer long-lasting color that remains vibrant and glossy for weeks. With various shades and finishes available, you can experiment with different colors to match your style and mood.
- Minimal damage: Unlike gel or acrylic nails, dip powder does not require filing or drilling of the natural nail bed, significantly reducing the risk of damage or weakening of the nails.
The Steps to Perfect Dip Powder Nails
- Preparation: Start by shaping and filing your nails to your desired length and shape. Push back the cuticles and remove any excess skin to ensure a clean surface.
- Base coat: Apply a thin layer of base coat to each nail, making sure to cover the entire nail surface. This will create a strong foundation for the dip powder to adhere to.
- Dip powder application: Dip one finger at a time into the pigmented powder, making sure to tap off any excess. Repeat this process for each nail, using a different dip powder color if desired.
- Activator: Apply a layer of activator to each nail, using a brush to ensure full coverage. This will help to set and harden the powder onto the nails.
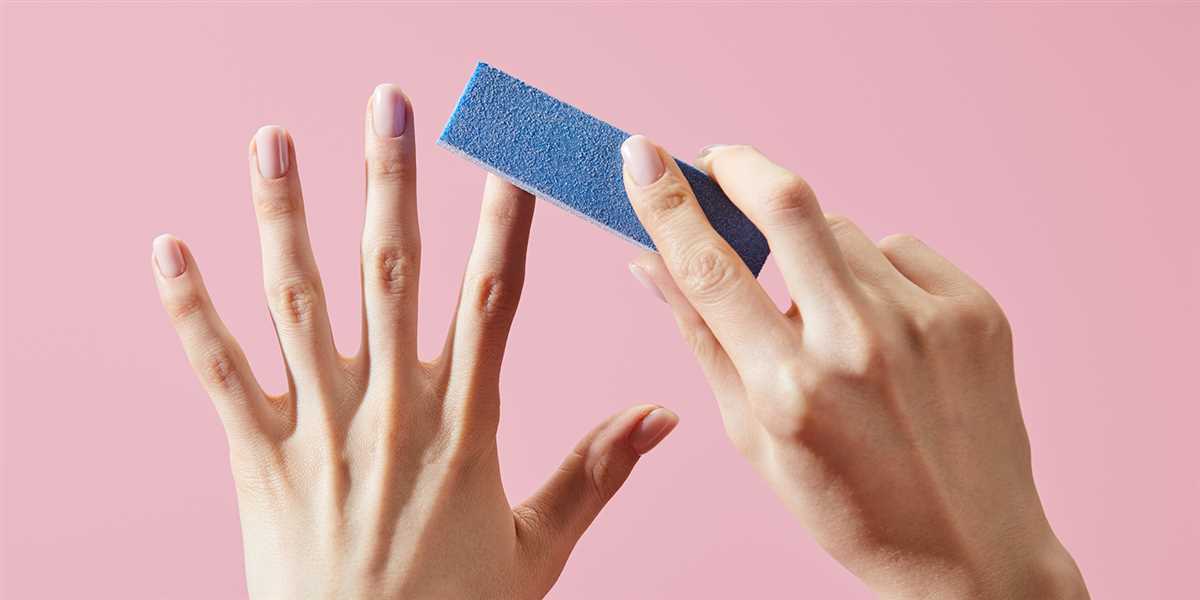
- Buffing and shaping: Once the activator has dried, gently buff the surface of the nails to create a smooth and even finish. Shape the nails using a file and remove any rough edges.
- Top coat: Finally, apply a layer of clear top coat to each nail, sealing in the dip powder and adding a glossy shine. Allow the nails to dry completely before applying any additional products or activities.
Conclusion
With its impressive durability, easy application, and long-lasting color, dip powder is a game-changer in the world of nail care. By following the steps mentioned above, you can unleash the power of dip powder and achieve perfect nails that will turn heads wherever you go. Say goodbye to frequent touch-ups and hello to flawless nails that last for weeks.

Taking Nail Art to the Next Level with a Nail Drill
If you’re a fan of nail art and want to take your skills to the next level, investing in a nail drill is a game-changer. A nail drill is a necessary tool for professional nail technicians, but it’s also becoming popular among nail art enthusiasts for its versatility and efficiency.
Benefits of Using a Nail Drill
Using a nail drill opens up a whole new world of possibilities for nail art. Here are some benefits of incorporating a nail drill into your nail art routine:
- Efficiency: With a nail drill, you can remove old gel polish or acrylics much faster than traditional methods, saving you time and effort.
- Precision: The high speed and precision of a nail drill allow you to create intricate designs and shapes with ease.
- Versatility: A nail drill can be used for a variety of tasks, such as shaping and shortening nails, removing cuticles, and creating detailed nail art designs.
- Smooth Finish: The smooth finish achieved with a nail drill ensures that your nail art looks professional and lasts longer.
Tips for Using a Nail Drill
Before you start using a nail drill, it’s important to keep a few things in mind:
- Safety: Always prioritize safety by wearing protective gear, such as goggles and gloves, and following the manufacturer’s instructions.
- Start Slow: If you’re new to using a nail drill, start at a slow speed and gradually increase as you gain more experience.
- Keep it Cool: To prevent overheating and damage to your nails, use a cooling agent or periodically dip your nails in cool water while drilling.
- Practice: Like any new skill, using a nail drill requires practice. Start practicing on an artificial nail or ask a friend to be your model before working on your own nails.
Choosing the Right Nail Drill
When selecting a nail drill, consider the following factors:

- Speed: Look for a nail drill with adjustable speed settings, allowing you to customize it to your needs and skill level.
- Attachments: Check if the nail drill comes with a variety of attachments for different purposes, such as sanding bands, drill bits, and buffers.
- Noise and Vibration: Consider models that have low noise and vibration levels for a more comfortable and enjoyable experience.
- Power source: Decide between corded or cordless nail drills depending on your preference and mobility needs.
Conclusion
A nail drill can elevate your nail art game and take it to the next level. With its efficiency, precision, and versatility, a nail drill is a valuable tool for any nail art enthusiast. Just remember to prioritize safety, start slow, and practice regularly to master the art of using a nail drill.
The Benefits of Using a Nail Drill for Dip Powder Nails
When it comes to perfecting the art of dip powder nails, using a nail drill can be an invaluable tool. Nail drills offer a range of benefits that can help you achieve professional-looking results right at home. Here are some of the advantages of incorporating a nail drill into your dip powder nail routine:
1. Improved Surface Preparation
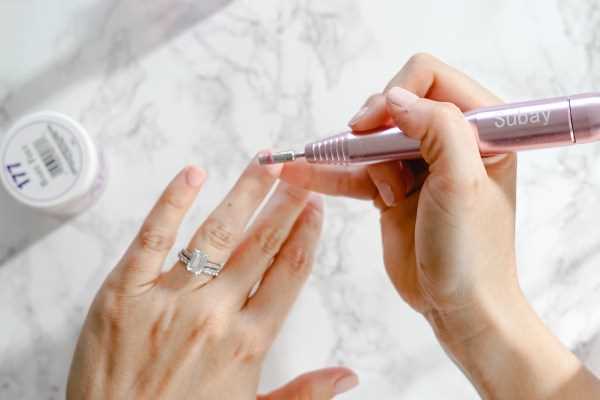
A nail drill allows you to easily and quickly prepare the surface of your natural nail before applying the dip powder. With the right drill bit, you can gently remove the shine from the nail, making it easier for the powder to adhere and ensuring a longer-lasting manicure.
2. Efficient Product Removal
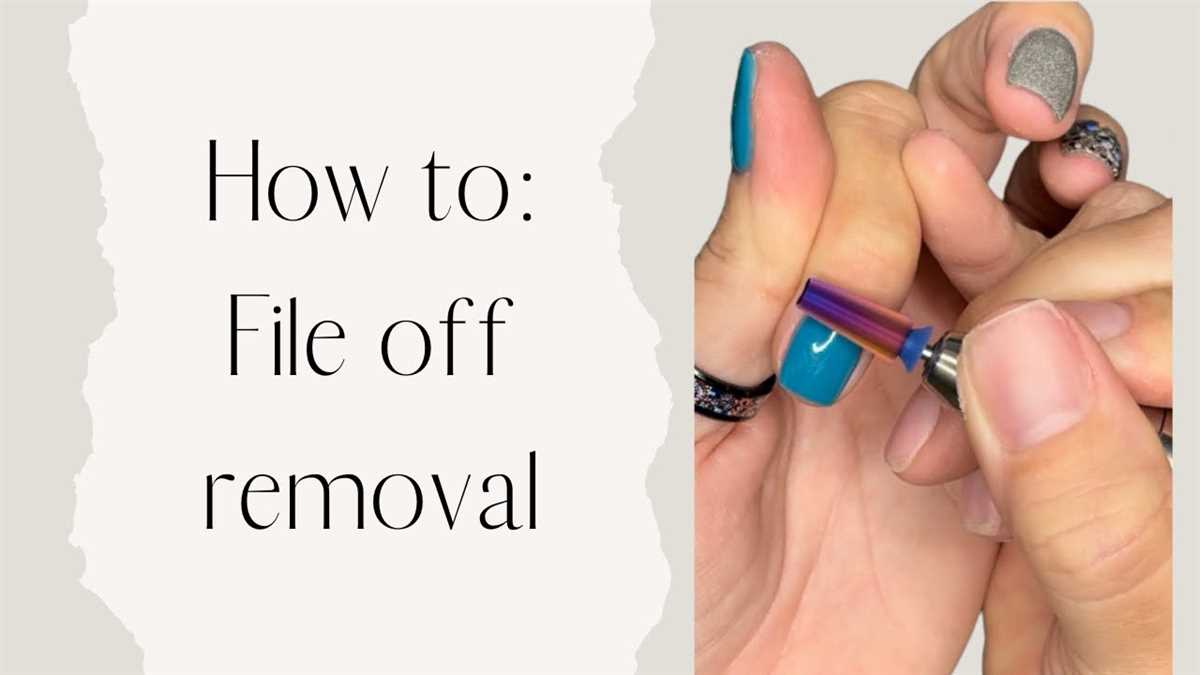
When it’s time to remove your dip powder nails, a nail drill can save you time and effort. With a suitable drill bit, you can file away the layers of powder, making the removal process much quicker compared to manual filing or soaking in acetone.

3. Precise Shaping and Reshaping
Whether you prefer a square, round, or almond shape, a nail drill allows you to easily shape and reshape your dip powder nails according to your desired style. You can achieve smooth and even edges and make adjustments without damaging the natural nail.
4. Filing and Buffing
Using a drill with the appropriate attachments, you can effectively file and buff your dip powder nails to create a smooth and flawless finish. This helps eliminate any unevenness or imperfections, giving your nails a polished and professional look.
5. Time-Saving
By investing in a nail drill for your dip powder nails, you can significantly cut down on the time it takes to complete your manicure. The drill allows for faster surface preparation, shaping, and product removal, making the entire process more efficient.
6. Professional-Looking Results
With the precision and control offered by a nail drill, you can achieve salon-quality results in the comfort of your own home. The ability to precisely shape, file, and buff your dip powder nails helps create a polished and flawless finish that looks like it was done by a professional.
Incorporating a nail drill into your dip powder nail routine can enhance your overall manicure experience and help you achieve beautiful and long-lasting results. Just remember to use the drill with caution and follow proper safety guidelines to avoid any mishaps or damage to your nails.
Mastering the Techniques: How to Use a Nail Drill with Dip Powder
Step 1: Prepare the Nails
Before using a nail drill with dip powder, you need to properly prepare your nails. Start by removing any existing nail polish and filing your nails to your desired shape and length. Then, push back your cuticles using a cuticle pusher and trim any excess skin.
Step 2: Apply the Base Coat
Next, apply a thin layer of base coat to your nails. This will help the dip powder adhere properly to the nails. Allow the base coat to dry completely before moving on to the next step.
Step 3: Dip the Nails
Take a small dish and pour a sufficient amount of dip powder into it. Dip one finger at a time into the powder, making sure to cover the entire nail surface. Tap off any excess powder and repeat this process on all your nails.
Step 4: Use the Nail Drill
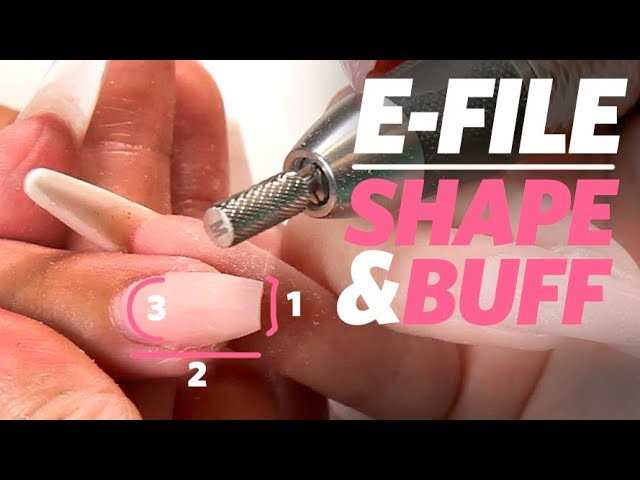
Now it’s time to use the nail drill. Attach the desired drill bit to the drill and adjust the speed to your preference. Start by gently buffing the surface of the nails to smooth out any unevenness or ridges caused by the dip powder. Be careful not to apply too much pressure or drill too aggressively, as this can damage your nails.
Step 5: Shape and File
Once the nails are smooth, you can use the nail drill to shape and file them. Choose a drill bit that is appropriate for your desired nail shape (e.g., round, square, almond, etc.) and gently shape the edges of the nails. Be cautious and work gradually, checking the shape frequently to avoid over-filing.
Step 6: Finish Off
After shaping and filing, use the nail drill to buff the nails once again. This will help to further smooth the surface and remove any potential rough spots. Finish off by applying a top coat to seal the dip powder and add shine to your nails. Allow the top coat to dry completely before proceeding.
Step 7: Clean Up
Finally, clean up any excess dip powder and debris around your nails. You can use a brush or cotton swab dipped in acetone to remove any stray powder or polish.
Using a nail drill with dip powder can take some practice, so be sure to start slow and steady. With time and experience, you’ll be able to master the techniques and achieve beautiful, salon-quality nails at home!
Exploring Different Nail Drill Bits for Dip Powder Application
Introduction
Using a nail drill for dip powder application can greatly enhance the efficiency and precision of the process. One of the key components of a nail drill is the drill bit, which determines the type of work it can perform. In this article, we will explore different nail drill bits that can be used for dip powder application.
1. Classic Diamond Bit
The classic diamond bit is one of the most commonly used nail drill bits for dip powder application. It features a round shape with a diamond coating, which allows for smooth and precise filing. This bit is ideal for removing excess dip powder, shaping the nails, and refining the surface.
2. Tapered Barrel Bit
The tapered barrel bit has a pointed cone shape and is perfect for working on the sidewalls and cuticles. It allows for precise filing in hard-to-reach areas, ensuring a clean and even application of the dip powder. The tapered barrel bit can also be used for refining the smile line and creating a more defined shape.
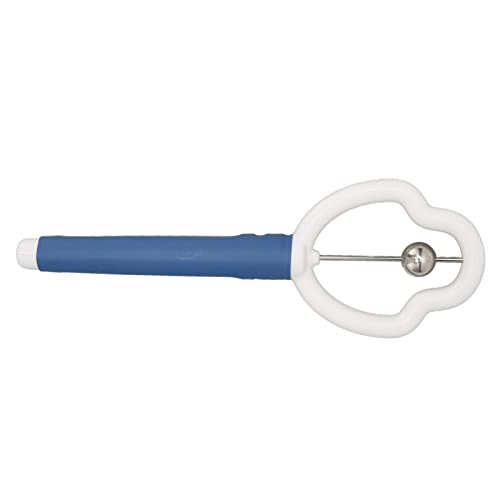
3. Under Nail Cleaner Bit
The under nail cleaner bit has a small, spoon-like shape that is designed to clean and remove dirt from underneath the nails. This bit is particularly useful for dip powder application as it ensures a clean and hygienic surface before applying the base coat. It can also be used to gently remove any excess dip powder that may have settled under the nails.
4. Carbide Safety Bit
The carbide safety bit is a versatile nail drill bit that is perfect for dip powder application. It features a rounded top with fine textured ridges, making it gentle on the natural nails. This bit can be used for removing dip powder, shaping the nails, refining the surface, and even for gentle cuticle work. The carbide safety bit ensures minimal damage to the natural nails, making it suitable for both professionals and beginners.
Conclusion
Choosing the right nail drill bit for dip powder application is essential for achieving a professional and flawless result. Whether you prefer the classic diamond bit for shaping and refining, the tapered barrel bit for precision work, the under nail cleaner bit for hygienic purposes, or the carbide safety bit for versatile use, there are plenty of options available to suit your needs. Experiment with different nail drill bits to find the ones that work best for you and your dip powder application technique.
Nail Drill Safety: Tips and Precautions for a Flawless Manicure
Introduction
A nail drill is a versatile tool that can make your manicure process easier and more efficient. However, it is important to prioritize safety when using a nail drill to prevent any potential accidents or damage to your nails. In this article, we will discuss some essential tips and precautions to ensure a flawless manicure using a nail drill.
1. Choose a High-Quality Nail Drill
To ensure safety, it is crucial to invest in a high-quality nail drill from a reputable brand. This will guarantee that the drill is made with durable materials and follows safety standards. Research different brands and read customer reviews to find a nail drill that suits your needs.
2. Use the Right Drill Bit

Using the correct drill bit is essential to prevent damage to your nails. Different drill bits are designed for specific purposes, such as removing gel polish, shaping nails, or filing down acrylics. Make sure to use the appropriate drill bit for the task at hand.
3. Start with a Low Speed
When using a nail drill, always start with a low speed setting. This will help you get comfortable with the tool and allow for better control. As you gain more experience, you can gradually increase the speed, but always be cautious to avoid damaging your nails.
4. Keep the Drill Bit Clean
Regularly clean the drill bit to remove debris and buildup. This will ensure optimal performance and prevent contamination. Follow the manufacturer’s instructions for cleaning the drill bit, as different materials may require specific methods.
5. Avoid Putting Pressure on the Nails
When using a nail drill, it is important to let the drill do the work. Avoid applying excessive pressure on your nails, as this can cause discomfort and potentially damage the nail bed. Instead, gently guide the drill bit over the nail surface.
6. Take Breaks
Using a nail drill for an extended period can put strain on your hands and wrists. Remember to take regular breaks to rest and stretch your fingers. This will help prevent fatigue and reduce the risk of injuries.
7. Educate Yourself

Before using a nail drill, make sure to educate yourself on proper techniques and safety precautions. Watch tutorial videos, read user manuals, and seek advice from professionals to ensure you are using the tool correctly and safely.
Conclusion
By following these tips and precautions, you can safely and effectively use a nail drill to achieve a flawless manicure. Prioritizing safety will not only protect your nails but also enhance your overall nail care routine. Remember to always be cautious, take breaks when needed, and seek professional guidance if you’re unsure about any aspect of using a nail drill.
Level Up Your Nail Game: Creating Stunning Designs with a Nail Drill
Are you tired of having plain nails and ready to take your nail game to the next level? Look no further than a nail drill! With a nail drill, you can create stunning designs that will impress everyone who sees them.
Why Use a Nail Drill for Nail Art?
A nail drill is a powerful tool that can be used to shape, file, and buff nails. It can also be used to create intricate designs and add 3D elements to your nails. Here are a few reasons why using a nail drill for nail art is a game-changer:
- Efficiency: Using a nail drill allows you to work faster and more efficiently than using traditional nail tools. You can easily remove old polish, shape your nails, and create designs in a fraction of the time.
- Precision: With different drill bits, you can achieve precise and intricate designs that are difficult to create by hand. The versatility of the nail drill allows you to experiment and create unique nail art that reflects your personal style.
- Professional Results: Using a nail drill gives your nail art a professional finish. The smooth and even surface created by the drill helps your polish, gel, or dip powder to adhere better, resulting in a longer-lasting manicure.
Creating Stunning Designs with a Nail Drill
Now that you know why a nail drill is a must-have tool for nail art, let’s explore some ideas and techniques for creating stunning designs:
- Nail Drills for Beginners: If you’re new to using a nail drill, start with simple designs. Use a fine drill bit to create dots, lines, or swirls on your nails. Practice your technique and experiment with different drill speeds and pressures.
- 3D Nail Art: With a nail drill and some acrylic or gel, you can create 3D designs like flowers, bows, or even characters. Start by shaping a small amount of acrylic or gel into the desired design, then attach it to your nail with nail glue or resin. Use the nail drill to smooth out any rough edges and add details.
- Intricate Patterns: Use a thin drill bit to create intricate patterns on your nails. You can create geometric shapes, tribal designs, or even miniature landscapes. Take your time and plan out your design before you start drilling.
- Embellishments: A nail drill is perfect for adding embellishments like rhinestones, studs, or charms to your nails. Use a small drill bit or a cone-shaped drill bit to create a hole in your nail, then apply nail glue and insert the embellishment. Secure it with a clear top coat for extra durability.
Remember to always prioritize the health of your nails and use proper safety precautions when using a nail drill. Invest in a high-quality drill and regularly maintain and sanitize your drill bits to ensure the best results.
With a nail drill and some creativity, you can take your nail game to a whole new level. Get ready to wow everyone with your stunning nail designs!
FAQ:
What is dip powder?
Dip powder is a type of nail polish that is applied as a powder and then sealed with a clear protective polish. It is known for its long-lasting and durable finish.
Can a nail drill be used with dip powder?
Yes, a nail drill can be used with dip powder to shape and smooth the nails before applying the polish. It can also be used to remove dip powder if desired.
Is using a nail drill with dip powder difficult?
Using a nail drill with dip powder can be a bit challenging at first, but with practice and proper technique, it becomes easier. It is important to start with a low speed and gradually increase it to avoid damaging the nail.
What are the benefits of using a nail drill with dip powder?
Using a nail drill with dip powder allows for easier and more precise shaping of the nails. It also helps to remove any excess powder and smooth the surface for a flawless finish.
Can a nail drill damage the nails when used with dip powder?
When used correctly, a nail drill should not cause any damage to the nails when used with dip powder. However, it is important to use the nail drill gently and avoid applying too much pressure to prevent any potential damage.
Video:

How to pronounce bigot
Meet Harrison Clayton, a distinguished author and home remodeling enthusiast whose expertise in the realm of renovation is second to none. With a passion for transforming houses into inviting homes, Harrison's writing at https://thehuts-eastbourne.co.uk/ brings a breath of fresh inspiration to the world of home improvement. Whether you're looking to revamp a small corner of your abode or embark on a complete home transformation, Harrison's articles provide the essential expertise and creative flair to turn your visions into reality. So, dive into the captivating world of home remodeling with Harrison Clayton and unlock the full potential of your living space with every word he writes.


