Learn the Easy Way to Cut a Groove in Wood with a Drill

When it comes to woodworking, there are numerous techniques you can learn to manipulate and shape wood. One useful technique that any woodworking enthusiast should have in their repertoire is cutting a groove in wood with a drill. If you want to add decorative details to your woodworking projects, such as inlays or joinery, knowing how to cut a groove will be invaluable.
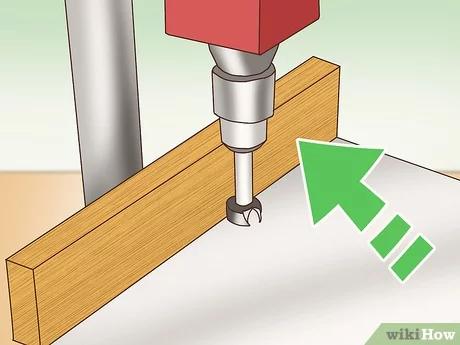
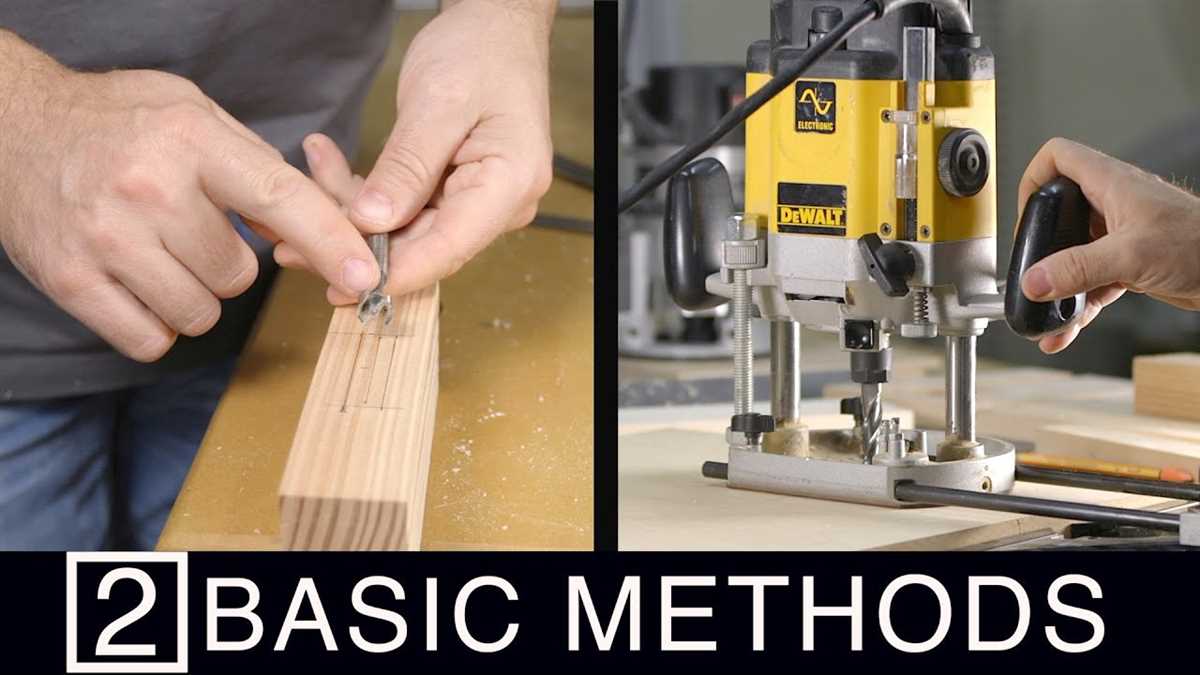
Cutting a groove in wood with a drill is a relatively simple process that can be done with a few basic tools. All you need is a drill, a router bit or a straight bit, and a fence or guide to ensure accuracy. The first step is to mark the location of the groove on your workpiece. Then, using the drill, create a series of closely spaced holes along the marked line. Once the holes are drilled, you can use the bit to connect them and create a clean, straight groove.
One important thing to remember when cutting a groove in wood with a drill is to work slowly and carefully. It’s important to take your time and make sure you’re applying consistent pressure to the drill as you move along the marked line. This will help prevent any accidents or damage to your workpiece. Additionally, it’s a good idea to practice on scrap wood before attempting to cut a groove on a finished piece to ensure you have a good understanding of the process.
Overall, cutting a groove in wood with a drill is a valuable technique to learn for any woodworking enthusiast. It opens up a world of possibilities for adding decorative details and joining pieces together in your projects. With a few basic tools and some practice, you’ll be able to create clean, precise grooves that will take your woodworking to the next level.
What is a groove?
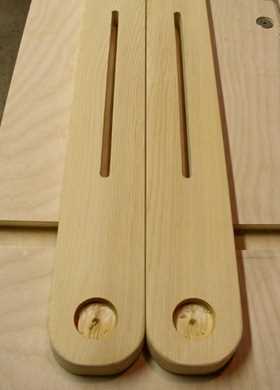
A groove is a long, narrow channel or indentation that is cut into a surface. In the context of woodworking, a groove refers to a cut or indentation that runs along the length of a piece of wood. Grooves are commonly used to join two pieces of wood together, to insert panels or shelves into cabinets or bookcases, or to create decorative features.

Grooves can be cut using various tools such as a table saw, dado blade, or a hand plane. However, in this article, we will focus on cutting grooves in wood using a drill.
The process of cutting a groove with a drill involves making multiple passes with a drill bit to remove material from the wood. The resulting groove typically has a rounded bottom and sharp edges.
Grooves can vary in width and depth, depending on the specific needs of the project. They can be as narrow as a few millimeters or as wide as several centimeters, and their depth can range from shallow to deep.
It is important to note that when cutting a groove, it is crucial to accurately measure and mark the desired dimensions to ensure a precise fit. Additionally, proper safety precautions such as wearing eye protection and securing the wood firmly in place should always be followed when using power tools.
Importance of cutting a groove in wood
Cutting a groove in wood is an essential technique that has a variety of uses in woodworking. Whether you are a professional woodworker or a DIY enthusiast, knowing how to cut a groove properly can greatly enhance the quality and functionality of your woodworking projects.

1. Joinery
One of the main reasons to cut a groove in wood is for joinery purposes. Grooves are commonly used to create strong and secure joints between two pieces of wood. By cutting a groove along the edge of one piece and a corresponding groove on the other piece, you can create a snug fit that ensures the pieces stay aligned and connected. This technique is often used for creating boxes, shelves, and drawers.
2. Hidden Wiring
Cutting a groove in wood can also be helpful when you need to hide wiring or cables within a piece of furniture or a wall. By creating a groove along the surface, you can easily run the wires through the groove, keeping them hidden from view. This is especially useful for creating clean and organized spaces without the hassle of visible wires.
3. Decorative Purposes
Another reason to cut a groove in wood is for decorative purposes. Grooves can add interesting texture and design elements to your woodworking projects. By using different router bits or chisels, you can create grooves of various widths and depths, allowing you to add intricate details and decorative patterns to your work.
4. Guiding Movement
By cutting a groove in a specific shape or path, you can create a guide for movement in your woodworking projects. This is particularly useful for creating sliding doors or drawers that need to move smoothly along a set path. The groove acts as a track for the movement, ensuring that the door or drawer opens and closes effortlessly.

5. Enhancing Stability
Cutting a groove in wood can also enhance the stability of a structure. By inserting a piece of wood or metal into the groove, you can strengthen the joint and prevent any movement or wobbling. This technique is commonly used in construction and woodworking projects that require added stability and durability.
In conclusion, cutting a groove in wood is an important technique that serves various purposes in woodworking. From joinery to decoration and stability, grooves help create strong, functional, and visually appealing projects. Whether you are working on a small craft or a large-scale construction, mastering the skill of cutting a groove will undoubtedly improve the quality and versatility of your woodworking projects.
Basic tools needed to cut a groove
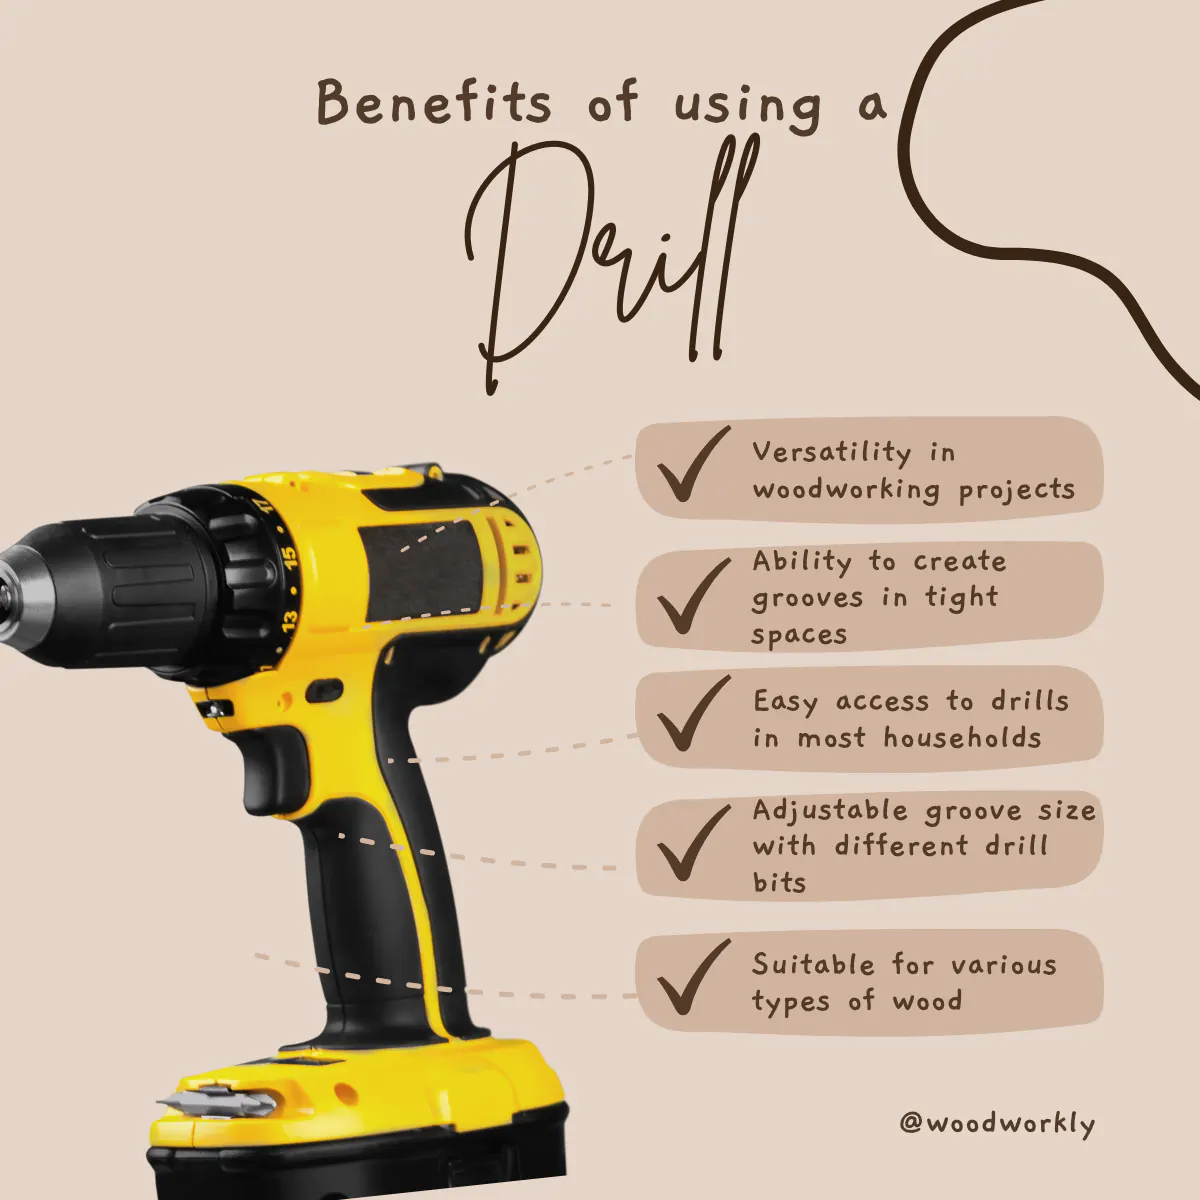
1. Drill
A drill is the primary tool you will need to cut a groove in wood. It can be either a corded or cordless drill, depending on your preference. Make sure to choose a drill with a variable speed setting, as this will allow you to control the cutting speed.
2. Drill bits

There are specific drill bits designed for cutting grooves in wood. For most basic grooves, a straight bit will suffice. However, if you need to cut a groove with a specific width or shape, you may require specialty bits such as a V-groove bit or a straight router bit.
3. Clamps or a vise
When cutting a groove in wood, it’s essential to secure the workpiece firmly in place. Using clamps or a vise will prevent the wood from moving during the cutting process, ensuring accurate and precise results.
4. Safety glasses
Protecting your eyes is crucial when working with power tools. Safety glasses will shield your eyes from any flying debris or wood chips that may occur during the cutting process.
5. Measuring tape or ruler
Before cutting a groove, you need to measure and mark the desired location and dimensions. A measuring tape or ruler will help you accurately determine where the groove should be and how deep it needs to be.

6. Pencil or marking tool
Marking the wood with a pencil or marking tool is essential for guiding your drill. It will ensure that you stay within the designated area and maintain the desired depth while cutting the groove.
7. Workbench or stable surface
Having a sturdy workbench or stable surface to place your wood on is crucial. It will provide a solid and secure foundation for your project, making it easier to control the drill and cut the groove accurately.
By acquiring these basic tools, you will have everything you need to successfully cut a groove in wood using a drill. Remember to follow proper safety precautions and take your time to achieve the best results.
Safety precautions to consider
1. Wear protective gear
Before starting any woodworking project, it is important to wear the necessary protective gear to prevent any injuries. This includes safety goggles, ear protection, and a dust mask.
2. Keep your work area clean
Ensure that your work area is clean and free from any debris or clutter. This will help reduce the risk of accidents and allow you to have better control over your tools.

3. Use the appropriate drill bit
Selecting the correct drill bit for the specific task is essential for safety. Using the wrong bit can result in accidents, such as the bit slipping or breaking.
4. Secure the wood
Before cutting a groove in wood with a drill, make sure it is securely clamped or held in place using a vise. This will prevent the wood from moving or spinning, reducing the risk of injuries.
5. Maintain a stable stance
When operating the drill, maintain a stable stance with your feet shoulder-width apart to ensure balance and prevent accidents caused by loss of control.
6. Be mindful of the drill’s speed and torque
When drilling a groove in wood, it is important to adjust the drill’s speed and torque settings according to the material and size of the groove. Using excessive force or speed can lead to accidents or damage to the wood.
7. Keep your hands away from the drill bit

Always keep your hands and fingers at a safe distance from the drill bit. Avoid hand placement near the rotating parts to prevent accidental injuries.
8. Avoid loose clothing and jewelry
When working with power tools like drills, it is important to remove any loose clothing, ties, or jewelry that may get caught in the machinery. This will reduce the risk of accidents and injuries.
9. Take breaks and stay hydrated
Woodworking can be physically demanding, so remember to take regular breaks and stay hydrated. Fatigue can lead to accidents, so it’s important to rest and recharge before continuing.
10. Read the drill’s manual
Before using a drill, read and understand the manufacturer’s instructions and safety guidelines provided in the manual. This will ensure that you are using the tool correctly and safely.
| Precaution | Reason |
|---|---|
| Wear protective gear | Prevent injuries from flying debris and dust |
| Keep work area clean | Reduce the risk of accidents and enhance control |
| Use the appropriate drill bit | Prevent accidents and ensure effective cutting |
| Secure the wood | Prevent movement and reduce the risk of injuries |
| Maintain a stable stance | Ensure balance and control while operating the drill |
| Be mindful of speed and torque | Avoid accidents and damage to the wood |
| Keep hands away from drill bit | Prevent accidental injuries |
| Avoid loose clothing and jewelry | Reduce the risk of entanglement |
| Take breaks and stay hydrated | Prevent fatigue-related accidents |
| Read the drill’s manual | Ensure correct and safe tool usage |
Step-by-step guide to cutting a groove with a drill

If you’re looking to cut a groove in wood for various woodworking projects, using a drill can be a simple and effective method. Here’s a step-by-step guide to help you achieve precise and clean grooves with a drill.
Materials and tools you’ll need:
- Wood
- Drill
- Drill bits (sized according to the width of the groove you want to cut)
- Clamps or vice
- Tape measure or ruler
- Pencil or marking tool
- Safety goggles
Step 1: Prepare your workspace
Choose a well-lit and ventilated area to work in. Secure your wood piece in a clamp or vice to prevent it from moving while you work.
Step 2: Mark the groove
Using a tape measure or ruler, measure and mark the exact location and dimensions of the groove you want to cut on the wood. This will help you maintain accuracy throughout the process.
Step 3: Select the appropriate drill bit
Choose a drill bit that matches the width of the groove you want to cut. It’s important to use the right size to achieve the desired groove depth and width.
Step 4: Attach the drill bit
Insert the selected drill bit into your drill, making sure it is securely fastened. Safety goggles should be worn at this point to protect your eyes from any flying debris during the process.
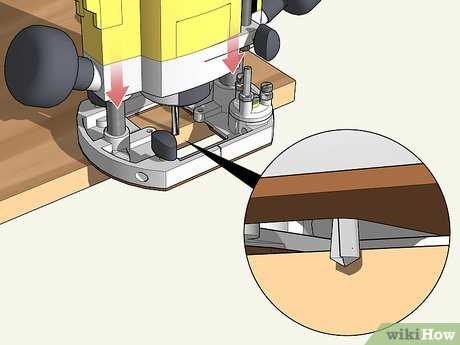
Step 5: Set the drill depth
Adjust the depth setting on your drill to match the desired depth of the groove. This will prevent you from drilling too deep or not deep enough.
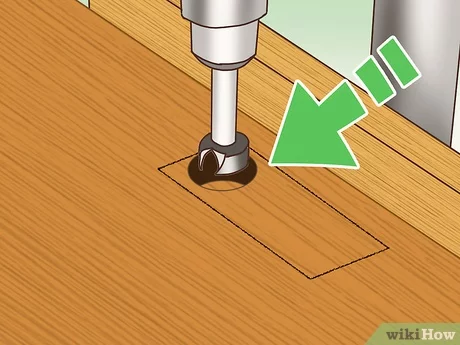
Step 6: Begin drilling
Position the drill bit at the starting point of the groove and apply gentle pressure to the drill. Start drilling slowly and steadily, following the marked line. Keep your hands firm and steady while maintaining control of the drill.
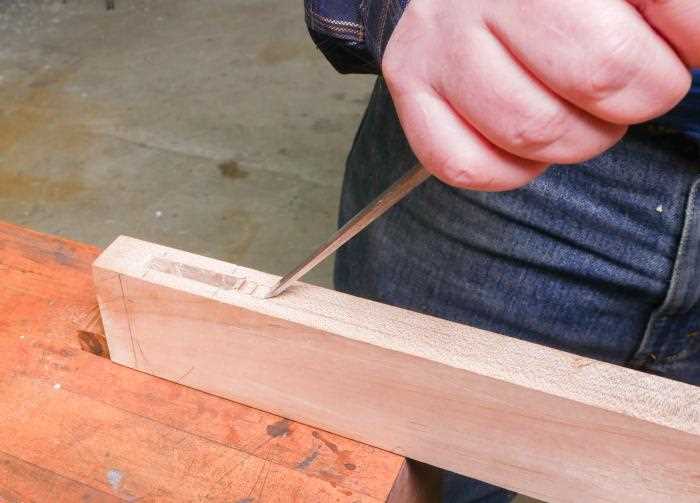
Step 7: Clean the groove
Once you have reached the end of the marked line, slowly lift the drill out of the groove. Use a chisel or sandpaper to clean up any rough edges or splinters in the groove.
Step 8: Test the groove
After cleaning the groove, test its depth and width using a scrap piece of wood that fits snugly. Make any necessary adjustments by repeating the drilling process if needed.
Step 9: Finish and sand
Once you are satisfied with the groove, sand the wood to ensure a smooth and polished finish. Remove any sawdust or debris from the surface and your work area.
Step 10: Final touches
Finally, apply any desired finish or sealant to the wood to protect and enhance its appearance. Allow it to dry completely before proceeding with your woodworking project.
By following these step-by-step instructions, you’ll be able to cut clean and precise grooves in wood using a drill. Remember to take all necessary safety precautions and work patiently for the best results.
Tips and tricks for successful groove cutting
- Choose the right drill bit: Select a drill bit that is suitable for cutting grooves in wood. A spiral bit or a straight bit with a flute is ideal for this purpose.
- Mark the groove: Use a pencil or a marking tool to mark the position and length of the groove on the wood surface. This will help guide your drilling process.
- Secure the wood: Clamp the wood securely to a workbench or a stable surface to prevent it from moving while cutting the groove.
- Set the depth: Adjust the depth of the drill bit according to the desired depth of the groove. This can be done by using the depth adjustment feature on the drill or by using a depth stop collar.
- Start slow: Start drilling the groove at a slow speed to create a pilot hole. This will help prevent the drill bit from wandering and ensure a straight cut.
- Maintain a steady pace: Keep a steady and even pressure on the drill as you cut the groove. This will help prevent splintering and ensure a smooth and clean cut.
- Clear out debris: Periodically remove the wood chips and debris from the groove to prevent them from interfering with the cutting process. You can use a brush or compressed air for this purpose.
- Test the fit: Check the fit of the groove by inserting the intended object into the groove. This will ensure that the groove is the right size and depth for its intended purpose.
By following these tips and tricks, you can successfully cut a groove in wood using a drill. Remember to always wear safety goggles and follow proper safety precautions when using power tools.
Common mistakes to avoid
- Using an incorrect drill bit size: One of the most common mistakes when cutting a groove in wood is using an incorrect drill bit size. Using a bit that is too large or too small can result in a groove that is not uniform and may not fit the required dimensions.
- Not securing the wood properly: Another mistake to avoid is not properly securing the wood before cutting the groove. If the wood is not securely clamped or held in place, it may move or shift during the drilling process, resulting in an uneven or messy groove.
- Applying too much pressure: Applying too much pressure while drilling the groove can cause the drill bit to dig too deeply into the wood, creating a wider groove than intended. It is important to apply a consistent amount of pressure and let the drill do the work.
- Not using a guide: Failing to use a guide can lead to an inaccurate or crooked groove. A guide, such as a straightedge or a template, can help ensure that the groove is cut in a straight line and to the desired depth.
- Not cleaning the groove: After cutting the groove, it is essential to remove any wood chips or debris that may be left behind. Failing to clean the groove properly can affect the overall quality of the finished product.
- Not practicing proper safety precautions: Safety should always be a priority when working with power tools. Not wearing protective gear, such as safety goggles or gloves, can lead to injuries. It is important to follow all safety guidelines and precautions when cutting a groove in wood.
FAQ:
What tools do I need to cut a groove in wood with a drill?
To cut a groove in wood with a drill, you will need a drill, a router bit or a straight bit, a depth stop collar, and a piece of wood to cut the groove in.
Is it difficult to cut a groove in wood with a drill?
No, cutting a groove in wood with a drill is not very difficult. It just requires a steady hand and some practice to get the groove straight and even.
What are some tips for cutting a groove in wood with a drill?
Some tips for cutting a groove in wood with a drill include measuring and marking the desired groove before starting, using a depth stop collar to control the depth of the groove, and going slow and steady to ensure accuracy.
Can I use any type of drill bit to cut a groove in wood?
While you can use various types of drill bits to cut a groove in wood, it is recommended to use a router bit or a straight bit specifically designed for cutting grooves. These bits are more efficient and provide cleaner cuts.
What are some common uses for grooves in wood?
Grooves in wood can be used for various purposes, such as creating decorative designs, joining wood pieces together, or for the installation of sliding doors or panels.
What safety precautions should I take when cutting a groove in wood with a drill?
When cutting a groove in wood with a drill, it is important to wear safety goggles to protect your eyes from wood chips or flying debris. Additionally, make sure to secure the wood piece properly and maintain a firm grip on the drill to prevent any accidents.
Can I cut a groove in wood with a cordless drill?
Yes, you can cut a groove in wood with a cordless drill. However, it is important to ensure that the drill has enough power and a suitable drill bit to effectively cut through the wood.
Video:


Meet Harrison Clayton, a distinguished author and home remodeling enthusiast whose expertise in the realm of renovation is second to none. With a passion for transforming houses into inviting homes, Harrison's writing at https://thehuts-eastbourne.co.uk/ brings a breath of fresh inspiration to the world of home improvement. Whether you're looking to revamp a small corner of your abode or embark on a complete home transformation, Harrison's articles provide the essential expertise and creative flair to turn your visions into reality. So, dive into the captivating world of home remodeling with Harrison Clayton and unlock the full potential of your living space with every word he writes.


