Drilling into Metal Studs: A Comprehensive Guide

When it comes to hanging objects on your walls, metal studs can present a unique challenge. Unlike traditional wooden studs, metal studs are not as forgiving when it comes to drilling holes. However, with the right tools and techniques, drilling into metal studs can be easily accomplished.
First and foremost, it’s important to use the correct drill bit for drilling into metal studs. The best drill bit for this task is a carbide-tipped bit, as it is specifically designed to cut through metal. Standard drill bits or even masonry bits can become dull or break when used on metal studs, so it’s crucial to invest in a high-quality carbide-tipped bit.
Before you begin drilling, it’s essential to locate the center of the stud. Using a stud finder or a magnet will help you determine the exact position of the metal stud. Once you’ve located the stud, mark the center point with a pencil or a small piece of masking tape.
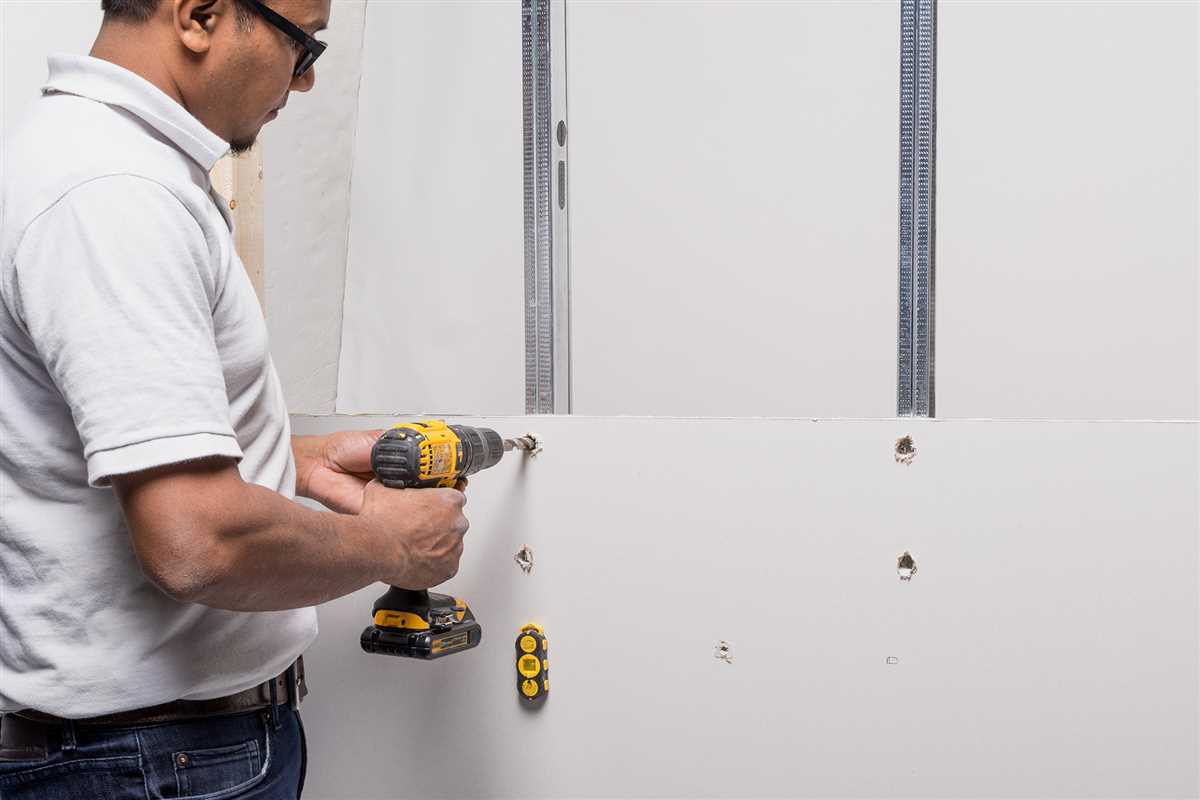
When drilling into metal studs, it’s important to use slow and steady pressure. Applying too much force can cause the bit to slip or even break. Start drilling at a low speed and gradually increase the speed as you go. Remember to periodically stop and clear away any metal shavings to prevent them from accumulating and causing the bit to overheat.
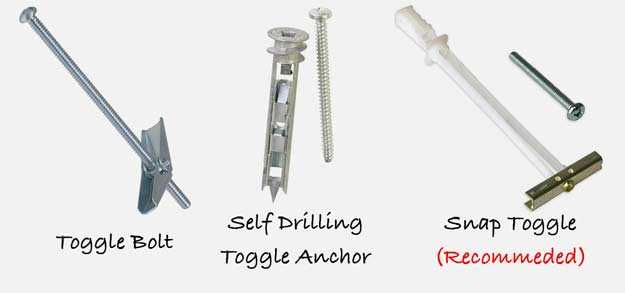
Keep in mind that metal studs are generally thinner and less stable than wooden studs, so it’s important to choose the right hanging hardware for your project. Anchors, such as toggle bolts or self-drilling anchors, are often recommended for securing objects to metal studs. These types of anchors distribute the weight more evenly and provide a secure hold.
By following these steps and taking the necessary precautions, drilling into metal studs can be a simple and successful task. Whether you’re hanging shelves, artwork, or a television mount, understanding the proper technique will ensure that your objects are securely fastened to the wall and don’t cause any damage to your metal studs.

Why You Need to Drill into Metal Studs
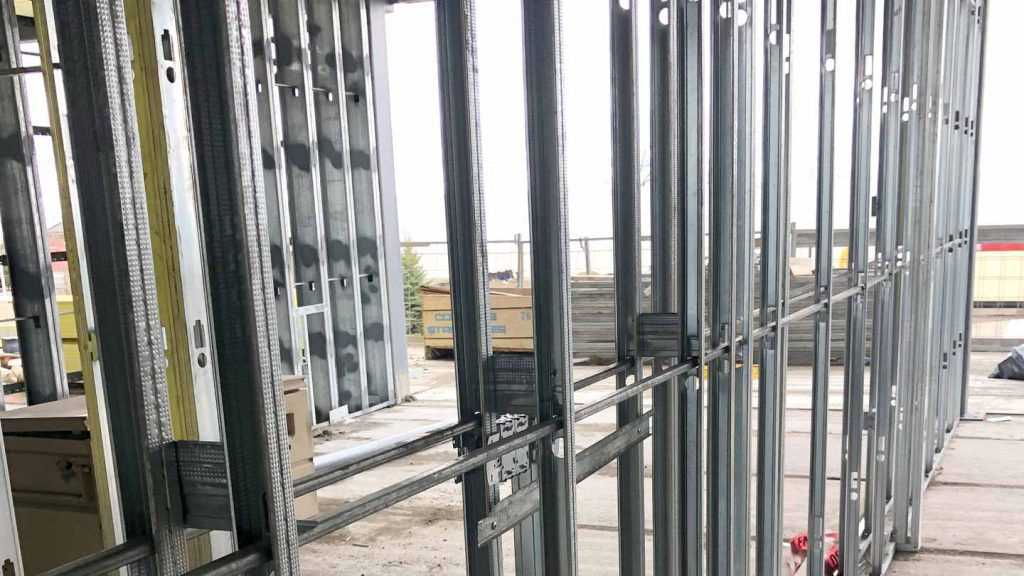
Drilling into metal studs is a necessary task in many construction and DIY projects. While traditional wooden studs have been widely used in the past, metal studs have gained popularity due to their durability, affordability, and ease of installation.
There are several reasons why you may need to drill into metal studs:
- Mounting heavy objects: Metal studs provide a sturdy and secure support structure for mounting heavy objects, such as shelves, cabinets, and TVs. Drilling into metal studs ensures that these objects are securely and safely attached to the wall.
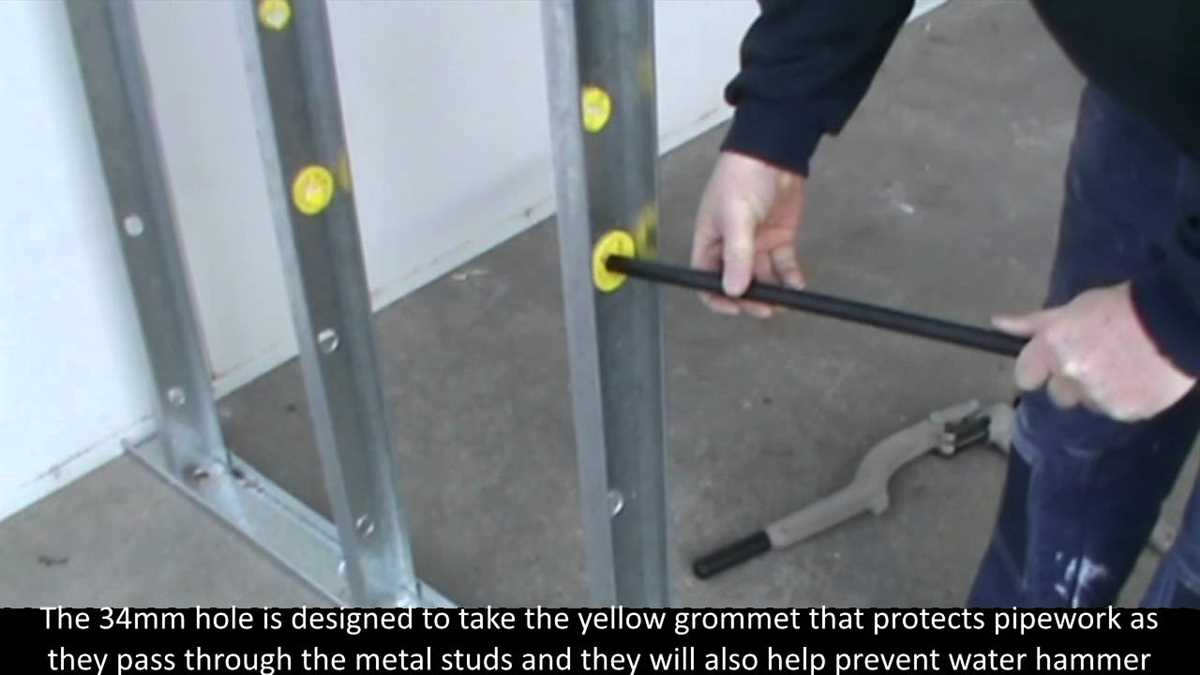
- Routing electrical wires or plumbing: When installing electrical wiring or plumbing in a building with metal studs, drilling holes in the studs allows for easy route planning and installation. It also helps to prevent damage to the wires or pipes.
- Hanging wall decorations: Whether you want to hang artwork, mirrors, or wall shelves, drilling into metal studs provides a reliable anchor point. This ensures that your decorations are securely fastened to the wall and won’t accidentally fall.
- Structural reinforcement: Metal studs can be used to reinforce weak or damaged areas of a wall. By drilling into the studs and inserting screws or bolts, you can strengthen the structure and prevent further damage.
It is important to note that drilling into metal studs requires appropriate tools and techniques. Using the wrong type of drill bit or applying too much pressure can damage the studs or result in a weak and unreliable attachment. Therefore, it is essential to follow proper guidelines and precautions when drilling into metal studs.
Overall, drilling into metal studs is a necessary skill for any construction or DIY enthusiast. It allows for secure mounting of objects, easy installation of electrical wiring or plumbing, and reinforcement of weak areas. With the right tools and techniques, you can safely and effectively drill into metal studs for various projects.
Tools and Materials Required for Drilling into Metal Studs
Tools:
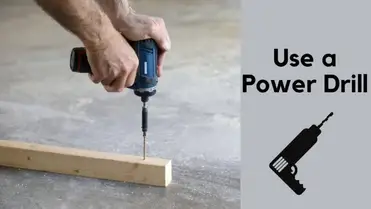
- Power Drill: A power drill is necessary for drilling into metal studs. Make sure to use a drill with enough power to drive through the metal studs.
- Drill Bits: Use high-speed steel (HSS) drill bits specifically designed for drilling into metal. These bits are harder and can withstand the force required for drilling into metal studs.
- Stud Finder: A stud finder is essential for locating the metal studs behind the wall. It helps in determining the exact position to drill the holes.
- Level: A level is useful to ensure that the holes are drilled straight into the metal studs.
- Measuring Tape: A measuring tape helps in measuring the distance between drill holes and ensures accuracy in positioning the holes.
- Marker or Pencil: Use a marker or pencil to mark the positions on the wall where the holes will be drilled.
Materials:

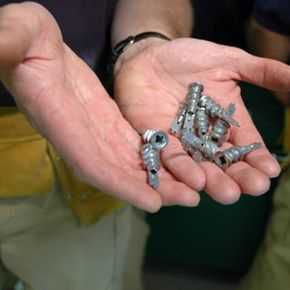
- Self-Tapping Screws: Self-tapping screws are commonly used to fasten items to metal studs. They have a sharp end that can easily penetrate the metal and create their own threads.
- Anchor Screws: Anchor screws are used when additional support is required. They are inserted into pre-drilled holes in the metal studs and provide a stronger and more secure attachment.
- Protective Gear: It is important to wear safety goggles to protect your eyes from any flying debris during the drilling process. Additionally, gloves can provide extra protection for your hands.
Gathering these tools and materials before drilling into metal studs will ensure that you have everything you need for a successful and safe drilling experience.
Safety Precautions when Drilling into Metal Studs
- Wear protective gear: Before starting any drilling, make sure to protect yourself by wearing safety goggles, a dust mask, and work gloves. This will help prevent any accidents or injuries caused by flying debris.
- Check for live wires: Before drilling into metal studs, it is important to ensure that there are no live wires behind the studs. Use a voltage tester or a stud finder with a built-in wire detector to confirm the absence of any electrical wires.
- Turn off the power: To be extra cautious, it is recommended to turn off the power supply to the area where you will be drilling. This will eliminate the risk of accidental contact with live wires.
- Choose the right drill bit: When drilling into metal studs, it is crucial to use the correct type of drill bit. A high-speed steel (HSS) or cobalt drill bit is recommended for drilling into metal. Make sure the drill bit is sharp and in good condition to ensure clean and efficient drilling.
- Start with a pilot hole: To avoid any slippage or damage to the metal stud, it is advisable to start drilling with a pilot hole. The pilot hole should be smaller than the diameter of the final hole you want to achieve.
- Secure the stud: To prevent excessive movement or vibrations while drilling, it is important to secure the metal stud properly. You can use clamps or a vise to hold the stud securely in place.
- Use slow and steady pressure: When drilling into metal studs, it is important to apply slow and steady pressure. Avoid applying too much force or pushing too hard, as this can cause the drill bit to break or slip.
- Remove sharp edges: After drilling into the metal studs, it is essential to remove any sharp edges or burrs. Use a file or sandpaper to smoothen the edges and make them safe to touch.
- Clean up properly: Once you have finished drilling, make sure to clean up the work area. Remove any debris, dust, or metal shavings to prevent accidents and maintain a safe environment.
Step-by-Step Guide for Drilling into Metal Studs
Materials Needed:
- Power drill
- Drill bit suitable for metal (such as a titanium-coated or cobalt drill bit)
- Safety goggles
- Work gloves
- Measuring tape
- Pencil
- Stud finder
Note: Before starting, make sure to wear your safety goggles and work gloves to protect yourself from any potential accidents.
Step 1: Measure and Mark
Using a measuring tape, locate the area where you want to drill into the metal studs. Mark the exact spot with a pencil.
Step 2: Use a Stud Finder
Use a stud finder to locate the position of the metal stud. Slide the stud finder along the wall until it indicates the presence of a stud.

Step 3: Confirm Stud Location
Tap the area where the stud finder detected the stud to confirm its location. A solid sound indicates the presence of the stud.
Step 4: Select the Drill Bit
Select a drill bit suitable for metal. Titanium-coated or cobalt drill bits are recommended for drilling into metal studs.
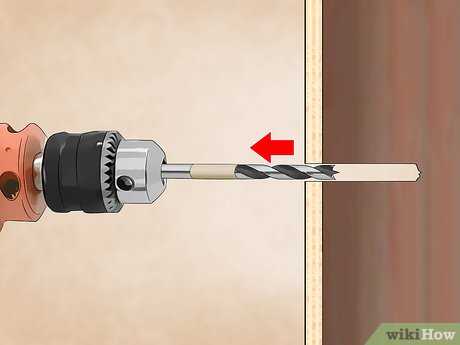
Step 5: Set up the Power Drill
Insert the appropriate drill bit into the power drill. Make sure it is properly secured before continuing.
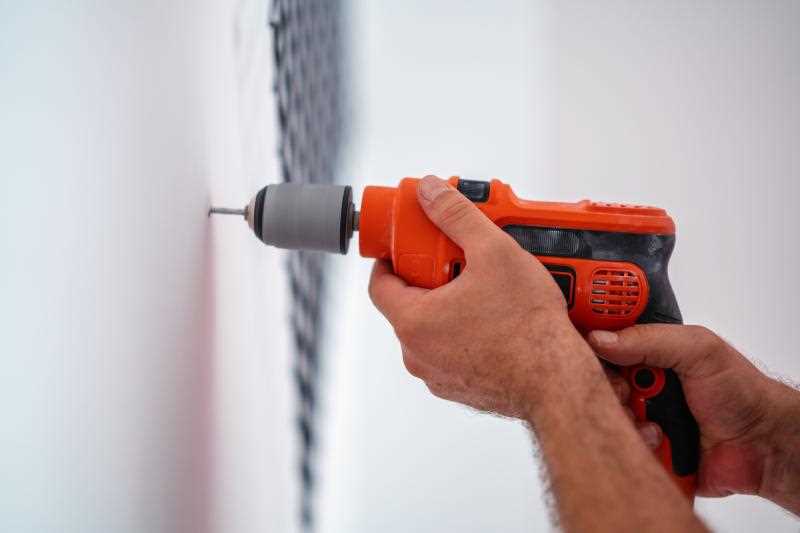
Step 6: Start Drilling
Place the drill bit on the marked spot and slowly start drilling. Apply steady and firm pressure, but avoid excessive force as it may damage the stud or cause the drill bit to break.
Step 7: Monitor Drilling Progress


Regularly check the depth of the hole while drilling. Once the desired depth is reached, stop drilling.
Step 8: Repeat if Necessary
If you need to drill additional holes into the metal stud, repeat steps 1-7 following the desired location and measurements.
Step 9: Clean Up
After drilling, make sure to clean up any debris or metal shavings. This will help prevent any accidents or damage to the surrounding areas.
Step 10: Proceed with the Desired Task

You can now proceed with the desired task, such as mounting a TV, installing shelves, or hanging a heavy mirror, using the drilled holes in the metal stud.
Additional Tips:
- Do not rush the drilling process. Take your time and apply steady pressure for better results.
- If you encounter resistance while drilling, it could mean you have hit a knot or other obstruction in the stud. Adjust your drilling technique to work around it.
- Always wear appropriate safety gear to protect yourself from any potential hazards.
Common Mistakes to Avoid when Drilling into Metal Studs
Drilling into metal studs can be a tricky task, especially if you are not familiar with the proper techniques. To ensure a successful drilling experience, it is important to avoid these common mistakes:
- Not using the correct drill bit: Metal studs require special drill bits that are designed for cutting through metal. Using the wrong drill bit can cause damage to the stud and result in a less secure attachment.
- Not locating the stud correctly: Before drilling into a metal stud, it is crucial to accurately locate its position. Failing to do so can lead to drilling into an empty space or hitting electrical wires or plumbing behind the stud.
- Using too much force: Unlike drilling into wood, drilling into metal studs requires a different level of force. Applying too much pressure can cause the drill bit to slip or break, and may damage the stud.
- Not supporting the stud: Metal studs can be less stable compared to their wooden counterparts. It is important to provide support behind the stud while drilling to prevent it from flexing or bending.
- Not wearing protective gear: When drilling into metal studs, metal shavings and sparks can be produced. It is essential to wear safety goggles, gloves, and appropriate clothing to protect yourself from potential injuries.
- Ignoring electrical or plumbing lines: Before drilling into any wall, it is important to check for the presence of electrical or plumbing lines using a stud finder or other detection tools. Drilling into these lines can be dangerous and result in costly repairs.
- Using the wrong drill speed: Metal studs require a lower drill speed compared to drilling into wood. Using high speeds can cause overheating of the drill bit and reduce its lifespan.
Avoiding these common mistakes can help ensure that your drilling into metal studs is successful and avoids any damage or accidents. Always take the necessary precautions and use the right tools and techniques for the job.
Tips and Tricks for Successful Drilling into Metal Studs
Drilling into metal studs can be a tricky task, as they are more dense and sturdy compared to wooden studs. However, with the right tools and techniques, you can successfully drill into metal studs without causing damage or compromising the integrity of the wall. Here are some tips and tricks to help you achieve a successful drilling experience:
1. Use the right drill bit
One of the most important factors for successful drilling into metal studs is using the appropriate drill bit. It is recommended to use high-speed steel (HSS) drill bits or cobalt drill bits, as they are designed to withstand the hardness of metal. Avoid using regular wood drill bits, as they can quickly become dull and ineffective.
2. Start with a pilot hole
Before drilling into the metal stud, it is advisable to start with a pilot hole. This small hole will serve as a guide for the larger drill bit and prevent it from slipping or wandering off target. Use a smaller drill bit, such as a 1/8-inch or 3/16-inch bit, to create the pilot hole.
3. Apply steady pressure
When drilling into metal studs, it is important to apply steady and consistent pressure. Unlike drilling into wood, metal requires more force and patience. Avoid using excessive force, as this can cause the drill bit to break or snap. Instead, maintain a steady hand and let the drill do the work.
4. Use lubrication
Using lubrication can significantly improve the drilling process and prevent premature wear on the drill bit. Apply a small amount of cutting fluid, oil, or lubricating spray to the drill bit before drilling into the metal stud. This will reduce friction and heat, making the drilling process smoother and more efficient.
5. Mark the drilling location
Before drilling, it is essential to mark the exact location where you want to drill. Use a pencil or marker to make a clear and visible mark on the metal stud. This will ensure that you drill in the right spot and avoid any mistakes or unnecessary holes in the wall.
6. Use a low-speed setting
When drilling into metal studs, it is recommended to use a low-speed setting on your drill. High-speed settings can cause the drill bit to overheat and lose its sharpness more quickly. Adjust your drill to a slower speed to maintain control and prolong the life of the drill bit.
7. Secure the stud if necessary
If the metal stud feels unstable or wobbly while drilling, it is crucial to secure it to prevent any accidents or damage. Use clamps or vice grips to hold the stud in place, ensuring it remains steady as you drill.
8. Clean up metal shavings
After drilling into the metal stud, it is important to clean up any metal shavings or debris that may be left behind. Use a vacuum, brush, or damp cloth to remove the shavings and maintain a clean work area.
By following these tips and tricks, you can ensure a successful drilling experience into metal studs. Remember to prioritize safety, use the right tools, and take your time to achieve accurate and precise results.
FAQ:
Is it possible to drill into metal studs?
Yes, it is possible to drill into metal studs. However, it requires using the right tools and techniques to avoid damaging the studs.
What tools do I need to drill into metal studs?
To drill into metal studs, you will need a drill with a metal drill bit, a stud finder, and safety goggles. Additionally, you may need a center punch, hammer, and an awl to create starter holes.
Can I use a regular drill bit to drill into metal studs?
No, it is not recommended to use a regular drill bit to drill into metal studs. Metal drill bits are specifically designed to drill through metal and have a pointed tip and fluted shape to remove the metal chips.
How do I find the center of a metal stud?
To find the center of a metal stud, you can use a stud finder, which is a handheld device that detects the presence of the metal stud. Once you locate the edges of the stud, mark them, and the center will be halfway between the marks.
Do I need to use a pilot hole when drilling into metal studs?
Yes, it is recommended to use a pilot hole when drilling into metal studs. A pilot hole helps to guide the drill bit and prevents the metal from cracking or splitting. The size of the pilot hole should be slightly smaller than the diameter of the drill bit.
What safety precautions should I take when drilling into metal studs?
When drilling into metal studs, it is important to wear safety goggles to protect your eyes from metal chips. It is also advisable to wear gloves to protect your hands. Additionally, make sure to secure the workpiece properly to prevent it from slipping or moving during the drilling process.
Are there any alternative methods to drilling into metal studs?
Yes, there are alternative methods to drilling into metal studs. These include using self-tapping screws or adhesive hooks that are designed to attach to metal surfaces. However, these methods may not be suitable for all situations and may have weight limitations.
Video:


Meet Harrison Clayton, a distinguished author and home remodeling enthusiast whose expertise in the realm of renovation is second to none. With a passion for transforming houses into inviting homes, Harrison's writing at https://thehuts-eastbourne.co.uk/ brings a breath of fresh inspiration to the world of home improvement. Whether you're looking to revamp a small corner of your abode or embark on a complete home transformation, Harrison's articles provide the essential expertise and creative flair to turn your visions into reality. So, dive into the captivating world of home remodeling with Harrison Clayton and unlock the full potential of your living space with every word he writes.


