How to Safely Drill into a Wall: Tips and Tricks

Drilling into a wall may seem like a simple task, but it can actually be quite tricky if you don’t take the proper precautions. Whether you’re hanging a shelf, installing a curtain rod, or mounting a TV, it’s important to approach the job with care to avoid damaging the wall or injuring yourself. In this article, we’ll provide you with some essential tips and tricks to help you safely drill into a wall.
1. Choose the Right Drill Bit
Before you start drilling, make sure you have the appropriate drill bit for the job. The type of drill bit you need will depend on the material of your wall. For example, if you’re drilling into drywall, a standard twist drill bit should suffice. However, if you’re drilling into masonry or concrete, you’ll need a masonry drill bit.
“Remember to read the instructions before you start drilling and make sure the drill bit is securely attached to the drill.”
2. Locate Studs or Anchors

It’s important to know where the studs or anchors are located in your wall before you start drilling. Studs provide more support for heavy items, so if you’re hanging something heavy, it’s best to drill into a stud. You can use a stud finder or tap on the wall to locate the studs. If you can’t find any studs, you’ll need to use wall anchors to hold your screws in place.
“Using a stud finder can save you a lot of time and effort, and prevent unnecessary damage to your wall.”
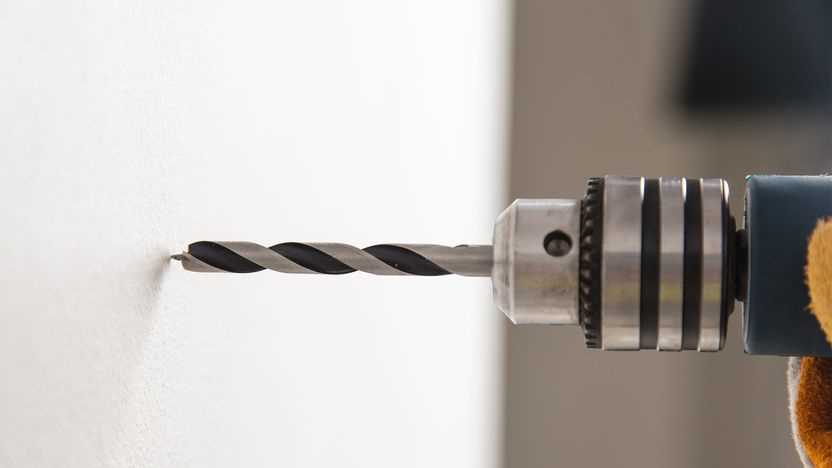
3. Start Small and Drill Slowly
When drilling into a wall, it’s a good idea to start with a small pilot hole before drilling the full-sized hole. This will help guide the drill and reduce the risk of the drill bit slipping. Additionally, drilling slowly will give you more control and prevent overheating of the drill bit. Take your time and apply gentle pressure while drilling.
“Remember to keep the drill level and straight to avoid creating angled or crooked holes.”
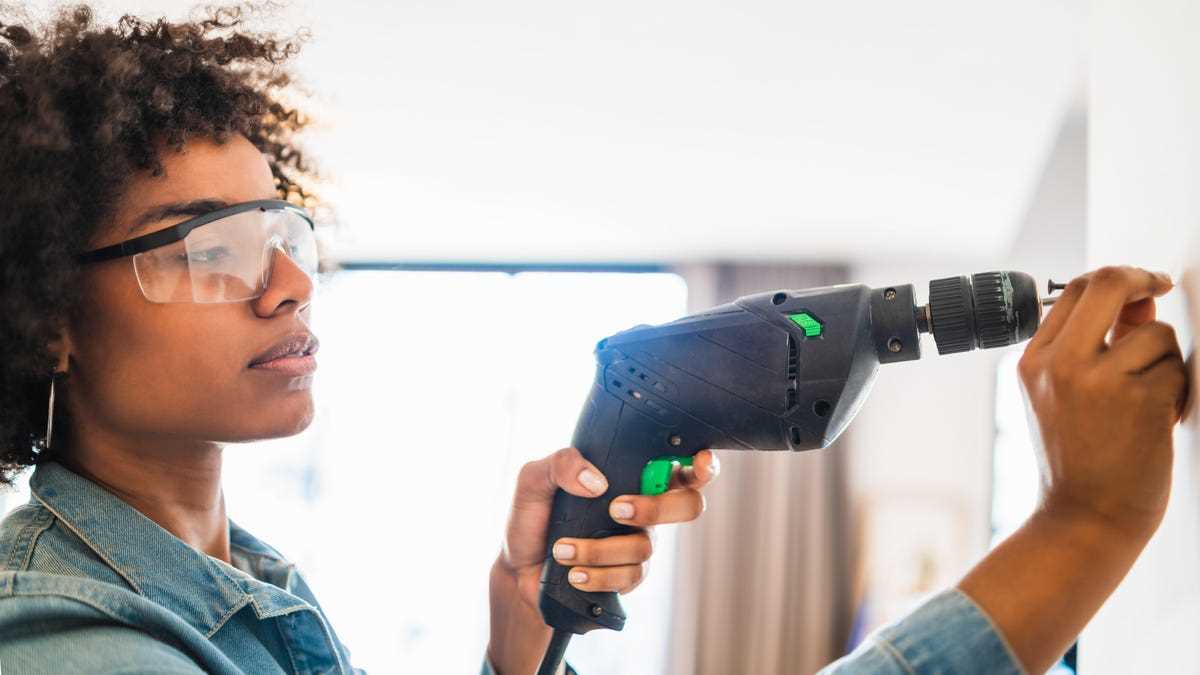
4. Use Proper Safety Gear

When drilling into a wall, it’s important to protect yourself by wearing the appropriate safety gear. This includes safety glasses to protect your eyes from flying debris, and earplugs if the drilling is particularly loud. It’s also a good idea to wear gloves to protect your hands from sharp edges or hot surfaces.
“Safety should always be your top priority when using power tools.”
By following these tips and tricks, you can ensure a safe and successful drilling experience. Remember to always use caution and take your time when drilling into a wall. With the right tools and techniques, you’ll be able to easily complete your home improvement projects without any mishaps.
Choosing the Right Drill
When it comes to drilling into a wall, choosing the right drill is essential. The right drill will make the job easier and produce better results. Here are some factors to consider when selecting a drill:

Type of Drill
- There are several types of drills available, including cordless drills, hammer drills, and impact drills.
- Cordless drills are convenient because they don’t require a power cord, but they may not have as much power as corded drills.
- Hammer drills are designed for drilling into harder surfaces, such as concrete or masonry.
- Impact drills combine the features of a regular drill with a hammer drill for added versatility.
Power
Consider the power of the drill you need for your project. Higher voltage drills usually have more power and can handle tougher materials. If you’re only drilling into drywall or wood, a lower voltage drill may be sufficient.
Chuck Size
The chuck size refers to the diameter of the hole that the drill bit fits into. A larger chuck size allows for the use of larger drill bits and provides more versatility. However, for most home projects, a standard chuck size of 3/8 or 1/2 inch should be sufficient.
Speed and Torque Settings
Look for a drill with variable speed settings, as this will allow you to adjust the speed to match the material you are drilling into. Additionally, a drill with multiple torque settings can help prevent overdriving screws and damaging the surface.
Additional Features
- Consider any additional features that may be helpful for your specific needs. Some drills come with built-in LED lights, which can provide better visibility in dimly lit areas. Others may have a built-in level or a magnetic plate to hold screws.
- It’s also worth considering the weight and ergonomics of the drill. You want a drill that feels comfortable to hold and use for extended periods.
By considering these factors, you can choose the right drill for your project and ensure a safer and more successful drilling experience.
Selecting the Right Drill Bit
When it comes to drilling into a wall, selecting the right drill bit is crucial. The type of drill bit you choose will depend on the material of the wall you are drilling into and the size of the hole you need to create. Here are some tips to help you select the right drill bit:

- Consider the material: Different materials require different drill bits. For example, masonry walls require a masonry drill bit, while wood walls require a wood drill bit. Make sure you choose a drill bit that is designed specifically for the material you are drilling into.
- Check the size: The size of the hole you need to create will determine the size of the drill bit you should use. Drill bits come in a variety of sizes, so ensure you choose one that matches the diameter of the hole you want to drill.
- Look for special features: Depending on your project, you may need a drill bit with special features. For example, if you are working with tile, a tile drill bit with a carbide tip may be necessary to avoid cracking the tile. Additionally, some drill bits have a fluted design that helps to remove debris while drilling.
- Consider the type of drill: The type of drill you are using will also affect the type of drill bit you need. For example, if you are using a hammer drill, you will need a drill bit that is specifically designed for use with a hammer action.
By carefully considering the material, size, special features, and type of drill, you can select the right drill bit for your project. This will help ensure that you achieve accurate and clean holes without damaging the wall.
Locating the Studs
Before drilling into a wall, it’s important to locate the studs. Studs are vertical wooden or metal beams that provide structural support to the wall. Drilling into a stud ensures that your screws or nails will be firmly anchored, making your installation safe and secure.
1. Use a Stud Finder
One of the easiest and most accurate ways to locate studs is by using a stud finder. This handheld device uses electronic sensors to detect changes in density behind the wall, indicating the presence of a stud. Start by turning on the stud finder and running it horizontally along the wall. When the stud finder beeps or lights up, mark the spot with a pencil. Repeat this process in a vertical pattern to locate the edges of the stud.
2. Look for Visual Cues
If you don’t have a stud finder, you can also look for visual cues that may indicate the presence of a stud. These include electrical outlets, light switches, and baseboards. Studs are typically placed 16 or 24 inches apart, so once you’ve found one stud, you can measure the distance to find additional studs.
3. Knock on the Wall
Another method is to simply knock on the wall and listen for a solid sound. When you knock on an area where there is a stud, the sound will be duller and less hollow compared to the rest of the wall. This technique requires practice and may not always be reliable, especially if the wall has insulation or other materials that can affect the sound.

4. Use a Magnet
If you have a small magnet, you can run it along the wall to locate the screws or nails that hold the drywall to the studs. These metal fasteners will stick to the magnet, indicating the position of the studs.
5. Measure from a Corner
If all else fails, you can measure from a corner to locate the studs. Studs are typically placed 16 inches apart, so you can measure 16 inches from a corner and mark the spot. Continue measuring in 16-inch increments to find additional studs.
Once you’ve located the studs, it’s important to mark their positions on the wall using a pencil or painter’s tape. This will ensure that you drill in the correct spot and avoid damaging the wall or hitting any electrical or plumbing lines. Remember to double-check your measurements and always use caution when drilling into a wall.
Marking the Drilling Spot
Before you start drilling into a wall, it is important to properly mark the spot where you want to place the hole. This will help ensure accuracy and prevent any unnecessary damage to the wall. Here are some tips and tricks for marking the drilling spot:
- Measure and locate: Use a tape measure or ruler to determine the exact location where you want to drill. Mark this spot with a pencil or a piece of masking tape.
- Find the stud: If you are drilling into a stud wall, it is important to locate the stud beforehand. You can use a stud finder or knock on the wall to listen for a solid sound. Mark the stud location with an “X” to avoid drilling in the wrong spot.
- Use a level: To ensure that your drilling spot is straight and level, place a level against the wall and adjust the position of the mark if needed. This will help prevent the drill from going in at an angle.
- Consider the wall material: Different wall materials may require different approaches when marking the spot. For example, if you are drilling into a tile wall, you can use a nail or awl to create a small indentation for the drill bit to catch on.
- Double-check the markings: Before you start drilling, take a moment to double-check your markings to ensure they are accurate. This will save you time and frustration later on.
By following these tips for marking the drilling spot, you can ensure that your drilling project goes smoothly and results in a clean and professional-looking finish.
Using a Level
Using a level is an important step in ensuring that your drilled holes are straight and even. Here are some tips for using a level effectively:
1. Choose a Level
There are different types of levels available, including bubble levels, laser levels, and digital levels. Choose the one that suits your needs and budget. Bubble levels are the most common and affordable option for most DIY projects.
2. Position the Level
Place the level vertically or horizontally on the wall where you plan to drill the hole. Make sure it is positioned securely and parallel to the surface. Rest the level on the wall, and adjust its position until the bubble is centered between the lines on the vial.
3. Check for Accuracy
Once the level is in position, double-check its accuracy by moving it slightly and observing the bubble. If the bubble stays centered, it means the wall is level. If not, make the necessary adjustments until the bubble is centered.
4. Mark the Hole Location
Once you have determined that the wall is level, mark the location for the drill hole using a pencil or tape. This will provide a guide for drilling the hole in the correct spot.
5. Repeat the Process
If you need to drill multiple holes, repeat the process for each hole. Make sure to recheck the level before drilling each hole to ensure accuracy.
By using a level correctly, you can ensure that your drilled holes are straight and accurate, minimizing the risk of damage to your walls and achieving a professional-looking end result.
Drilling Techniques
Choose the Right Drill Bit
Before you start drilling, it’s important to choose the right drill bit for the job. The type of drill bit you need will depend on the material you’re drilling into. For example, a masonry drill bit is required for drilling into brick or concrete, while a wood drill bit is needed for drilling into wooden surfaces.
Mark the Drilling Spot
Once you’ve chosen the right drill bit, mark the spot where you want to drill. Use a pencil or marker to make a small dot on the wall. This will serve as a guide and help ensure accuracy when drilling.
Prepare the Drill
Before you start drilling, make sure your drill is set up correctly. Insert the drill bit into the chuck of the drill and tighten it securely. If you’re using a corded drill, make sure it’s plugged into a power source. If you’re using a cordless drill, ensure that the battery is charged.
Start Drilling
Firmly hold the drill with both hands and position the drill bit directly over the marked spot on the wall. Apply steady pressure and engage the drill by pressing the trigger. Start drilling at a slow speed and gradually increase the speed as you penetrate the wall. Be sure to keep the drill level and straight to avoid any accidents or damage.
Clear the Dust
As you drill into the wall, dust and debris will accumulate around the hole. It’s important to clear this dust away periodically to ensure smooth drilling. You can use a small brush or a vacuum cleaner to remove the dust. This will help keep the drill bit from clogging and ensure optimal performance.
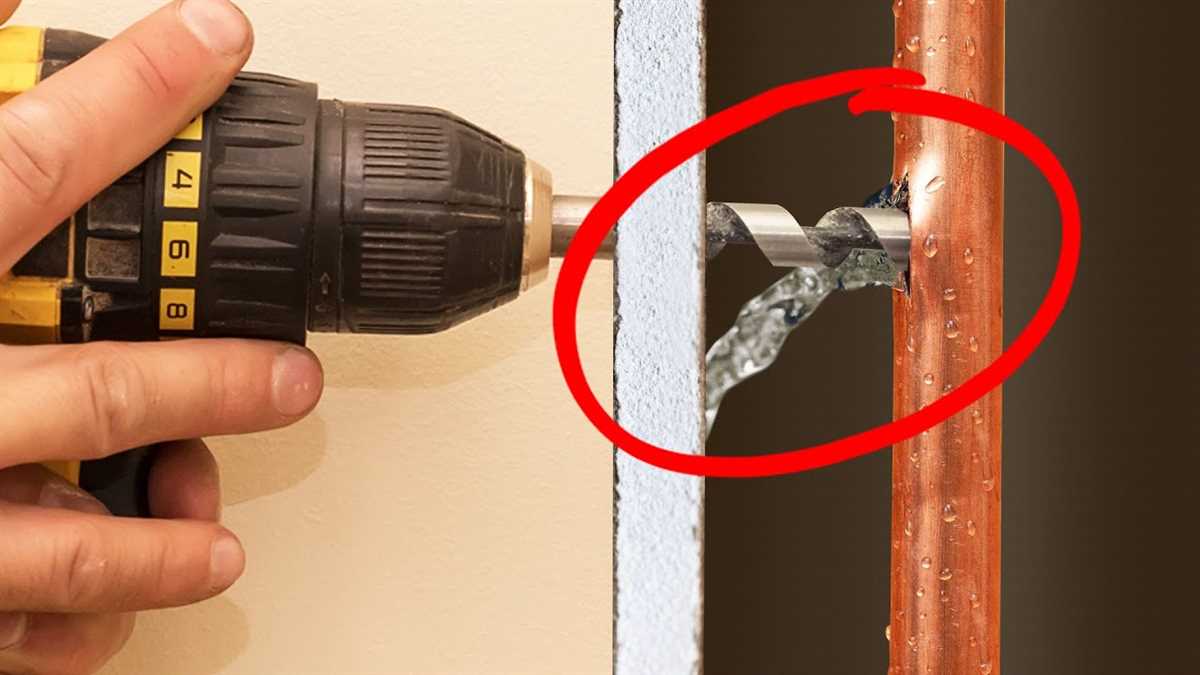
Check for Wires or Pipes
Before drilling into a wall, it’s crucial to check for any wires or pipes that may be hidden behind the surface. Use a stud finder or a wire detector to locate any potential obstacles. This will help prevent damage to electrical wiring or plumbing systems.
Secure the Wall Anchors
If you’re drilling into a wall to hang something, such as a shelf or a picture frame, you may need to use wall anchors. After drilling the hole, insert the wall anchors and tap them gently with a hammer until they are flush with the wall surface. This will provide additional support and ensure that your object is securely attached to the wall.
Clean Up
Once you’ve finished drilling, clean up any debris or dust that may have accumulated. Use a damp cloth or a vacuum cleaner to remove any remaining dust from the area. This will help maintain a clean and safe working environment.
Using Anchors
Overview
Anchors are essential when drilling into a wall as they provide extra support and prevent the screws from becoming loose over time. They help distribute the weight and tension evenly, making your wall-mounting project more secure and stable.
Types of Anchors
There are various types of anchors available in the market, and the choice depends on the weight of the item you want to hang and the type of wall you have. Here are some common types of anchors:
- Plastic Anchors: These are the most common type of anchors and are suitable for lightweight items. They expand as the screw is inserted, providing a secure hold in drywall.
- Screw Anchors: These anchors are designed for use in plaster walls. They have threads that grip into the wall, providing strong support.
- Toggle Bolts: Toggle bolts are ideal for heavy items as they provide excellent hold in drywall and plaster. They consist of a bolt with spring-loaded wings that open once inserted into the wall, providing a secure hold.
- Metal Anchors: Metal anchors are suitable for masonry and concrete walls. They provide a sturdy and reliable hold, making them perfect for heavy items.
Using Anchors
Here is a step-by-step guide on how to use anchors:
- Choose the appropriate anchor based on the weight and wall type.
- Using a drill bit slightly smaller than the anchor, drill a hole into the wall at the desired location for the anchor.
- Insert the anchor into the hole with a gentle tapping motion using a hammer. Make sure it’s flush with the wall surface.
- If using a plastic anchor, thread the screw into the anchor until it’s snug but not too tight. For other types of anchors, follow the manufacturer’s instructions on how to insert the screw.
- Tighten the screw until the item you’re hanging is secure.
Tips and Tricks
Here are some additional tips and tricks for using anchors:
- Always follow the manufacturer’s instructions for the specific type of anchor you’re using.
- Make sure to choose the right size anchor for the screw you’re using.
- Double-check for any electrical wires or pipes behind the wall before drilling.
- For extra support, use multiple anchors spaced evenly along the item you’re hanging.
- If you’re unsure about the weight or type of anchor to use, consult a professional.
Conclusion
Using anchors is crucial for securely mounting items on a wall. By choosing the right type of anchor and following the proper installation steps, you can ensure that your wall-mounted items are safe, stable, and will stay in place for years to come.
Safety Precautions
- Before beginning any drilling project, always wear protective goggles to protect your eyes from flying debris.
- Make sure to locate electrical wires, pipes, and other hidden obstructions behind the wall before drilling. Use a stud finder or other detection tools to ensure you do not accidentally damage any important infrastructure.
- Ensure that the drill bit is securely attached to the drill and tightened properly. Loose or improperly secured drill bits can cause accidents or damage the wall surface.
- Always maintain a firm grip on the drill and keep your hand away from the drilling area.
- Start drilling at a slow speed and gradually increase the speed as needed. This helps to maintain control and prevents the drill from slipping or causing damage to the wall.
- Use a cordless drill or ensure that the power cord is safely positioned and not tangled or obstructed.
- When drilling into a wall, avoid excessive pressure or force. Let the drill bit do the work and apply steady, even pressure as needed.
- Keep your work area clear of clutter to prevent tripping hazards and to ensure easy access and movement.
- If you are unfamiliar with drilling or have any doubts about your abilities, consider hiring a professional to handle the job.
By following these safety precautions, you can minimize the risk of accidents, injuries, and damage to your walls or home. It is important to prioritize safety and take the necessary precautions when drilling into walls.
FAQ:
What precautions should I take before drilling into a wall?
Before drilling into a wall, you should ensure that you know what is behind the area you want to drill. Use a stud finder to locate any electrical wires or plumbing pipes. It is also important to wear safety goggles and a dust mask to protect yourself from dust and debris.
What tools do I need for drilling into a wall?
For drilling into a wall, you will need a power drill, drill bits suitable for your wall type, a stud finder, a level, a pencil, and a tape measure. It is also helpful to have a vacuum or a brush to clean up the dust after drilling.
How do I find studs in a wall?
To find studs in a wall, you can use a stud finder. Simply move the stud finder along the wall and wait for it to indicate when it is over a stud. Once you locate a stud, mark the spot with a pencil so you know where to drill.
What should I do if I accidentally hit a wire while drilling?
If you accidentally hit a wire while drilling, the first thing you should do is turn off the power in that area of the house. If necessary, you may need to call a professional electrician to assess the damage and make any necessary repairs.
Can I drill into any type of wall?
No, you cannot drill into any type of wall without considering its composition. Different types of walls, such as drywall, plaster, or concrete, require different drill bits and drilling techniques. It is important to use the correct tools and methods for your specific wall type.
Video:


Meet Harrison Clayton, a distinguished author and home remodeling enthusiast whose expertise in the realm of renovation is second to none. With a passion for transforming houses into inviting homes, Harrison's writing at https://thehuts-eastbourne.co.uk/ brings a breath of fresh inspiration to the world of home improvement. Whether you're looking to revamp a small corner of your abode or embark on a complete home transformation, Harrison's articles provide the essential expertise and creative flair to turn your visions into reality. So, dive into the captivating world of home remodeling with Harrison Clayton and unlock the full potential of your living space with every word he writes.


