How to remove Disk Drill from Mac: Step-by-Step Guide

If you’re a Mac user looking to remove Disk Drill from your computer, you’ve come to the right place. Disk Drill is a popular data recovery software for Mac that helps you recover lost or deleted files. However, if you no longer need the software or want to free up space on your Mac, uninstalling Disk Drill is a straightforward process.
In this step-by-step guide, we will walk you through the process of removing Disk Drill from your Mac. Whether you’re a beginner or an experienced user, these instructions will help you successfully uninstall the software without any hassle.
Before we proceed with the uninstallation process, it’s important to note that removing Disk Drill will permanently delete any data or files that were recovered using the software. Make sure to back up any important files before proceeding.
Now, let’s get started with the uninstallation process of Disk Drill from your Mac.
Close Disk Drill application

The first step to remove Disk Drill from your Mac is to close the application. Here’s how you can do it:
- Click on the Disk Drill icon in the Dock to bring up the application.
- Go to the top menu bar and click on the “Disk Drill” menu.
- In the dropdown menu, select “Quit Disk Drill” to close the application.
Alternatively, you can also use the keyboard shortcut Command + Q to quickly quit the application.
Once you have successfully closed Disk Drill, you can proceed with the uninstallation process to completely remove it from your Mac.
Remove Disk Drill from the Applications folder
If you no longer need Disk Drill on your Mac and want to remove it from your Applications folder, you can follow these steps:

- Open Finder on your Mac by clicking on the Finder icon in the Dock.
- In the menu bar, click on “Go” and select “Applications” from the drop-down menu. Alternatively, you can use the shortcut “Shift + Command + A”.
- A new Finder window will open, displaying all the applications installed on your Mac.
- Scroll through the list of applications to locate Disk Drill. You can also use the search bar in the top-right corner of the Finder window and type “Disk Drill” to quickly find the application.
- Once you have found Disk Drill, click on it to select it.
- Next, drag and drop Disk Drill into the Trash icon in the Dock. Alternatively, you can right-click on Disk Drill and select “Move to Trash” from the contextual menu.
- A confirmation dialog will appear asking if you are sure you want to move the application to the Trash. Click “Remove” to confirm.
- Finally, empty the Trash to permanently remove Disk Drill from your Mac. You can do this by right-clicking on the Trash icon in the Dock and selecting “Empty Trash” from the contextual menu.
After following these steps, Disk Drill will be completely removed from your Mac’s Applications folder.
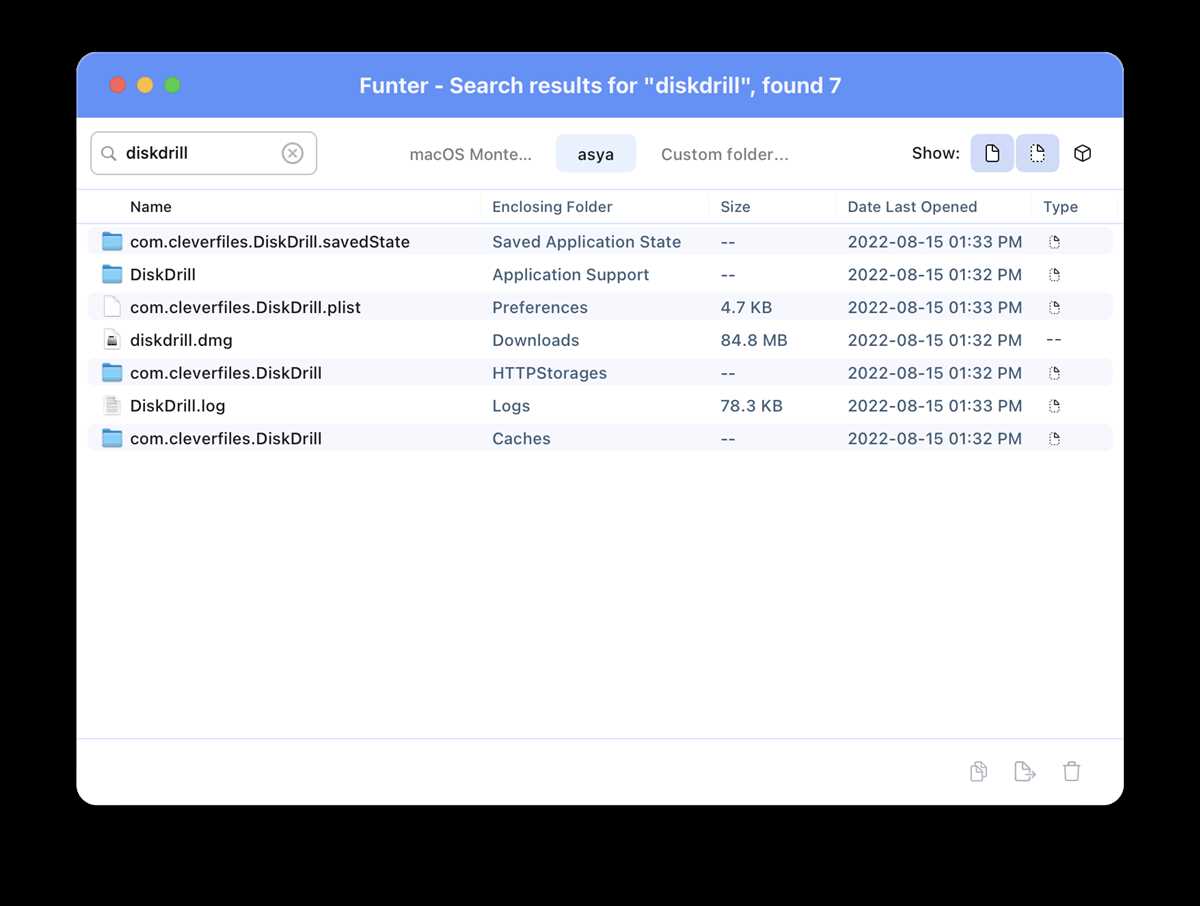
Delete Disk Drill-related files and folders
When uninstalling Disk Drill from your Mac, you’ll also want to remove any associated files and folders to ensure a complete removal. Follow the steps below to delete Disk Drill-related files and folders:
- Open Finder on your Mac.
- Click on the “Go” menu in the top menu bar.
- Hold down the “Option” key on your keyboard to reveal the “Library” option in the dropdown menu.
- Click on the “Library” option to open the Library folder.
Within the Library folder, navigate to the following locations:
- Application Support:
- Open the “Application Support” folder.
- Search for any folders related to Disk Drill. These folders may have names like “Disk Drill” or “CleverFiles”.
- If you find any Disk Drill-related folders, right-click on them and select “Move to Trash” to delete them.
- Caches:
- Open the “Caches” folder.
- Search for any files or folders related to Disk Drill. These files or folders may have names like “com.cleverfiles” or “Disk Drill”.
- If you find any Disk Drill-related files or folders, right-click on them and select “Move to Trash” to delete them.
- Preferences:
- Open the “Preferences” folder.
- Search for any files related to Disk Drill. These files may have names like “com.cleverfiles.diskdrill.plist”.
- If you find any Disk Drill-related files, right-click on them and select “Move to Trash” to delete them.
Once you have deleted all the Disk Drill-related files and folders, remember to empty your Trash to permanently remove them from your Mac.

Congratulations! You have successfully deleted Disk Drill-related files and folders from your Mac.
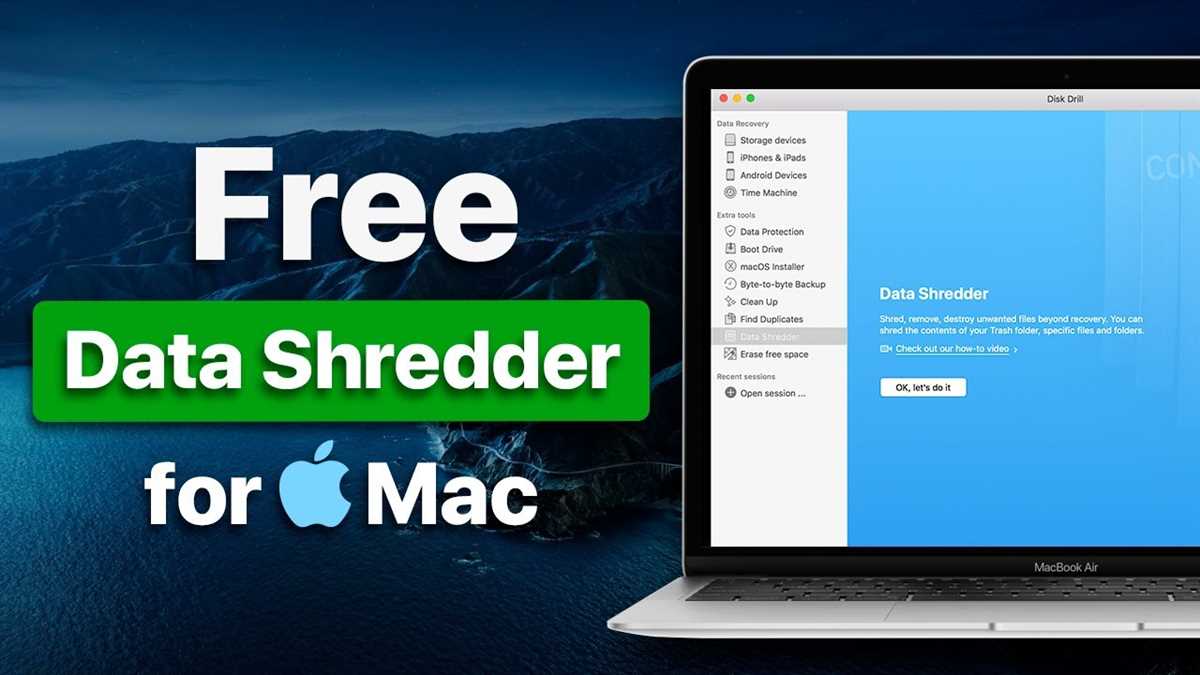
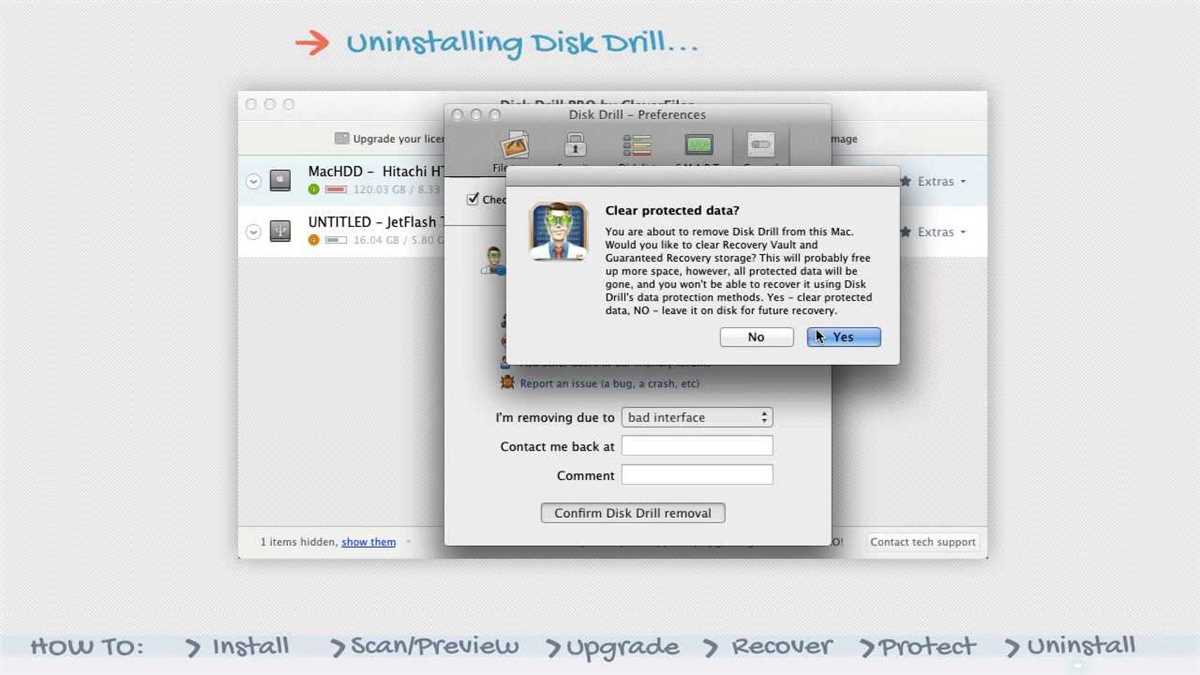
Uninstall Disk Drill with the help of its uninstaller
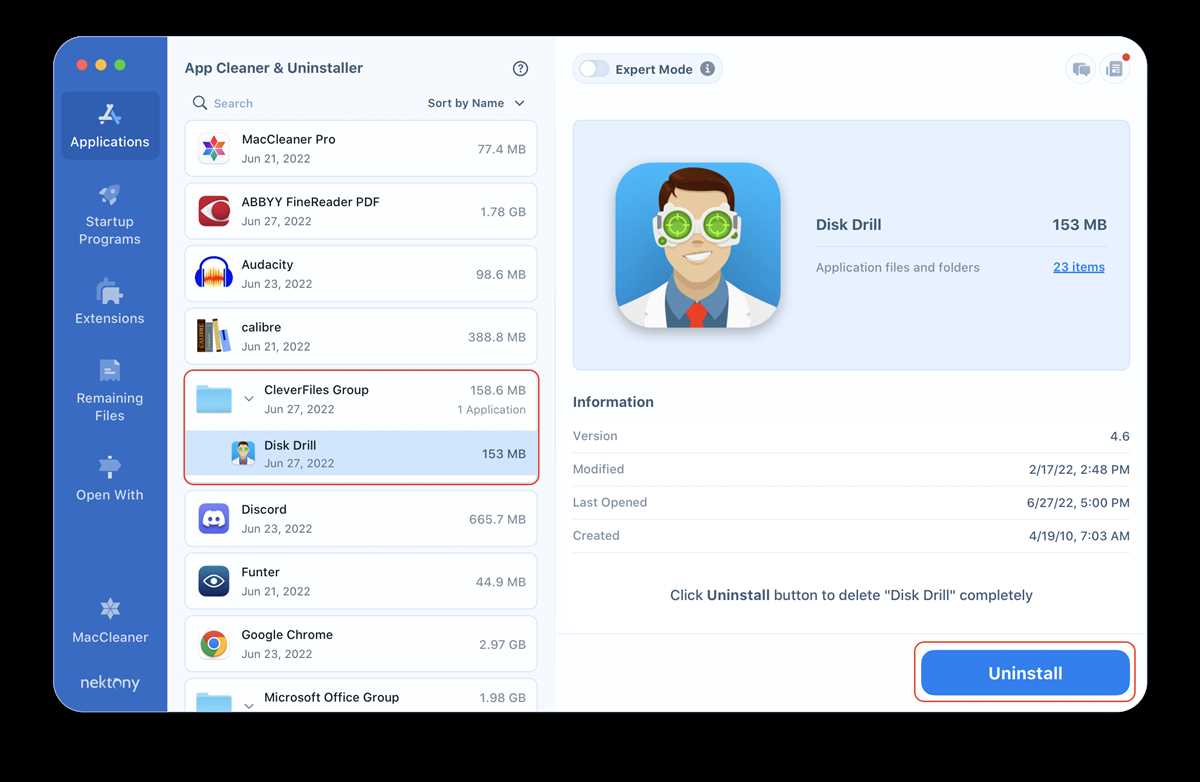
If you have decided to remove Disk Drill from your Mac, it is recommended to use the built-in uninstaller provided by the application itself. This ensures a complete removal of all associated files and settings. Here is a step-by-step guide on how to uninstall Disk Drill using its uninstaller:
- Open the Disk Drill application from the Applications folder or Launchpad on your Mac.
- If it is currently running, make sure to close it before proceeding with the uninstallation.
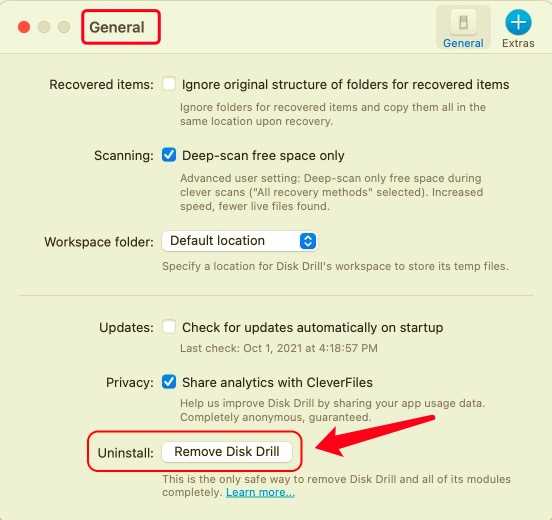
- In the top menu bar, click on “Disk Drill” and select “Preferences” from the dropdown menu.
- A preferences window will appear. Click on the “General” tab at the top.
- Scroll down to find the “Uninstall Disk Drill” button and click on it.
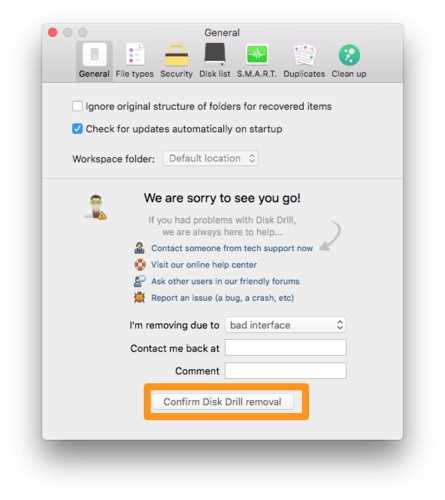
- A confirmation dialog box will pop up, asking if you are sure you want to uninstall Disk Drill. Click on the “Uninstall” button to proceed.
- Enter your administrator password when prompted to authorize the uninstallation process.
- The uninstaller will automatically remove Disk Drill from your Mac, along with all its related files and settings.
- Once the uninstallation process is complete, you will see a notification indicating that Disk Drill has been successfully uninstalled.
By following these steps, you can effectively uninstall Disk Drill from your Mac using its built-in uninstaller. Remember to restart your Mac after the uninstallation process is complete to ensure that all changes take effect.
Remove Disk Drill leftovers from Library folders

After uninstalling Disk Drill from your Mac, there might still be some leftover files and folders in the Library folders. These leftovers can take up valuable storage space and potentially interfere with other applications. To completely remove Disk Drill, follow these steps:
Step 1: Go to the Library folder
- Open a new Finder window.
- Click on “Go” in the menu bar at the top of the screen.
- Hold down the “Option” key on your keyboard to reveal the “Library” option.
- Click on “Library” to open the Library folder.
Step 2: Remove Disk Drill files and folders
In the Library folder, look for the following directories and files associated with Disk Drill:
- Application Support/DiskDrill
- Application Support/com.cleverfiles
- Caches/com.cleverfiles.Disk_Drill
- Preferences/com.cleverfiles.Disk_Drill.plist
Delete these directories and files by dragging them to the Trash or right-clicking and selecting “Move to Trash”.
Step 3: Empty the Trash

After deleting the Disk Drill files and folders, empty the Trash to permanently remove them from your Mac.
- Right-click on the Trash icon in the Dock.
- Select “Empty Trash” from the context menu.
- Click on “Empty Trash” in the confirmation dialog.
By following these steps, you will successfully remove any leftover Disk Drill files and folders from your Library directories, ensuring a clean uninstallation of the application.
Delete Disk Drill preferences and support files
If you want to completely remove Disk Drill from your Mac and delete any preferences and support files associated with the application, follow these steps:
- Quit Disk Drill if it is currently running.
- Open Finder.
- Click on “Go” in the menu bar, then select “Go to Folder…” or press Command + Shift + G on your keyboard.
- In the “Go to Folder” window, type “~/Library” (without the quotes) and click “Go”. This will open your user Library folder.
- Open the “Application Support” folder.
- Locate the folder named “DiskDrill”. Drag it to the Trash.
- Go back to the Library folder, but this time open the “Preferences” folder.
- Locate the file named “com.cleverfiles.DiskDrill.plist”. Drag it to the Trash.
- If you have used Disk Drill’s recovery feature to create any mountable Disk Images, go to the “Volumes” folder within the “Application Support” folder. Delete any Disk Images that you no longer need.
- Empty the Trash to permanently delete the Disk Drill preferences and support files.
Once you have completed these steps, Disk Drill and all associated files should be completely removed from your Mac.
Clear Disk Drill-related caches and logs
To completely remove Disk Drill from your Mac, you should also clear any related caches and logs. These files store intermediate data and records of software activities and can take up valuable space on your computer’s hard drive. Here are the steps to clear Disk Drill-related caches and logs:
- Open a Finder window on your Mac.
- Press the Command + Shift + G shortcut on your keyboard.
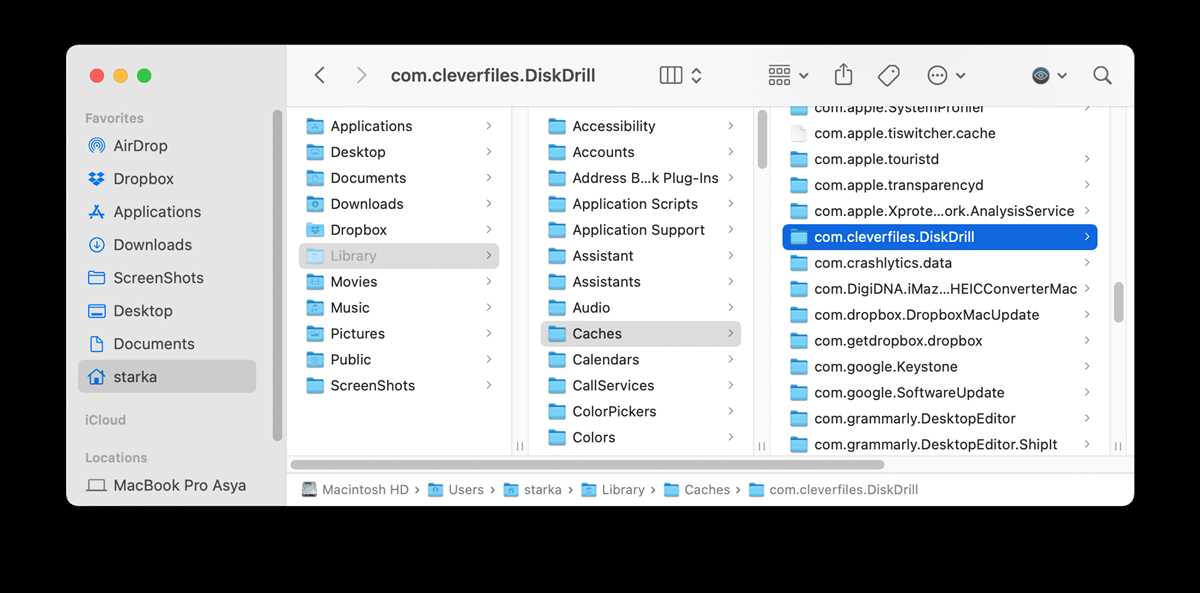
- In the “Go to the folder” window that appears, type “~/Library/Caches” (without quotes) and click on the “Go” button.
- Look for any folders related to Disk Drill, such as “com.cleverfiles.Disk Drill”.
- Select the Disk Drill-related folders and drag them to the Trash bin.
- Next, press the Command + Shift + G shortcut again.
- This time, type “~/Library/Logs” (without quotes) and click on the “Go” button.
- Look for any log files related to Disk Drill, such as “com.cleverfiles.DiskDrill.log”.
- Select the Disk Drill-related log files and drag them to the Trash bin.
- Once you’ve cleared the caches and logs, empty the Trash bin to permanently delete them from your Mac.
Clearing Disk Drill-related caches and logs will help ensure that all traces of the software are removed from your Mac. It’s important to note that deleting these files will not affect any user data or important system files.
Empty the Trash to completely remove Disk Drill
After you have uninstalled Disk Drill from your Mac, there may still be some leftover files or folders in your Trash. To completely remove Disk Drill and free up space on your Mac, you need to empty the Trash.
Follow these steps to empty the Trash:
- Click on the Trash icon in the Dock.
- A window will open showing all the files and folders in the Trash.
- Click on “Empty” in the upper-right corner of the window.
- A confirmation message will appear asking if you want to permanently delete the items in the Trash. Click on “Empty Trash” to proceed.
Once you have emptied the Trash, Disk Drill and its associated files will be completely removed from your Mac. Make sure to double-check the Trash to ensure that all files related to Disk Drill have been successfully deleted.
It’s important to remember that emptying the Trash will permanently delete the files and they cannot be recovered. So, make sure there are no important files in the Trash before proceeding with the emptying process.
FAQ:
Can I remove Disk Drill from my Mac?
Yes, you can remove Disk Drill from your Mac by following a few simple steps.
What is Disk Drill?
Disk Drill is a data recovery software for Mac that helps you recover lost or deleted files.
Why would I want to remove Disk Drill from my Mac?
You may want to remove Disk Drill from your Mac if you no longer need it or if you want to free up disk space.
How do I uninstall Disk Drill from my Mac?
To uninstall Disk Drill from your Mac, you can simply drag the application to the Trash. Then, you can empty the Trash to complete the uninstallation process.
Are there any other steps I need to follow to fully remove Disk Drill from my Mac?
Yes, after dragging Disk Drill to the Trash, you should also check for and remove any related files and folders in your Library and Preferences folders.
Video:

Meet Harrison Clayton, a distinguished author and home remodeling enthusiast whose expertise in the realm of renovation is second to none. With a passion for transforming houses into inviting homes, Harrison's writing at https://thehuts-eastbourne.co.uk/ brings a breath of fresh inspiration to the world of home improvement. Whether you're looking to revamp a small corner of your abode or embark on a complete home transformation, Harrison's articles provide the essential expertise and creative flair to turn your visions into reality. So, dive into the captivating world of home remodeling with Harrison Clayton and unlock the full potential of your living space with every word he writes.


