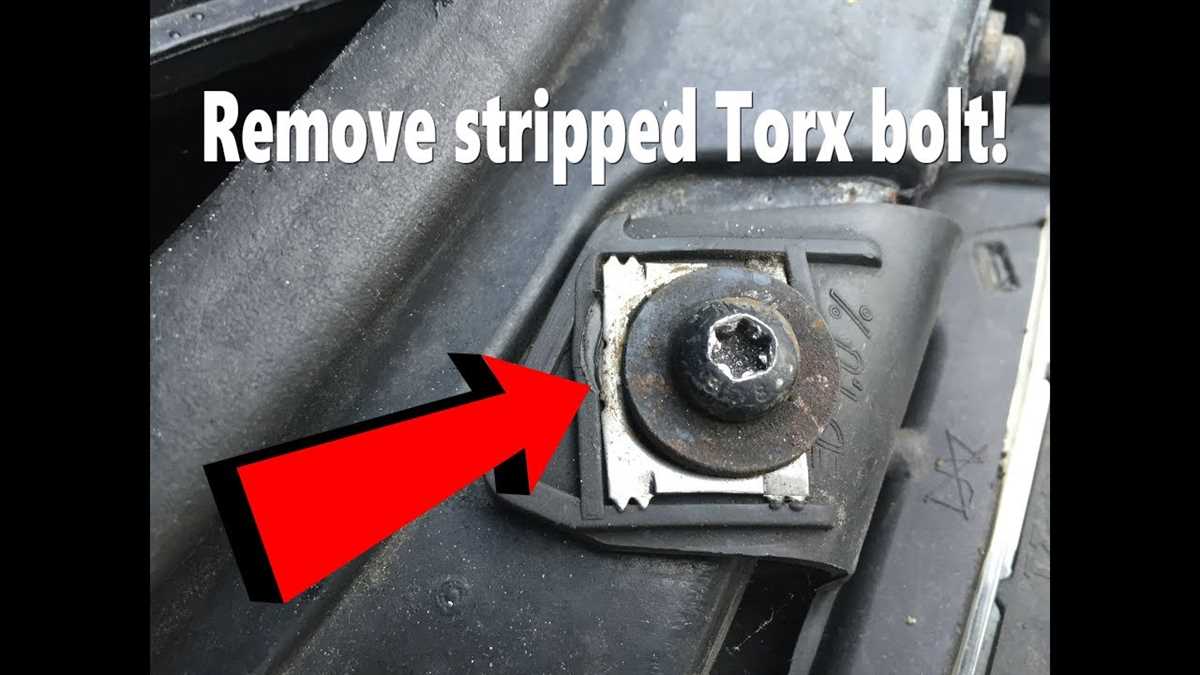
How to Remove a Stripped Bolt with Drilling Techniques
Dealing with a stripped bolt can be a frustrating and time-consuming process. Whether you’re working on a DIY project or trying to repair something, a stripped bolt can bring your progress to a halt. Luckily, there are effective drilling techniques that can help you remove a stripped bolt.
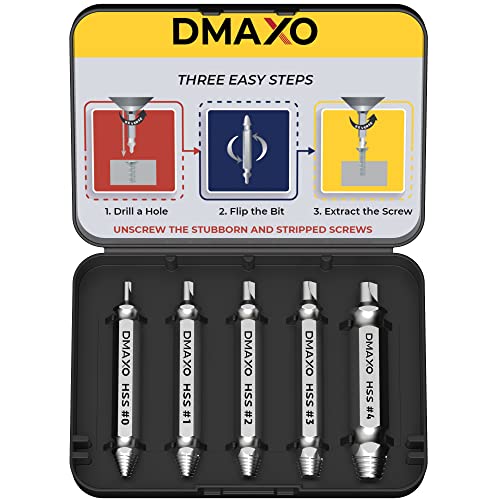
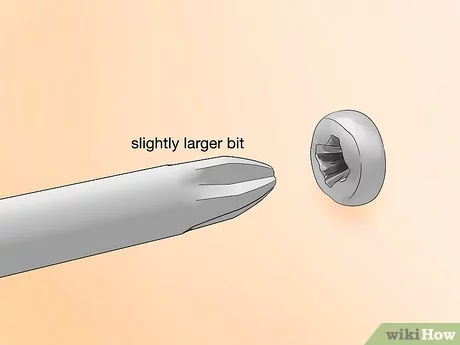
One of the most common methods for removing a stripped bolt is drilling into it. This technique involves drilling a small hole into the center of the bolt, creating a pathway for the bolt extractor or screwdriver. To begin, you’ll need a drill with a drill bit that is slightly smaller than the diameter of the bolt shaft.
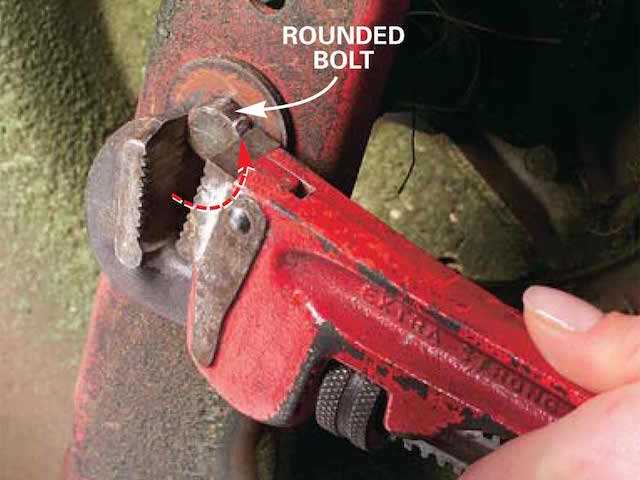
Once you have the appropriate drill bit, secure the bolt with a pair of locking pliers or a wrench to prevent it from spinning. Place the drill bit at the center of the bolt and slowly apply pressure while drilling in a clockwise motion. It’s important to start with a low drill speed to prevent the drill bit from slipping and damaging the surrounding area. As you drill deeper, increase the drill speed gradually until the entire hole is drilled.
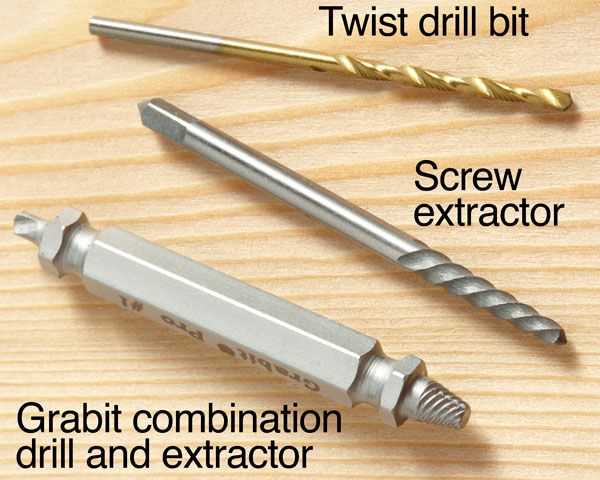
After you’ve drilled the hole, you can use a screw extractor tool or a left-handed drill bit to remove the stripped bolt. The screw extractor is designed to grip onto the sides of the hole and turn counterclockwise to loosen and remove the bolt. The left-handed drill bit, on the other hand, is designed to bite into the bolt while drilling in reverse, effectively unscrewing the bolt from the threaded hole.
In conclusion, when faced with a stripped bolt, drilling techniques can come to the rescue. By following the steps mentioned above and using the appropriate tools, you can successfully remove a stripped bolt and continue with your project. Remember to exercise caution and wear protective gear while drilling to ensure your safety. Happy bolt removal!

Assessing the Severity of the Stripped Bolt
Before attempting to remove a stripped bolt using drilling techniques, it is important to assess the severity of the damage. This will help determine the best approach to successfully remove the bolt without causing further damage to the surrounding area or the bolt itself.
Visual Inspection
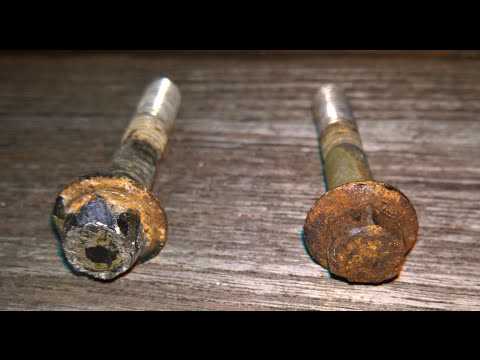
Start by visually inspecting the stripped bolt and its surroundings. Look for signs of wear and tear, rust, or any other factors that may have contributed to the bolt becoming stripped. This will help in understanding the underlying cause of the issue and guide the removal process.
Tightness of the Bolt
Determine how tight the stripped bolt is in its current state. If the bolt is loose or only slightly tightened, it may be easier to remove using non-destructive methods such as applying penetrating oil or using a wrench. If the bolt is extremely tight or seized, drilling techniques may be necessary.
Damaged Threads

Inspect the threads of the stripped bolt to determine the extent of the damage. If only a few threads are damaged, there may still be enough grip to remove the bolt using a specialized tool or techniques such as using pliers or vice grips. However, if the damaged threads are severe or extend deep into the bolt, drilling may be the most effective option.
Condition of Surrounding Material
Consider the condition of the surrounding material where the stripped bolt is located. If the material is delicate, such as in the case of a soft metal or plastic, extra caution must be taken to avoid causing further damage during the removal process. In such cases, drilling may be a last resort to prevent harming the surrounding material.
Accessibility
Assess the accessibility of the stripped bolt. If the bolt is located in a confined or hard-to-reach area, using drilling techniques to remove it may be the most practical solution. Drilling allows for the use of specialized tools and methods that can effectively remove a stripped bolt even in tight spaces.
By considering these factors, you can assess the severity of the stripped bolt and choose a suitable method for removal. It is important to be cautious and patient during the removal process to avoid causing further damage or complications.
Gather the Necessary Tools and Materials


Before you begin removing a stripped bolt using drilling techniques, make sure you have the necessary tools and materials on hand. Having everything prepared ahead of time will make the process smoother and more efficient. Here are the tools and materials you will need:
- Power drill: You will need a power drill with a drill bit that is slightly smaller than the diameter of the bolt.
- Drill bits: It is a good idea to have a selection of drill bits available, ranging in size from small to large. This will allow you to adjust the drilling size if needed.
- Center punch: A center punch is used to create a small indentation in the center of the stripped bolt. This will help guide the drill bit during drilling.
- Hammer: A hammer is used to strike the center punch and create the indentation in the bolt.
- Protective gear: It is important to wear safety goggles and gloves to protect your eyes and hands during the drilling process.
- Lubricant: Applying lubricant to the stripped bolt can help to reduce friction and make drilling easier.
- Extractor set (optional): If you have access to an extractor set, it can be useful for removing the stripped bolt after drilling.
- Pliers or wrench: Pliers or a wrench may be needed to remove the stripped bolt once it has been drilled.
By gathering all of these tools and materials before starting the removal process, you will be well-prepared to tackle the task at hand. This will help to ensure a successful and efficient removal of the stripped bolt.
Prepare the Work Area
Before you start removing a stripped bolt with drilling techniques, it’s important to prepare your work area properly. This will ensure that you have everything you need within reach and that you can work efficiently and safely.
Gather Your Tools
- Drill and drill bit set: Make sure you have a drill that is powerful enough to handle the job and a set of drill bits that includes the appropriate size for the bolt you need to remove.
- Lubricant: Having a lubricant on hand can make the drilling process smoother and help prevent overheating.
- Protective gear: Safety glasses and gloves are essential to protect your eyes and hands from any flying debris or metal shards.
- Pliers or vice grips: These tools will come in handy if you need to hold the bolt in place or if you encounter any difficulties during the drilling process.
Clean the Work Area
Clear away any clutter from your work area to create a clean and organized space. Remove any items that may get in the way or be damaged during the process.
Secure the Workpiece
If the bolt is part of a larger object, such as a machine or a piece of furniture, make sure it is securely held in place. This will prevent any shifting or movement that could affect your drilling accuracy or cause damage to the object.

Protect Surrounding Areas
Use a drop cloth or newspaper to cover nearby surfaces and protect them from potential damage. This will help catch any debris that may fly off during the drilling process and prevent it from causing harm to surrounding areas.
Applying Heat to Loosen the Stripped Bolt
When a bolt becomes stripped, it can be incredibly frustrating and difficult to remove. However, one effective method for loosening a stripped bolt is by applying heat. Heat can help to expand the metal, making it easier to remove the bolt.
Before applying heat to the stripped bolt, it is important to take safety precautions. Make sure you are working in a well-ventilated area and wear protective gloves and goggles to avoid any potential burns or injuries.
Tools and Materials Needed:
- Heat source (propane torch or heat gun)
- Fire extinguisher (for safety)
- Penetrating oil
- Ratchet or wrench
- Vice grips or locking pliers
Step-by-Step Instructions:

- Apply penetrating oil to the stripped bolt. This will help to loosen any rust or debris that may be contributing to the bolt’s tightness.
- Using a ratchet or wrench, try to turn the bolt counterclockwise to loosen it. If the bolt is still stuck, proceed to the next step.
- Choose a suitable heat source, such as a propane torch or heat gun. Hold the heat source about 6 inches away from the stripped bolt.
- Move the heat source back and forth along the bolt, heating it evenly. Be careful not to hold the heat source in one spot for too long, as this can cause damage to surrounding areas.
- Continue applying heat for about 1-2 minutes, or until the bolt is hot to the touch.
- Once the bolt is heated, quickly try to turn it counterclockwise with a ratchet or wrench. The expansion caused by the heat should make it easier to remove the bolt.
- If the bolt still doesn’t budge, use vice grips or locking pliers to grip the bolt head and provide extra leverage. Apply steady pressure while turning counterclockwise.
- If all else fails, you may need to use a drill or other extraction method to remove the stripped bolt.
Remember, applying heat to a stripped bolt can be effective, but it also carries some risk. Be cautious and make sure to follow proper safety precautions to avoid any accidents or injuries.
Drilling Pilot Holes in the Stripped Bolt
When dealing with a stripped bolt, one of the most effective techniques to remove it is by using drilling methods. One important step before drilling into the stripped bolt is to create pilot holes. Pilot holes are smaller holes that are drilled prior to the main drilling process. They serve as guides for the subsequent drilling and help prevent the bit from slipping or wandering off track.
Here is a step-by-step guide on how to create pilot holes in a stripped bolt:
- Gather the necessary tools: Firstly, gather all the required tools. This includes a power drill, drill bits, lubricant or cutting fluid, safety goggles, and gloves.
- Select the right drill bit size: Choose a drill bit that is slightly smaller in diameter than the stripped bolt. The pilot hole should be around 1/8 inch to 1/4 inch in size.
- Secure the bolt: Secure the stripped bolt firmly in a vise or clamp. This will prevent it from moving while drilling and ensure more precise results.
- Apply lubricant: Apply lubricant or cutting fluid to the pilot hole area. This will reduce friction and heat generated during the drilling process, ensuring smoother drilling.
- Position the drill bit: Position the drill bit tip at the center of the stripped bolt. Make sure the drill is set to the correct rotation speed.
- Start drilling: Press the trigger of the power drill and begin drilling slowly. Apply steady and even pressure to avoid any mishaps. Let the drill bit do the work and avoid forcing it into the bolt.
- Monitor the progress: Keep an eye on the pilot hole depth. Once the desired depth is reached, stop drilling. The pilot hole should be deep enough to guide the subsequent drilling into the stripped bolt.
- Repeat the process: Repeat the process if there are multiple stripped bolts. Create pilot holes in each one before moving on to the main drilling process.
Creating pilot holes in a stripped bolt before drilling is a crucial step in successfully removing it. These pilot holes act as guides, making the subsequent drilling process safer and more efficient.
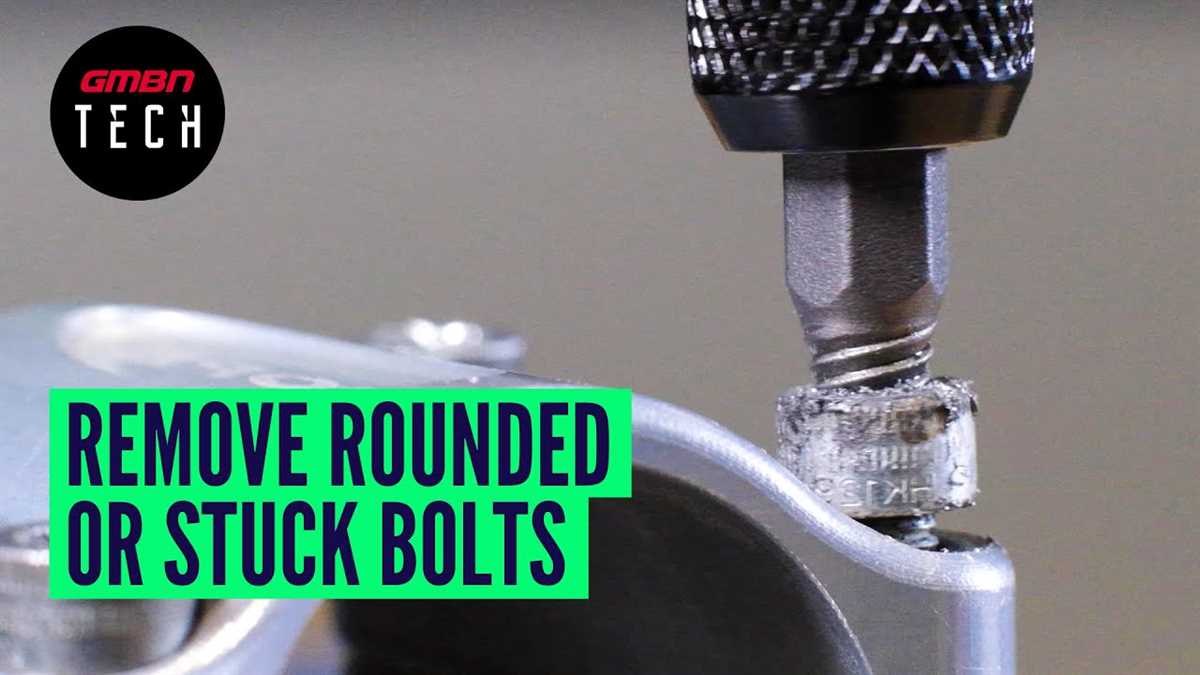
Using Easy Out Extractor Tools to Remove the Stripped Bolt
When it comes to removing a stripped bolt, one of the most effective tools you can use is an easy out extractor. These specially designed tools are made to grip onto stripped bolt heads and remove them with ease. Here are the steps to follow when using an easy out extractor:
- Assess the situation: Before using an easy out extractor, make sure the surrounding area is clear and there is enough space to work comfortably. Also, check the size and type of the stripped bolt to ensure you have the right extractor tool for the job.
- Prepare the bolt: Use a center punch to create a small indentation in the center of the stripped bolt. This will help guide the drill bit and prevent it from wandering off course.
- Select the drill bit: Choose a drill bit that matches the size of the easy out extractor. The drill bit should be slightly smaller than the extractor to allow for easier removal of the stripped bolt.
- Drill into the bolt: Carefully drill into the center of the stripped bolt using slow and steady pressure. Take care not to drill too deeply or apply too much force, as this can cause damage to the surrounding material.
- Insert the easy out extractor: Once the hole is drilled, insert the easy out extractor into the hole. Make sure it is securely in place and aligned with the stripped bolt.
- Apply turning force: Use a wrench or a pair of pliers to apply turning force to the easy out extractor. Turn it counterclockwise to loosen and remove the stripped bolt. If necessary, use some penetrating oil to help loosen any rust or debris.
- Remove the stripped bolt: After the bolt is loosened, continue turning it until it is completely removed from the threaded hole. Inspect the hole for any remaining debris or damage.
Using an easy out extractor can be a reliable method for removing stripped bolts. However, it is important to proceed with caution and take your time to avoid any further damage. If you are unsure or uncomfortable with this process, it is best to seek professional assistance.
Finishing Touches and Preventing Future Stripped Bolts
Once you have successfully removed the stripped bolt using drilling techniques, there are a few finishing touches you can apply to ensure the bolt hole is ready for a new bolt and to prevent future stripped bolts.
1. Clean the Bolt Hole
Before inserting a new bolt, it’s important to clean the bolt hole to remove any debris or metal fragments left behind from the drilling process. Use a wire brush or compressed air to clean the hole thoroughly.
2. Apply Anti-Seize Compound
To prevent future stripped bolts, apply an anti-seize compound to the threads of the new bolt. This compound acts as a lubricant and helps prevent corrosion, making it easier to remove the bolt in the future.
3. Use the Correct Torque
When tightening the new bolt, make sure to use the correct torque specifications. Over-tightening can lead to stripped bolts, while under-tightening can result in loose connections. Refer to the manufacturer’s specifications or a torque wrench for the appropriate torque setting.
4. Consider Using Thread Inserts
If you frequently encounter stripped bolts in a particular application, consider using thread inserts such as helicoils or screw thread inserts. These inserts provide a stronger threaded connection and can help prevent future stripping.
5. Regular Maintenance and Inspections
To prevent stripped bolts, it’s important to regularly inspect and maintain your equipment. Check for any signs of wear or corrosion on bolts and replace them as needed. Regularly tightening bolts to the correct torque can also help prevent stripping.
6. Use the Right Tools
Using the right tools for the job is essential in preventing stripped bolts. Invest in high-quality wrenches, sockets, and impact drivers to ensure a secure and proper fit when tightening bolts. Avoid using tools that are worn or damaged.
By following these finishing touches and implementing preventive measures, you can minimize the occurrence of stripped bolts and ensure the longevity of your equipment.
FAQ:
What is a stripped bolt?
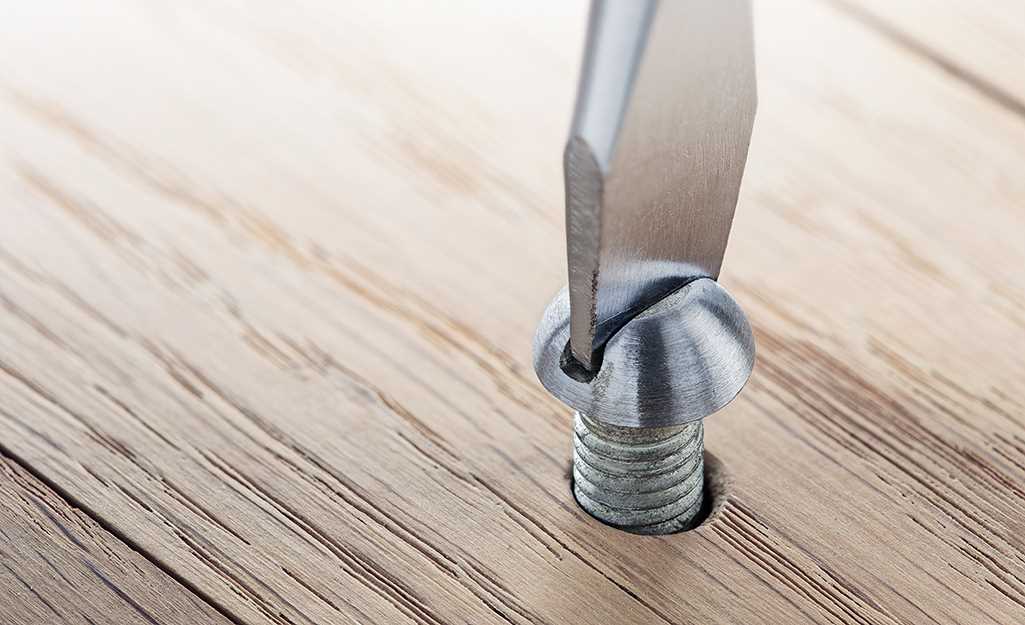
A stripped bolt is a bolt where the head has been damaged or worn down, making it difficult to remove with traditional tools.
What causes a bolt to become stripped?
A bolt can become stripped due to over-tightening, corrosion, or using the wrong tools. When the head of the bolt is damaged, it can be difficult to grip and remove.
What are some signs that a bolt is stripped?
Some signs that a bolt is stripped include the inability to turn the bolt with a wrench, visible damage to the bolt head, or a rounded-off appearance.
What is a pilot hole?
A pilot hole is a small hole drilled into a material before a larger hole is made. It helps guide the larger drill bit and prevents it from slipping.
What do I do if the drill bit gets stuck in the stripped bolt?
If the drill bit gets stuck in the stripped bolt, you can try using a penetrating lubricant to loosen it. If that doesn’t work, you may need to use a drill bit extractor to remove the stuck bit.
Can drilling techniques be used on all types of bolts?
Drilling techniques can be used on most types of bolts, but it’s important to use the correct size drill bits and screw extractors for the specific bolt you are working with.
Video:


Meet Harrison Clayton, a distinguished author and home remodeling enthusiast whose expertise in the realm of renovation is second to none. With a passion for transforming houses into inviting homes, Harrison's writing at https://thehuts-eastbourne.co.uk/ brings a breath of fresh inspiration to the world of home improvement. Whether you're looking to revamp a small corner of your abode or embark on a complete home transformation, Harrison's articles provide the essential expertise and creative flair to turn your visions into reality. So, dive into the captivating world of home remodeling with Harrison Clayton and unlock the full potential of your living space with every word he writes.


