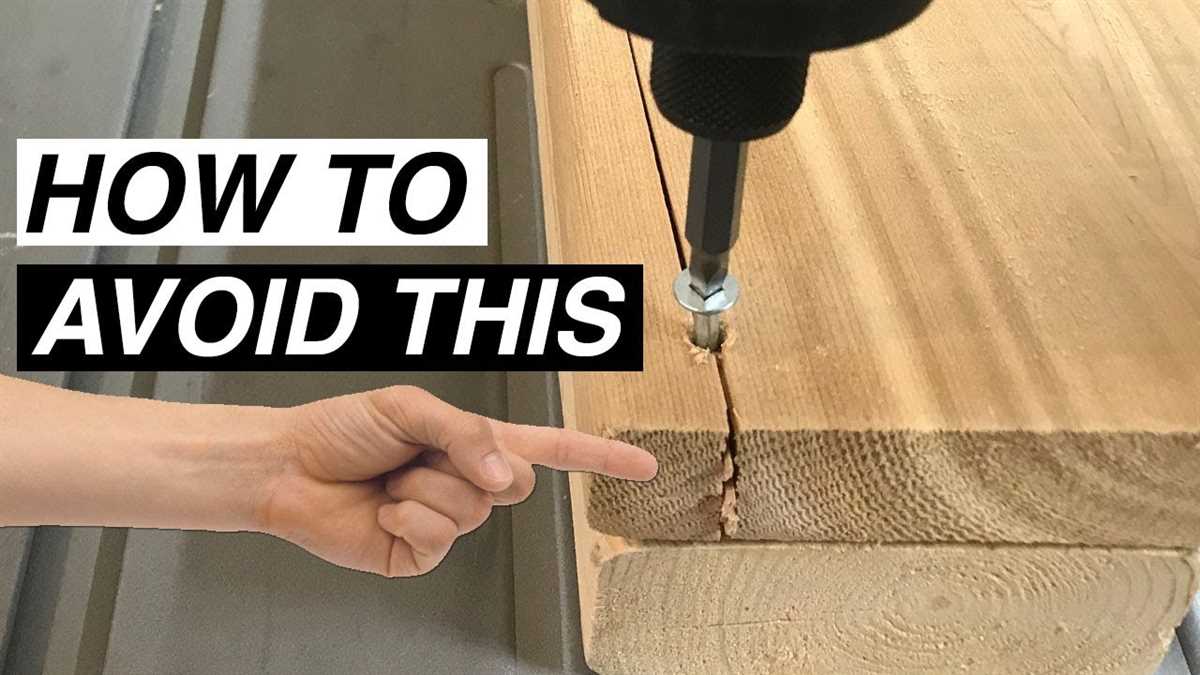
How to Drill into Wood Stud: Step-by-Step Guide

Drilling into a wood stud is a common task when it comes to hanging shelves, mirrors, or other heavy objects on the wall. However, if you don’t do it correctly, you can end up damaging the stud or causing the object you’re hanging to fall. In this step-by-step guide, we will show you the proper technique to drill into a wood stud without any mishaps.
Step 1: Find the Stud
The first thing you need to do is locate the wood stud. You can use a stud finder or tap on the wall to listen for a solid sound, indicating the presence of a stud. Once you have located the stud, mark its edges with a pencil.
Step 2: Prepare your drill
Next, you’ll need to prepare your drill. Make sure you have the right drill bit for the job. For drilling into wood studs, a general-purpose drill bit with a diameter slightly smaller than the screws or anchors you’re using will suffice. Insert the drill bit into your drill and tighten it securely.

Step 3: Drill into the stud
Position your drill over the marked area and start drilling slowly. Apply gentle pressure and let the drill bit do the work. It’s important to drill straight into the stud to prevent the bit from wandering and creating a larger hole than necessary. Stop drilling when you reach the desired depth.
Step 4: Secure the object
Once you have drilled into the wood stud, remove the drill and use a screwdriver or other appropriate tool to insert the screws or anchors into the hole. Make sure they are securely fastened to the stud.
Step 5: Test the stability

After securing the object, give it a gentle tug to ensure it is firmly attached to the wall. If it feels loose or unstable, you may need to consider using longer screws or anchors, or repositioning them to hit the center of the stud.
By following these step-by-step instructions, you can safely and effectively drill into a wood stud without any issues. Remember to always exercise caution and use the appropriate tools and hardware for the job.
Get the Right Tools
1. Drill
First and foremost, you will need a drill to successfully drill into a wood stud. When selecting a drill, make sure it has enough power and speed to penetrate the wood. A drill with adjustable speed and a torque setting is ideal for this task.
2. Drill bits
Next, you will need the appropriate drill bits for the job. For drilling into a wood stud, you will typically want to use a standard wood drill bit with a size suitable for the screws or fasteners you plan to use. It’s a good idea to have a few different sizes of drill bits on hand to accommodate different screw sizes.
3. Tape measure
Having a tape measure is essential for accurately marking the locations where you want to drill. Measure and mark the spots on the wood stud where you want to drill the holes. This will help ensure that your screws or fasteners are properly aligned.

4. Pencil or marker
Use a pencil or a marker to make the marks on the wood stud. This will allow you to easily see where to drill and ensure accuracy in your drilling.
5. Level
A level is useful for making sure your marks and drill holes are straight and aligned. Place the level against the stud to ensure that your marks are level and then use it again when drilling the holes to make sure they are straight.
6. Safety goggles
Always prioritize safety when using power tools. Wear safety goggles to protect your eyes from any debris or wood shavings that may be produced while drilling.
7. Work gloves
Wearing work gloves can provide a better grip on the drill and protect your hands from any accidental slips or injuries.
8. Dust mask
When drilling into wood, there may be some dust or debris generated. To protect your lungs, consider wearing a dust mask to prevent inhalation of these particles.

9. Stud finder (optional)
While not necessary, a stud finder can be a helpful tool to locate the wood studs behind the wall. It can save you time and effort by accurately identifying the stud locations.
10. Clamps (optional)
In some cases, it may be helpful to have clamps to secure the wood stud or the workpiece in place. This can provide stability and prevent any movement while drilling.
Choose the Right Drill Bit
When drilling into a wood stud, it’s important to choose the right drill bit for the job. The type of drill bit you use can affect the ease of drilling and the quality of the hole. Here are a few factors to consider when selecting a drill bit:
1. Size
The size of the drill bit is one of the most important factors to consider. You’ll want to choose a drill bit that is slightly smaller in diameter than the screw or anchor you plan to use. This will ensure a tight and secure fit.
2. Material

Drill bits are made from various materials, including high-speed steel (HSS) and carbide. For drilling into wood studs, a standard HSS drill bit is usually sufficient. However, if you are drilling into hardwood or need to drill through metal studs, you may want to consider a carbide-tipped drill bit for increased durability.
3. Shank Shape
The shank shape of the drill bit determines how it is held in the drill chuck. Most drill bits have a round shank, which is compatible with the majority of drill chucks. However, some drill bits have a hexagonal or hex shank, which can provide better grip and prevent slipping.
4. Drill Bit Type
There are several types of drill bits that can be used for drilling into wood studs. The most common types include twist drill bits, spade bits, and auger bits. Twist drill bits are versatile and can be used for various materials, while spade bits are ideal for creating larger holes. Auger bits are designed specifically for wood drilling and are often used for deep holes.
5. Coating
Some drill bits come with a coating to reduce friction and improve durability. These coatings can include titanium, black oxide, or cobalt. While a coated drill bit can be beneficial, it is not always necessary for drilling into wood studs. However, if you frequently drill into other materials or need extra durability, a coated drill bit may be worth considering.
By considering these factors and choosing the right drill bit for drilling into wood studs, you can ensure a successful and efficient drilling process.
Mark the Stud
Before you start drilling, it’s important to properly mark the location of the wood stud. This will ensure that you drill in the correct spot and avoid damaging any other parts of the wall.
Here are the steps to mark the stud:
- Use a stud finder: Start by using a stud finder to locate the position of the stud behind the wall. Move the stud finder slowly along the wall until it indicates the presence of a stud. Mark the location with a pencil.
- Measure from the corner: If you know the distance of the stud from a corner, use a tape measure to accurately measure and mark the distance on the wall. This can help you find the stud even if the stud finder is not working properly.
- Look for visual clues: Sometimes, you can see visual clues that indicate the presence of a stud. Look for nail heads, small dimples, or seams in the drywall that might align with the stud. Use a pencil to mark these areas for reference.
Once you have marked the stud, double-check the location before proceeding to drill. It’s important to be precise to avoid any mishaps during the drilling process.
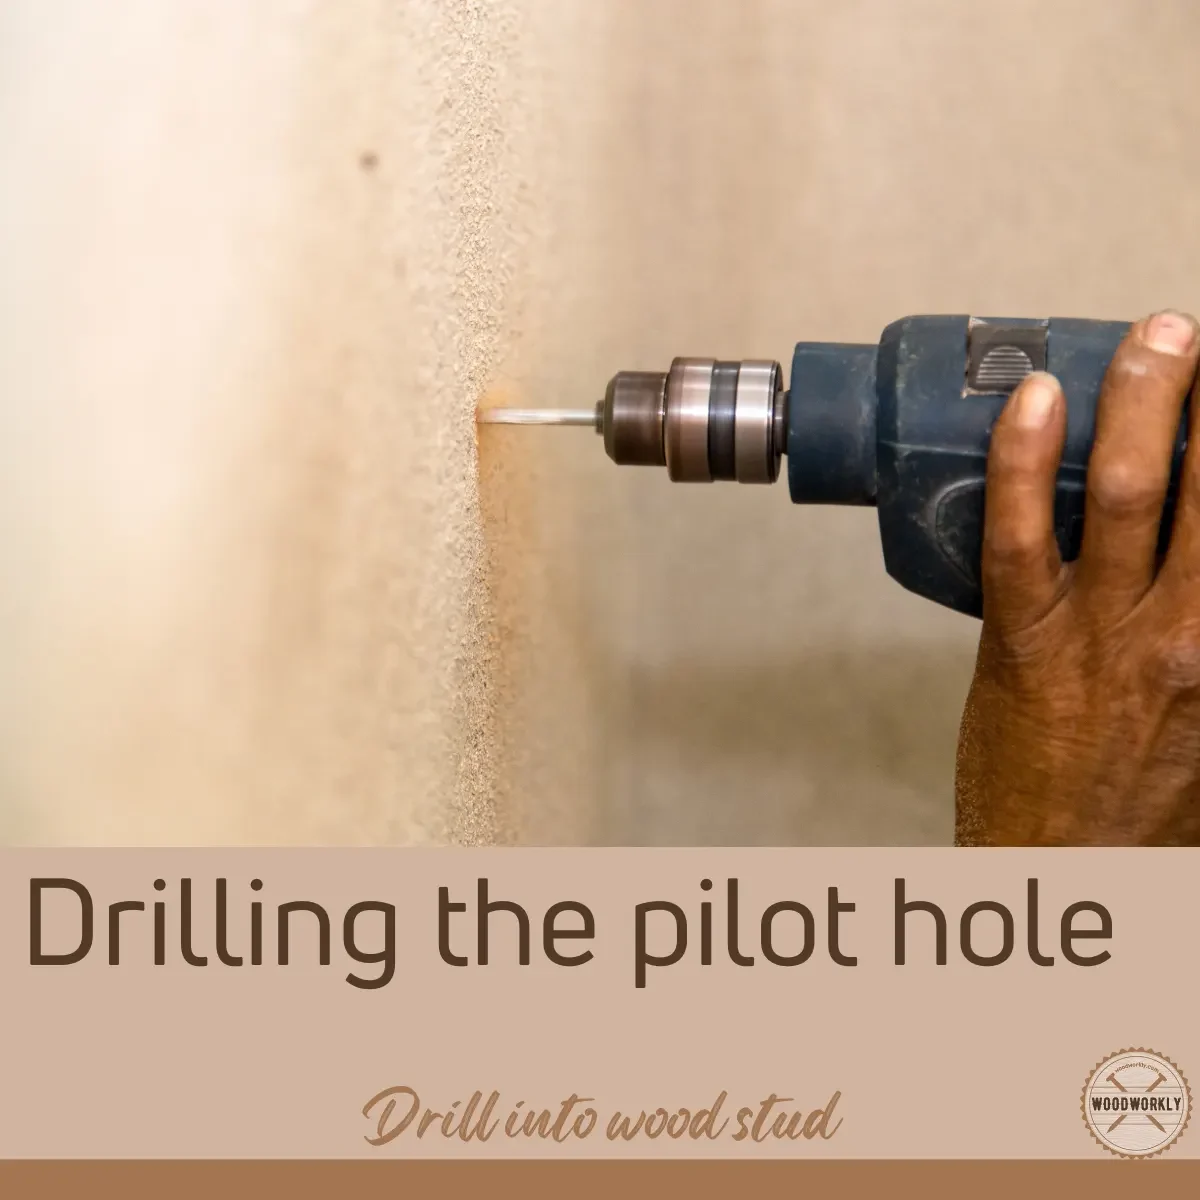
Use a Pilot Hole
Using a pilot hole before drilling into a wood stud is highly recommended, especially if you are using a large or long screw. A pilot hole helps to prevent the wood from splitting and provides a guide for the screw. Here is a step-by-step guide on how to use a pilot hole:
- Choose the right drill bit: Start by selecting a drill bit that is slightly smaller in diameter than the screw you will be using. This will ensure that the pilot hole is the right size to hold the screw securely.
- Mark the location: Use a pencil or a marker to mark the precise location where you want to drill the pilot hole on the wood stud. Double-check the markings to ensure accuracy.
- Secure the wood stud: Hold the wood stud securely in place using clamps or by asking a partner to hold it. This will prevent the wood from moving or spinning while you are drilling.
- Drill the pilot hole: Place the drill bit into the marked location on the wood stud. Hold the drill perpendicular to the wood surface and apply gentle pressure. Start drilling slowly and steadily. Ensure that the drill bit penetrates the wood stud smoothly without any wobbling.
- Clean the pilot hole: Once you have drilled the pilot hole, remove the drill bit from the hole. Blow away any excess sawdust or debris from the hole using a can of compressed air or by gently blowing into it.
- Insert the screw: Now, you are ready to insert the screw into the pilot hole. Make sure the screw is the right size and thread type for the wood stud. Use a screwdriver or a drill with a screwdriver bit to drive the screw into the pilot hole. Apply gentle pressure to avoid stripping the screw or damaging the wood.
Using a pilot hole before drilling into a wood stud is a simple yet important step that can help ensure a secure and successful installation. Taking the time to use a pilot hole can save you from potential headaches such as split wood or loose screws.
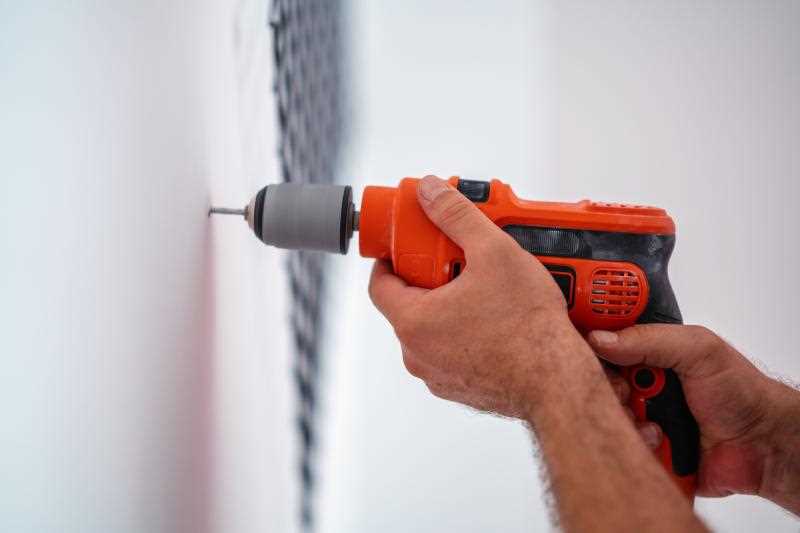
Start Drilling
1. Prepare your drill
Before you begin drilling into a wood stud, ensure that your drill is equipped with the appropriate drill bit for the size hole you need to create. The drill bit should be sharp and in good condition to avoid any issues while drilling.
2. Mark the drilling spot
Use a pencil or a marker to mark the spot on the wood stud where you want to drill. Double-check your measurements to ensure accuracy.
3. Secure the wood stud
If you are drilling into a vertical wood stud, you can secure it in place by using clamps or by having someone hold it firmly. This will prevent the stud from moving while you are drilling.
4. Position the drill
Hold the drill firmly with both hands and align the tip of the drill bit with the marked spot on the wood stud. Ensure that the drill is perpendicular to the surface of the stud.
5. Start drilling
Begin drilling slowly, applying light pressure to the drill. Use a steady, even motion to penetrate the wood stud. If you are using a cordless drill, make sure the battery is fully charged to maintain consistent drilling power.
6. Drill to the desired depth
Continue drilling until you reach the desired depth. It is essential to be mindful of the length of the drill bit to avoid drilling through the stud completely.
7. Remove the drill
Once you have reached the desired depth, release the drill’s trigger and slowly remove the drill bit from the hole. Take care not to damage the surrounding wood surface.
8. Clean up
Remove any wood shavings or debris from the hole using a small brush or by gently blowing on the area. You can also use a vacuum cleaner to clean up the drilling area.
9. Test the hole
Afterward, check the hole to ensure that it is the correct size and depth. If necessary, you can use sandpaper or a file to adjust the size or smooth any rough edges.
10. Repeat if needed
If you need to drill additional holes into the wood stud, repeat the previous steps, starting from marking the drilling spot. Take necessary precautions to maintain accuracy and safety throughout the process.
Check the Depth
Before you start drilling into the wood stud, it’s important to determine the depth of the stud. This will ensure that you choose the right size drill bit for the job.
One way to check the depth is to use a tape measure or ruler. Measure the width of the stud to determine how deep you need to drill. If you don’t have a tape measure or ruler, you can also estimate the depth by using a pencil or pen. Insert the pencil or pen into the screw hole of the bracket or hanger that you plan to install. Mark the pencil or pen at the point where it meets the surface of the stud. This will give you an approximate depth.
Another option is to use a stud finder with a depth indicator. This tool will locate the edges of the stud and provide you with the depth measurement. Simply slide the stud finder along the wall until it detects the edge of the stud, then take note of the depth indicated on the tool.
Once you have determined the depth of the stud, you can choose the appropriate size drill bit. It’s important to select a drill bit that is slightly shorter than the depth of the stud to prevent damage to the surrounding area or the other side of the wall.
Remove the Drill Bit
Once you have finished drilling into the wood stud, it is important to remove the drill bit from the stud properly. This will help prevent any damage to the stud or the drill bit itself.
- First, turn off the power tool to ensure safety.
- Gently pull the trigger or release the on/off switch to stop the drill from rotating.
- Wait for the drill bit to come to a complete stop before proceeding.
- Once the drill bit has stopped spinning, carefully pull the drill bit out of the wood stud.
- Be mindful of any wood chips or debris that may have accumulated on the drill bit. You can use a brush or your fingers to remove any debris.
It is important to handle the drill bit with care to avoid any injuries. The drill bit may be hot after use, so allow it to cool down before handling.
Fill the Hole
After drilling into a wood stud, you might find that you need to fill the hole for various reasons. Here are a few steps you can follow to fill the hole effectively:
1. Clean the Hole
Before filling the hole, make sure it is clean and free from any debris or dust. You can use a small brush or a vacuum cleaner to carefully remove any loose particles. Ensuring a clean hole will help the filler adhere better.
2. Choose the Right Filler
There are different types of fillers available in the market, such as wood filler, epoxy filler, or putty. Choose a filler that matches the color of your wood stud for a seamless finish. Additionally, consider the size of the hole and the desired final appearance when selecting the filler.
3. Apply the Filler
Using a putty knife or a similar tool, apply the filler to the hole. Make sure to press it into the hole firmly, ensuring it completely fills the space. Smooth out the surface of the filler to create a level finish. Follow the manufacturer’s instructions for the specific filler you are using.
4. Let it Dry
Allow the filler to dry completely before moving on to the next step. The drying time can vary depending on the type and brand of filler used, so refer to the product instructions. It is essential to let the filler fully cure to ensure a strong and durable repair.
5. Sand the Filler
Once the filler is dry, use sandpaper to sand down the surface of the filled hole. This will help smooth out any rough edges and create a seamless transition between the filler and the surrounding wood. Sand in a circular motion, gradually blending the filler with the surrounding area until it is flush.
6. Paint or Stain
If necessary, you can paint or stain the filled area to match the color and finish of the wood stud. Apply the paint or stain using a brush or sponge, following the manufacturer’s instructions. Allow it to dry completely before considering the project complete.
Filling a hole in a wood stud is a simple process that can easily be accomplished by following these steps. Taking the time to properly fill the hole will ensure a professional-looking and long-lasting repair.
FAQ:
What is a wood stud?
A wood stud is a vertical framing member in a building’s wall, typically made of wood, that provides structural support and a surface to attach materials.
Why would I need to drill into a wood stud?
You might need to drill into a wood stud to hang shelves, artwork, or other heavy objects on the wall. The stud provides a secure and stable anchoring point for these items.
What tools do I need to drill into a wood stud?
To drill into a wood stud, you will need a power drill, drill bits suitable for wood, a stud finder, a pencil, a level, and screws or other fasteners to secure your desired object.
How do I find a wood stud in the wall?
You can use a stud finder, which is a handheld device that detects changes in density behind the wall. Simply move the stud finder along the wall until it indicates the presence of a stud. Alternatively, you can look for visual clues, such as nail or screw heads, that may indicate the location of a stud.
What is the proper technique for drilling into a wood stud?
First, mark the desired location on the wall using a pencil and level. Use the stud finder to confirm the exact position of the stud. Then, select an appropriate drill bit and insert it into the power drill. Apply gentle pressure and start drilling slowly into the stud, keeping the drill straight and perpendicular to the wall. Once you have drilled to the desired depth, remove the drill bit and secure your desired object using screws or other fasteners.
Are there any precautions I should take when drilling into a wood stud?
Yes, it is important to ensure that there are no electrical wires or plumbing pipes running through the stud before drilling. You can use a wire and pipe detector to check for these hazards. Additionally, make sure to wear safety goggles and work gloves to protect yourself from any potential injuries.
Video:


Meet Harrison Clayton, a distinguished author and home remodeling enthusiast whose expertise in the realm of renovation is second to none. With a passion for transforming houses into inviting homes, Harrison's writing at https://thehuts-eastbourne.co.uk/ brings a breath of fresh inspiration to the world of home improvement. Whether you're looking to revamp a small corner of your abode or embark on a complete home transformation, Harrison's articles provide the essential expertise and creative flair to turn your visions into reality. So, dive into the captivating world of home remodeling with Harrison Clayton and unlock the full potential of your living space with every word he writes.


