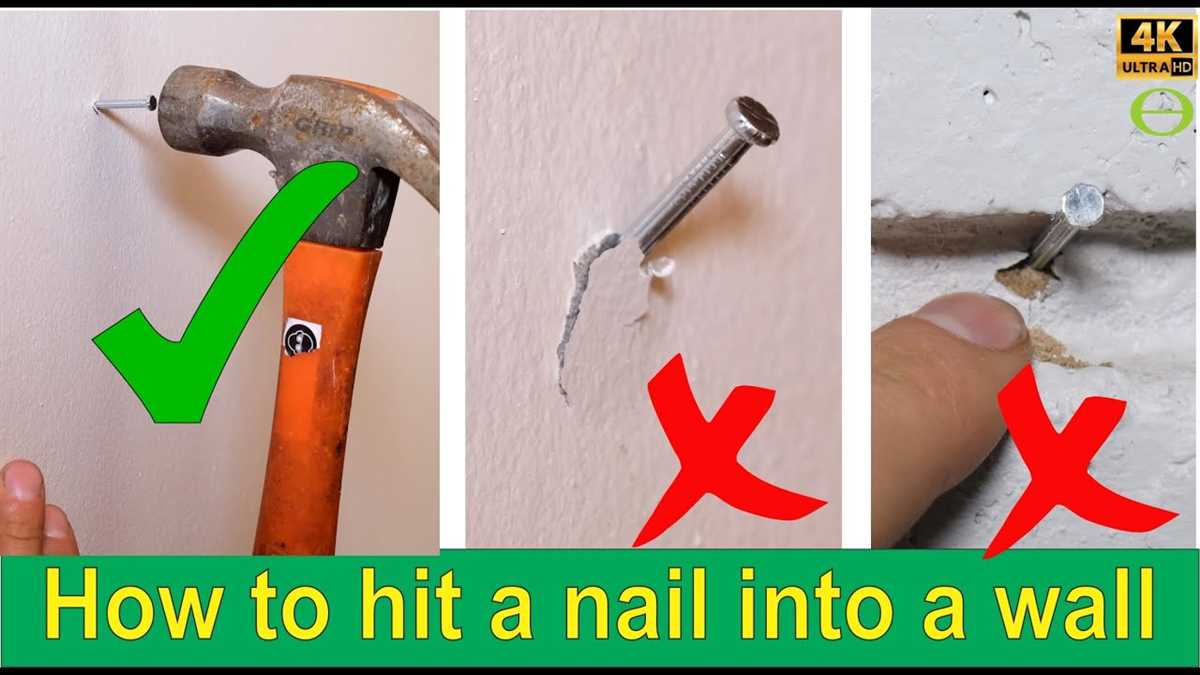
How to Drill into Plaster without Cracking It: Tips and Techniques

Drilling into plaster can be a daunting task, especially if you’re worried about cracking or damaging the surface. However, with the right techniques and tools, you can successfully drill into plaster without any mishaps. Whether you need to hang a picture frame, install a shelf, or mount a TV, this guide will provide you with helpful tips to ensure a smooth drilling process.
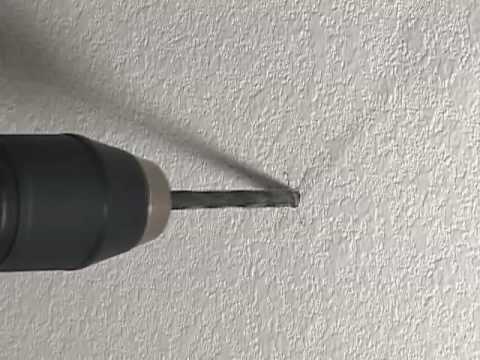
Choose the right drill bit: The first step in drilling into plaster without cracking it is to select the appropriate drill bit. For plaster surfaces, it’s recommended to use a carbide-tipped masonry bit. These bits are specifically designed to handle the hardness of plaster and prevent cracking. Avoid using regular twist bits, as they are more likely to cause damage.
Mark the drilling spot: Before you begin drilling, use a pencil to mark the exact spot where you want to drill. This will help you maintain accuracy and prevent unnecessary damage. Make sure to use a level or measuring tape to ensure that your mark is straight and aligned with your desired hanging location.
Pro tip: Consider using a small piece of painter’s tape to create a crosshair on the surface. This will provide a visual guide and help you stay on track while drilling.
Pre-drill a pilot hole: To further prevent cracking, it’s helpful to pre-drill a small pilot hole before drilling the actual hole. Use a smaller drill bit, such as a 1/8-inch bit, and drill slowly and steadily into the marked spot. This pilot hole will act as a guide and reduce the chances of the plaster cracking when you drill the final hole.
Drill at a slow speed: When drilling into plaster, it’s important to use a slow speed setting on your drill. High speeds can generate excessive heat, which can lead to cracking. Set your drill to a low speed and apply gentle pressure as you drill into the plaster. This will allow you to have more control over the drilling process and minimize the risk of damage.

By following these tips and techniques, you can successfully drill into plaster without cracking it. Remember to always exercise caution, go slow, and use the right tools for the job. With a little patience and practice, you’ll be able to tackle any drilling project with confidence.
What is plaster?
Plaster is a building material commonly used for coating walls and ceilings. It is a mixture of gypsum, sand, and water, which forms a paste that hardens when dry. Plaster is known for its smooth and durable finish, making it a popular choice for both interior and exterior surfaces.
Plaster has been used for thousands of years in construction, with evidence of its use dating back to ancient civilizations such as Egypt, Greece, and Rome. It was traditionally applied by skilled craftsmen who would spread the wet plaster onto walls or ceilings using a trowel.
-
Types of plaster: There are several types of plaster used in construction, each with its own specific characteristics and purposes. Some common types include:
-
- Lime plaster: Made from a mixture of lime, sand, and water, lime plaster is known for its breathability and flexibility. It is often used for historic restoration projects.
- Gypsum plaster: Also known as plaster of Paris, gypsum plaster is made from gypsum powder mixed with water. It is commonly used for interior walls and ceilings due to its quick drying time.
- Acoustic plaster: Designed to absorb sound, acoustic plaster contains special additives that enhance its sound dampening properties. It is often used in theaters, concert halls, and recording studios.
-
Benefits of plaster: Plaster offers several advantages over other wall finishes, including:
-
- Smooth and seamless finish: Plaster can create a seamless and monotone finish, making it popular for contemporary interiors.
- Durability: Plaster is resistant to chips, cracks, and dents, making it a long-lasting option for walls and ceilings.
- Fire resistance: Plaster has excellent fire resistance properties, which can help slow down the spread of fire.
- Insulation: Plaster has some insulating properties, helping to regulate temperature and reduce noise transmission.
In summary, plaster is a versatile building material used for coating walls and ceilings. It comes in different types with varying characteristics, and offers benefits such as a smooth finish, durability, fire resistance, and insulation. Proper knowledge of how to work with and drill into plaster can help preserve its integrity and prevent cracking.
Why is it important to drill into plaster without cracking it?
Drilling into plaster can be a challenging task, especially if you don’t want to damage or crack the surface. It is essential to drill into plaster without cracking it for several reasons:

- Preserving the aesthetics: Plaster walls and ceilings are often carefully finished and have decorative features. Any cracks or damages caused by drilling can greatly impact the overall appearance of the surface.
- Maintaining structural integrity: Cracks in plaster can weaken the structure and compromise its stability. By avoiding cracks during drilling, you ensure that the plaster remains strong and intact.
- Reducing repair costs: Repairing cracked plaster can be a time-consuming and expensive process. Preventing cracks in the first place saves you the hassle and cost of repairing the damage later on.
- Preventing dust and debris: When plaster cracks during drilling, it can generate a significant amount of dust and debris. This can be messy and hazardous, especially if you are working in an occupied space or have respiratory sensitivities.
- Ensuring a secure anchor: If you are drilling into plaster to install something, such as shelves or artwork, cracks can weaken the anchor point and make it less secure. By drilling without cracking the plaster, you create a solid and reliable anchor for your fixtures.
Drilling into plaster without cracking it requires proper tools, techniques, and patience. By taking the necessary precautions and using the right approach, you can successfully drill into plaster while preserving its integrity and appearance.
Tips for drilling into plaster without cracking it
- Use a sharp drill bit: Using a dull or worn-out drill bit can cause the plaster to crack. Make sure to use a high-quality, sharp drill bit for best results.
- Start with a pilot hole: Before drilling the final hole, it is recommended to start with a small pilot hole. This will help guide the drill and reduce the chances of cracking the plaster.
- Go slow and steady: When drilling into plaster, it is important to take your time and maintain a steady hand. Applying too much pressure or drilling too fast can cause the plaster to crack.
- Use low drilling speeds: Using high drilling speeds can generate excess heat, which can weaken the plaster and increase the chances of cracking. Set your drill to a low speed to avoid this issue.
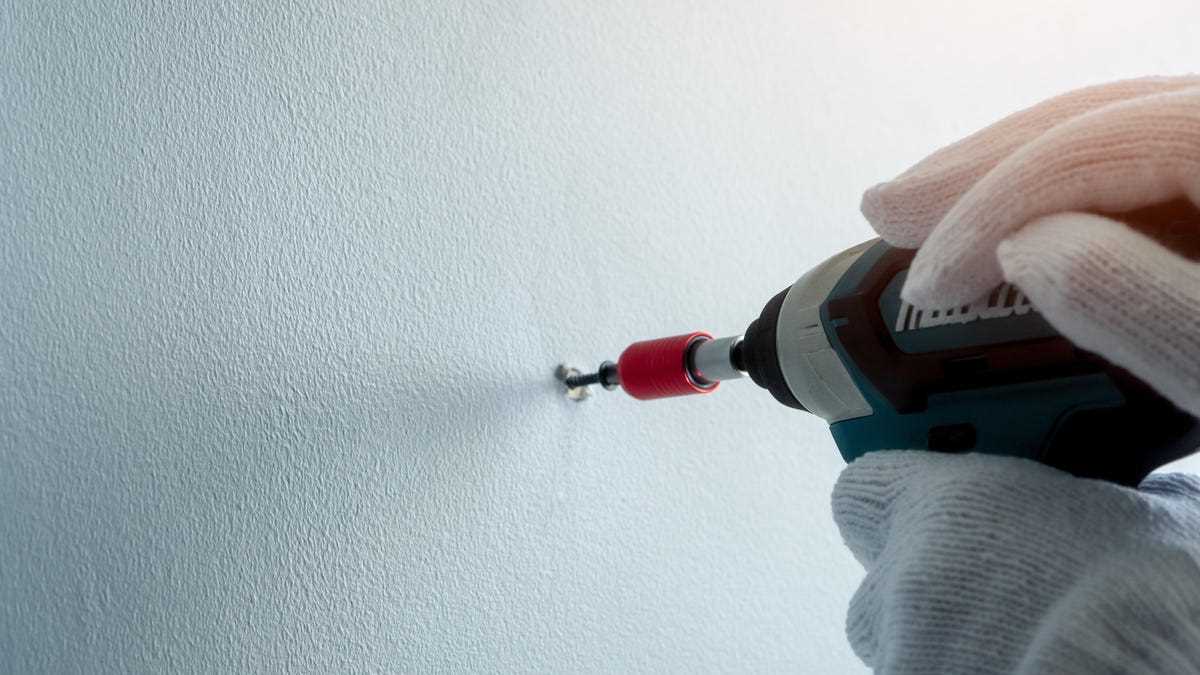
- Mark the drilling location: Before drilling, it is helpful to mark the exact spot where you want to drill. This will ensure that your hole is in the right place and reduce the risk of cracking the surrounding plaster.
- Use a drill with a depth stop: If you are drilling into plaster near a delicate area, such as electrical wiring or plumbing, it is advisable to use a drill with a depth stop. This will help prevent you from drilling too deep and potentially damaging hidden components.
- Clear away dust: After drilling, make sure to clear away any loose plaster and dust from the hole. This will provide a clean surface for inserting anchors or screws.
- Consider using anchors: If you are drilling into plaster to hang something heavy, it is recommended to use anchors to provide extra support. Anchors can help distribute the weight and reduce the chances of the plaster cracking or breaking.
- Practice on a scrap piece of plaster: If you are unsure about drilling into plaster, it can be helpful to practice on a scrap piece of plaster before working on your final project. This will give you a chance to test your drilling technique and make any necessary adjustments.
By following these tips, you can effectively drill into plaster without cracking it and ensure a successful outcome for your project. Remember to always use caution and prioritize safety when working with power tools.
Locating studs in plaster walls
Locating studs in plaster walls can be tricky, but it is an important step to ensure that you drill into a stable area and avoid cracking the plaster. Here are some techniques you can use to find studs in plaster walls:
- Use a stud finder: A stud finder is a handy tool that uses electronic sensors to detect changes in density behind the wall. Simply move the stud finder along the wall and it will indicate when it detects a stud.
- Look for visual clues: Another way to locate studs is by looking for visual clues such as nail heads or screws. These are often visible through the plaster, especially in older homes where the plaster may have deteriorated or been damaged.
- Tap the wall: By tapping the wall lightly with your knuckles or a small hammer, you can listen for the sound change that indicates a stud. A hollow sound usually means there is no stud, while a solid sound indicates the presence of a stud.
- Measure from a known point: If you know the distance between studs in your walls (typically 16 or 24 inches), you can use a measuring tape to measure from a known point, such as a corner or an electrical outlet. This can help you estimate the location of other studs.
- Use a magnet: Some studs are made of metal, and you can use a magnet to find them. Simply place the magnet against the wall and move it around until it sticks to a stud.
Once you have located a stud, make sure to mark its position on the wall using a pencil or painter’s tape. This will help you avoid drilling or nailing in the wrong spot and potentially damaging the plaster.

Remember, it is always a good idea to proceed with caution when drilling into plaster walls. Start with a small pilot hole to test the location and check for any unexpected obstructions. Taking your time and using the proper tools and techniques will help you successfully drill into plaster without cracking it.
Using the right drill bit
When drilling into plaster without cracking it, one of the crucial factors is using the right drill bit. A standard twist drill bit intended for use on wood or metal may not be suitable for drilling into plaster. Here are some types of drill bits that work well for drilling into plaster:
Masonry drill bits
Masonry drill bits are designed specifically for drilling into materials like plaster, brick, and concrete. These bits have a carbide tip that can easily cut through the hard surface of plaster without causing cracks. They are available in various sizes to accommodate different hole sizes. When using a masonry drill bit, it’s essential to choose the appropriate size for the hole you want to create.
Diamond-tipped drill bits
Diamond-tipped drill bits are another option for drilling into plaster. These bits are specifically designed for drilling through hard materials like stone and ceramic. The diamond coating on the tip enables these drill bits to penetrate the tough plaster surface smoothly and without causing any cracks. However, diamond-tipped drill bits can be more expensive compared to other options.
Tile drill bits

If you already have tile drill bits or need to drill into plaster near a tiled surface, these bits can work well. Tile drill bits are designed to cut through ceramic tiles, but they can also be effective for drilling into plaster. These bits typically have a pointed tip with a carbide or diamond coating, which allows them to penetrate hard surfaces without causing cracks. It’s important to use these drill bits at a slow speed and apply gentle pressure to avoid damaging the plaster.
Before using any of these drill bits, it’s crucial to ensure you have the right size for the job. Using a drill bit that is too small can cause the plaster to crack due to excessive pressure, while using a bit that is too large may make the hole too wide and unstable. Always refer to the manufacturer’s guidelines for the recommended drill bit size.
Applying the correct pressure
Applying the correct pressure is crucial when drilling into plaster to prevent it from cracking. Here are a few tips to help you apply the right amount of pressure:
- Start with a pilot hole: Before drilling the actual hole, it is recommended to start with a pilot hole. This small hole will help guide your drill bit and reduce the risk of cracking the plaster.
- Use a sharp drill bit: A sharp drill bit will allow you to apply less pressure while drilling. Dull drill bits can cause more friction and require more force, increasing the chances of cracking the plaster.
- Let the drill do the work: Instead of forcing the drill into the plaster, let the drill do the work. Apply steady and even pressure, allowing the drill bit to gradually penetrate the plaster without applying excessive force.
- Take breaks: If you notice the plaster starting to crack or the drill bit struggling, it’s important to take breaks. Give the plaster and the drill bit some time to cool down before continuing.
- Use the right drill speed: Using the correct drill speed is important to prevent the plaster from cracking. If the drill speed is too high, it can generate excess heat and cause the plaster to crack. Start with a slower speed and adjust accordingly.
Remember, drilling into plaster requires patience and a gentle touch. By following these tips and techniques, you can successfully drill into plaster without cracking it.
Using a drill with adjustable speed
When drilling into plaster, using a drill with adjustable speed can greatly help prevent cracking. Adjustable speed drills allow you to control the speed at which the drill bit rotates, giving you more control over the drilling process.

Here are some tips for using a drill with adjustable speed when drilling into plaster:
- Start with a slow speed: Begin drilling at a slow speed to ensure precision and avoid putting too much pressure on the plaster. This will help prevent cracking or breaking the plaster surface.
- Progressively increase the speed: As you continue drilling, you can gradually increase the speed of the drill to navigate through the plaster more efficiently. However, be cautious not to go too fast, as this can cause the drill bit to overheat and potentially damage the plaster.
- Use a sharp drill bit: Using a sharp drill bit is essential when drilling into plaster. Dull bits can cause unnecessary strain on the plaster, increasing the risk of cracking. It’s a good idea to replace the drill bit if it becomes dull during the drilling process.
- Apply even pressure: Apply even pressure on the drill to prevent the drill bit from catching and potentially damaging the plaster. It’s important to maintain a steady hand and avoid excessive force.
- Take breaks if necessary: If you notice the drill bit or the wall becoming too hot, pause periodically to let them cool down. This can help prevent overheating and potential damage to the plaster.
By following these tips and using a drill with adjustable speed, you can drill into plaster without cracking it and successfully complete your project.
Techniques for drilling into plaster without cracking it
Drilling into plaster can be a tricky task, as the material is brittle and prone to cracking. However, with the right techniques and tools, you can successfully drill into plaster without damaging it. Here are some tips to help you achieve the best results:
1. Choose the right drill bit
Using the right drill bit is essential to prevent cracking plaster. A masonry drill bit with a carbide or diamond tip is ideal for drilling into plaster. These bits are specifically designed to handle the hard and brittle nature of plaster, reducing the risk of cracking.
2. Make pilot holes
Pilot holes are small starter holes that help guide the drill bit and prevent it from wandering. Before drilling the actual hole, use a smaller sized drill bit to make a pilot hole. This will create a path for the larger drill bit to follow, reducing the chances of cracking the plaster.
3. Use low speed and light pressure
When drilling into plaster, it’s important to use low speed and light pressure. Plaster is a delicate material, and excessive force can cause it to crack. Set your drill to a low speed setting and apply gentle pressure while drilling. This will help prevent the drill bit from digging into the plaster and causing damage.
4. Support the area around the drilling spot
An effective way to prevent the plaster from cracking is to support the area around the drilling spot. You can do this by using a piece of scrap wood or a block of foam behind the plaster. The support will absorb the pressure from the drill and reduce the risk of cracking.
5. Clean the drill bit regularly

As you drill into plaster, debris can build up on the drill bit, reducing its effectiveness and increasing the chances of cracking the plaster. To prevent this, clean the drill bit regularly while drilling. Simply retract the drill bit from the hole and remove any plaster debris before continuing to drill.
6. Take breaks and cool the drill bit
Drilling into plaster generates heat, which can cause the drill bit to become dull and less effective. To prevent this, it’s important to take breaks during the drilling process and cool the drill bit. You can do this by dipping the drill bit into a cup of water periodically. Cooling the bit will help maintain its sharpness and prevent it from overheating.
7. Consider using anchors or adhesive hooks
If you’re concerned about cracking the plaster, an alternative option is to use anchors or adhesive hooks. These can be installed without drilling and are suitable for hanging lightweight items. However, keep in mind that they may not be as secure as drilling directly into the plaster.
By following these techniques, you can drill into plaster without cracking it. Remember to be patient and take your time, as rushing the process can lead to unwanted damage. Always prioritize safety and use appropriate protective gear while drilling.
Using a pilot hole
When drilling into plaster, it is often recommended to start with a pilot hole. A pilot hole is a small hole that is drilled before the actual hole to guide the drill bit and prevent the plaster from cracking. This technique is especially useful when drilling into delicate or fragile areas of plaster.
Here are some steps to follow when using a pilot hole:
- Choose the right drill bit: Select a small drill bit that is appropriate for the size of the hole you want to create. It is recommended to start with a bit that is 1/8 inch in diameter.
- Mark the spot: Use a pencil or marker to mark the exact location where you want to drill the hole. Make sure to measure and mark accurately to ensure the hole is in the right place.
- Start with the pilot hole: Place the tip of the drill bit on the marked spot and apply gentle pressure. Begin drilling at a slow speed to create the pilot hole. Keep the drill straight and perpendicular to the wall to ensure the hole is straight.
- Check the pilot hole: Once the pilot hole is deep enough, stop drilling and check if it is centered and straight. Use a level or a straight edge to ensure the hole is in the right position.
- Proceed with the larger hole: Once the pilot hole is created and checked, you can proceed with drilling the larger hole. Use a larger drill bit that is appropriate for the size of the hole you want to create.
By using a pilot hole, you can minimize the risk of cracking or damaging the plaster while drilling. This technique allows for better control and precision, especially when drilling into delicate surfaces. Remember to always take your time and be patient during the drilling process to achieve the best results.
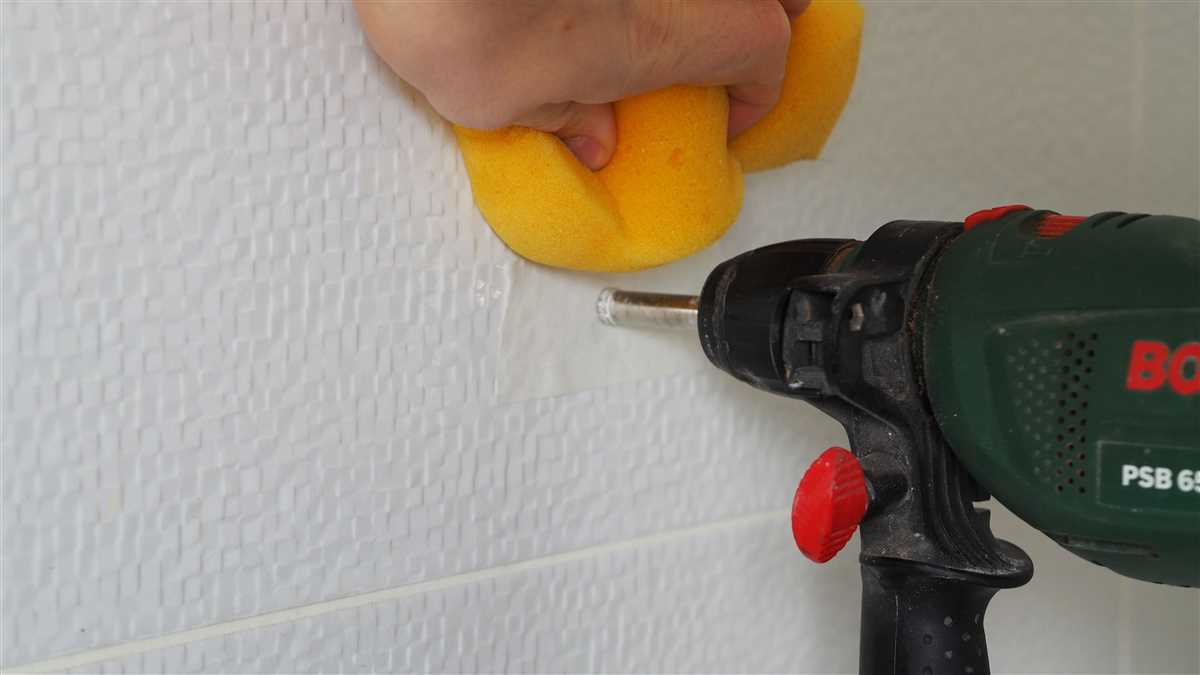
Using masking tape

One technique that can help prevent cracking when drilling into plaster is to use masking tape. Masking tape is a type of adhesive tape that is commonly used in painting projects to protect certain areas from being painted. However, it can also be used in drilling to provide additional support for the plaster and reduce the likelihood of cracks.
Step 1: Prepare the area
Before applying the masking tape, it is important to clean the surface of the plaster and ensure it is dry. Dust or debris on the plaster can prevent the tape from adhering properly.
Step 2: Mark the drilling spot
Use a pencil or marker to mark the exact spot on the plaster where you want to drill. This will help ensure that you apply the masking tape in the correct position.
Step 3: Apply the masking tape
Cut a piece of masking tape that is larger than the area you want to drill into. Place the tape over the marked spot on the plaster and press down firmly to make sure it adheres well.
Step 4: Make a pilot hole
Before drilling into the plaster, it is a good idea to make a pilot hole. This smaller hole will help guide the drill bit and reduce the chances of the plaster cracking.
Step 5: Start drilling
With the masking tape in place and the pilot hole made, you can now start drilling into the plaster. Use a slow and steady motion, ensuring that the drill is perpendicular to the surface to prevent any unnecessary pressure on the plaster.
Step 6: Remove the masking tape
Once you have finished drilling, carefully remove the masking tape from the plaster. Slowly peel it off, making sure not to pull it too quickly or forcefully, as this may cause the plaster to crack.
Using masking tape can provide an additional layer of protection when drilling into plaster. It helps to stabilize the plaster and reduce the chances of cracks or damage. Remember to always drill slowly and steadily, and to remove the tape gently to avoid any unwanted cracks in the plaster.
FAQ:
What are some tips for drilling into plaster without cracking it?
Some tips for drilling into plaster without cracking it include using a sharp drill bit, applying gentle pressure, using a drill with a variable speed control, starting with a small pilot hole, and using a plastic anchor or toggle bolt to secure the screw.
Is it necessary to use a specific type of drill bit when drilling into plaster?
Yes, it is necessary to use a sharp drill bit specifically designed for drilling into plaster. A masonry or carbide-tipped drill bit is recommended for this purpose.
What can happen if the drill speed is set too high?
If the drill speed is set too high, it can cause the plaster to crack or crumble. It is important to use a drill with a variable speed control and set it to a low speed to prevent damage.
Should plaster be pre-drilled before inserting screws?
Yes, it is recommended to pre-drill small pilot holes into the plaster before inserting screws. This helps to prevent cracking and provides a guide for the screw to follow.
What are some alternative methods for hanging items on plaster walls without drilling?
Some alternative methods for hanging items on plaster walls without drilling include using adhesive hooks or strips, picture hanging strips, and tension rods. These methods are suitable for lighter items.
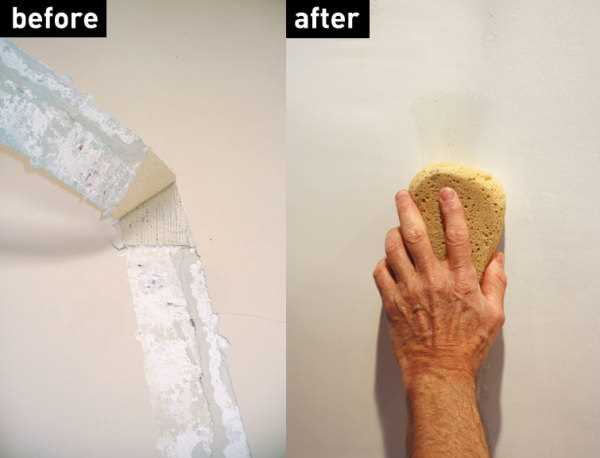
Is it possible to repair small cracks in plaster walls?
Yes, it is possible to repair small cracks in plaster walls. This can be done by filling the cracks with spackling paste or joint compound, sanding the area smooth, and then painting over it to match the surrounding wall.
What should be done if the plaster cracks while drilling?
If the plaster cracks while drilling, it is important to stop drilling immediately to prevent further damage. The cracked area can be repaired by filling it with spackling paste, allowing it to dry, and then sanding and repainting the area.
Video:


Harrison Clayton
Meet Harrison Clayton, a distinguished author and home remodeling enthusiast whose expertise in the realm of renovation is second to none. With a passion for transforming houses into inviting homes, Harrison's writing at https://thehuts-eastbourne.co.uk/ brings a breath of fresh inspiration to the world of home improvement. Whether you're looking to revamp a small corner of your abode or embark on a complete home transformation, Harrison's articles provide the essential expertise and creative flair to turn your visions into reality. So, dive into the captivating world of home remodeling with Harrison Clayton and unlock the full potential of your living space with every word he writes.


