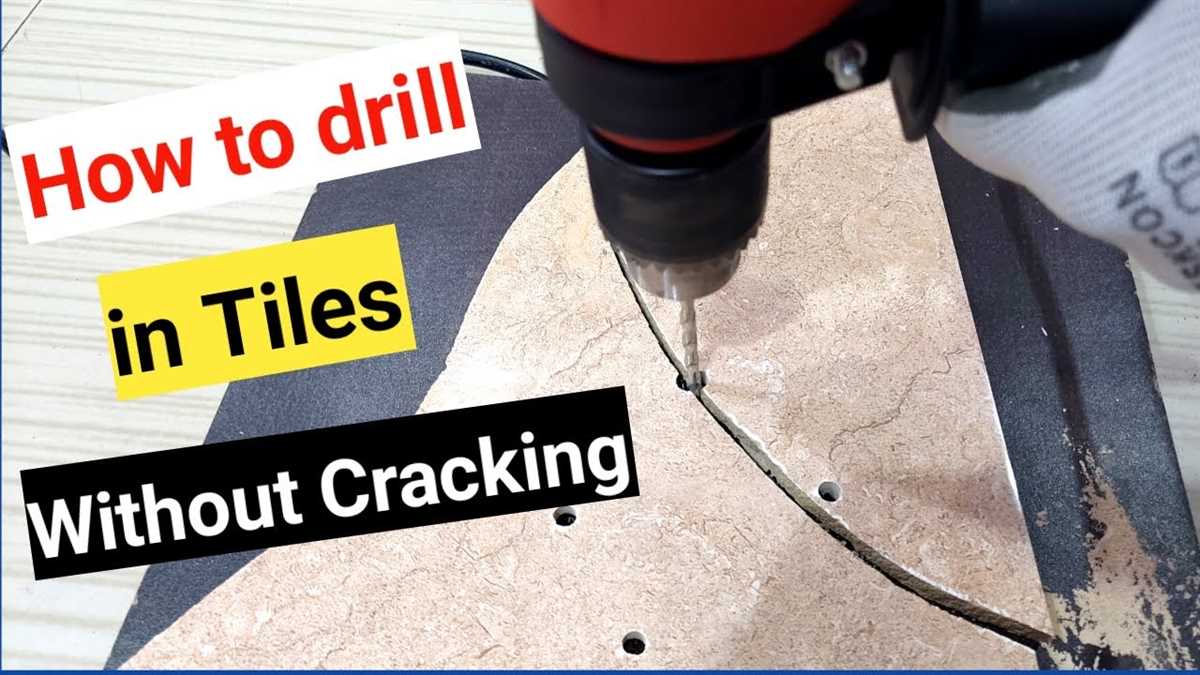
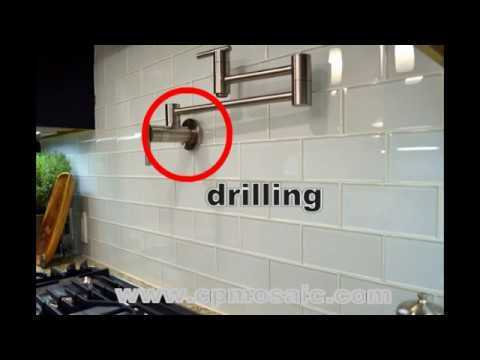
How to drill glass tile without cracking

Glass tiles can add a beautiful and elegant touch to any space. Whether you’re installing a backsplash in your kitchen or a mosaic in your bathroom, drilling through glass tiles can be a daunting task. The delicate nature of glass makes it prone to cracking or chipping if not properly drilled.
However, with the right tools and techniques, you can successfully drill through glass tile without any damages. This guide will walk you through the step-by-step process of drilling glass tiles without cracking them, so you can achieve the look you desire without any mishaps.
Firstly, it’s important to choose the right drill bit for the job. A diamond-tipped drill bit is highly recommended for drilling through glass tiles, as it is specifically designed to handle the hardness and delicacy of glass. These drill bits are available at most hardware stores and online, and come in various sizes to suit your needs.
Tips and Techniques for Drilling Glass Tile
1. Choose the Right Drill Bit
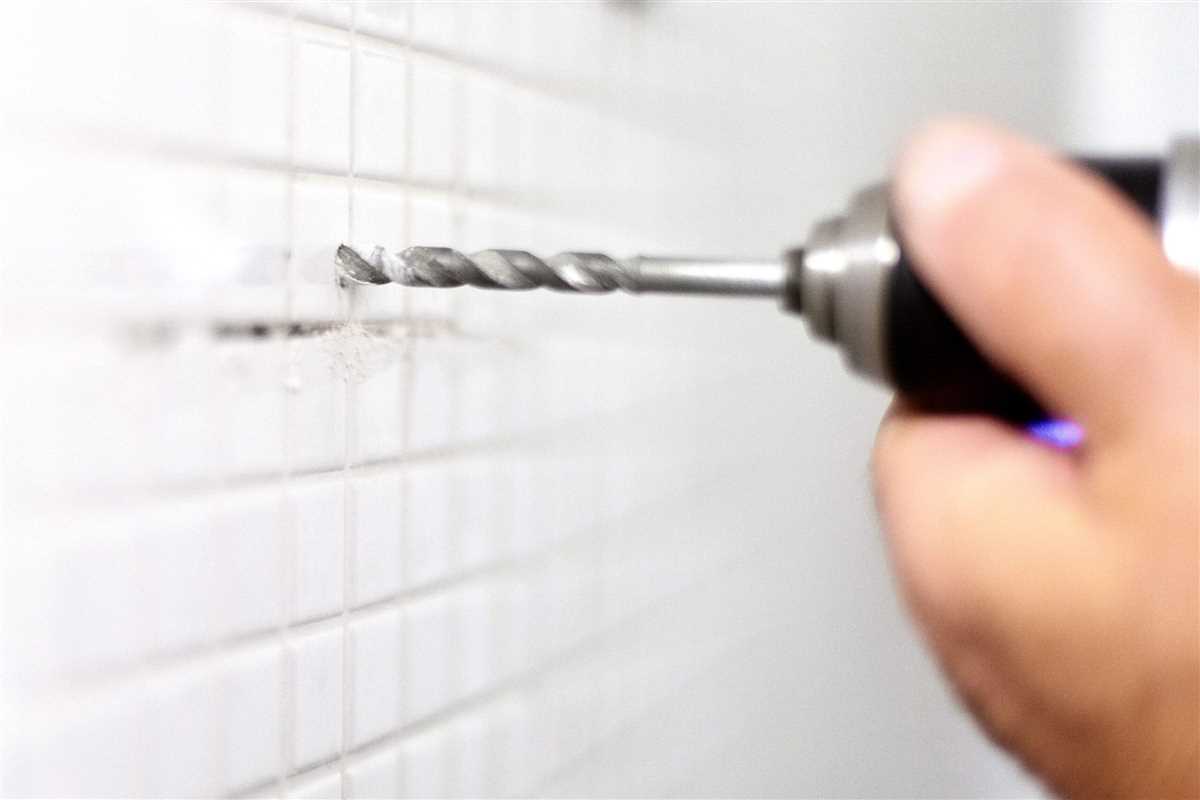
When drilling glass tile, it is crucial to use a drill bit that is specifically designed for this material. Diamond-tipped or carbide drill bits are the best options, as they are made to withstand the hardness of glass and are less likely to crack or chip the tile.

2. Mark the Hole Location
Before drilling, it is important to accurately mark the location where you want the hole to be. Use a pencil or a fine-tip marker to make a small dot or an “X” on the tile. This will serve as a guide and help prevent the drill bit from sliding off the surface.
3. Use Lubrication
Lubricating the drill bit and the glass tile can reduce the risk of cracking. Apply a small amount of water or coolant to the drilling area to keep the bit cool and prevent friction, which can lead to heat buildup and potential damage to the tile.
4. Start with a Small Pilot Hole
When drilling glass tile, it is best to start with a small pilot hole before enlarging it to the desired diameter. This helps to prevent the bit from slipping and provides more control during drilling. Use a low speed setting on your drill to minimize the risk of cracking.
5. Apply Even Pressure
When drilling, it is important to apply even pressure to the drill. Too much pressure can crack or break the glass tile, while too little pressure can cause the bit to slip and damage the surface. Maintain a steady hand and let the drill bit do the work, applying gentle but consistent pressure.
6. Avoid Hammering or Vibration
Avoid using a hammer function or applying excessive vibration to the drill when working with glass tile. These actions can increase the risk of cracking or chipping the tile. Instead, use a regular drilling function with a smooth, controlled motion.
7. Take Breaks and Cool Down
If you are drilling multiple holes or working on a large glass tile project, take regular breaks to allow the drill bit and tile to cool down. Heat buildup can weaken the tile and increase the chances of cracking. Give the drill and tile a chance to rest and cool off before continuing.
8. Protect Yourself
When drilling glass tile, it is important to protect yourself from flying debris. Wear safety goggles to shield your eyes and consider wearing gloves and a long-sleeved shirt to prevent any potential injuries. Glass fragments can be sharp, so take precautions to keep yourself safe.
9. Practice on Scrap Tiles
If you are new to drilling glass tile or unsure about the process, it is a good idea to practice on scrap pieces before working on your actual project. This will give you a chance to familiarize yourself with the techniques and adjust your drilling technique if needed.
10. Be Patient
Drilling glass tile requires patience and a steady hand. Take your time and work at a slow, controlled pace to minimize the risk of cracking. Rushing or applying too much force can lead to costly mistakes. Remember, it’s better to be slow and careful than to have to replace cracked tiles.
Choose the Right Drill Bit
When drilling into glass tile, it is crucial to select the correct drill bit. Using the wrong type of drill bit can result in cracks and breaks in the tile. Here are some options to consider:
- Diamond Drill Bit: This type of drill bit has a diamond-coated tip that provides excellent cutting power. Diamond drill bits are specifically designed for drilling hard materials such as glass and tile. They can be expensive, but they provide the best results.
- Tungsten Carbide Drill Bit: Another option is a tungsten carbide drill bit. These bits are made of a strong and durable material that can cut through glass tile. Tungsten carbide drill bits are more affordable than diamond ones, but they may not last as long.
- Tile and Glass Drill Bit: Some drill bits are specifically designed for drilling tile and glass. These bits usually have a spear-shaped or arrowhead tip that helps to prevent the bit from wandering and cracking the tile.
Before using any drill bit, it is important to ensure that it is suitable for use on glass tile. Read the manufacturer’s instructions and look for a bit that is labeled as suitable for drilling glass or tile.
Additionally, it is recommended to use a drill with variable speed settings. Glass tile is delicate, and drilling at a high speed can increase the risk of cracking. Start with a low speed and gradually increase it as needed.
Remember to wear safety goggles and use a light touch when drilling glass tile to minimize the risk of damage. Taking the time to choose the right drill bit and using proper technique will help you successfully drill glass tile without cracking it.
Mark the Spot
Before you begin drilling the glass tile, it’s important to mark the spot where you want to make a hole. This will help ensure accuracy and prevent any unnecessary cracks or damage to the tile. Here are some steps you can follow to mark the spot:
- Clean the surface: Use a mild cleanser and a soft cloth to clean the surface of the glass tile. This will remove any dirt, dust, or residue that could interfere with your marking.
- Choose a location: Determine the exact location where you need to drill the hole. Measure and mark the spot using a pencil or a marker. Make sure to take into account any specific dimensions or requirements for your project.
- Use a level: Place a small level on top of the marked spot to ensure that it’s perfectly horizontal or vertical, depending on your needs. Adjust the position if necessary to maintain accuracy.
- Apply masking tape: Once you’re satisfied with the location and alignment of the mark, apply a small piece of masking tape directly over it. This will help prevent the drill bit from slipping and provide extra stability during the drilling process.
By taking the time to carefully mark the spot before drilling, you’ll significantly reduce the risk of cracking or damaging the glass tile. This simple step can make a big difference in the overall success of your project.
Prepare the Tile and Work Area
Before attempting to drill into glass tile, it is important to properly prepare the tile and the work area to ensure success and prevent cracking or damage. Follow these steps to adequately prepare:
- Gather Supplies: Collect all the necessary supplies, including safety goggles, a diamond drill bit suitable for glass, a drill with adjustable speed, masking tape, a spray bottle filled with water, and a scrap piece of wood or plastic.
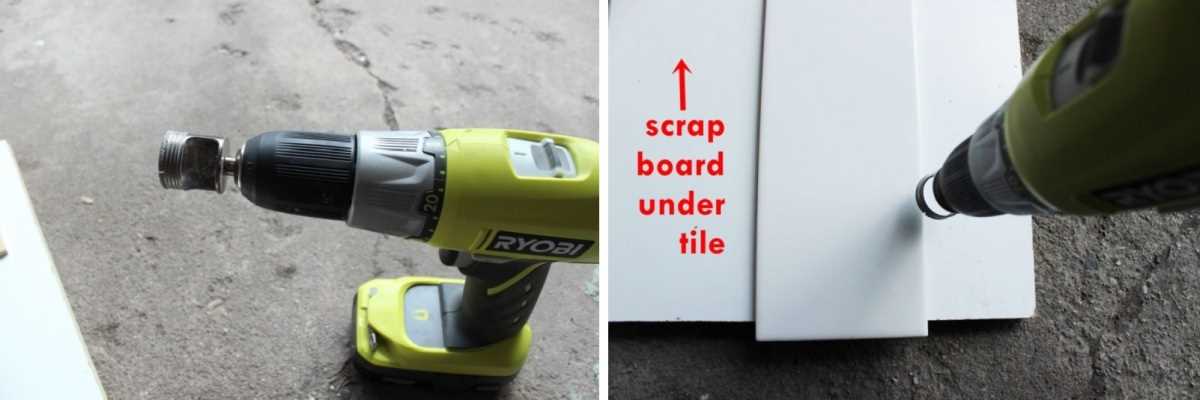
- Choose the Right Location: Select an appropriate location to perform the drilling, such as a workbench or a sturdy table. Protect the work surface by placing a scrap piece of wood or plastic under the tile to absorb any vibrations.
- Measure and Mark: Use a measuring tape and a pencil to measure and mark the precise location where the hole needs to be drilled on the glass tile. Double-check the measurements to ensure accuracy.
- Secure the Tile: Use masking tape to secure the glass tile onto the work surface. This will help prevent any slippage or movement during the drilling process. Ensure that the tile is flat and stable.
- Create a Dam: To prevent the drill bit from slipping off the tile surface, create a dam using small pieces of masking tape or plumber’s putty around the marked hole. This will help provide a starting point for the drill bit and prevent it from wandering.
By following these steps, you will be properly prepared to drill into glass tile without cracking or damaging it. Next, you can proceed to the actual drilling process.
Apply Lubrication
Applying lubrication is an important step to avoid cracking the glass tile while drilling. The lubrication acts as a coolant and reduces friction, preventing excessive heat buildup that can cause the glass tile to crack. Here are a few lubrication options:
1. Water
Water is one of the most accessible and commonly used lubricants when drilling glass tile. It is important to keep the drilling area wet to continuously cool down the glass and the drill bit. You can use a spray bottle or a damp sponge to apply water as you drill.
2. Cutting Oil
Another effective lubricant for drilling glass tile is cutting oil. Cutting oil is specifically designed for drilling applications and provides better lubrication than water alone. Apply a few drops of cutting oil directly on the drilling area and continue drilling. This lubricant will help to reduce heat and friction during the drilling process.
3. Glass Lubricant
There are specially formulated glass lubricants available in the market that are designed to minimize the risk of cracking while drilling glass materials. These lubricants often come in a gel or paste form that adheres well to the glass surface. Follow the instructions provided by the manufacturer for the best results.
4. Dish Soap
If you don’t have access to specialized lubricants, dish soap can be a good alternative. Mix a small amount of dish soap with water to create a soapy solution. Apply the solution to the drilling area before you start drilling. The soap will act as a lubricant and greatly reduce the chances of cracking the glass tile.
5. Petroleum Jelly
For small drilling projects, you can also use petroleum jelly as a lubricant. Simply apply a thin layer of petroleum jelly to the drilling area before starting to drill. This will provide some lubrication and help prevent cracking. However, keep in mind that petroleum jelly can be messy and may require additional cleaning afterwards.
Remember to reapply lubrication periodically during the drilling process to ensure optimal results. By using a suitable lubricant, you can significantly reduce the risk of cracking the glass tile and increase the success rate of your drilling project.
Use Slow Speed and Light Pressure
When drilling glass tile, it is important to use a slow drill speed and apply light pressure to minimize the risk of cracking. Glass tile is delicate and can easily break if too much force is applied.
Step 1: Choose the Right Drill Bit
Before you begin drilling, make sure you have the right type of drill bit for glass tile. A carbide-tipped drill bit is the best option as it is specifically designed for drilling through hard materials like glass. Avoid using regular drill bits as they can cause the tile to crack.
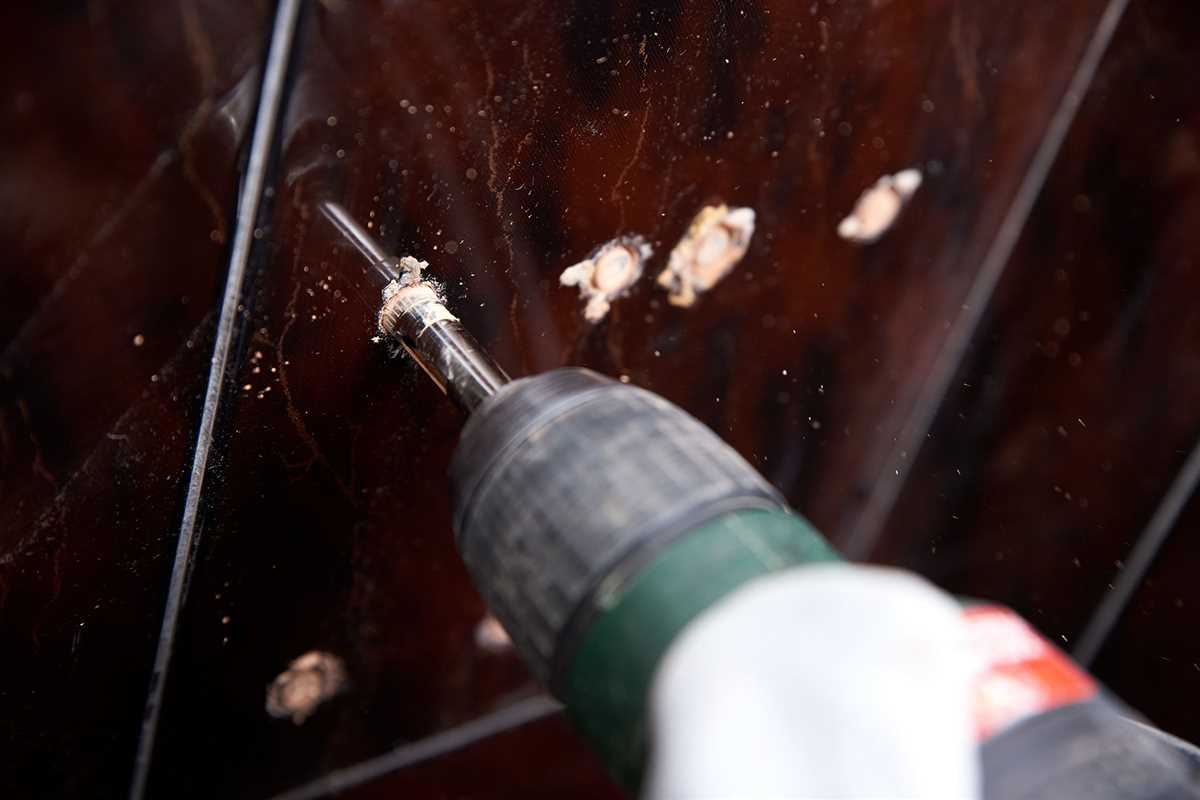
Step 2: Start with a Pilot Hole
To prevent the glass tile from cracking, start by creating a pilot hole. This can be done by using a small nail or awl to make a small indentation on the surface of the tile. The pilot hole will help guide the drill bit and reduce the risk of slipping or cracking the tile.
Step 3: Lubricate the Drill Bit
Applying a lubricant, such as water or a specialized drilling oil, to the drill bit can help reduce heat and friction while drilling. This will help prevent the glass tile from cracking due to excessive heat buildup.
Step 4: Drill with Slow Speed
Set your drill to its slowest speed setting before beginning to drill. Using a high-speed setting can generate too much heat and cause the glass tile to crack. Slow and steady is the key to successfully drilling through glass tile.
Step 5: Apply Light Pressure

When drilling, apply gentle and consistent pressure. Too much pressure can cause the tile to crack, while too little pressure can lead to the drill bit slipping. Find the right balance and let the drill bit do the work.
By using a slow drill speed and light pressure, you can significantly reduce the risk of cracking when drilling glass tile. Take your time, be patient, and exercise caution to achieve a clean and successful drill hole in your glass tile.
Drill at the Right Angle
When drilling into glass tile, it’s essential to drill at the right angle to avoid cracking the tile. The angle at which you insert the drill bit into the tile can make a significant difference in the success of your drilling.
Steps to Drill at the Right Angle
- Mark the drilling spot: Use a marker or a piece of tape to mark the exact spot where you want to drill. This will serve as a guide to help you maintain the correct angle.
- Position the drill: Hold the drill perpendicularly, ensuring that the drill bit is aligned with the marked spot. It’s important to keep the drill steady and maintain the correct angle throughout the drilling process.
- Start drilling: Begin drilling slowly and gradually increase the speed as you feel more comfortable. Apply light pressure and let the drill do the work. Avoid pushing too hard, as this can increase the risk of cracking the glass tile.
- Use lubrication: To reduce friction and prevent overheating, it’s recommended to use water or a lubricating oil while drilling. This will help keep the drill bit cool and prolong its lifespan.
- Drill in intervals: Instead of drilling continuously, it’s advisable to drill in short intervals. This allows the glass tile to cool down and minimizes the risk of cracking due to heat buildup.
Following these steps and drilling at the right angle will significantly reduce the chances of cracking the glass tile. Remember to take your time, be patient, and use the appropriate tools and techniques for the best results.
Take Breaks and Cool Down
Drilling glass tile can generate a lot of heat, which increases the risk of cracking or damaging the tile. To reduce this risk, it’s important to take breaks and let both the drill bit and the tile cool down periodically. This will help prevent the glass from becoming too hot and brittle.
When drilling glass tile, it’s recommended to drill for about 10 to 15 seconds and then stop and let the drill bit cool down for 15 to 30 seconds. This cooling off period will allow the heat to disperse and reduce the chances of cracking the tile. It’s also a good idea to periodically touch the tile surface to check for any excessive heat.
In addition to giving the drill bit and tile time to cool down, taking breaks will also give you a chance to rest and prevent fatigue. Drilling through glass tile can require a lot of pressure and concentration, and taking breaks will help you maintain accuracy and precision throughout the process.
Remember, patience is key when drilling glass tile. Rushing through the process or trying to drill continuously without breaks can result in cracked or damaged tiles. Take your time, let everything cool down, and you’ll be more likely to achieve successful and clean drill holes in your glass tile.
Prevent Cracking and Chipping
Drilling through glass tiles can be a delicate process as they are prone to cracking and chipping. However, with proper precautions and techniques, you can minimize the risk of damage. Here are some tips to help you prevent cracking and chipping when drilling glass tiles:
1. Use a Glass Bit
When drilling through glass tiles, it’s important to use a specialized glass bit. These bits have a spear-shaped carbide tip that is specifically designed for drilling through glass and other hard materials. Using a regular drill bit can increase the chances of cracking and chipping.
2. Start Slowly
Drilling at high speeds can generate excess heat and put unnecessary pressure on the glass tile, leading to cracking. To minimize the risk, start drilling at a slow speed and gradually increase the speed as you go deeper into the tile. This will help prevent the glass from heating up and cracking.
3. Use Lubrication
Applying a lubricant, such as water or oil, while drilling can help reduce the friction and heat generated during the drilling process. This will further minimize the chances of cracking and chipping. Make sure to keep the drill bit and the surface of the glass tile lubricated throughout the drilling process.
4. Mark the Point of Drilling
Before drilling, mark the exact point where you want to drill on the glass tile. This will help you maintain precision and prevent the drill bit from slipping and causing unnecessary damage. You can use a marker or tape to create a visible guide for drilling.
5. Support the Tile
Placing the glass tile on a stable surface, such as a piece of scrap wood or a rubber mat, can help prevent cracking. The supporting surface will absorb some of the pressure and vibration caused by drilling, reducing the risk of damage to the glass tile.
6. Use Light Pressure
When drilling through glass tiles, it’s important to apply light and even pressure. Excessive force can cause the tile to crack or chip. Let the drill bit do the work and avoid pushing too hard. Applying consistent and gentle pressure will help you maintain control and prevent damage to the glass tile.
7. Take Breaks

During the drilling process, it’s a good idea to take short breaks to let the drill bit and the glass tile cool down. This will help prevent overheating, which can lead to cracking. Taking breaks also gives you an opportunity to examine the progress and make adjustments if needed.
By following these tips, you can significantly reduce the risk of cracking and chipping when drilling glass tiles. Remember to always wear safety goggles and gloves while drilling, as small glass fragments can be hazardous.
FAQ:
What tools can I use to drill glass tile?
You can use a diamond-tipped drill bit or a carbide-tipped drill bit to drill glass tile.
What is the best way to drill glass tile without cracking it?
The best way to drill glass tile without cracking it is to use a slow speed and apply steady, even pressure while drilling. You should also use lubrication, such as water or oil, to keep the drill bit cool and prevent excessive heat.
Can I use a regular drill bit to drill glass tile?
No, using a regular drill bit can cause the glass tile to crack. It is best to use a diamond-tipped or carbide-tipped drill bit specifically designed for drilling glass.
How do I choose the right drill bit for glass tile?
You should choose a drill bit that is specifically designed for drilling glass tile. Look for diamond-tipped or carbide-tipped drill bits, as they are the most effective for this task.
Do I need to use lubrication when drilling glass tile?
Yes, using lubrication, such as water or oil, is important when drilling glass tile. It helps to keep the drill bit cool and prevent excessive heat, which can cause the tile to crack.
How can I prevent the glass tile from cracking while drilling?
To prevent the glass tile from cracking while drilling, you should use a slow speed, apply steady, even pressure, and use lubrication. It is also important to start with a small pilot hole before drilling the full-size hole.
Are there any alternative methods for drilling glass tile?
Yes, there are alternative methods for drilling glass tile. Some people recommend using a glass drill bit in a rotary tool, while others suggest using a glass cutter to score the tile before drilling. However, using a diamond-tipped or carbide-tipped drill bit in a regular drill is generally the most common and effective method.
Video:

Best Pro Tile Saw

Meet Harrison Clayton, a distinguished author and home remodeling enthusiast whose expertise in the realm of renovation is second to none. With a passion for transforming houses into inviting homes, Harrison's writing at https://thehuts-eastbourne.co.uk/ brings a breath of fresh inspiration to the world of home improvement. Whether you're looking to revamp a small corner of your abode or embark on a complete home transformation, Harrison's articles provide the essential expertise and creative flair to turn your visions into reality. So, dive into the captivating world of home remodeling with Harrison Clayton and unlock the full potential of your living space with every word he writes.


