How to Drill a Square Hole in Wood: Step-by-Step Guide

Drilling square holes in wood may seem like an impossible task, but with the right tools and techniques, it can be accomplished. Whether you’re looking to create a unique woodworking project or need a square hole for a specific purpose, this step-by-step guide will show you how to achieve the desired result.
Step 1: Prepare Your Materials
Before you begin, gather all the necessary materials. You will need a wood drill bit specifically designed for square holes, a power drill, a square template or guide, and of course, the piece of wood you want to drill into.
Step 2: Mark Your Hole
Using a pencil and a square template or guide, mark the area on the wood where you want the square hole to be. Double-check your measurements to ensure accuracy.

Step 3: Secure the Wood
Next, secure the piece of wood you are drilling into. You can use clamps or a vise to hold it firmly in place. This will prevent the wood from moving while you drill.
Step 4: Start Drilling
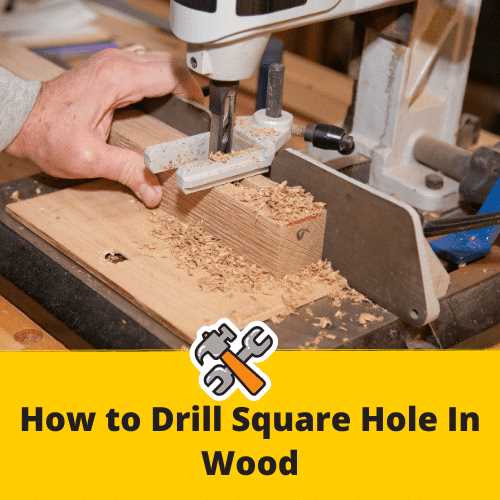
Attach the wood drill bit to your power drill and position it on the marked area. Slowly start drilling, applying consistent pressure. Be sure to keep the drill perpendicular to the surface of the wood to maintain a straight hole.
Step 5: Make Multiple Passes
To create a square hole, you will need to make multiple passes with the drill. Start by drilling a hole in each corner of the marked area. Then, gradually connect the holes by moving the drill bit between each corner, following the marked lines.
Step 6: Clean the Hole
After you’ve completed drilling the square hole, use a chisel or sandpaper to clean up any rough edges or excess wood. This will ensure a smooth and professional-looking finish.
Step 7: Test the Fit
Before considering your square hole complete, test the fit of any objects or components you plan to insert into it. Make any necessary adjustments to ensure a proper fit.
Step 8: Finish and Protect
Finally, apply a finish or protective coat to the wood surrounding the square hole to enhance its appearance and durability. This will also help prevent any potential damage to the wood in the future.
By following this step-by-step guide, you can successfully drill a square hole in wood. Remember to take your time, practice proper safety precautions, and enjoy the process of creating something unique and functional!
What is a square hole?
A square hole is a geometric shape characterized by four equal sides and four right angles. It is a hole that has a square cross-section, meaning the hole is square-shaped when viewed from the top or bottom. This differs from the more common round holes that are cylindrical in shape.
Square holes are often used in woodworking projects for various purposes. They can be used to create tight-fitting joints or for decorative purposes. Square holes are commonly found in furniture, cabinets, and other wooden structures.
There are several methods for drilling a square hole in wood, each with its own advantages and disadvantages. These methods include using a chisel and mallet, using a mortise chisel and drill, or using a specialized square hole drill bit.
Why would you want to drill a square hole in wood?
Drilling a square hole in wood may seem unconventional, as round holes are the most common and easily drilled shape. However, there are several situations where drilling a square hole can be advantageous and necessary. Here are some reasons why you might want to drill a square hole in wood:
Joinery and Woodworking
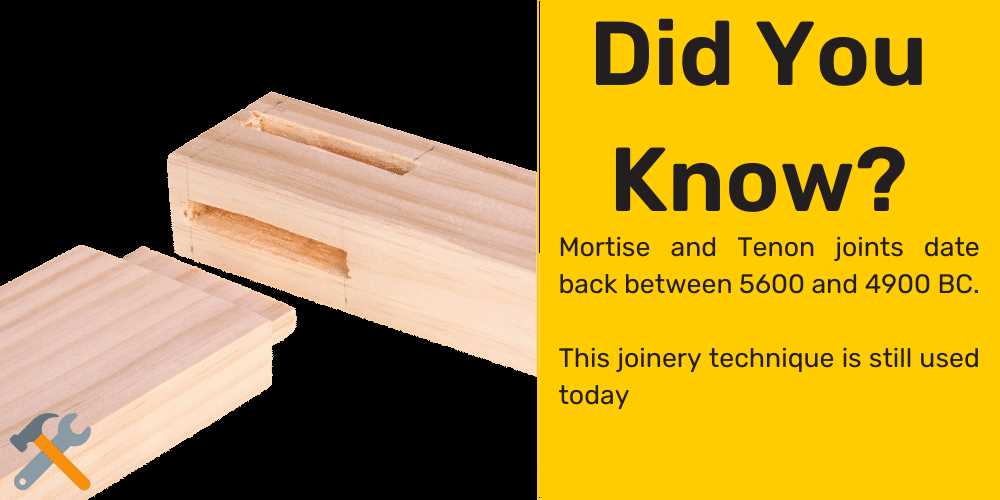
Square holes are commonly used in joinery and woodworking projects, where precise and tight-fitting joints are required. Square holes allow for the use of square pegs or tenons, which create stronger and more stable connections compared to round pegs.
For example, in traditional mortise and tenon joints, a square hole is drilled to receive the square tenon, providing a solid and secure joint. The square shape prevents the tenon from rotating and adds strength to the overall structure.
Hardware Installation
Some hardware, such as hinges and latches, require square holes for proper installation. Square holes ensure that the hardware fits securely and doesn’t rotate or wobble over time.
By drilling a square hole precisely to the specifications of the hardware, you can ensure a clean and snug fit, allowing the hardware to function properly and the wood to remain secure.
Aesthetic Purposes

Drilling square holes in wood can also be done for purely aesthetic purposes. Square holes can add a unique and visually interesting element to a wood project, making it stand out from the crowd.
Using square holes creatively in furniture or decorative pieces can create a sense of craftsmanship and attention to detail. It can also serve as a decorative feature on its own or be used in conjunction with other design elements.
Specialized Applications
In some specialized applications, square holes may be required for specific functions. For example, in electrical work, square holes are often used for outlets and switches to ensure proper alignment and fit.
Additionally, in certain woodworking techniques like marquetry or inlay work, square holes may be necessary to accommodate specific design elements and patterns.
Overall, while drilling a square hole in wood may not be as straightforward as drilling a round hole, there are various situations where it can be useful and necessary. Whether for joinery, hardware installation, aesthetic purposes, or specialized applications, drilling a square hole opens up new possibilities in woodworking and craftsmanship.
Step 1: Gather the necessary tools and materials
To drill a square hole in wood, you will need the following tools and materials:
- A power drill with variable speed control
- A square drill bit or a mortising bit
- A chisel
- Clamps
- A pencil or a marking tool
- Safety glasses
- Work gloves
- A workbench or a sturdy surface
- A piece of wood
Make sure you have all these tools and materials before proceeding to the next step.
Tools
- Drill Press
- Square Drill Bit
- Hammer
- Chisel
- Tape Measure
- Pencil
- Clamps
- Safety Glasses
When drilling a square hole in wood, you will need several tools to ensure accuracy and safety. Here are the tools you will need:
- Drill Press: A drill press is a machine that allows you to accurately drill holes at a specific angle and depth. It is essential for drilling square holes as it provides the necessary stability and precision.
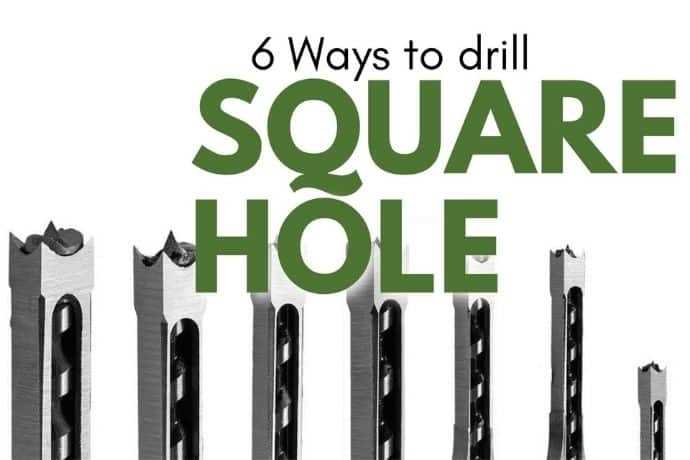
- Square Drill Bit: A square drill bit is specially designed to create square-shaped holes. It has four cutting edges that help remove wood efficiently and create clean, accurate holes.
- Hammer: A hammer is used to tap the chisel gently and help remove the excess wood from the corners of the drilled hole, making it square-shaped.
- Chisel: A chisel is used to remove the excess wood from the corners of the drilled hole. It allows you to create perfectly square corners and tidy up the edges of the hole.
- Tape Measure: A tape measure is used to measure and mark the precise location where the square hole needs to be drilled.
- Pencil: A pencil is used to mark the location and outline of the square hole on the wood.
- Clamps: Clamps are used to secure the wood firmly in place, ensuring stability and preventing any movement during the drilling process.
- Safety Glasses: Safety glasses are essential to protect your eyes from any flying debris or wood chips that may occur during the drilling process.
Having these tools on hand will help you complete the task of drilling a square hole in wood safely and accurately.
Materials
- Drill
- Square bit
- Wood
- Measuring tools (ruler, tape measure)
- Pencil
- Clamp or vise
- Safety goggles
- Dust mask
- Sanding tools (sandpaper or sanding block)
Step 2: Mark the location of the square hole
Before you start drilling, it’s important to mark the exact location where you want to create the square hole. This will ensure that you drill in the right spot and maintain accuracy throughout the process.
To mark the location, follow these simple steps:
- Carefully measure and determine the precise dimensions of the square hole you want to create. Use a ruler or a measuring tape to ensure accuracy.
- Take a pencil or a marker and mark the four corners of the square hole on the wood surface. Make sure the marks are clearly visible and won’t easily rub off.
- Connect the marks using a straightedge or a square to outline the shape of the square hole. This step will give you a visual guide during the drilling process.
Remember to double-check your measurements and marks before proceeding to the next step. This will help prevent any mistakes and ensure a clean and accurate square hole.
Step 3: Prepare the wood for drilling
Before you start drilling a square hole in wood, it is important to properly prepare the wood to ensure a successful outcome. Here are the steps to follow:
1. Measure and mark

Start by measuring and marking the location of the square hole on the wood. Use a measuring tape and a pencil to make accurate measurements and mark the area where the hole will be drilled.
2. Clamp the wood
To prevent the wood from shifting or moving during the drilling process, it is recommended to securely clamp it to a workbench or any stable surface. This will ensure that the wood remains stable and the hole is drilled in the desired location.
3. Create a pilot hole
Using a small drill bit, create a pilot hole in the center of the marked area. This will serve as a guide for the larger drill bit to follow. Make sure the pilot hole is straight and centered to ensure accuracy.
4. Select the appropriate drill bit
Choose the appropriate size of the drill bit based on the size of the square hole you want to create. It is recommended to use a Forstner bit or a spade bit for drilling square holes in wood.
5. Apply masking tape
Before drilling with the selected drill bit, it is advisable to apply masking tape on the surface of the wood around the marked area. This will help prevent splintering and ensure cleaner edges.
6. Secure the drill bit
Insert the selected drill bit into the drill chuck and tighten it securely. Make sure the drill bit is aligned straight and centered to ensure accurate drilling.
7. Start drilling
Place the drill bit into the pilot hole and start drilling the square hole. Apply steady pressure and keep the drill bit aligned with the marked area. Drill slowly and steadily to avoid splintering or damaging the wood.
Following these steps will help you properly prepare the wood for drilling a square hole. Once the wood is prepared, you can move on to the next step of actually drilling the square hole.
Measurements and layout
Before you start drilling a square hole in wood, it’s important to take accurate measurements and carefully plan the layout. Here are the steps to follow:
1. Determine the size and depth of the square hole
Decide on the dimensions of the square hole you want to create. Measure the length, width, and depth of the hole using a tape measure or ruler. Make sure to take accurate measurements, as these will determine the size of the hole.
2. Mark the position of the square hole
Using a pencil or marking tool, mark the position on the wood where you want the square hole to be. Consider the length, width, and depth measurements when selecting the location. Ensure that the mark is visible and clearly defines the edges of the hole.
3. Create a guide for the drill bit
To ensure precise drilling, it’s helpful to create a guide for the drill bit. This can be done by drilling a smaller hole within the marked area. Use a drill bit that is smaller than the width of the desired square hole. Place the tip of the drill bit on the marked position and drill a hole to the desired depth.
4. Mark the corners of the square hole
Using a square or ruler, extend lines from the edges of the guide hole to mark the corners of the square hole. These lines will serve as a reference for drilling the corners of the hole accurately.
5. Drill the corners of the square hole
Start drilling at one of the marked corners using a drill bit that matches the width of the square hole. Position the drill bit at a slight angle to create a pilot hole and then gradually straighten it as you drill deeper. Repeat this process for each corner of the square hole.
6. Connect the corners of the square hole
After drilling the corners, connect them by drilling along the marked lines. Start from the pilot holes and slowly move the drill bit along the lines. Be careful to maintain a straight and steady movement to ensure the edges of the square hole are clean and precise.
7. Clean up the edges
After drilling the square hole, use sandpaper or a chisel to clean up the edges. This will remove any rough or uneven surfaces, making the hole more visually appealing and functional.
Following these measurements and layout steps will help you drill a square hole in wood accurately and achieve the desired result. Remember to take your time, be patient, and double-check your measurements before drilling.
Step 4: Drill pilot holes
Before drilling the square hole, it is helpful to drill pilot holes. Pilot holes are smaller holes that guide the drill bit and help prevent the wood from splitting or cracking. They also make it easier to drill the square hole accurately.
Here are the steps to drill pilot holes:
- Select a drill bit that is slightly smaller than the width of the square hole you want to drill.
- Place a piece of masking tape on the drill bit at the desired depth. This will act as a guide to prevent you from drilling too deep.
- Mark the location of the pilot holes on the wood using a pencil or marking tool.
- Secure the wood to a workbench or clamp it down to prevent it from moving during drilling.
- Align the drill bit with the marked pilot hole location.
- Hold the drill firmly and apply gentle pressure as you begin drilling. Start slow and gradually increase the speed.
- Drill the pilot hole to the desired depth, stopping when the masking tape reaches the wood surface.
- Repeat the process for each pilot hole.
Once you have drilled the pilot holes, you are ready to move on to the next step of drilling the square hole.
Select the correct drill bit size
Choosing the right drill bit size is crucial when drilling a square hole in wood. Using the wrong size can result in a hole that is too small or too large for the project you are working on. Here are some steps to help you select the correct drill bit size:
- Measure the size of the object: Start by measuring the size of the object you are drilling the square hole for. This will give you an idea of the approximate size of the hole you need to create.
- Consider the thickness of the wood: Take into account the thickness of the wood you are working with. Thicker wood may require a larger drill bit size to accommodate the square hole.
- Choose a drill bit size: Consult a drill bit size chart or guide to determine the appropriate size for your project. The chart will typically list the recommended drill bit sizes for different hole dimensions.
- Test the drill bit: Before drilling the square hole in your wood, it is recommended to test the selected drill bit on a scrap piece of wood. This will ensure that the drill bit size is appropriate and will result in the desired square hole.
By selecting the correct drill bit size, you can ensure that the square hole you drill in the wood is the right size for your project and will provide a precise and clean finish. Take the time to measure, consider the thickness, consult a chart, and test the drill bit to achieve the best results.
FAQ:
What tools do I need to drill a square hole in wood?
To drill a square hole in wood, you will need a power drill, a square hole drill bit, a chisel, a hammer, and a tape measure.
Can I use a regular drill bit to make a square hole?
No, you cannot use a regular drill bit to make a square hole. You need a square hole drill bit specifically designed for the task.
What is the first step in drilling a square hole?
The first step is to mark the center of the square hole on the wood using a tape measure and a pencil.
How do I start drilling the hole?
To start drilling the hole, place the square hole drill bit on the marked center of the hole and apply steady pressure while drilling with the power drill.
What do I do after drilling the initial hole?
After drilling the initial hole, you will need to use a chisel and a hammer to remove the remaining material and square up the hole.
What are some tips for drilling a square hole in wood?
Some tips for drilling a square hole in wood are to go slow and steady, use a sharp square hole drill bit, and make sure to always wear safety goggles.
Video:


Meet Harrison Clayton, a distinguished author and home remodeling enthusiast whose expertise in the realm of renovation is second to none. With a passion for transforming houses into inviting homes, Harrison's writing at https://thehuts-eastbourne.co.uk/ brings a breath of fresh inspiration to the world of home improvement. Whether you're looking to revamp a small corner of your abode or embark on a complete home transformation, Harrison's articles provide the essential expertise and creative flair to turn your visions into reality. So, dive into the captivating world of home remodeling with Harrison Clayton and unlock the full potential of your living space with every word he writes.


