How to Align Drill Holes: A Step-by-Step Guide for Precision and Accuracy

When it comes to drilling holes, precision and accuracy are essential. Whether you are a professional carpenter or a DIY enthusiast, aligning drill holes correctly can make all the difference in the success of your project. In this step-by-step guide, we will walk you through the process of aligning drill holes with precision and accuracy.
Step 1: Measure and Mark
The first step in aligning drill holes is to measure and mark the desired location for your holes. Use a tape measure or ruler to ensure accurate measurements, and mark the spot with a pencil or marker. If drilling multiple holes, it is important to measure and mark each hole separately to avoid any mistakes.
Step 2: Create Guide Lines
Next, create guide lines to assist you in aligning your drill holes. This can be done by using a straight edge or a level. Place the straight edge or level along the marked spot and draw a line with your pencil or marker. Repeat this step for each hole, making sure to align the guide lines precisely.

Step 3: Use a Center Punch
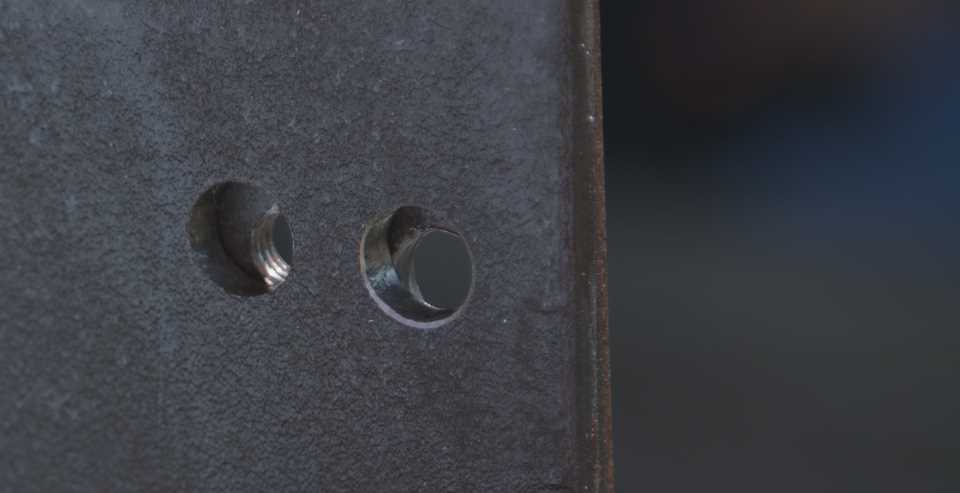
Using a center punch can greatly improve the accuracy of your drill holes. Place the center punch on the marked spot and give it a firm tap with a hammer. This will create a small indentation that will guide the drill bit and prevent it from wandering off course.
Step 4: Start Drilling
Now it’s time to start drilling. Use a drill bit that matches the size of your hole and insert it into your drill. Position the drill bit at a 90-degree angle to the surface and slowly start drilling. Apply steady pressure and let the drill do the work, making sure to stay on the guide lines for each hole.
Step 5: Check and Adjust

After drilling each hole, it is important to check the alignment and make any necessary adjustments. Use a tape measure or ruler to ensure that the holes are evenly spaced and aligned correctly. If any adjustments need to be made, use a file or sandpaper to enlarge or shape the holes as needed.
Remember, precision and accuracy are key when aligning drill holes. Take your time, measure carefully, and follow these steps to ensure the success of your project.
By following this step-by-step guide, you can align drill holes with precision and accuracy, resulting in a professional-looking finish for your woodworking or DIY projects. So grab your drill and get ready to take your craftsmanship to the next level!
Importance of Precision and Accuracy
When it comes to aligning drill holes, precision and accuracy are of utmost importance. Whether you’re working on a DIY project or a professional construction job, ensuring that your drill holes are aligned correctly can make a significant difference in the overall outcome. Here are a few reasons why precision and accuracy matter:
1. Stronger and Sturdier Connections
Aligning drill holes with precision ensures that the connections you create are strong and sturdy. When drill holes are not accurately aligned, it can result in weakened connections that may break or fail under stress. Whether you’re joining two pieces of wood, installing shelves, or constructing furniture, precise alignment of drill holes ensures that the connections will withstand the test of time.

2. Professional and Polished Finish
When drill holes are aligned with precision and accuracy, the finished product looks professional and polished. Whether you’re working on a woodworking project or installing cabinets in a kitchen, accurately aligned drill holes contribute to an overall high-quality appearance. It shows that you’ve taken the time and effort to ensure that every detail is just right.
3. Easy Replacement and Adjustment
Proper alignment of drill holes makes it easier to replace or adjust components in the future. When drill holes are not aligned accurately, it can be challenging to remove or modify the connections without causing damage. However, when the holes are precisely aligned, you can easily remove or adjust components as needed without compromising the overall structure.
4. Avoidance of Costly Mistakes
Aligning drill holes with precision helps you avoid costly mistakes. When drill holes are not accurately aligned, it can lead to inaccurate measurements, incorrect positioning, and unnecessary rework. This can result in wasted time, materials, and resources. However, by paying attention to precision and accuracy in drill hole alignment, you can save yourself from costly errors and ensure a smooth and efficient workflow.
5. Increased Safety

Precision and accuracy in drill hole alignment contribute to increased safety. Well-aligned drill holes create secure connections that minimize the risk of accidents or injuries. Whether you’re working on a construction site or undertaking a DIY project at home, the last thing you want is for drill holes to be misaligned and compromise the stability and safety of the structure.
Overall, precision and accuracy in drill hole alignment are essential for achieving reliable and professional results. By ensuring that your drill holes are aligned correctly, you can create stronger connections, achieve a polished finish, make future adjustments easier, avoid costly mistakes, and prioritize safety in your projects.
Choosing the Right Tools and Materials
Drill
When it comes to drilling holes with precision and accuracy, choosing the right drill is essential. Consider the following factors when selecting a drill:
- Power: Choose a drill with enough power to handle the materials you will be working with. Different materials require different levels of power.
- Speed: Look for a drill with variable speed settings. This will allow you to adjust the speed according to the material and hole size.
- Chuck Size: Make sure the drill has a chuck size that is suitable for the drill bits you will be using. Different drills have different chuck sizes.
- Ergonomics: Consider the ergonomics of the drill, such as the grip and weight. A comfortable drill will ensure better control and precision.
Drill Bits
Choosing the right drill bits is just as important as choosing the right drill. Here are some factors to consider:

- Material: Different drill bits are designed for specific materials, such as wood, metal, or concrete. Make sure you select the appropriate drill bits for the material you will be drilling into.
- Diameter: Consider the diameter of the hole you need to drill and choose drill bits that match the desired size. Having a variety of sizes on hand will give you more flexibility.
- Quality: Invest in high-quality drill bits that are durable and sharp. Quality drill bits will provide better results and last longer.
- Type: There are various types of drill bits available, including twist bits, spade bits, and Forstner bits. Research the different types and choose the one that best suits your project.
Measuring Tools
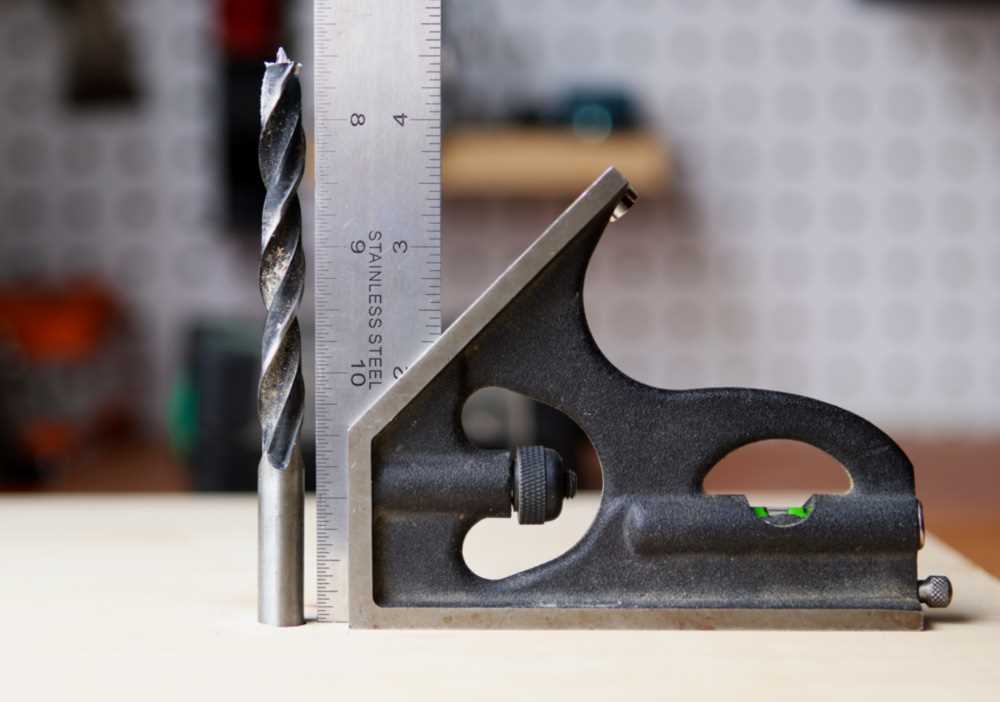
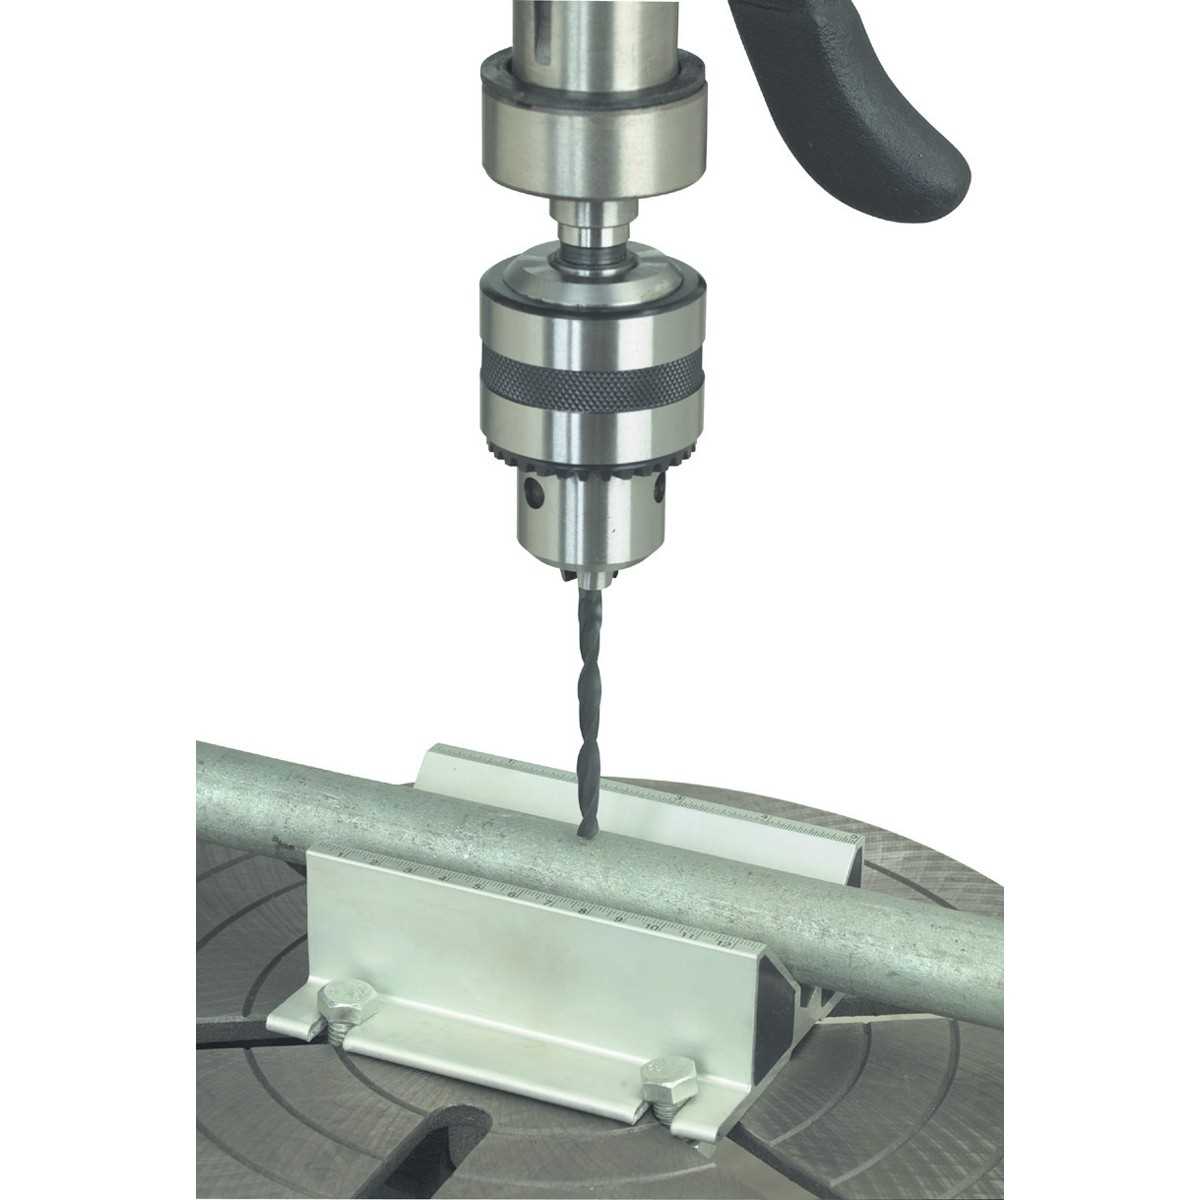
Accurate measurements are crucial for aligning drill holes. Here are some measuring tools that you should have:
- Tape Measure: A tape measure is essential for measuring distances accurately. Look for a sturdy tape measure with clear markings.
- Square: A square is used to ensure that your drill holes are at a right angle. Choose a square that is easy to handle and has precise measurements.
- Level: A level is used to ensure that your drill holes are straight. Look for a level with a bubble vial that is easy to read.
- Marking Tools: Invest in a good-quality pencil or a marking pen to make clear and accurate marks on the material.
Safety Equipment
Always prioritize safety when working with drills and other tools. Here are some safety equipment you should have:
- Safety Glasses: Protect your eyes from flying debris by wearing safety glasses.
- Dust Mask: When drilling into materials that produce dust or debris, wear a dust mask to protect your lungs.
- Gloves: Depending on the materials, wearing gloves can provide extra protection and grip.
- Hearing Protection: Drilling can generate loud noises, so wear earplugs or earmuffs to protect your ears.
Measuring and Marking the Hole Locations
Before you begin drilling, it is crucial to accurately measure and mark the hole locations on your workpiece. This will ensure that the holes are properly aligned and spaced according to your design or project requirements. Here are the steps to measure and mark the hole locations:
- Gather the necessary tools: To measure and mark the hole locations, you will need a tape measure or ruler, a pencil, and a marking tool such as a center punch or awl.
- Take accurate measurements: Use a tape measure or ruler to measure the distances between the desired hole locations. It is essential to be precise and double-check your measurements to avoid any errors.
- Mark the hole locations: Once you have determined the measurements, use a pencil to mark the exact spots where the holes will be drilled. For accuracy, it can be helpful to use a straightedge or square to ensure the lines are perpendicular or parallel as needed.
- Create pilot holes (if necessary): Depending on the material you are working with, it may be beneficial to create pilot holes before drilling the final holes. This can help guide the drill bit and prevent any potential damage or splitting.
- Use a center punch or awl: For precision drilling, you can use a center punch or awl to create small indentations at the marked hole locations. This will help prevent the drilling bit from wandering or slipping when you begin drilling.
- Double-check the markings: Before proceeding with drilling, take a moment to review and verify that the hole locations are correct. Any mistakes or inaccuracies at this stage can significantly affect the final alignment and appearance of your project.
By following these steps to measure and mark the hole locations, you can ensure precision and accuracy when drilling. Taking the time to properly measure and mark before drilling will result in a professional-looking finished product that meets your specifications.
Setting Up the Drill
1. Gather all the necessary tools and materials
Before you start setting up the drill, make sure you have all the necessary tools and materials on hand. This includes:
- A power drill
- Drill bits of the appropriate size for your project
- Measuring tape or ruler
- Pencil or marker
- Masking tape
- Safety glasses or goggles
2. Prepare the work surface
Ensure that the work surface is clean and clear of any obstructions. This will provide a stable and safe area for you to work on.
If you are working on a delicate or finished surface, consider placing a piece of scrap wood underneath to protect it from any accidental damage.
3. Secure the material
Position the material you need to drill on the work surface. Use clamps or a vice to secure it in place, ensuring that it won’t move or shift during the drilling process.
If using clamps, make sure they are firmly tightened but not too tight as to damage the material.
4. Mark the drill hole locations
Using a measuring tape or ruler, determine the precise location for each drill hole. Mark these spots with a pencil or marker, ensuring they are clearly visible.
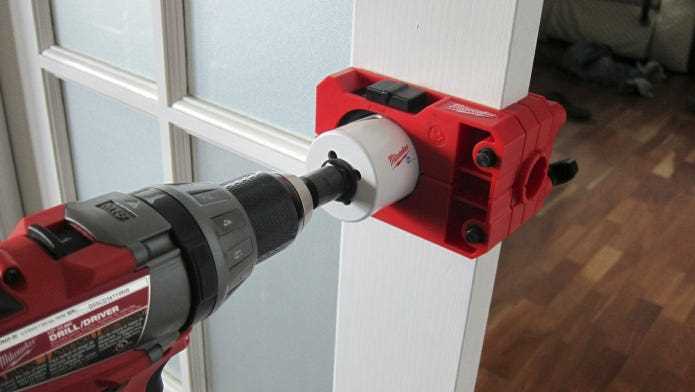
For accuracy and consistency, consider creating a drilling template using a piece of cardboard or a specialized drilling guide.
5. Use masking tape as a guide
Apply a strip of masking tape over each marked drill hole location. This will not only provide extra visibility, but it will also help prevent the drill bit from slipping and causing damage to the material.
When applying the masking tape, make sure it is securely pressed onto the material and covers the entire area around the drill hole location.
6. Put on safety glasses or goggles
Always prioritize safety when using a power drill. Before you begin drilling, put on a pair of safety glasses or goggles to protect your eyes from any flying debris.
Make sure the safety glasses or goggles fit comfortably and securely on your face.
Aligning the Drill with the Marked Locations
Once you have accurately marked the locations for your drill holes, it’s essential to align your drill with those marks to ensure precision and accuracy in your drilling.
Step 1: Choose the correct drill bit
Before aligning the drill, make sure you have the correct drill bit for the material you are working with. Using the wrong drill bit can result in damage to the material or a poor-quality hole.
Step 2: Secure your workpiece
Be sure to firmly secure your workpiece using clamps or a vise to prevent it from moving during drilling. This will help maintain accuracy in aligning the drill with the marked locations.
Step 3: Position the drill
Hold the drill perpendicular to the surface of the workpiece. Align the drill bit with one of the marked locations and make sure it is centered over the mark.
Step 4: Apply gentle pressure
With the drill bit aligned, apply gentle pressure to the drill to ensure it remains in place. This will help prevent any shift in alignment as you begin drilling.
Step 5: Start drilling
Once you have aligned the drill with the marked location and secured it in place, slowly start drilling. Use a steady and controlled motion to guide the drill bit through the material.
Step 6: Repeat the process
If you have multiple drill holes to align, repeat steps 3 to 5 for each marked location. Take your time to ensure each hole is accurately aligned and drilled.
By following these steps, you can successfully align your drill with the marked locations and achieve precision and accuracy in your drilling project.
Performing the Drilling Process
Once you have marked the drill holes and prepared the workpiece, it is time to perform the drilling process. This section will guide you through the steps to ensure precision and accuracy in your drilling.
Step 1: Choose the Right Drill Bit
Before you begin drilling, it is important to select the appropriate drill bit for your project. Take into consideration the material of the workpiece and the size of the desired hole. Different drill bits are designed for specific materials and purposes, so be sure to choose one that is suitable for the job.
Step 2: Secure the Workpiece
Place the workpiece securely on a stable surface or clamp it down to prevent any movement during drilling. This will help maintain accuracy and prevent damage to both the workpiece and the drill bit.
Step 3: Set the Drill Speed
Adjust the drill speed to match the requirements of the material being drilled. Higher speeds are generally used for softer materials, while slower speeds are recommended for harder materials. Consult the manufacturer’s guidelines for the drill and/or the drill bit for the optimal speed settings.
Step 4: Position the Drill Bit
Carefully position the drill bit over the first marked drill hole. Use a steady hand and apply gentle pressure to keep the drill bit aligned with the mark.
Step 5: Start Drilling
With the drill bit aligned, gradually apply downward pressure and activate the drill. Start at a slow speed and increase gradually as the hole deepens. Maintain a consistent drilling speed to prevent overheating or damaging the drill bit.
Step 6: Repeat the Process
Once the first hole is completed, move on to the next marked drill hole and repeat the previous steps. Take your time and ensure each hole is drilled accurately and precisely.
Step 7: Clean and Inspect
After drilling all the required holes, clean the work area and inspect the drilled holes. Use a brush or compressed air to remove any debris or dust from the holes and ensure they are clean and ready for further use or installation.
Step 8: Final Check
Before finishing, double-check the alignment and positioning of the drilled holes. Use a ruler or measuring tool to confirm that the distances between the holes are accurate and meet your requirements.
Following these steps will help you perform the drilling process with precision and accuracy. Remember to always prioritize safety by wearing appropriate protective gear and following proper drilling techniques.
Checking the Alignment and Making Adjustments
After drilling the holes, it is important to check the alignment before proceeding. This will ensure that your project turns out with the desired precision and accuracy. Here are the steps to check the alignment and make any necessary adjustments:
- Use a straightedge: Place a straightedge, such as a ruler or level, against the drilled holes. Ensure that the straightedge runs parallel to the desired alignment. If there is any deviation or gap between the straightedge and the holes, adjustments will be needed.
- Measure the alignment: Use a measuring tape or ruler to measure the spacing between the holes. If the spacing is not consistent or matches the desired measurement, adjustments are required.
- Identify the misaligned holes: If there are any misaligned or improperly spaced holes, mark them for adjustment. This can be done using a pencil or marker.
- Make adjustments: Depending on the type of drilling equipment used, there are several ways to make the necessary adjustments. Some common methods include adjusting the drilling depth, changing the drilling angle, or using a different drill bit size.
- Redrill the holes: Once the adjustments have been made, carefully redrill the marked holes. Take your time and ensure that the drill bit is aligned properly before drilling.
- Recheck the alignment: After redrilling the adjusted holes, repeat the alignment checks using the straightedge and measuring tool. Ensure that the spacing and alignment meet the desired specifications.
By following these steps, you can ensure that your drill holes are aligned accurately and precisely. Taking the time to check the alignment and make adjustments will result in a professional-looking and structurally sound finished project.
FAQ:
What is the best way to ensure precision and accuracy when aligning drill holes?
The best way to ensure precision and accuracy when aligning drill holes is to carefully measure and mark the desired locations for the holes before drilling. It is important to use the right tools and techniques, such as using a ruler or measuring tape to measure the distances and a center punch to create a small indentation at the center of each hole. Additionally, using a drill guide or a jig can help to maintain alignment and prevent the drill bit from wandering off-course.
Video:


Meet Harrison Clayton, a distinguished author and home remodeling enthusiast whose expertise in the realm of renovation is second to none. With a passion for transforming houses into inviting homes, Harrison's writing at https://thehuts-eastbourne.co.uk/ brings a breath of fresh inspiration to the world of home improvement. Whether you're looking to revamp a small corner of your abode or embark on a complete home transformation, Harrison's articles provide the essential expertise and creative flair to turn your visions into reality. So, dive into the captivating world of home remodeling with Harrison Clayton and unlock the full potential of your living space with every word he writes.


