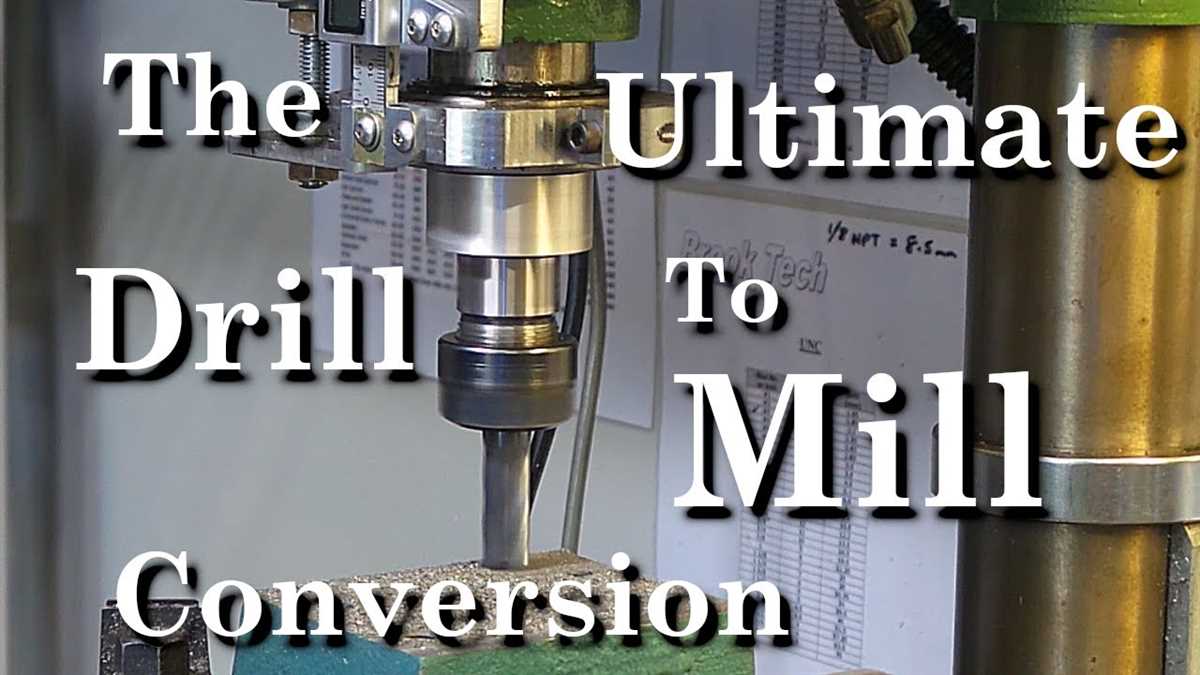
Converting a Drill Press into a Milling Machine: Step-by-Step Guide
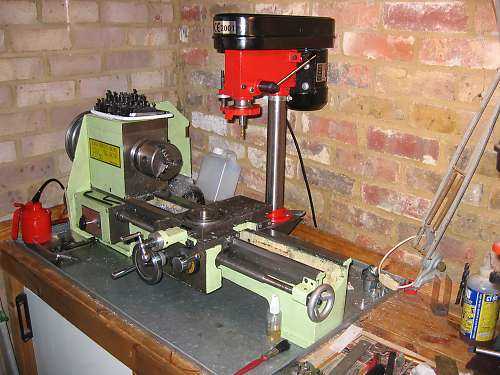
If you are an avid DIY enthusiast or a small-scale machining hobbyist, you might have found yourself in a situation where you need a milling machine, but don’t have the budget or space for one. However, if you already own a drill press, there is a solution to this problem – converting it into a milling machine. This step-by-step guide will walk you through the process and help you transform your drill press into a functional milling machine.
Converting a drill press into a milling machine has numerous advantages. Firstly, it allows you to perform milling operations on various materials, including wood, metal, and plastics. This opens up a world of possibilities for creating precision parts and prototypes for your projects. Additionally, modifying your drill press is a cost-effective alternative to purchasing a dedicated milling machine, saving you money in the process.
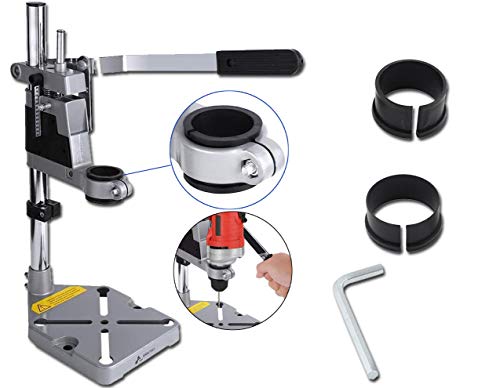
Before you begin the conversion process, it’s essential to gather all the necessary tools and materials. These include a drill press, a milling vise, end mills, a rotary table, a mill chuck, and a milling spindle with a Morse Taper adapter. Having these items ready will ensure a smoother and more efficient process. It’s also important to consider safety precautions, such as wearing protective eyewear and working in a well-ventilated area.
Once you have gathered your tools and ensured your safety, you can proceed with the conversion process. This involves removing the chuck from your drill press and installing the mill chuck and spindle in its place. You will also need to attach the milling vise to the worktable and secure it firmly. The rotary table can be used to perform more complicated milling operations, while the end mills will enable you to shape and cut the material.
By following this step-by-step guide and investing a little time and effort, you can turn your drill press into a functional milling machine that can handle a plethora of machining tasks. Whether you are looking to create intricate woodworking pieces or machine small metal parts, the converted drill press will prove to be a valuable addition to your workshop.

What is a Drill Press?
A drill press is a machine tool used for drilling holes in various materials. It consists of a base, column, table, and drill head. The drill head contains a motor and a spindle, which holds the cutting tool.
The main advantage of a drill press over a handheld drill is the ability to accurately and precisely drill perpendicular holes. The drill press provides a stable and controlled environment for drilling, allowing for more consistent results.
Drill presses are commonly used in woodworking, metalworking, and other industries where accurate drilling is required. They are available in a variety of sizes and power capacities to accommodate different types of projects.
Components of a Drill Press
- Base: The base is the foundation of the drill press and provides stability during operation.
- Column: The column is a vertical pillar that supports the drill head and allows for height adjustment.
- Table: The table is a flat surface that supports the workpiece and can be adjusted for angle and height.
- Drill Head: The drill head houses the motor and spindle. It can be moved up and down the column for drilling at different depths.
Operating a Drill Press


To operate a drill press, the user secures the workpiece to the table and adjusts the spindle speed and feed rate. The drill bit is aligned with the desired drilling location, and the user activates the motor to start drilling. The drill press provides precise control over the drilling process, allowing for accurate and repeatable holes.
Safety Considerations
When using a drill press, it is important to follow safety guidelines to prevent accidents and injuries. Some safety considerations include:
- Eye Protection: Wear safety goggles or a face shield to protect your eyes from flying debris.
- Clamping: Always secure the workpiece to the table using clamps or a vise to prevent it from moving during drilling.
- Speed and Feed: Use the appropriate speed and feed rate for the material being drilled to avoid overheating or causing damage to the drill bit.
- Clearing Chips: Clear chips and debris from the drilling area regularly to maintain a clean and safe working environment.
By following these safety guidelines and operating a drill press correctly, you can safely and effectively use this versatile machine for your drilling needs.
What is a Milling Machine?
A milling machine is a tool used to machine solid materials. It can be used to perform a variety of operations such as cutting, drilling, and shaping materials like metal, wood, and plastic. The machine utilizes rotary cutters to remove material from the workpiece, creating complex shapes and profiles.
Milling machines are classified based on their orientation and control methods:

Types of Milling Machines:
- Vertical Milling Machine: The spindle axis is vertically oriented, and the tool is mounted on a movable arm called a quill. This type of machine is ideal for tasks that require precision and intricate detailing.
- Horizontal Milling Machine: The spindle axis is horizontally oriented, and the workpiece is positioned on a table that can move in multiple directions. This type of machine is commonly used for large-scale production and heavy-duty cutting.
- Universal Milling Machine: This machine combines the features of both vertical and horizontal milling machines, allowing for a wide range of operations.
Control Methods:
- Manual Control: The operator manually adjusts the machine’s movements and feeds using handwheels and levers. This method provides flexibility and greater control over the milling process.
- Computer Numerical Control (CNC): In CNC milling machines, the movements and feeds are controlled by a computer. This method offers higher precision and automation, making it suitable for complex operations and mass production.
Milling machines are commonly used in various industries, including manufacturing, automotive, aerospace, and prototyping. They are versatile tools that enable the creation of intricate parts and components with high accuracy.
Gather the Required Tools
Before you can start converting your drill press into a milling machine, you will need to gather the necessary tools and materials. Here is a list of the items you will need:
- Drill press
- Milling vise
- Milling bits
- End mills
- Clamps
- Angle plates
- Center finder
- Indicator
- Workpiece
- Measuring tools (calipers, micrometers, etc.)
The drill press is the main tool that you will be converting, so make sure you have a reliable and sturdy one. The milling vise is essential for holding the workpiece securely in place while milling. You will also need various milling bits, such as end mills, to perform different types of cuts.
Clamps are necessary for securing the workpiece and angle plates are useful for holding the workpiece at different angles. A center finder is helpful for locating the center of the workpiece, and an indicator is used to measure the accuracy of the milling process.
Lastly, you will need a workpiece to practice on and measuring tools, such as calipers and micrometers, to ensure the accuracy of your milling operations.

| Tool | Description |
|---|---|
| Drill press | Main tool to be converted into a milling machine |
| Milling vise | Used for holding the workpiece securely during milling |
| Milling bits | Various types of cutting tools for milling operations |
| End mills | Specific type of milling bit used for cutting operations |
| Clamps | Used to secure the workpiece in place |
| Angle plates | Helpful for holding the workpiece at different angles |
| Center finder | Used to locate the center of the workpiece |
| Indicator | Measures the accuracy of the milling process |
| Workpiece | A piece of material to practice milling on |
| Measuring tools | Calipers, micrometers, etc. for measuring accuracy |
Prepare the Drill Press
Before converting your drill press into a milling machine, you need to prepare it properly. Here are the steps:
Step 1: Clean and Inspect
- Start by cleaning your drill press thoroughly, removing any dirt, debris, or rust.
- Inspect all the components, including the base, column, and head, for any signs of damage or wear.
- Make sure all the moving parts, such as the quill, spindle, and chuck, are functioning properly.
Step 2: Secure the Drill Press
Next, you need to secure your drill press to prevent any movement or vibrations during the milling process:
- Tighten all the bolts and screws on the drill press to ensure it is stable.
- Consider using clamps or a vise to secure the drill press to your workbench or a sturdy surface.
- Use leveling tools, such as a spirit level, to ensure your drill press is perfectly level.
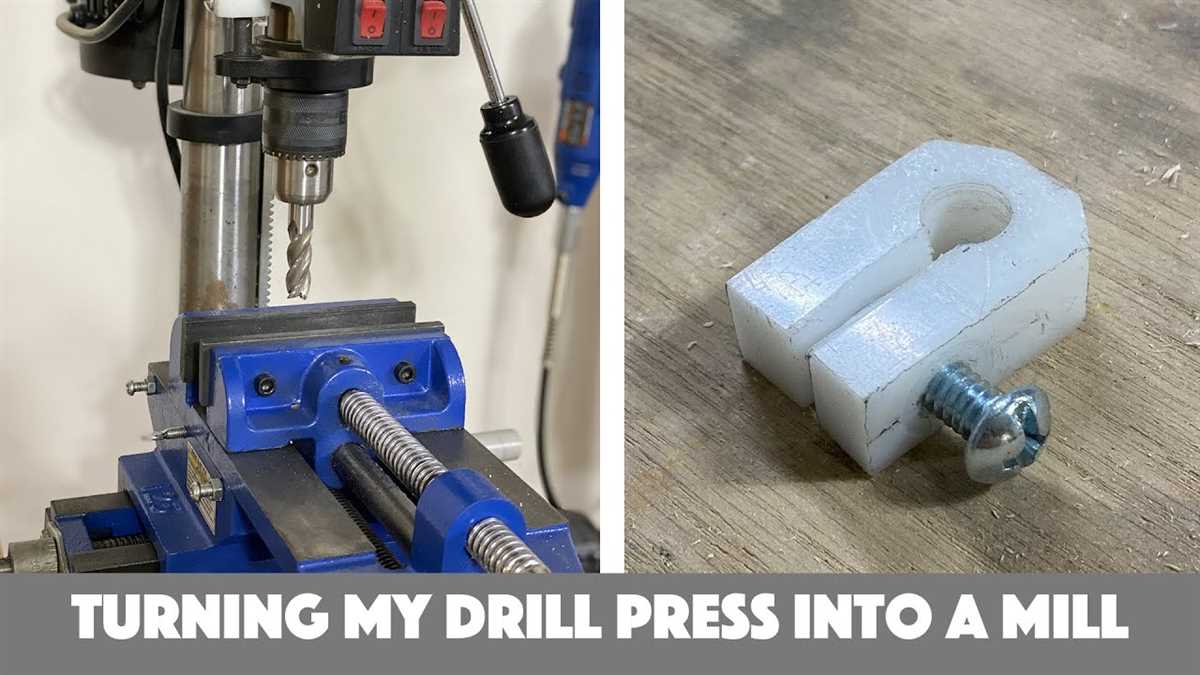
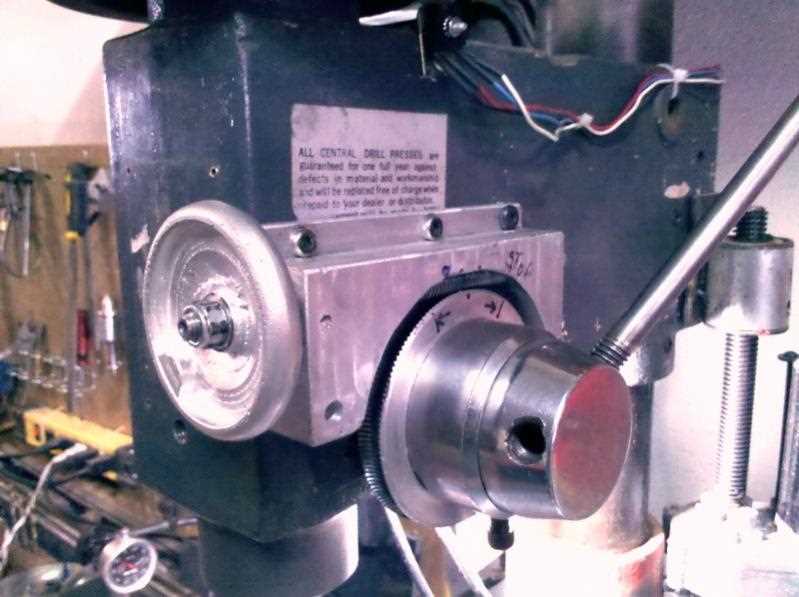
Step 3: Attach the Milling Head
Now, it’s time to attach the milling head to your drill press:

- Remove the chuck from the drill press spindle by loosening the chuck key.
- Install the milling head onto the spindle, ensuring it is securely attached.
- Tighten the locking mechanisms on the milling head to prevent any movement.
Step 4: Install Proper Tooling
Lastly, you need to install the appropriate tooling for milling:
- Select the milling cutter or end mill suitable for your desired milling task.
- Install the milling cutter into the spindle and tighten it securely.
- Ensure the milling cutter is aligned properly with the workpiece.
By following these steps, you will have a properly prepared drill press ready to be used as a milling machine.
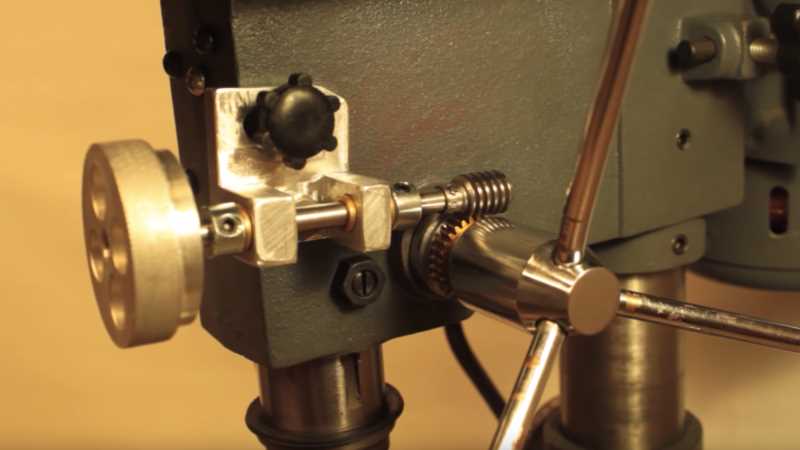
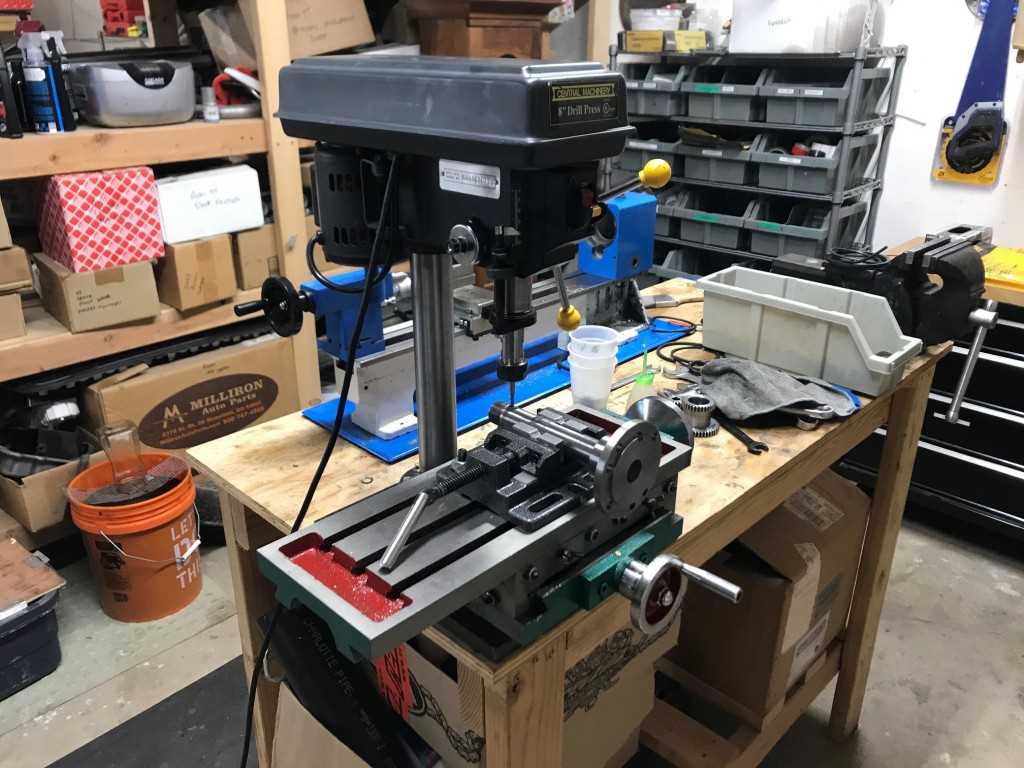
Mount the Milling Head
Mounting the milling head is an important step in converting your drill press into a milling machine. The milling head is the attachment that will hold the cutting tools and perform the milling operations.
Here are the steps to mount the milling head:
- Make sure the drill press is turned off and unplugged for safety.
- Remove any accessories or attachments from the drill press, such as the drill chuck.
- Inspect the top of the drill press column to locate the mounting hole or slots for the milling head.
- Position the milling head above the mounting hole or slots.
- Align the mounting holes or slots on the milling head with the ones on the drill press column.
- Insert the bolts or screws through the mounting holes and tighten them using a wrench or screwdriver.
- Make sure the milling head is securely attached to the drill press.
Once the milling head is mounted, you can proceed to install the cutting tools and set up the workpiece for milling.
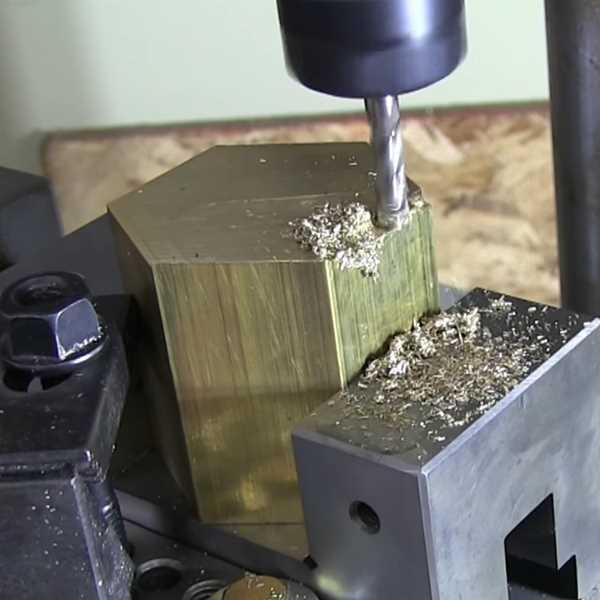
Secure the Workpiece
Securing the workpiece is a crucial step when using a drill press converted into a milling machine. It ensures that the material being machined stays in place and prevents any unwanted movement or accidents.
There are several methods to secure the workpiece, depending on its shape, size, and material. Here are a few common techniques:
- Clamping: One of the most common ways to secure a workpiece is using clamps. Clamps can be attached to the drill press table or the milling machine vise to hold the material firmly in place.
- Vise: A milling machine vise is a specialized tool that provides a secure grip on the workpiece. It consists of two jaws that can be tightened or loosened to hold the material firmly.
- Magnetic Workholding: Magnetic workholding systems use magnets to secure ferrous (magnetic) materials. The workpiece is placed on a magnetic chuck or plate, which holds it in place during milling operations.
- Fixture: A fixture is a custom-designed tool or device that holds the workpiece securely. It is often used for complex shapes or when multiple machining operations need to be performed on the same workpiece.
Regardless of the method chosen, it is important to ensure that the workpiece is securely fastened and does not move during milling. Any movement can result in inaccuracies or even damage to the workpiece or the milling machine.
Before starting the milling operation, it is also essential to double-check the workpiece alignment and make any necessary adjustments. This will help ensure that the milling process is precise and accurate.
Adjust the Speed and Feed
One of the key factors in converting a drill press into a milling machine is the ability to adjust the speed and feed of the machine. This allows you to control the cutting speed and depth, ensuring optimal performance and accuracy.
Choosing the Right Speed
When milling, selecting the appropriate speed is crucial. The speed at which the cutting tool moves through the material affects the quality of the cut and the life of the tool. Different materials require different cutting speeds to achieve optimal results.
There are several factors to consider when choosing the right speed:
- The type of material you are milling
- The diameter and type of cutting tool
- The desired depth of cut
Typically, larger diameter tools require slower speeds, while smaller diameter tools can withstand higher speeds. Additionally, harder materials generally require slower speeds to avoid overheating and premature tool wear.
Adjusting the Speed
Most drill presses have a speed control knob or lever that allows you to adjust the spindle speed. To convert a drill press into a milling machine, it is necessary to have variable speed capabilities.
Here are the steps to adjust the speed:
- Locate the speed control knob or lever on your drill press.
- Refer to the manufacturer’s guidelines or a speed chart to determine the appropriate speed for the material and cutting tool you are using.
- Turn the speed control knob or adjust the lever to the desired speed.
It is important to note that when using a drill press as a milling machine, you should always start with a slower speed and gradually increase it as needed. This allows you to maintain control over the cutting process and avoid damaging the tool or workpiece.
Setting the Feed Rate
The feed rate is another important parameter to consider when converting a drill press into a milling machine. The feed rate determines how fast the tool moves across the workpiece, and it affects the surface finish, tool life, and chip formation.
When setting the feed rate, consider the following:
- The type of material you are milling
- The depth of cut
- The diameter and type of cutting tool
Giving special consideration to these factors will help you achieve the desired results and prevent tool breakage or workpiece damage.
Unfortunately, most drill presses do not have a built-in feed rate adjustment mechanism. To overcome this limitation, you can manually control the feed rate by applying steady and even pressure to the workpiece.
During the milling process, it is important to monitor the feed rate and make adjustments as necessary to maintain a consistent and controlled cutting motion.
Begin Milling
Once you have set up your drill press as a milling machine and have installed the necessary tools and fixtures, it’s time to begin milling. Follow these steps to get started:
1. Secure your workpiece
Before you begin milling, make sure your workpiece is securely clamped to the milling table. This will prevent any movement or vibrations that could affect the accuracy of your cuts.
2. Adjust the cutting depth
Depending on the type of cut you want to make, you will need to adjust the cutting depth of the milling machine. Use the depth adjustment handle or knob to set the desired depth. It’s important to note that making multiple shallow passes is generally safer and produces better results than trying to make a deep cut in one pass.
3. Set the milling speed
Different materials require different milling speeds. Consult the material specifications or charts to determine the appropriate speed for your workpiece. Adjust the speed of your drill press accordingly. It’s always better to start with a slower speed and increase gradually if needed.
4. Position the cutting tool
Move the milling head or table to position the cutting tool over the desired starting point on your workpiece. Use the X and Y adjustment handles or knobs to achieve precise positioning.
5. Start the drill press
Double-check all adjustments and make sure everything is secure. Turn on the drill press and allow it to reach the desired speed before initiating the milling operation.
6. Begin milling
With the drill press running, slowly lower the cutting tool into the workpiece using the Z adjustment handle or knob. Start with light pressure and maintain a consistent feed rate. It’s important to let the tool do the cutting and not force it through the material.
7. Monitor the milling process
Throughout the milling process, keep an eye on the cutting tool and workpiece. Make sure everything is running smoothly and there are no signs of excessive heat or other issues. If necessary, make adjustments to speed, cutting depth, or feed rate to ensure optimal results.
8. Clean up and inspect
Once you have finished milling, turn off the drill press and remove the workpiece. Inspect the milled surface for any imperfections or rough spots and clean up any debris left behind.
Following these steps will help you get started with milling on your converted drill press, and with practice, you can improve your skills and tackle more complex milling projects.
FAQ:
What is a drill press?
A drill press is a machine tool used for drilling holes in various materials. It consists of a drill head mounted on a column, which can be raised or lowered to adjust the height of the drill bit.
Can I convert a drill press into a milling machine?
Yes, it is possible to convert a drill press into a milling machine with some modifications. However, it is important to note that a drill press is not designed to handle the same level of precision and force as a dedicated milling machine.
What are the advantages of converting a drill press into a milling machine?
Converting a drill press into a milling machine can be a cost-effective solution for those who need occasional milling operations. It allows you to perform light milling tasks without investing in a separate milling machine.
What are the steps involved in converting a drill press into a milling machine?
The process of converting a drill press into a milling machine involves several steps. First, you need to remove the drill chuck and replace it with a milling spindle. Then, you need to attach a milling vise to the drill press table and secure it properly. Additionally, you may need to make adjustments to ensure the accuracy and stability of the setup.
Is it difficult to convert a drill press into a milling machine?
Converting a drill press into a milling machine requires some mechanical skills and knowledge of the equipment. While it may not be difficult for someone with experience in machining, it can be challenging for beginners. It is recommended to follow a step-by-step guide and take necessary precautions to ensure safety and accuracy.
Video:


Meet Harrison Clayton, a distinguished author and home remodeling enthusiast whose expertise in the realm of renovation is second to none. With a passion for transforming houses into inviting homes, Harrison's writing at https://thehuts-eastbourne.co.uk/ brings a breath of fresh inspiration to the world of home improvement. Whether you're looking to revamp a small corner of your abode or embark on a complete home transformation, Harrison's articles provide the essential expertise and creative flair to turn your visions into reality. So, dive into the captivating world of home remodeling with Harrison Clayton and unlock the full potential of your living space with every word he writes.


