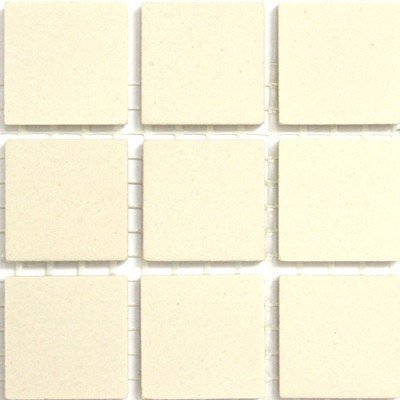
How to Cut Porcelain Tiles with an Angle Grinder
If you’re planning a home renovation and need to cut porcelain tiles, an angle grinder can be a useful tool. Porcelain tiles are known for their durability, but they can be difficult to cut without the right equipment. An angle grinder is a versatile tool that can be used to cut a variety of materials, including porcelain tiles. With the right blade and technique, you can make clean, precise cuts on your porcelain tiles.
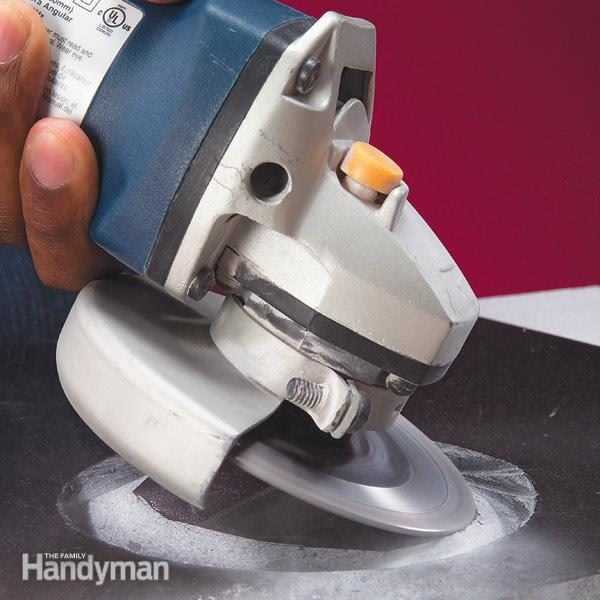
Before you begin cutting porcelain tiles with an angle grinder, it’s important to gather the necessary materials. You’ll need an angle grinder with a diamond blade specifically designed for cutting porcelain tiles. These diamond blades are coated in a layer of diamonds to provide a sharp cutting edge that can make clean cuts. Additionally, you’ll need safety equipment, including safety glasses, ear protection, and a dust mask to protect yourself from any potential hazards.
Once you have your angle grinder and safety equipment ready, you can begin the process of cutting porcelain tiles. The first step is to measure and mark the area where you want to make your cut. Use a pencil or marker to make a clear, visible line on the surface of the tile. This line will serve as your guide as you cut.
Next, set up your angle grinder with the diamond blade. Follow the manufacturer’s instructions for attaching the blade to the grinder. Make sure the blade is securely attached and properly aligned. Turn on the grinder and slowly lower the blade onto the marked line. Apply gentle pressure as you move the grinder along the line, allowing the blade to cut through the tile. It’s important to take your time and let the grinder do the work, as applying too much pressure can cause the blade to overheat and potentially damage the tile.
Once you’ve made your cut, be sure to turn off the grinder and allow the blade to come to a complete stop before removing it from the tile. Take a moment to inspect the cut and make any necessary adjustments or refinements. If the cut is not clean or straight, you can use a file or sandpaper to smooth out any rough edges or uneven areas. Remember to always wear your safety equipment and work in a well-ventilated area to minimize the risk of inhaling dust or debris.

In conclusion, cutting porcelain tiles with an angle grinder can be a quick and efficient way to achieve clean, precise cuts. By using the right blade and following the proper technique, you can confidently tackle your home renovation projects with ease. Just remember to always prioritize safety and take your time to ensure the best results.
Safety Precautions
1. Wear Protective Gear
When cutting porcelain tiles with an angle grinder, it is important to wear the appropriate protective gear to ensure your safety. This includes safety glasses or goggles to protect your eyes from flying debris, a dust mask to prevent inhalation of fine particles, and work gloves to protect your hands from potential hazards.
2. Secure the Workpiece
Before cutting the porcelain tiles, it is essential to securely clamp or hold the workpiece in place. This will prevent it from moving or shifting during the cutting process, reducing the risk of accidents or injuries.
3. Choose the Right Blade
Selecting the right blade for your angle grinder is crucial for both the quality of the cut and your safety. Make sure to choose a diamond blade specifically designed for cutting porcelain tiles. These blades are more durable and effective in cutting through the hard material, minimizing the chances of accidents such as kickback.
4. Plan the Cuts
Before starting the cutting process, it is important to plan the cuts carefully. Measure and mark the desired cut lines on the tiles, and ensure that they are clear and visible. This will help you maintain control and accuracy during the cutting process, reducing the chances of making mistakes that can lead to accidents.

5. Use a Guide
Using a guide or fence can help you achieve straight and accurate cuts. You can create a guide using a straight edge or a piece of scrap wood. Simply clamp the guide onto the tile, and use it as a reference for guiding the angle grinder along the cut line. This will enhance safety and precision while cutting.
6. Take Breaks and Stay Alert
When working with an angle grinder, it is essential to take regular breaks to prevent fatigue and maintain focus. Cutting porcelain tiles can be a time-consuming task, so it is important to rest periodically to avoid making mistakes due to tiredness. Additionally, always stay alert and aware of your surroundings to minimize the risk of accidents caused by distractions or lack of attention.
By following these safety precautions, you can ensure a safer and more efficient cutting process when working with an angle grinder and porcelain tiles. Remember to always prioritize your safety and take the necessary precautions to protect yourself from potential hazards.
Choosing the Right Angle Grinder
Choosing the right angle grinder is crucial when cutting porcelain tiles. There are several factors to consider when selecting the appropriate tool for the job.
Type of Grinder
There are two main types of angle grinders: corded and cordless. Corded grinders are powered by electricity and are generally more powerful, making them ideal for heavy-duty tasks like cutting porcelain tiles. Cordless grinders, on the other hand, offer more flexibility and mobility, but may not have enough power for cutting through tough materials.

Power and Speed

When cutting porcelain tiles, it is important to choose an angle grinder with sufficient power and speed. The power of an angle grinder is typically measured in watts or amps. Higher power means the grinder can handle tougher materials more easily. Speed, measured in revolutions per minute (RPM), determines how fast the blade will spin. Higher RPM allows for smoother and quicker cuts.
Disc Size and Type
The disc size and type are also important considerations. The disc size refers to the diameter of the blade. For cutting porcelain tiles, a smaller disc size, such as 4.5 inches or 5 inches, is recommended for better control and precision. Additionally, using a diamond blade specifically designed for cutting porcelain tiles will ensure clean and accurate cuts.
Overall, choosing the right angle grinder involves considering the type of grinder, its power and speed, and the size and type of the disc. By selecting the appropriate tool, you can achieve precise and efficient cuts when working with porcelain tiles.
Selecting the Proper Diamond Blade
Understanding the Importance of a Diamond Blade
Choosing the right diamond blade is crucial when cutting porcelain tiles with an angle grinder. A diamond blade is designed with small diamond particles embedded in its edge, which allow it to effectively cut through hard materials like porcelain. The quality and type of diamond blade you select will greatly impact the cutting speed, accuracy, and finish of your cuts. Therefore, it is essential to choose a blade that is specifically designed for cutting through porcelain tiles.

Considerations for Selecting the Right Diamond Blade

When selecting a diamond blade for cutting porcelain tiles, there are several factors to consider:
- Blade Size: Ensure that the blade size is appropriate for your angle grinder and the size of the tiles you are cutting.
- Blade Type: Look for a blade that is specifically designed for cutting porcelain tiles. These blades often have a continuous rim or a turbo rim, which helps to reduce chipping and ensure a smoother cut.
- Diamond Grit: The diamond grit determines the cutting speed and the quality of the finished cut. Finer grit blades are ideal for making precise cuts with a smooth finish, while coarser grit blades are better for faster cuts but may result in a rougher finish.
- Wet or Dry Cutting: Consider whether you prefer to cut the tiles wet or dry. Some diamond blades are designed for wet cutting, which helps to prevent overheating and keep the blade cool. Others are suitable for dry cutting, but may require periodic cooling breaks.
- Budget: Consider your budget when selecting a diamond blade. While higher-quality blades may be more expensive, they can provide better performance and longer life, making them a worthwhile investment.
Consulting the Manufacturer’s Recommendations
Before making a final decision, it is always a good idea to consult the manufacturer’s recommendations for the specific angle grinder and porcelain tiles you are using. The manufacturer may provide specific guidance on the type of diamond blade that is best suited for your cutting needs. Following the manufacturer’s recommendations will help ensure that you choose the proper diamond blade and achieve optimal results when cutting porcelain tiles with an angle grinder.
Marking the Tiles
Before you start cutting your porcelain tiles with an angle grinder, it’s important to accurately mark the sections that need to be cut. This will help ensure that you make precise cuts and minimize the risk of damaging the tiles. Here are some steps to follow for marking the tiles:
- Measure and mark the desired cut: Use a measuring tape to determine the exact length or width that you need to cut from the tile. Then, use a pencil or a marker to mark the measurements on the tile’s surface.
- Create a straight line guide: To make a straight cut, it’s helpful to create a guide line on the tile. You can do this by using a straightedge, such as a ruler or a level, and drawing a line along the marked measurements. This will serve as a visual guide for cutting.
- Consider using masking tape: If you’re concerned about the pencil or marker marks rubbing off or becoming difficult to see during the cutting process, you can apply masking tape along the marked line. This will help keep the line visible and prevent any damage from the angle grinder.
- Double-check your markings: Before you start cutting, it’s important to ensure that your measurements and markings are accurate. Take a moment to review your markings and make any necessary adjustments to ensure a precise cut.
By taking the time to properly mark your porcelain tiles, you can help ensure that your cuts are accurate and minimize the risk of errors or damages. This step is crucial for achieving professional-looking results when cutting porcelain tiles with an angle grinder.

Cutting Process
To cut porcelain tiles with an angle grinder, it is important to follow a proper cutting process. This involves several steps to ensure accurate and safe cuts.
Step 1: Safety Precautions
Before beginning the cutting process, it is crucial to take necessary safety precautions. This includes wearing protective eyewear, gloves, and a dust mask to protect from flying debris and dust. It is also important to secure the tile and make sure it is stable before cutting.
Step 2: Marking the Tile
Start by measuring and marking the area you want to cut on the tile. This can be done using a pencil or a marker. Make sure the marked line is clear and visible.
Step 3: Setting up the Angle Grinder
Next, set up the angle grinder with a diamond blade specifically designed for cutting porcelain tiles. Make sure the blade is securely attached to the grinder and adjust the cutting depth according to the thickness of the tile.
Step 4: Cutting the Tile
Begin the cutting process by slowly and steadily guiding the angle grinder along the marked line. Apply even pressure and let the grinder do the work. Avoid applying excessive force which can cause the tile to crack or chip. Take breaks and allow the grinder to cool down if needed.
Step 5: Cleaning and Smoothing the Cut
After cutting the tile, use a file or sandpaper to clean and smooth the edges of the cut. This will remove any rough edges or burrs and ensure a clean finish.
By following these steps, you can effectively cut porcelain tiles with an angle grinder and achieve precise cuts for your tiling projects.
Grinding the Edges
Once you have cut your porcelain tile to the desired shape and size, you will need to grind the edges to smooth them out. This is an important step to ensure a professional-looking finish.
To grind the edges, you will need to use a diamond blade on your angle grinder. This type of blade is specifically designed to cut through hard materials like porcelain. Make sure the blade is securely attached to your grinder before you begin.
Start by holding the angle grinder firmly and positioning it at a 45-degree angle to the edge of the tile. Slowly move the grinder back and forth along the edge, applying gentle pressure. Be sure to keep the grinder moving at a steady pace to prevent uneven grinding.
As you grind, you may notice that the edges become rough or jagged. This is normal, but you can use the grinder to smooth them out. Gently tilt the grinder back and forth to remove any rough spots and create a smooth, even edge.
It is also important to keep the area around the tile clean as you grind. Porcelain dust can be harmful if inhaled, so be sure to wear a dust mask and work in a well-ventilated space. After you have finished grinding the edges, wipe away any dust or debris with a damp cloth before continuing your project.
Cleaning and Finishing
After cutting your porcelain tiles with an angle grinder, it’s important to clean and finish them properly to achieve a professional result. The following steps will guide you in this process:
Clean the Tiles
Carefully remove any debris or dust that may have accumulated on the tiles during the cutting process. This can be done using a soft brush or a damp cloth. Make sure to clean both the front and back surfaces of the tiles to ensure a clean and smooth finish.
Smooth the Edges
Porcelain tiles can have sharp and rough edges after cutting, which can be uncomfortable and unsightly. To smooth the edges, use a tile file or a sandpaper with a fine grit. Gently rub the edges in a circular motion until they become smooth and even.
Apply a Sealant
To protect the cut edges of your porcelain tiles from moisture and staining, it’s recommended to apply a suitable sealant. There are many sealants specifically designed for porcelain tiles that provide a protective barrier and enhance their appearance. Follow the instructions provided by the sealant manufacturer for the best results.
Inspect for Imperfections
Inspect the cut tiles for any imperfections or irregularities. If you notice any chips or uneven edges, you can use a touch-up pen or paint to conceal them. This will help ensure a flawless and seamless look once the tiles are installed.
Organize and Store
Once your porcelain tiles are cleaned, smoothed, sealed, and inspected, it’s important to organize and store them properly. Use a clean and dry area to stack the tiles, making sure they are protected from any potential damage. Store them in a way that allows for easy access and identification when it’s time to install them.
By following these cleaning and finishing steps, you can transform your cut porcelain tiles into beautiful and professional-looking pieces ready to be used in your next project.
Maintenance and Safety Tips
Maintenance Tips
Proper maintenance of your angle grinder is essential to ensure its longevity and optimal performance. Here are some tips to keep in mind:
- Regularly clean the grinder to remove any debris or dust that may accumulate during use.
- Inspect the grinder for any signs of damage or wear and tear. Replace any damaged parts immediately.
- Check the grinder’s power cord for any fraying or damage. Do not use the grinder if the cord is damaged.
- Store the grinder in a dry and safe place when not in use to protect it from moisture and potential damage.
Safety Tips
Using an angle grinder can be dangerous if proper safety precautions are not taken. Follow these tips to ensure your safety:
- Wear appropriate personal protective equipment (PPE) including safety goggles, ear protection, and gloves.
- Keep a firm grip on the grinder and maintain a stable stance while using it to prevent accidents.
- Avoid wearing loose clothing or jewelry that could get caught in the grinder.
- Before starting the grinder, ensure that the blade is securely attached and properly aligned.
- Do not force the grinder through the tile. Let the grinder’s weight and the cutting disc do the work.
- Always cut away from yourself and others to avoid injury.
- Keep a fire extinguisher within reach in case of any accidents or sparks that may ignite flammable materials.
- Unplug the grinder after use and wait for the blade to completely stop spinning before setting it down.
By following these maintenance and safety tips, you can ensure a safer and more efficient experience when cutting porcelain tiles with an angle grinder.
FAQ:
What tools do I need to cut porcelain tiles with an angle grinder?
To cut porcelain tiles with an angle grinder, you will need the following tools: an angle grinder, a porcelain tile cutting blade, safety goggles, a dust mask, ear protection, a tape measure, a pencil or marker, and clamps or a vise grip.
Is it difficult to cut porcelain tiles with an angle grinder?
Cutting porcelain tiles with an angle grinder can be a bit challenging, especially if you don’t have much experience with power tools. However, with the right technique and the proper safety precautions, it is definitely doable.
Can I use a regular blade on my angle grinder to cut porcelain tiles?
No, you should not use a regular blade on your angle grinder to cut porcelain tiles. Porcelain tiles are extremely hard and brittle, so they require a specialized porcelain tile cutting blade that is specifically designed for cutting through this type of material.
Do I need to wear any protective gear while cutting porcelain tiles with an angle grinder?
Yes, it is extremely important to wear the proper protective gear when cutting porcelain tiles with an angle grinder. You should wear safety goggles to protect your eyes from flying debris, a dust mask to prevent inhalation of dust particles, and ear protection to prevent damage to your hearing. Additionally, it is also a good idea to wear work gloves to protect your hands from any potential accidents.
Video:


Meet Harrison Clayton, a distinguished author and home remodeling enthusiast whose expertise in the realm of renovation is second to none. With a passion for transforming houses into inviting homes, Harrison's writing at https://thehuts-eastbourne.co.uk/ brings a breath of fresh inspiration to the world of home improvement. Whether you're looking to revamp a small corner of your abode or embark on a complete home transformation, Harrison's articles provide the essential expertise and creative flair to turn your visions into reality. So, dive into the captivating world of home remodeling with Harrison Clayton and unlock the full potential of your living space with every word he writes.


