Step-by-Step Guide to Installing Air Compressor Lines in Your Garage

If you’re an avid DIYer or enjoy working on cars, having an air compressor in your garage can greatly simplify your projects. Air compressors are incredibly versatile tools that can power a variety of pneumatic tools, such as impact wrenches, spray guns, and sanders. To maximize the functionality of your air compressor and make your garage workshop more efficient, it’s essential to install proper air compressor lines.
Installing air compressor lines in your garage may seem like a daunting task, but with the right tools and a step-by-step approach, it can be a straightforward process. The first step is to carefully plan the layout of your air compressor lines. Consider the location of your air compressor, the length of the lines you’ll need, and the number of tools you’ll be using simultaneously. Proper planning will ensure that you have enough air pressure and flow to power your tools effectively.
Once you have a plan in place, the next step is to gather the necessary materials and tools. You’ll need various fittings, such as tees, elbows, and couplers, as well as pipes or hoses, depending on your preference. It’s important to choose high-quality materials that can withstand the high pressure and constant air flow. Don’t forget to wear safety glasses and gloves when working with compressed air to protect yourself from potential hazards.
With your materials and tools ready, you can begin the installation process. Start by mounting the air compressor in a secure location and connect it to a power source. Then, measure and cut the pipes or hoses to the desired lengths, ensuring that they can reach the tools you plan to use. Use fittings and connectors to join the pipes together, making sure to secure them tightly to prevent leaks. Consider using Teflon tape or pipe sealant to ensure a tight seal.
Finally, test the system for any leaks or pressure drops. Turn on the air compressor and check for any hissing sounds or visible air leaks. Inspect each connection and fitting, tightening them if necessary. Use a pressure gauge to check the air pressure at various points along the lines, ensuring that it’s consistent. By following these steps and taking the time to install air compressor lines properly, you can enjoy a reliable and efficient air supply in your garage for all your projects.

What is an Air Compressor?
An air compressor is a device that converts power into potential energy stored in pressurized air. It is commonly used in various industries and applications, including construction, manufacturing, automotive repair, and more.
Air compressors work by taking in air from the environment and compressing it, which increases its pressure and decreases its volume. This pressurized air can then be used to power tools, inflate tires, clean surfaces, and perform other tasks.
There are different types of air compressors available, including reciprocating, rotary screw, and centrifugal compressors. Reciprocating compressors use pistons to compress the air, while rotary screw compressors utilize two interlocking screws. Centrifugal compressors rely on centrifugal force to compress the air.
When choosing an air compressor, various factors should be considered, such as the required air pressure, the volume of air needed, and the specific applications it will be used for. It is important to select the right size and type of air compressor to ensure optimal performance and efficiency.

In conclusion, an air compressor is a versatile device that harnesses air power for various industrial and commercial purposes. By understanding the different types of air compressors and their applications, individuals can make informed decisions when selecting and utilizing these powerful tools.
Why Install Air Compressor Lines in Your Garage?
Installing air compressor lines in your garage can provide you with a multitude of benefits and make your workspace more efficient. Here are a few reasons why you should consider installing air compressor lines in your garage:
Increased Versatility
Having air compressor lines in your garage allows you to use a variety of air tools and equipment. Whether you are a DIY enthusiast or a professional mechanic, having access to compressed air can significantly expand your capabilities and make tasks much easier to accomplish.
Time and Energy Savings
Using an air compressor can save you time and energy compared to manual labor. With compressed air, you can power pneumatic tools that are faster and more efficient than traditional hand tools. This can make jobs such as inflating tires, painting, or using power wrenches much quicker and less physically demanding.
Cost-Effective Solution
Investing in air compressor lines for your garage can be a cost-effective solution in the long run. While the initial installation may require some upfront costs, the efficiency and versatility of compressed air can help you save money over time. You can reduce the need to purchase expensive electric or battery-powered tools, and compressed air is often more energy-efficient than other power sources.

Improved Workspace Organization
Installing air compressor lines in your garage can help you better organize your workspace. By having a dedicated air compressor system, you can eliminate the clutter of hoses and cables strewn across your garage floor. This not only improves safety but also makes it easier to move around and find the tools and equipment you need.
When it comes to maximizing productivity and efficiency in your garage, installing air compressor lines is a worthwhile investment. It provides you with increased versatility, saves time and energy, offers a cost-effective solution, and improves workspace organization. Consider installing air compressor lines to take your garage to the next level.
Step 1: Planning
Before you begin installing air compressor lines in your garage, it is essential to plan out the layout and design. This will ensure that you create an efficient and effective system that meets your needs.
Start by determining the specific areas in your garage where you will need compressed air. Consider the types of tools and equipment you will be using and their locations. This will help you determine the number and placement of air outlets.
Next, measure the distance between your air compressor and the furthest point where you will need compressed air. This will help you determine the length of air hose you will need and the size of your main air line.

Additionally, assess the available space in your garage. Consider factors such as ceiling height, wall space, and any obstructions that may impact the installation. This will help you determine the best path for running your air lines and avoid any unnecessary obstacles.
Lastly, consider the future expansion of your air compressor system. If you plan on adding more tools or equipment in the future, it is a good idea to account for this in your initial planning. This may include installing additional outlets or allowing for extra capacity in your main air line.
Determining Your Air Compressor Needs
Determining your specific air compressor needs is the first step in installing air compressor lines in your garage. It is important to consider the type and amount of tools or equipment you plan to use with your air compressor, as well as the necessary air pressure and flow rate.
Tool requirements: Make a list of all the tools and equipment you plan to use with your air compressor. Consider the air pressure and flow rate required by each tool. Some tools, such as impact wrenches or paint sprayers, may require a higher pressure and flow rate compared to a simple air nailer.
Frequency of use: Determine how often you will be using your air compressor. If you plan to use it frequently, you may need a larger compressor with a higher capacity to avoid constant refilling and emptying of the tank.

Tank size: Consider the tank size that will best suit your needs. A larger tank size will allow for a longer running time before the compressor needs to kick on, but it may take up more space in your garage. A smaller tank, on the other hand, may require more frequent refilling, but it can be more compact and easier to handle.
Air pressure and flow rate: Determine the necessary air pressure and flow rate required by your tools. This information can usually be found in the tool’s documentation or specifications. Ensure that your chosen air compressor can generate the required pressure and flow rate for your tools.
Noise level: Consider the noise level of the air compressor. Some models are designed to operate quietly, which can be beneficial if you plan to use the compressor in a residential garage or a shared workspace.
By taking these factors into account and determining your specific air compressor needs, you can choose the right compressor that will meet your requirements and ensure smooth operation of your tools and equipment.
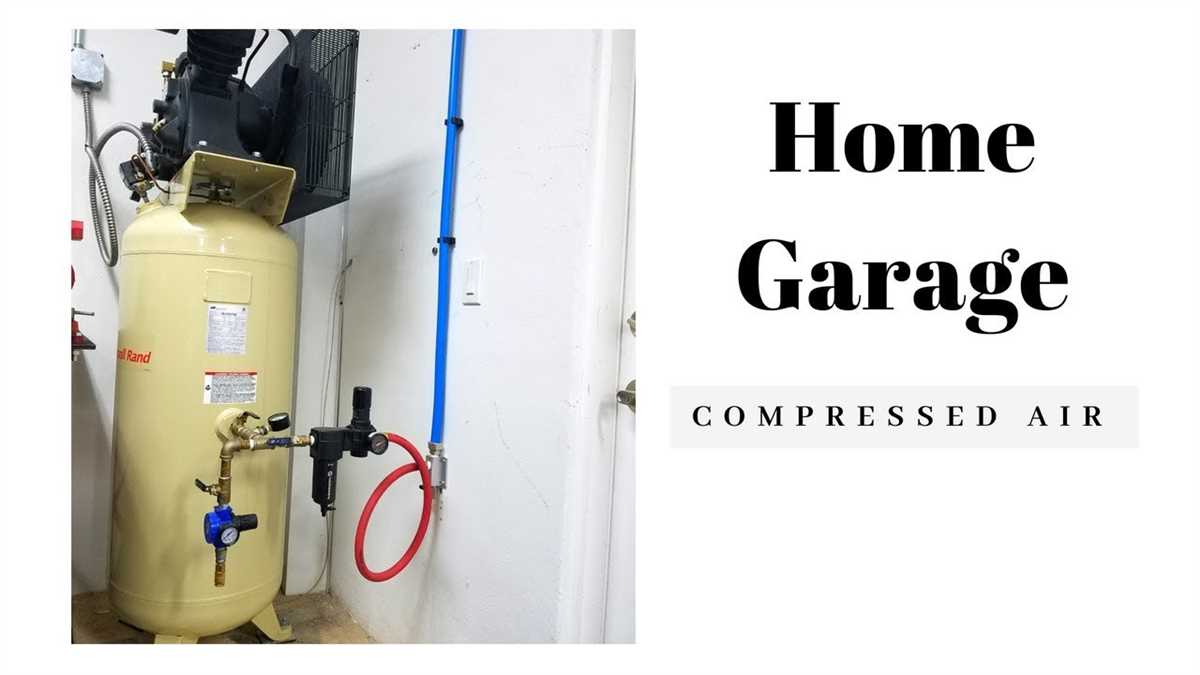
Choosing the Right Location for Your Air Compressor
Consider the Noise Level
When choosing the location for your air compressor, it is important to consider the noise level. Air compressors can be quite loud, so it is best to place it in a location that is far away from living spaces or areas where noise is a concern. This could be a separate room, a well-insulated garage, or a basement.

Ensure Proper Ventilation
Your air compressor needs proper ventilation in order to function efficiently and prevent overheating. It is important to place the compressor in a well-ventilated area to allow for proper air circulation. If possible, choose a location near a window or install a ventilation system to ensure adequate airflow.
Consider Accessibility
When choosing the location for your air compressor, it is important to consider accessibility. You will need to regularly check and maintain the compressor, so it should be easily accessible. Additionally, you should have enough space around the compressor to allow for easy installation and maintenance of the air line system.
Protect from Moisture and Dust
Air compressors are susceptible to damage from moisture and dust. It is important to choose a location that is free from excessive moisture and dust to prevent any clogging or damage to the compressor. If your garage or chosen location is prone to moisture or dust, consider installing a dehumidifier or air filtration system.
Consider Power Supply
Your air compressor will require a reliable power supply to operate effectively. When choosing a location, ensure that there is a nearby electrical outlet that can accommodate the power needs of the compressor. Consider the amperage and voltage requirements of your compressor and choose a location accordingly.
In conclusion, choosing the right location for your air compressor is crucial for its proper functioning and longevity. Consider the noise level, ventilation, accessibility, protection from moisture and dust, and availability of a suitable power supply when selecting a location for your compressor.

Step 2: Gathering Materials
Before you can begin installing air compressor lines in your garage, you will need to gather all the necessary materials. Here are the items you will need:
- Air Compressor: You will need an air compressor to supply the air for your system. Choose a compressor that is suitable for your needs and has a sufficient capacity to power your tools.
- Air Hoses: Purchase high-quality air hoses that are capable of withstanding the pressure and temperature of your air compressor. Consider the length of the hoses you will need to reach all the areas of your garage.
- Fittings and Connectors: You will need a variety of fittings and connectors to create a secure and leak-free air compression system. These include couplers, nipples, elbows, and tees.
- Air Tools: Depending on your specific needs, you may require various air tools such as impact wrenches, air drills, and paint sprayers. Ensure you have the necessary tools for your projects.
- Mounting Hardware: If you plan on mounting your air compressor to the wall or ceiling, you will need appropriate hardware such as brackets or hangers. Make sure the mounting hardware is suitable for the weight and size of your compressor.
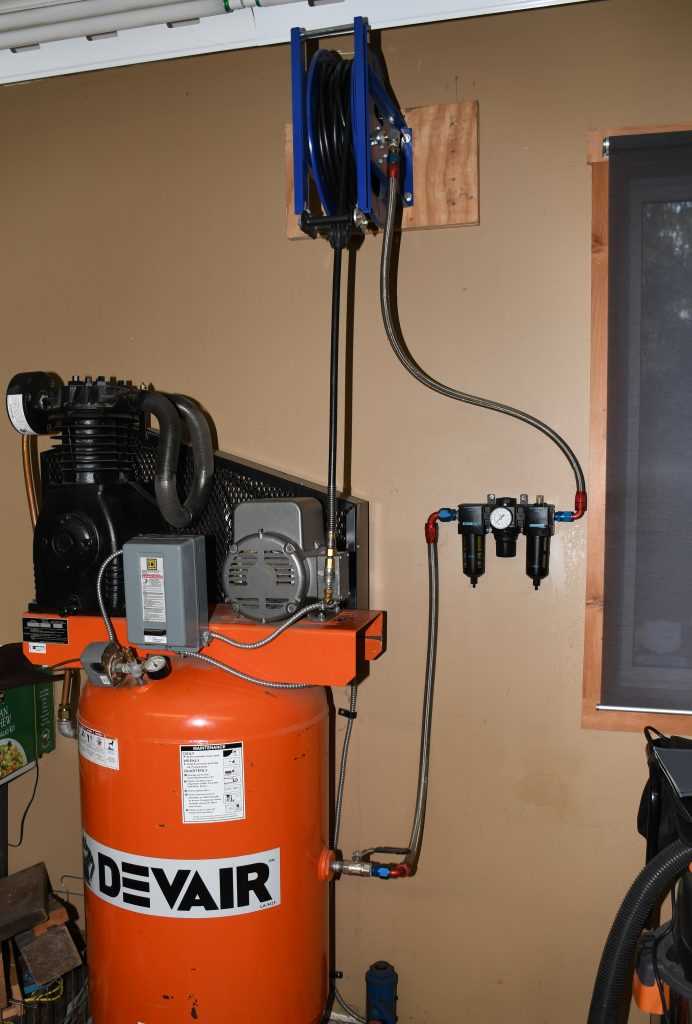
- Filters and Regulators: To ensure the quality of the compressed air and regulate its pressure, you will need filters and regulators. These components help remove impurities and control the airflow.
- Teflon Tape: Teflon tape is essential for creating a tight seal between threaded connections. Wrap Teflon tape around the threads of your fittings to prevent air leaks.
- Tools: Lastly, you will need basic tools such as a wrench, pliers, and a tape measure to assemble and install your air compressor lines.
Once you have gathered all the necessary materials, you will be ready to move on to the next step of installing your air compressor lines in your garage.
Essential Tools and Equipment
Air Compressor
The most important tool you will need for installing air compressor lines in your garage is the air compressor itself. This is the machine that will create the compressed air that will power your tools and equipment. Make sure to choose an air compressor that has enough capacity to meet your needs. Consider factors such as the required pressure, air volume, and the tools you will be using.
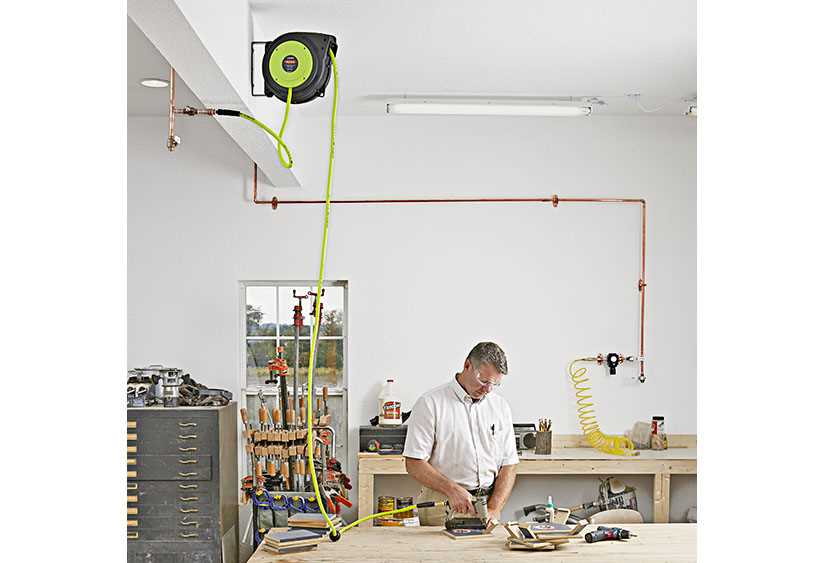
Compressed Air Lines
You will also need the actual compressed air lines to transport the air from the compressor to your tools. These can be made of various materials, such as copper, steel, or polyethylene. Copper and steel are more durable options, while polyethylene is easier to install and less prone to rust. Consider the length and diameter of the compressed air lines based on the layout of your garage and the distance from the compressor to your tools.
Fittings and Connectors
To connect the compressed air lines to your tools and the compressor, you will need a variety of fittings and connectors. These include couplers, plugs, adapters, valves, and regulators. Make sure to choose fittings and connectors that are compatible with the size and type of your air lines, as well as the tools you will be using. It is also important to choose high-quality fittings and connectors to ensure a secure and leak-free connection.
Hangers and Supports
Properly supporting and securing your compressed air lines is essential to prevent damage and ensure their longevity. You will need hangers and supports to hold the air lines in place. These can be in the form of brackets, clamps, or straps. Consider the weight of the air lines and the level of vibration in your garage to determine the appropriate hangers and supports for your installation.
Tools
In addition to the specific tools required for installing the air compressor lines, you will also need a set of basic tools, such as wrenches, pliers, and a tape measure. These tools will be useful for assembling and adjusting the fittings and connectors, as well as making any necessary modifications to the air lines. Having these tools readily available will make the installation process more efficient and ensure a proper installation.
In conclusion, having the essential tools and equipment for installing air compressor lines in your garage is crucial for a successful installation. From the air compressor itself to the fittings, connectors, hangers, supports, and general tools, each item plays a role in creating a functional and efficient compressed air system in your garage.
Types of Air Compressor Lines
Air compressor lines are an essential component of any garage setup, allowing for the efficient and reliable delivery of compressed air to power various tools and equipment. There are several types of air compressor lines available, each with its own advantages and uses.
Rubber Air Hoses
One common type of air compressor line is the rubber air hose. These hoses are flexible and durable, making them suitable for a variety of applications. Rubber air hoses can withstand high pressures and are resistant to abrasion and kinking, ensuring long-lasting performance. They are often used in automotive repair shops and construction sites.
Polyurethane Air Lines
Polyurethane air lines are another popular option for air compressor installations. These lines are lightweight and highly flexible, making them easy to handle and maneuver in tight spaces. They have excellent resistance to oil, chemicals, and UV rays, making them suitable for outdoor use. Polyurethane air lines are commonly used in woodworking shops and other light-duty applications.
Nylon Air Tubes
Nylon air tubes are a more rigid option for air compressor lines. They are lightweight and offer excellent resistance to impact and vibration. Nylon air tubes are also resistant to chemicals and oil. These tubes are commonly used in manufacturing facilities and industrial settings where durability and reliability are crucial.
In conclusion, choosing the right type of air compressor line depends on the specific needs and requirements of your garage setup. Rubber air hoses are versatile and durable, while polyurethane air lines offer flexibility and resistance to external elements. Nylon air tubes provide excellent durability and are suitable for heavy-duty applications. Consider the specific demands of your garage operation to determine which type of air compressor line is best suited for your needs.
Step 3: Installing the Air Compressor Lines
Once you have determined the best location for your air compressor and have prepared the necessary tools and materials, you can now proceed with installing the air compressor lines. This step is crucial in ensuring a proper and efficient airflow throughout your garage.
1. Choose the Right Type of Air Compressor Lines
Before installing the air compressor lines, it is important to choose the right type of lines for your specific needs. There are various options available, including copper, stainless steel, and rubber. Each material has its own advantages and disadvantages, so make sure to research and select the one that suits your requirements.
2. Measure and Cut the Air Compressor Lines
Measure the distance between the air compressor and the desired connection points in your garage. Use a measuring tape to accurately determine the length of the lines needed. Once measured, mark the lines and use a pipe cutter or saw to cut them to the appropriate length. Make sure to wear safety goggles and gloves during this process.
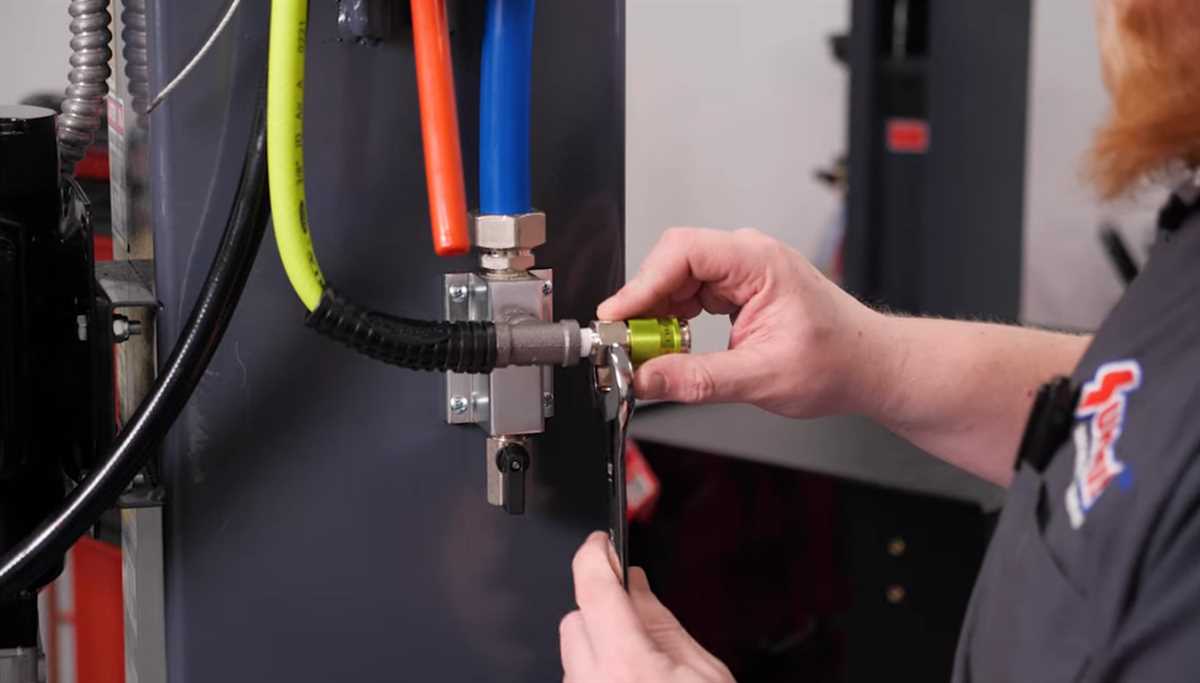
3. Install the Fittings and Connect the Lines
Next, install the fittings onto the ends of the air compressor lines. Depending on the type of lines you are using, this may involve soldering, crimping, or using compression fittings. Follow the manufacturer’s instructions for your specific fittings. Once the fittings are securely in place, connect the lines to the air compressor and the connection points in your garage using the appropriate connectors.
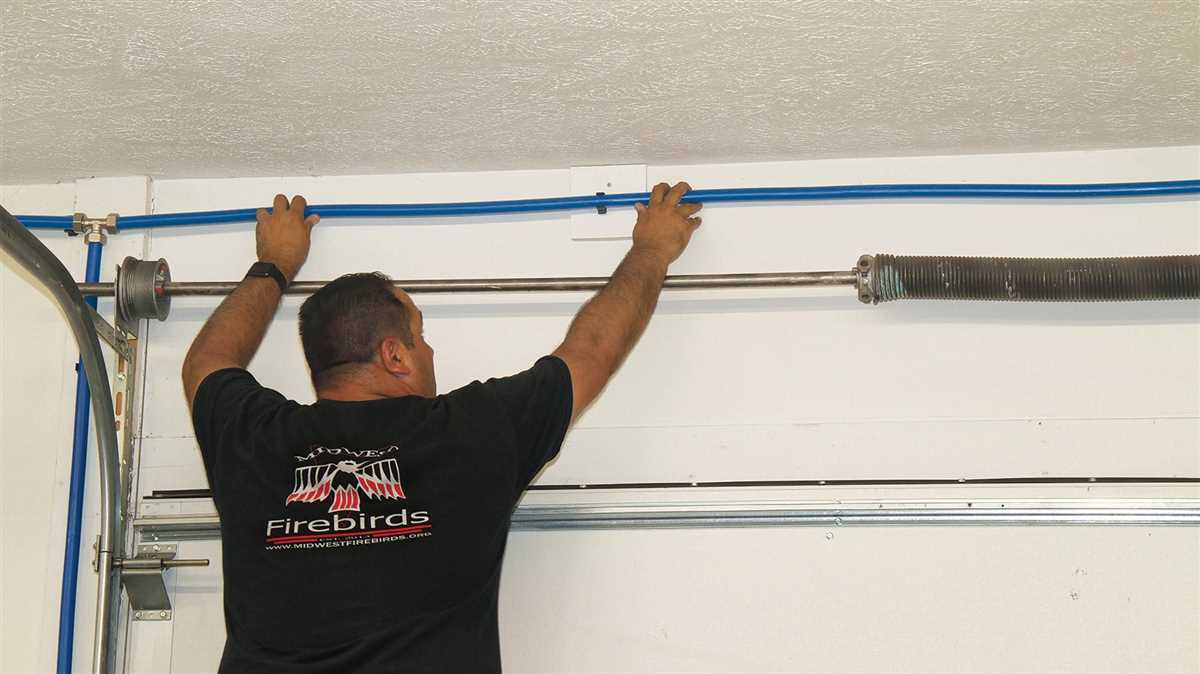
4. Secure the Air Compressor Lines
To ensure the stability and safety of the air compressor lines, it is important to secure them properly. Use clamps or brackets to fasten the lines to the walls or ceiling of your garage. Make sure to space the clamps or brackets evenly along the length of the lines to prevent sagging or excessive movement. This will help prevent damage to the lines and ensure a consistent airflow.
5. Test the Air Compressor Lines
Once the air compressor lines are installed, it is crucial to test them before use. Turn on the air compressor and check for any leaks or air pressure issues. Ensure that all connections are tight and secure. If any leaks or issues are detected, make the necessary adjustments or repairs before using the air compressor.
By following these steps and properly installing the air compressor lines in your garage, you can ensure a reliable and efficient air supply for all your pneumatic tools and equipment.
Measuring and Cutting the Air Compressor Lines
Before installing the air compressor lines in your garage, it is important to accurately measure and cut the lines to ensure a proper fit and functionality. Here are some steps to help you with this process:
- First, determine the desired location for your air compressor lines in the garage. Consider factors such as accessibility and ease of use.
- Measure the distance from the air compressor to the location where you want to install the lines. This will determine the length of the lines you need to cut.
- Using a measuring tape, mark the length of the lines on the tubing material. Make sure to leave some extra length for connecting fittings.
- Next, use a sharp cutting tool, such as a tubing cutter or hacksaw, to cut the lines at the marked points. Ensure a clean and straight cut to avoid leaks or restrictions in airflow.
- After cutting the lines, remove any burrs or sharp edges using a deburring tool or sandpaper. This will ensure a smooth surface for proper fitting and sealing.
It is important to note that when cutting the air compressor lines, you should always follow the manufacturer’s instructions and safety guidelines for the specific materials you are working with. Additionally, make sure to wear appropriate safety gear, such as gloves and eye protection, to avoid any injuries.
FAQ:
Why do I need to install air compressor lines in my garage?
Installing air compressor lines in your garage allows you to easily power pneumatic tools and equipment without needing to constantly move the compressor. It provides a convenient and efficient way to use compressed air for various tasks, such as inflating tires, painting, and operating tools.
Do I need any special tools to install air compressor lines in my garage?
You will need basic tools such as a pipe wrench, pliers, and a tape measure. Additionally, having a tubing cutter or a hacksaw can be helpful for cutting the air lines to the desired length.
How long does it usually take to install air compressor lines in a garage?
The time it takes to install air compressor lines in a garage can vary depending on the complexity of the layout and the experience level of the person installing them. On average, it can take anywhere from a few hours to a full day to complete the installation.
Can I install air compressor lines in my garage without professional help?
Yes, it is possible to install air compressor lines in your garage without professional help. However, it is important to have a basic understanding of plumbing and the necessary tools to ensure a proper installation. If you are unsure, it may be best to consult a professional or seek guidance from knowledgeable individuals.
Video:


Meet Harrison Clayton, a distinguished author and home remodeling enthusiast whose expertise in the realm of renovation is second to none. With a passion for transforming houses into inviting homes, Harrison's writing at https://thehuts-eastbourne.co.uk/ brings a breath of fresh inspiration to the world of home improvement. Whether you're looking to revamp a small corner of your abode or embark on a complete home transformation, Harrison's articles provide the essential expertise and creative flair to turn your visions into reality. So, dive into the captivating world of home remodeling with Harrison Clayton and unlock the full potential of your living space with every word he writes.


