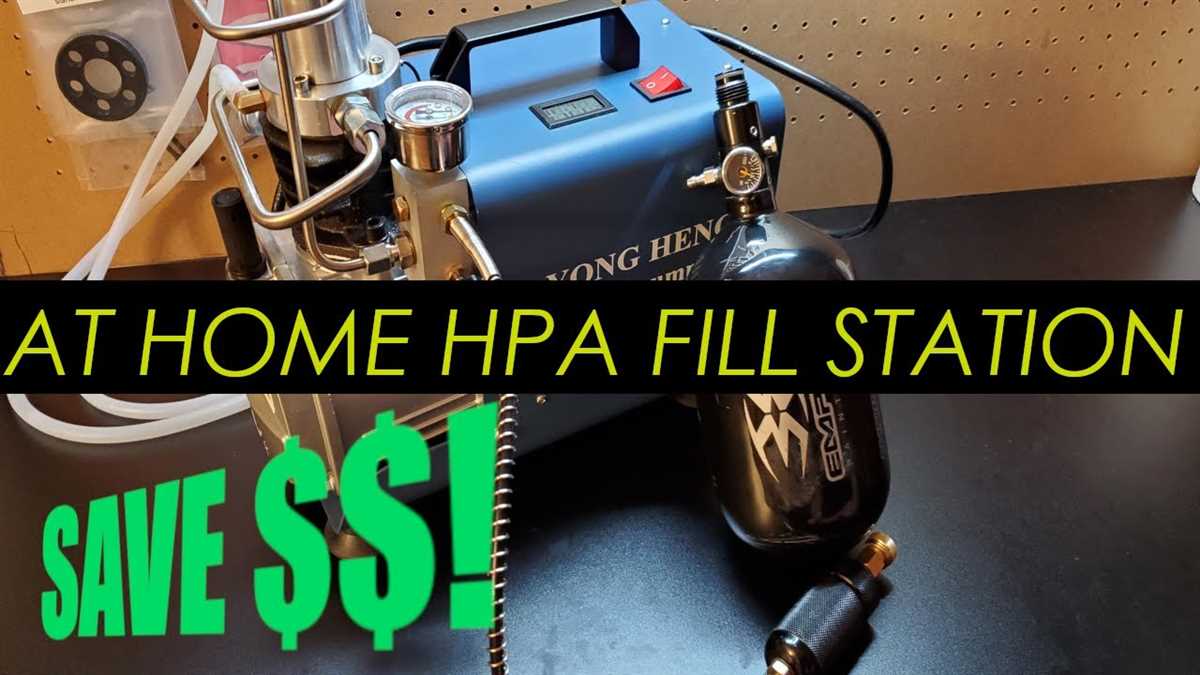
Step-by-Step Guide: How to Fill Your HPA Tank with an Air Compressor

If you participate in activities that require the use of high-pressure air tanks, such as paintball or scuba diving, knowing how to fill your HPA tank with an air compressor is essential. An HPA tank, also known as a high-pressure air tank, is a container that holds compressed air at a pressure higher than the surrounding atmospheric pressure. It is important to fill your HPA tank properly to ensure safety and optimal performance.
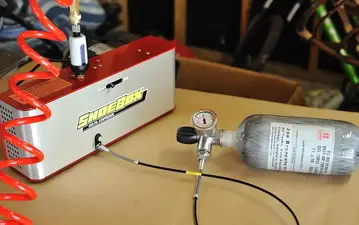
Before getting started, make sure you have the necessary equipment and tools. You will need an air compressor with a high-pressure output, an HPA tank with a compatible fill valve, and a fill station or adaptor. It is crucial to use equipment that is designed for high-pressure applications and is in good working condition. Check the manufacturer’s instructions for specific recommendations regarding the use of the air compressor and HPA tank.
The first step is to prepare your air compressor. Ensure that it is properly connected to a power source and that the pressure regulator is set to the appropriate level for filling your HPA tank. This information can usually be found in the HPA tank’s instruction manual or on its label. It is crucial to set the pressure regulator within the recommended range to avoid overfilling or damaging your HPA tank.
Next, connect the HPA tank to the air compressor using the compatible fill valve. Make sure the connection is secure and tight to prevent any leaks during the filling process. It is recommended to use Teflon tape on the threads of the HPA tank’s fill valve to ensure a good seal. Once the connection is secure, you are ready to start filling your HPA tank with compressed air.
Step 1: Prepare Your HPA Tank
Before you can begin filling your HPA tank with an air compressor, you need to make sure it is properly prepared. Follow these steps to ensure your tank is ready for the filling process:

1. Inspect the tank
Before filling your HPA tank, thoroughly inspect it for any signs of damage or wear. Look for any cracks, dents, or leaks that could compromise the integrity of the tank. If you notice any issues, do not attempt to fill the tank and instead, consult a professional or replace the tank.
2. Check the tank’s pressure rating
Every HPA tank has a specific pressure rating that determines the maximum amount of pressure it can hold safely. It is important to verify that the pressure rating of your tank matches the pressure rating of the air compressor you will be using to fill it. Using an air compressor with a higher pressure rating than your tank can lead to dangerous over-pressurization.
3. Make sure the tank is empty
Prior to filling your HPA tank, ensure that it is completely empty. It is important to release any remaining air or gas that may be inside the tank before attempting to fill it. This can be done by either firing the marker connected to the tank or using the tank’s pressure-release valve if available.
By following these steps to prepare your HPA tank, you can ensure that it is in proper condition for the filling process and reduce the risk of accidents or damage during operation.

Step 2: Prepare Your Air Compressor
Before filling your HPA tank with an air compressor, it is important to properly prepare the compressor for use. Here are the steps to do so:
1. Check the compressor’s oil level
Start by checking the oil level of your air compressor. Use the manufacturer’s instructions to locate the oil dipstick or oil level indicator. Ensure that the oil level is at the recommended level. If the oil level is low, add the appropriate type and amount of compressor oil.
2. Check the compressor’s air filter
Inspect the air filter of the compressor to ensure it is clean and free from debris. If the air filter is dirty, remove it and clean it according to the manufacturer’s instructions. If the air filter is damaged or worn out, replace it with a new one.
3. Check the compressor’s water drain valve
Locate the water drain valve on your air compressor and ensure it is closed tightly. If it is open, close it by turning it clockwise. It is important to have a closed water drain valve to prevent any water or moisture from entering the HPA tank during the filling process.
4. Check the compressor’s pressure regulator

Inspect the pressure regulator of your air compressor and ensure it is set to the appropriate pressure level for filling your HPA tank. Refer to your HPA tank’s manufacturer guidelines for the recommended pressure level. Adjust the pressure regulator as necessary using the regulator knob or dial.
By properly preparing your air compressor before filling your HPA tank, you can ensure safe and efficient operation. Following these steps will help prevent any potential issues and ensure a successful filling process.
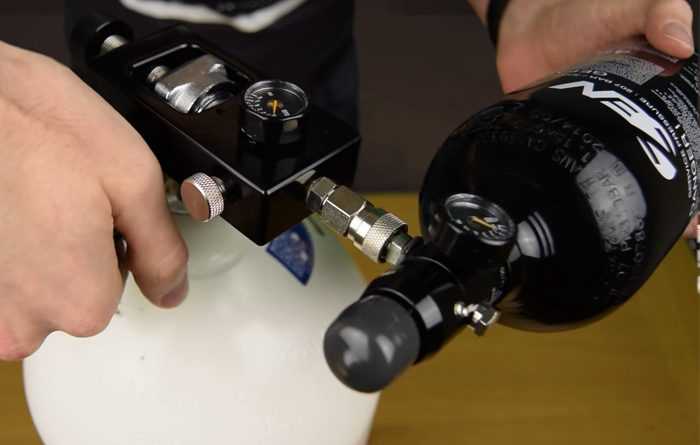
Step 3: Connect Your HPA Tank to the Air Compressor
Once you have set up your air compressor correctly and it is turned on, the next step is to connect your HPA tank to the compressor. This step is crucial to ensure that your tank fills properly and safely.
Start by locating the fill port on your HPA tank. This is usually a threaded opening on the top or side of the tank. Ensure that the fill port is clean and free from any debris or dirt that may affect the sealing of the connection.
Next, take the end of the high-pressure hose that is attached to your air compressor and connect it to the fill port on your HPA tank. Twist the hose onto the fill port in a clockwise direction until it is securely fastened. It is important to ensure a tight connection to prevent any leaks or loss of air pressure during the filling process.

Once the hose is securely connected, double-check that all connections are tight and secure. This will help to prevent any accidents or injuries that may occur if a connection becomes loose during the filling process.
Now that your HPA tank is properly connected to the air compressor, you can proceed to the next step of the filling process. Make sure to follow the instructions provided by the tank manufacturer and the air compressor manufacturer to ensure a safe and effective filling process.
Step 4: Start Filling Your HPA Tank
Once you have properly connected your air compressor to the HPA tank, it is time to start filling it. Before proceeding, make sure that all the valves on the tank and the compressor are closed.
1. Open the valve on the HPA tank: To begin the filling process, slowly open the valve on the HPA tank. This will allow the air from the compressor to enter the tank and start filling it.
2. Monitor the pressure gauge: As the air enters the tank, keep a close eye on the pressure gauge. It will indicate the amount of air inside the tank and give you an idea of how much more air is needed to reach your desired pressure level.

3. Adjust the pressure: If you have a specific pressure level in mind, you can adjust the air compressor accordingly. Most compressors have a pressure adjustment knob or dial that allows you to control the output pressure. Slowly increase or decrease the pressure until you reach your desired level.
4. Close the valves: Once your HPA tank is filled to the desired pressure level, close the valve on the tank first, and then close the valve on the air compressor. This will prevent any air from escaping and ensure that the tank remains pressurized.
5. Disconnect the air compressor: Once all the valves are closed, disconnect the air compressor from the HPA tank. Double-check that both the tank and compressor valves are closed properly to avoid any accidental release of air.
Now that your HPA tank is filled, you can safely use it for various applications, such as paintball, airsoft, or any other activity that requires high-pressure air.
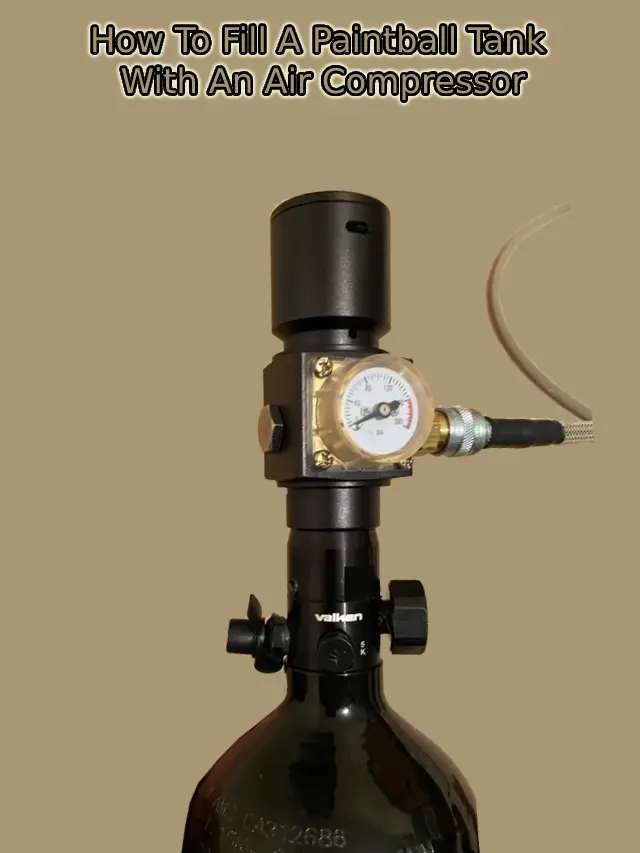
Step 5: Monitor the Pressure Gauge
Once you start filling your HPA tank with air from the compressor, it’s important to monitor the pressure gauge throughout the process. The pressure gauge will give you an indication of how much air is being pumped into the tank and when it reaches its maximum capacity.

Keep a close eye on the pressure gauge and make sure it doesn’t exceed the recommended pressure limit for your HPA tank. Going beyond this limit can be dangerous and may result in damage to the tank or other equipment. If you’re unsure about the maximum pressure for your tank, consult the manufacturer’s guidelines or ask an experienced professional.
As the pressure builds up, you’ll notice the needle on the pressure gauge rising. This is a good sign that the tank is being filled, but be cautious not to overfill it. When the pressure gauge reaches the desired level or the recommended maximum pressure, stop the air compressor and disconnect the tank to prevent any further air from entering.
Remember to always handle the pressure tank and gauge with care during this process. Accidental damage or mishandling can lead to serious injury. If you notice any issues or abnormalities with the pressure gauge, such as sudden drops or fluctuations in pressure, stop filling immediately and seek professional assistance.
Step 6: Stop Filling When Desired Pressure is Reached
Once you have started filling your HPA tank with air from the compressor, it is important to monitor the pressure and stop filling when the desired pressure is reached. This is crucial to ensure the safety and proper functioning of your HPA system.
Here are the steps to follow to stop filling when the desired pressure is reached:

- Keep an eye on the pressure gauge on your HPA tank. This gauge will show you the current pressure inside the tank.
- Refer to the user manual or manufacturer’s instructions to determine the recommended pressure range for your specific HPA tank.
- As the pressure in the tank approaches the desired pressure range, slow down the filling process by adjusting the regulator or valve on the compressor.
- Once the pressure reaches the desired range, immediately shut off the compressor to stop the flow of air into the tank.
- Double check the pressure gauge on your HPA tank to ensure that the desired pressure has been achieved and is stable.
It is important not to overfill the HPA tank, as this can lead to safety issues and potentially damage the tank or HPA system. Overfilling can cause the tank to burst or rupture, which can result in serious injury or property damage.
By carefully monitoring the pressure and stopping the filling process when the desired pressure is reached, you can ensure the safe and efficient operation of your HPA tank and air compressor.
Step 7: Disconnect Your HPA Tank
Once you have filled your HPA tank with the desired amount of air, it is time to disconnect it from the air compressor. This step is crucial to ensure proper handling and prevent any accidental releases of compressed air.
Begin by turning off the air compressor and releasing any remaining pressure in the system. This can be done by opening the air release valve or slowly turning the pressure adjustment knob to the lowest setting.
Once the pressure has been released, carefully unscrew the air hose that is connecting the HPA tank to the air compressor. It is essential to do this slowly and steadily to avoid any sudden releases of air or damage to the tank or compressor.
After the air hose has been disconnected, place a cap or cover on the HPA tank’s valve to protect it from dirt or debris. This will also help to prevent any accidental openings or leaks during storage or transportation.
Finally, double-check that the HPA tank is securely disconnected and properly covered before moving it or storing it away. It is essential to handle the HPA tank with care and store it in a safe and appropriate location to ensure its longevity and performance.
Step 8: Store Your HPA Tank Safely
After filling your HPA tank, it’s important to store it safely to ensure its longevity and prevent any accidents. Here are some steps to follow:
1. Find a Suitable Storage Area
Choose a cool, dry place to store your HPA tank. Avoid areas with extreme temperatures or high humidity, as these conditions can damage the tank and its components over time.
2. Secure the Tank
Place your HPA tank in a secure position to prevent any accidental falls or damage. Use a tank stand or holder specifically designed for HPA tanks, or ensure that the tank is placed in a stable position where it won’t tip over easily.
3. Protect the Tank from Direct Sunlight
Avoid exposing your HPA tank to direct sunlight for prolonged periods. Ultraviolet rays can degrade the materials and weaken the tank, potentially leading to leaks or other safety hazards.
4. Inspect the Tank Regularly
Check your HPA tank periodically for any signs of damage, such as dents, scratches, or corrosion. If you notice any issues, it’s important to address them promptly to prevent further damage or potential safety risks.
5. Follow Manufacturer’s Recommendations

Refer to the manufacturer’s instructions or guidelines for specific storage recommendations for your HPA tank. Different tanks may have unique requirements, so it’s essential to follow the manufacturer’s recommendations to ensure proper storage.
By following these steps, you can store your HPA tank safely and prolong its lifespan, allowing you to enjoy many successful outings with your airsoft or paintball equipment.
FAQ:
What is an HPA tank?
An HPA (High-Pressure Air) tank is a pressurized container used to store compressed air, which is commonly used in paintball, airsoft, and other applications.
Why do I need an air compressor to fill my HPA tank?
An air compressor is required to fill an HPA tank because it compresses the air and raises its pressure to the level necessary for the tank.
What kind of air compressor do I need?
You will need a high-pressure air compressor that is capable of reaching the pressure rating of your HPA tank. A compressor with a maximum pressure of at least 3000 or 4500 PSI is recommended.
How do I connect the air compressor to my HPA tank?
To connect the air compressor to your HPA tank, you will need a fill station with the appropriate fittings and a high-pressure fill whip. Attach the fill station to the compressor, connect the fill whip to the tank, and then open the valve on the tank to allow air to flow in.
Can I use a regular air compressor to fill my HPA tank?
No, a regular air compressor is not suitable for filling an HPA tank. It does not provide the necessary pressure to fill the tank to its rated capacity. You need a high-pressure air compressor specifically designed for this purpose.
Is it safe to fill my HPA tank with an air compressor?
Yes, it is safe to fill your HPA tank with an air compressor as long as you follow the manufacturer’s instructions and use the correct equipment. It is important to regularly inspect your equipment for any signs of damage or wear to ensure safe operation.
Is there anything I need to do after filling my HPA tank?
After filling your HPA tank, it is recommended to bleed the air from the fill whip and disconnect it from the tank. This helps to prevent any pressure buildup and ensures the safe storage of your tank.
Video:


Harrison Clayton
Meet Harrison Clayton, a distinguished author and home remodeling enthusiast whose expertise in the realm of renovation is second to none. With a passion for transforming houses into inviting homes, Harrison's writing at https://thehuts-eastbourne.co.uk/ brings a breath of fresh inspiration to the world of home improvement. Whether you're looking to revamp a small corner of your abode or embark on a complete home transformation, Harrison's articles provide the essential expertise and creative flair to turn your visions into reality. So, dive into the captivating world of home remodeling with Harrison Clayton and unlock the full potential of your living space with every word he writes.


