Painting a Car with a Small Air Compressor: Tips and Techniques

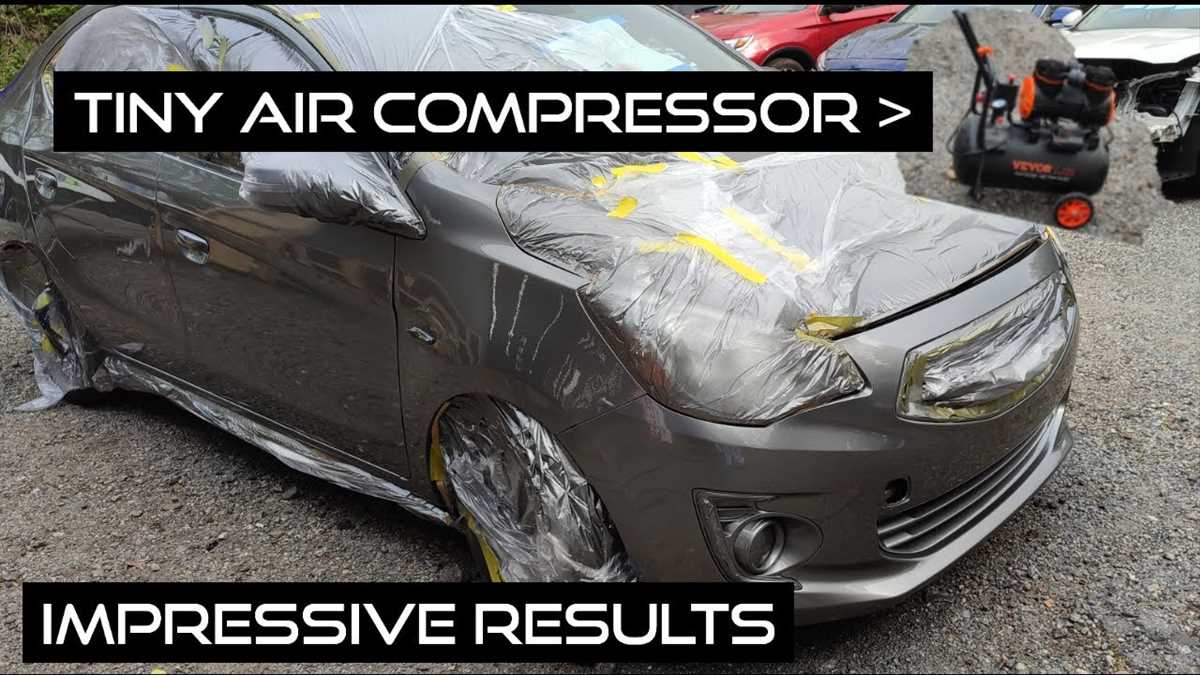
When it comes to painting a car, having the right tools can make all the difference. While professional paint booths and high-powered air compressors are ideal, not everyone has access to these resources. However, with a small air compressor and the right techniques, you can still achieve a professional-looking paint job on your car.
One of the most important tips for painting a car with a small air compressor is to properly prepare the surface. This includes sanding down any rough spots, filling in any dents or scratches, and applying a primer. By taking the time to properly prep the surface, you will ensure that the paint adheres well and the final finish is smooth and even.
Another important technique to consider is the use of thin coats. Due to the limited air supply of a small air compressor, it is best to apply thin layers of paint rather than trying to cover the entire surface in one go. This not only helps prevent runs and drips, but also allows for better control over the application process. Keep in mind that multiple thin coats will be necessary to achieve the desired color and finish.
In addition to thin coats, it is important to use proper painting techniques such as overlapping strokes and maintaining a consistent distance from the surface. Overlapping strokes ensure even coverage, while maintaining a consistent distance helps achieve a uniform finish. Practice on a scrap piece of material before starting on your car to become familiar with the technique and to find the optimal settings for your small air compressor.
Tips for Painting a Car with a Small Air Compressor
Painting a car with a small air compressor can be a challenging task, but with the right tips and techniques, it is definitely possible to achieve professional-looking results. Here are some tips to help you get started:

1. Choose the Right Paint
When painting a car with a small air compressor, it is important to choose the right paint that is compatible with your equipment. Look for paint that is specifically designed for use with air compressors and follow the manufacturer’s instructions for mixing and application.
2. Properly Prepare the Surface
Before painting, make sure to properly prepare the surface of the car. This includes cleaning off any dirt, grease, or debris and sanding down any rough areas. Use a primer to create a smooth surface for the paint to adhere to.
3. Use Thin Coats
When painting with a small air compressor, it is better to use multiple thin coats rather than one thick coat. This will help to prevent runs and drips, and will also ensure a more even and professional-looking finish.
4. Maintain Proper Air Pressure
Make sure to maintain proper air pressure throughout the painting process. Too much pressure can cause overspray and uneven coverage, while too little pressure can result in a splotchy finish. Adjust the air pressure as needed to achieve the desired results.

5. Keep a Consistent Distance
When using a small air compressor to paint a car, it is important to keep a consistent distance between the nozzle and the surface. This will help to ensure an even application of paint and prevent uneven coverage.
6. Practice on a Test Panel
If you are new to painting with a small air compressor, it may be helpful to practice on a test panel before moving on to the actual car. This will allow you to familiarize yourself with the equipment and techniques, and make any necessary adjustments before starting the painting process.
7. Take Your Time
Painting a car with a small air compressor can be a time-consuming process, but it is important to take your time and be patient. Rushing through the job can result in mistakes and a less professional finish. Take breaks as needed and make sure to properly clean and maintain your equipment throughout the process.
By following these tips, you can achieve great results when painting a car with a small air compressor. Remember to always prioritize safety and work in a well-ventilated area. Happy painting!
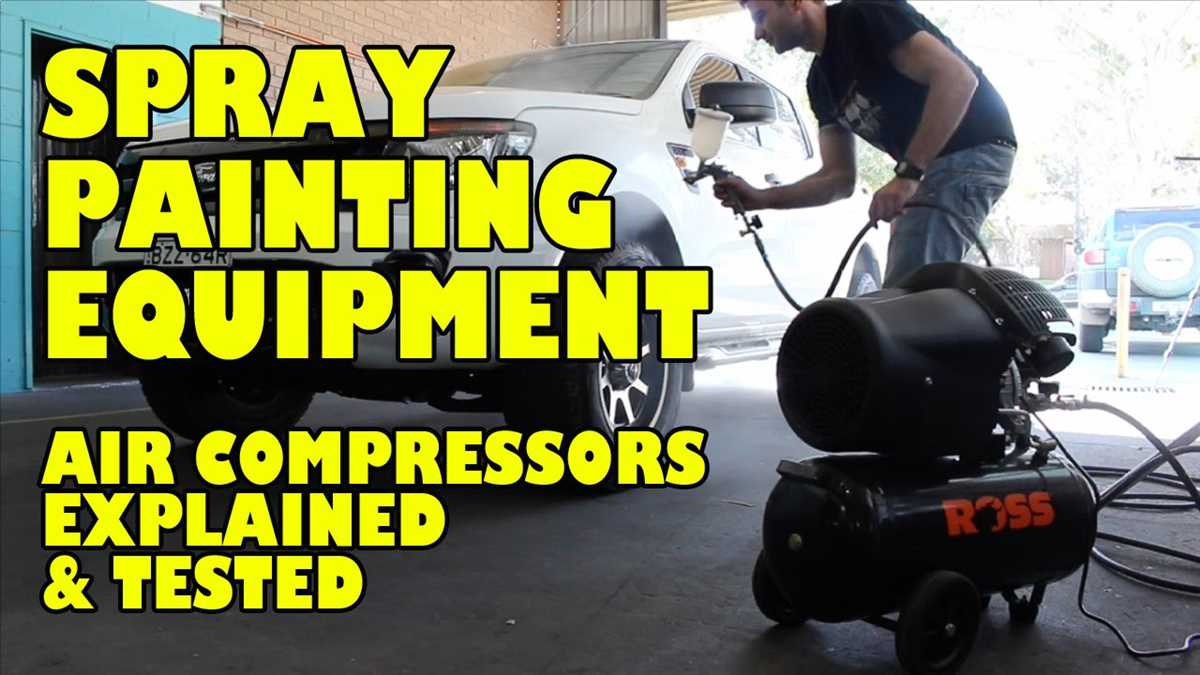
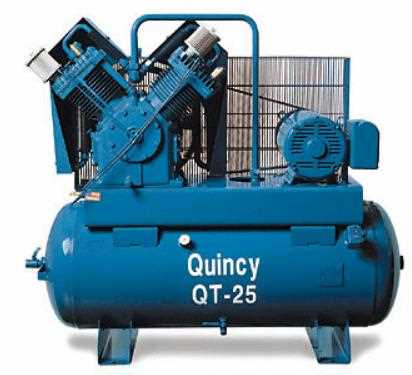
Choosing the Right Air Compressor
Consider the Air Pressure and Volume
When choosing an air compressor for painting a car, it is important to consider the air pressure and volume requirements for the paint gun. The air pressure, measured in pounds per square inch (PSI), determines the force with which the paint is sprayed onto the car’s surface. The volume, measured in cubic feet per minute (CFM), determines how quickly the paint is delivered. It is essential to choose an air compressor that can provide the necessary air pressure and volume to ensure a smooth and even paint job.

Check the Power Source
Another important factor to consider when choosing an air compressor is the power source. Air compressors can be powered by electricity or gas. Electric air compressors are typically more suitable for smaller paint jobs, as they are quieter and more convenient to use. Gas-powered air compressors, on the other hand, provide higher air pressure and volume, making them better suited for larger painting projects. It is important to take into account the availability of power sources and the specific needs of the painting project before making a decision.
Look for Portability and Size
Portability and size are also worth considering when choosing an air compressor for painting a car. A smaller and more portable air compressor can be easier to move around and store, making it a better choice for DIY enthusiasts or professionals who need to work in different locations. However, it is important to ensure that the portable air compressor can still provide sufficient air pressure and volume for the painting task at hand.
Consider Noise Level
Noise level is another factor to take into account when choosing an air compressor for painting a car. Some air compressors can be very loud, which can be disruptive and uncomfortable, especially if you are working in a residential area or in close proximity to others. It is advisable to choose an air compressor with a lower noise level to minimize disruptions and ensure a more pleasant work environment.
Compare and Evaluate Options
Before making a final decision, it is important to compare and evaluate different air compressor options. Consider the specific requirements of the painting project, such as the type of paint gun used, the size of the car, and the desired finish. Look for air compressors that are compatible with these requirements and compare their features, including air pressure, volume, power source, portability, size, and noise level. This way, you can choose an air compressor that best fits your needs and ensures a successful car painting experience.

Preparing the Car Surface
Before you start painting your car with a small air compressor, it is crucial to properly prepare the surface to ensure a smooth and professional-looking finish. Here are some tips and techniques to help you get started:
Clean the Surface
Start by thoroughly cleaning the car’s surface to remove any dirt, grease, or other contaminants. Use a mild detergent and water solution to wash the car, making sure to rinse it off completely. For stubborn dirt or residue, you may need to use a degreaser or solvent.
Repair Any Damage
Inspect the car’s surface for any scratches, dents, or other imperfections. Use body filler or putty to repair any small dents, and sand the area until it is smooth and level. If there are larger areas of damage, such as rust spots or deep scratches, you may need to use a sanding disc or grinder to remove the damaged paint or metal.
Sand the Surface
After repairing any damage, sand the entire surface of the car using fine-grit sandpaper or a sanding block. This will help ensure proper adhesion of the new paint. Be sure to sand in circular motions and in all directions to create a smooth and even surface. After sanding, use a tack cloth to remove any dust or debris.
Mask off the Area
Before painting, protect any areas of the car that you do not want to be painted. Use painters’ tape and plastic sheeting to cover windows, lights, trim, and any other areas that should remain unpainted. This will help prevent overspray and ensure a clean finish.

By following these steps to properly prepare the surface of your car, you will be one step closer to achieving professional results when painting with a small air compressor.
Sanding and Priming
Before painting a car with a small air compressor, it is important to prepare the surface by sanding and priming. Sanding helps remove any imperfections, such as scratches or old paint, while priming creates a smooth and even base for the paint to adhere to. Here are some tips and techniques for sanding and priming:
1. Prepare the Surface
Start by washing the car thoroughly to remove any dirt or debris. Once the car is clean, use a fine-grit sandpaper to sand the entire surface. This will help create a rough texture for the primer to grip onto. Pay attention to any areas with rust or chipped paint, as they may require extra sanding and preparation.
2. Choose the Right Primer
Select a high-quality automotive primer that is compatible with both the car’s surface and the paint you will be using. Apply the primer using a spray gun or a paintbrush, depending on the size of the area you are working on. Apply a thin, even coat and allow it to dry completely before sanding.
3. Sand the Primer
Once the primer is dry, use a fine-grit sandpaper to sand the entire surface again. This will help smoothen out any imperfections and create an even base for the paint. Be sure to sand in a circular motion and regularly check the surface for any rough spots or areas that need further attention.
4. Clean and Repeat
After sanding, clean the surface with a tack cloth or a lint-free cloth to remove any dust or debris. If necessary, repeat the priming and sanding process to achieve the desired smoothness and texture. Remember to always follow the manufacturer’s instructions for the primer and allow proper drying time between coats.
By properly sanding and priming the car’s surface, you can ensure a professional-looking paint job with a small air compressor. Taking the time to prepare the surface will result in a long-lasting and durable finish that will enhance the appearance of your car.
Masking Off Areas
Masking off areas is an important step in the car painting process, as it helps protect certain parts of the vehicle from overspray and ensures clean paint lines. Here are some tips and techniques for effectively masking off areas before painting:
1. Identify the areas to be masked
Before starting the masking process, carefully examine the vehicle and identify the areas that need to be protected. This can include the windows, lights, trim, and any other parts that should not be painted. Make a list or mark these areas to ensure they are properly masked off.
2. Use quality masking tape
When masking off areas, it is important to use high-quality automotive masking tape. This type of tape is designed to adhere well to surfaces and resist paint bleeding. Avoid using regular household tape as it may not provide the same level of protection.
3. Clean and prepare the surfaces
Before applying the masking tape, clean the surfaces that need to be masked off. Remove any dirt, dust, or debris that could prevent the tape from sticking properly. It is also a good idea to lightly sand the area around the edges of the tape to ensure a smooth transition between the masked and painted areas.
4. Use plastic or paper sheeting for larger areas
If you need to mask off larger areas, such as the whole car or a section of it, consider using plastic or paper sheeting. This will provide better coverage and protection compared to tape alone. Secure the sheeting tightly with tape or clips to prevent it from moving during the painting process.
5. Take your time and be thorough
When masking off areas, take your time and be thorough. Ensure that all edges of the tape are pressed down firmly to create a tight seal. Check for any gaps or areas that may have been missed, as even a small opening can lead to paint overspray.
By following these tips and techniques, you can effectively mask off areas before painting a car with a small air compressor. This will help you achieve clean and professional-looking results.
Mixing the Paint Properly
When it comes to painting a car with a small air compressor, one of the most important steps is mixing the paint properly. Properly mixed paint will ensure a smooth and even application, as well as long-lasting results.
Step 1: Choose the Right Paint
Before mixing the paint, it is important to choose the right type of paint for your car. Consider factors such as the color you want, the type of paint (basecoat or single-stage), and the brand. Check the manufacturer’s instructions for any specific mixing ratios or requirements.
Step 2: Gather the Materials
Next, gather all the necessary materials for mixing the paint. This includes paint cups, stirring sticks, and a scale or measuring cup. It is important to have accurate measurements to ensure the proper mixing ratio.
Step 3: Measure the Paint and Reducer
Measure the paint and the reducer according to the manufacturer’s instructions. This is typically done by weight or volume, depending on the type of paint you are using. Use a scale or measuring cup to ensure precise measurements.
Step 4: Mix the Paint
Pour the measured paint and reducer into a paint cup. Use a stirring stick to thoroughly mix the paint until it is well blended and there are no streaks or clumps. It is important to take your time and ensure that the paint is mixed properly.
Step 5: Test the Consistency
Once the paint is mixed, test its consistency by dipping a viscosity cup into the paint and observing how quickly it flows out. Adjust the consistency by adding more reducer if the paint is too thick or adding more paint if it is too thin.
Step 6: Strain the Paint
Before using the paint, it is recommended to strain it to remove any impurities or debris that may affect the final finish. Use a paint strainer or filter to strain the paint and ensure a smooth application.
By following these steps and properly mixing the paint, you can achieve professional-looking results when painting a car with a small air compressor.
Applying the Paint in Thin Layers
When painting a car with a small air compressor, it is important to apply the paint in thin layers. This allows for a smoother finish and helps prevent drips and runs in the paint job.
One technique for applying the paint in thin layers is to use a light, sweeping motion with the spray gun. This helps to evenly distribute the paint and minimizes the risk of applying too much paint in one area.
Another tip is to hold the spray gun at a consistent distance from the car’s surface. This distance will vary depending on the type of paint being used and the specific instructions provided by the manufacturer. However, a general rule of thumb is to hold the spray gun about 6-8 inches away from the surface.
It is also important to overlap each pass with the spray gun to ensure complete coverage. This helps to avoid uneven patches and ensures that the paint is applied evenly across the entire surface.
Additionally, it is a good idea to let each layer of paint dry before applying the next. This allows for better adhesion between the layers and helps prevent the paint from running or sagging.
Overall, applying the paint in thin layers requires patience and precision. By following these tips and techniques, you can achieve a professional-quality paint job with a small air compressor.
Using the Correct Spray Gun Nozzle Size
Choosing the correct spray gun nozzle size is crucial when painting a car with a small air compressor. The nozzle size determines the amount of paint flow and pattern width, directly impacting the quality of the paint job. Using the wrong nozzle size can result in overspray, uneven coverage, and a less professional finish.
Factors to Consider
When selecting the correct nozzle size, several factors should be taken into account:
- Type of Paint: Different types of paint require different spray gun nozzle sizes. Thicker paints, such as primers and high-build coatings, typically require larger nozzle sizes to ensure proper atomization and coverage. Finer paints, like basecoats and clearcoats, may require smaller nozzle sizes for better control and precision.
- Painting Technique: The desired painting technique also plays a role in choosing the correct nozzle size. For larger areas, a larger nozzle size with a wider pattern may be more efficient. On the other hand, smaller nozzle sizes are better suited for intricate details and fine lines.
- Air Compressor Capacity: Small air compressors may have limitations in terms of air pressure and volume. It’s important to choose a nozzle size that matches the capabilities of the compressor. Using a nozzle size that requires more air pressure or volume than the compressor can provide may result in inadequate atomization and poor paint application.
Testing and Adjusting
It’s recommended to perform test sprays and make adjustments before starting the actual paint job. This allows for fine-tuning of the spray gun settings, including nozzle size, to achieve the desired results. Additionally, it’s important to follow the manufacturer’s recommendations and guidelines for the specific spray gun being used to ensure optimal performance.
Overall, using the correct spray gun nozzle size is essential for achieving a high-quality paint job when working with a small air compressor. It’s worth taking the time to research and experiment with different nozzle sizes to find the best match for the type of paint, painting technique, and air compressor capacity.
Applying Clear Coat for a Professional Finish
When it comes to achieving a professional finish on a painted car, applying a clear coat is essential. Clear coat serves as a protective layer that not only enhances the appearance of the paint job but also provides durability and resistance against UV rays, chemicals, and other elements that can damage the paint.
Preparation: Before applying the clear coat, it is important to ensure that the car’s surface is clean and smooth. This involves thoroughly washing and drying the car, and sanding down any imperfections or rough spots. It is also recommended to tape off any areas that do not require clear coat.
Choosing the Right Clear Coat: There are different types of clear coats available on the market, so it is important to choose one that is suitable for automotive use. Look for a clear coat that provides UV protection, is compatible with your base coat, and is easy to apply. Reading product reviews and consulting with professionals can help in making the right choice.
Application Techniques: When applying the clear coat, it is important to follow the manufacturer’s instructions and use proper spraying techniques. This usually involves using a spray gun or an air compressor with a paint gun attachment. It is important to apply the clear coat in thin, even layers, allowing each layer to dry before applying the next. This ensures a smooth and glossy finish.
Drying and Curing: After applying the clear coat, it is important to allow it to dry and cure properly. This usually involves letting the car sit in a well-ventilated area for a specific amount of time, which can vary depending on the type of clear coat used. It is important to avoid touching or rubbing the freshly applied clear coat during this time to prevent any imperfections or marks.
Finishing Touches: Once the clear coat has dried and cured, it is important to inspect the paint job for any imperfections such as dust particles or runs. These can be fixed by lightly sanding and polishing the affected areas. Applying a final layer of wax or sealant can also help in providing additional protection and enhancing the shine of the clear coat.
Maintenance: To ensure that the clear coat maintains its professional finish, it is important to regularly wash and wax the car. This not only helps in keeping the paint job looking shiny but also provides added protection against environmental factors. It is also recommended to avoid parking the car in direct sunlight for extended periods to prevent any fading or damage to the clear coat.
By following these tips and techniques, you can achieve a professional finish when applying a clear coat to your painted car. Remember to take your time, be patient, and ensure proper preparation and application for the best results.
FAQ:
What are the benefits of using a small air compressor to paint a car?
Using a small air compressor to paint a car has several benefits. Firstly, it is portable and lightweight, making it easy to move around and use in different locations. Secondly, it is cost-effective compared to larger air compressors. Additionally, a small air compressor provides enough pressure to achieve a smooth and even paint finish.
What kind of paint should I use with a small air compressor?
When using a small air compressor to paint a car, it is recommended to use automotive paint. This type of paint is specifically formulated for use on cars and provides a durable and long-lasting finish. Within the category of automotive paint, there are different options such as acrylic enamel, urethane, and water-based paints. The choice will depend on personal preference, budget, and desired outcome.
Is it necessary to have prior experience with painting before using a small air compressor to paint a car?
While prior experience with painting can be helpful, it is not necessary to have it before using a small air compressor to paint a car. With proper preparation and practice, anyone can achieve good results. It is important to follow the proper techniques, such as sanding, priming, and applying thin coats of paint. It is also recommended to start with a small area or practice on scrap panels before painting the entire car.
What are some tips for achieving a professional-looking paint job with a small air compressor?
To achieve a professional-looking paint job with a small air compressor, there are a few tips to keep in mind. Firstly, thorough surface preparation is key. This includes cleaning, sanding, and priming the car. Secondly, using high-quality paint and materials will make a noticeable difference in the final result. It is important to apply thin coats of paint and allow proper drying time between layers. Finally, practicing proper spraying techniques, such as maintaining consistent pressure and distance from the surface, will help achieve a smooth and even finish.
Can a small air compressor handle the high air pressure required for painting a car?
Yes, a small air compressor is capable of handling the air pressure required for painting a car. While larger air compressors might have higher pressure output, a small compressor can still provide enough pressure to achieve a smooth and even paint finish. It is important to make sure that the compressor is properly adjusted and that the necessary air pressure is maintained throughout the painting process.
Are there any safety precautions to take when using a small air compressor to paint a car?
Yes, there are several safety precautions to take when using a small air compressor to paint a car. Firstly, it is important to wear appropriate safety gear, such as goggles, a respirator, and gloves, to protect against paint fumes and overspray. Proper ventilation is also important to prevent the buildup of toxic fumes. Additionally, it is essential to follow the manufacturer’s instructions and guidelines for operating the air compressor safely.
Can a small air compressor be used for other tasks besides painting a car?
Yes, a small air compressor can be used for various tasks besides painting a car. It can be used for inflating tires, powering pneumatic tools, airbrushing, and more. However, it is important to consider the specific requirements of each task and ensure that the compressor is suitable for the intended use. Different tasks might require different air pressure levels and airflow capacities.
Video:


Harrison Clayton
Meet Harrison Clayton, a distinguished author and home remodeling enthusiast whose expertise in the realm of renovation is second to none. With a passion for transforming houses into inviting homes, Harrison's writing at https://thehuts-eastbourne.co.uk/ brings a breath of fresh inspiration to the world of home improvement. Whether you're looking to revamp a small corner of your abode or embark on a complete home transformation, Harrison's articles provide the essential expertise and creative flair to turn your visions into reality. So, dive into the captivating world of home remodeling with Harrison Clayton and unlock the full potential of your living space with every word he writes.


