How to Deal with a Broken Air Compressor: Tips and Solutions

Having a broken air compressor can be frustrating, especially when you rely on it for various tasks. Whether you use an air compressor for inflating tires, powering tools, or operating machinery, it is essential to know how to handle a malfunctioning device. In this article, we will explore tips and solutions to help you deal with a broken air compressor effectively.
Diagnosing the Issue: The first step in dealing with a broken air compressor is identifying the problem. Common issues include a lack of air pressure, strange noises, or the compressor not turning on at all. Understanding the symptoms of the problem will help you determine the necessary actions to resolve it.
Performing Basic Troubleshooting: Once you have identified the issue, it is essential to perform some basic troubleshooting steps. Start by checking the power source, ensuring that the air compressor is properly connected and receiving power. Additionally, inspect the air filter and clean it if necessary. Examining the hoses and connections for leaks or damage is also crucial.
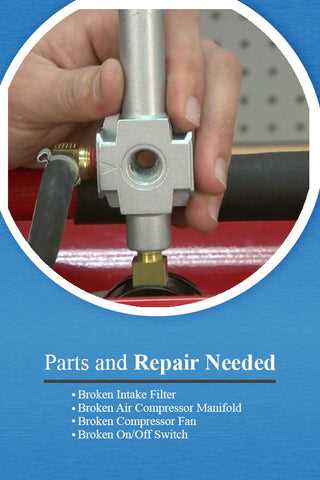
Repairing or Replacing Components: If the basic troubleshooting steps do not resolve the issue, you may need to repair or replace some components. This may involve replacing a faulty pressure switch, repairing a leaky hose, or replacing a damaged motor. It is important to consult the manufacturer’s instructions or seek professional assistance to ensure the proper repair or replacement procedure.
Maintaining the Air Compressor: To prevent future breakdowns, it is crucial to properly maintain your air compressor. Regularly cleaning and lubricating the components, checking for leaks, and ensuring proper oil levels can help extend the lifespan of your device. Following the manufacturer’s maintenance guidelines and scheduling routine inspections can also help identify potential issues before they become major problems.

Conclusion: Dealing with a broken air compressor can be a daunting task, but with the right tips and solutions, it is possible to resolve the issue effectively. By diagnosing the problem, performing basic troubleshooting, repairing or replacing components when needed, and maintaining the air compressor properly, you can ensure its optimal performance and longevity. Remember to consult the manufacturer’s instructions or seek professional assistance when necessary to avoid further damage to the device.
Common Signs of a Broken Air Compressor
1. No Air Output
If your air compressor is not providing any air output, it could be a sign of a malfunction. Check if the compressor is properly connected to the power source and if the pressure gauge shows any pressure. If there is no pressure or if the compressor does not start, it may be due to a faulty motor, capacitor, or pressure switch.
2. Unusual Noise
An air compressor that makes strange or loud noises while operating is likely experiencing a problem. Listen for any knocking, grinding, or squeaking sounds. These noises can indicate issues with the motor, bearings, or belts. Ignoring these noises can lead to further damage and potential system failure.
3. Leaks
Leaking air from the compressor is a clear sign of a problem. Check for visible leaks around the fittings, hoses, or tanks. Leaks can occur due to loose connections, worn-out seals, cracked hoses, or damaged tanks. Addressing and fixing leaks promptly is essential to maintain the efficiency and safety of your air compressor.
4. Overheating
If your air compressor becomes excessively hot during operation, it could be a sign of a malfunction. Overheating can be caused by issues such as low oil levels, faulty cooling fans, or a clogged ventilation system. Continuous operation while overheating can lead to damage to the motor or other components, so it is important to address this issue promptly.

5. Inconsistent Pressure
If your air compressor is unable to maintain consistent pressure, it may be experiencing a problem. Check if the pressure gauge fluctuates or if the compressor struggles to build or maintain pressure. Issues such as a faulty pressure switch, leaky valves, or a worn-out compressor pump can cause inconsistent pressure. Addressing these issues is crucial to ensure reliable performance and prevent potential damage to the compressor.
In conclusion, being aware of these common signs of a broken air compressor will help you detect and address any issues before they escalate. Regular maintenance and prompt repair are essential to ensure the longevity and efficiency of your air compressor. If you notice any of these signs, consult a professional for proper diagnosis and repair.
Abnormal Noises
If you hear any abnormal noises coming from your air compressor, it is important to address the issue as soon as possible. These noises can indicate a problem with the internal components of the compressor and can lead to further damage if left untreated.
Causes of Abnormal Noises
There are several potential causes for abnormal noises in an air compressor. One common cause is a loose or damaged belt. If the belt is loose, it can create a squealing or squeaking sound. A damaged belt may produce a grinding or rattling noise.
Another possible cause of abnormal noises is a malfunctioning motor. If the motor is not operating correctly, it can create loud or irregular sounds. Additionally, a worn-out or damaged piston can also produce unusual noises, such as knocking or banging.

Solutions for Abnormal Noises
If you suspect that the noise is coming from a loose or damaged belt, you should inspect it for any signs of wear or damage. Tighten or replace the belt as necessary. If the noise persists, it may be necessary to replace the motor or piston. This should be done by a professional to ensure proper installation and prevent further damage to the compressor.
In some cases, the abnormal noise could be caused by a lack of lubrication. Check the oil levels in the compressor and add more if needed. Proper lubrication can help reduce friction between moving parts and minimize noise.
Regular maintenance and inspection of your air compressor can help identify and prevent abnormal noises. It is recommended to follow the manufacturer’s guidelines for maintenance and service intervals to keep your compressor in optimal condition.
Loss of Pressure
A loss of pressure is a common issue with air compressors, and it can be caused by a variety of factors. One possible cause is a leak in the air hose or fittings. Check all connections and hoses for any signs of damage or leakage. Tighten any loose fittings or replace damaged hoses to ensure a proper seal.
Another possible cause of pressure loss is a malfunctioning pressure switch. The pressure switch is responsible for regulating the pressure in the compressor. If it is not functioning properly, it may need to be replaced. To determine if the pressure switch is the issue, you can use a multimeter to check for continuity or consult the manufacturer’s manual.

Clogged air filters can also lead to a loss of pressure. Over time, dust and debris can accumulate in the air filters, restricting the airflow. Regularly clean or replace the air filters to maintain proper air flow and prevent pressure loss.
It is also important to check the compressor’s oil level. Low oil levels can cause the compressor to overheat, resulting in a loss of pressure. Refer to the manufacturer’s manual for the correct type and amount of oil to use in your specific compressor.
If none of these solutions resolve the loss of pressure, it is recommended to consult a professional technician or contact the manufacturer for further assistance. They will be able to diagnose and repair any more complex issues that may be causing the loss of pressure in your air compressor.
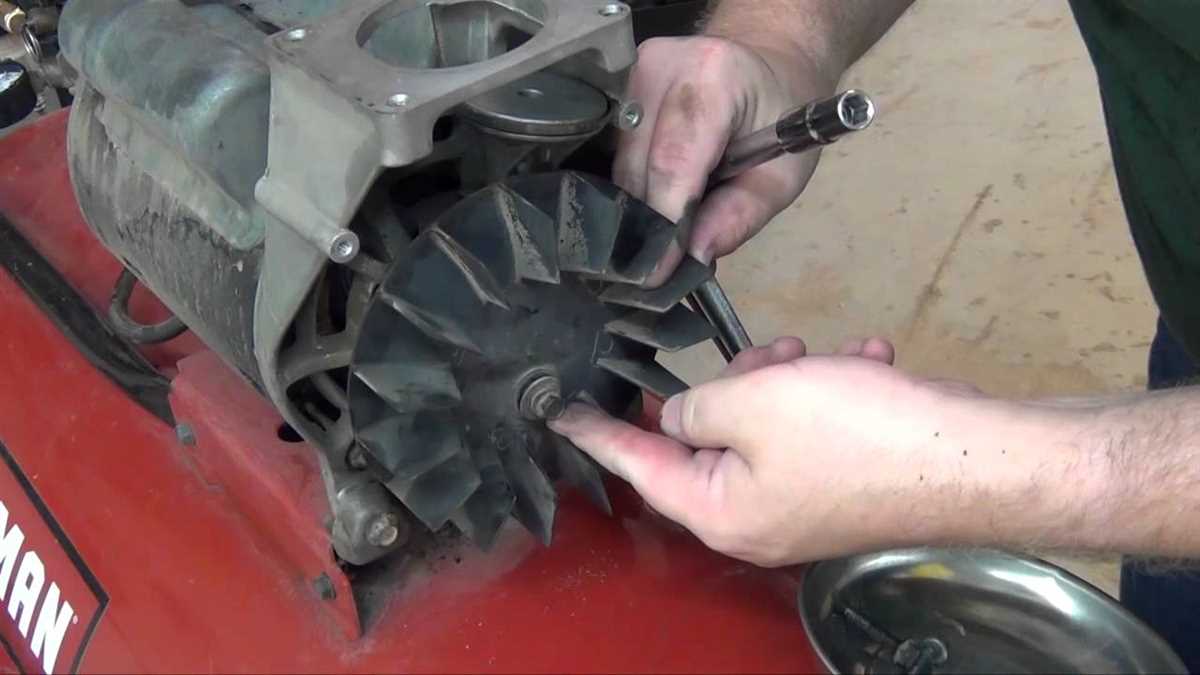
Motor Overheating
If your air compressor motor is overheating, it could be due to a variety of reasons. One common cause is a lack of proper ventilation. The motor needs to be able to dissipate heat, and if it is enclosed in a tight space or surrounded by debris, it may not be able to cool down effectively. Ensure that the area around the motor is clear of obstructions and that there is adequate airflow.

Another possible cause of motor overheating is an issue with the motor’s bearings. Over time, the bearings can wear out or become dirty, which can increase friction and heat. Regular maintenance, such as lubricating the bearings or replacing them if necessary, can help prevent overheating.
Faulty wiring or electrical connections can also lead to motor overheating. If the wiring is loose or damaged, it can cause the motor to draw more current than it should, resulting in excessive heat. Inspect all electrical connections and ensure they are secure and in good condition. If any issues are detected, they should be addressed promptly.
In some cases, the motor itself may be faulty and in need of repair or replacement. If none of the above solutions solve the overheating issue, it is advisable to seek professional help from a qualified technician. They will be able to diagnose the problem and recommend the appropriate course of action.
Preventing motor overheating can also be achieved by following proper usage guidelines. Avoid operating the air compressor for extended periods without giving it a chance to cool down. Regularly clean and inspect the motor and surrounding area to remove any dirt or debris. By taking these precautions, you can help extend the lifespan of your air compressor motor and avoid costly repairs.
Leaking Air

Air leakage is a common issue faced by air compressor owners. When your air compressor is leaking air, it can lead to reduced performance and increased energy consumption. There are several potential causes for air leakage, and it’s important to identify and fix the problem as soon as possible.
Possible Causes of Air Leakage:
- Leaking fittings: One possible cause of air leakage is loose or damaged fittings. Check all the connections and tighten them if necessary. If you notice any damaged fittings, they will need to be replaced.
- Worn-out seals: The seals in your air compressor can wear out over time, leading to air leakage. Inspect the seals and replace any that are damaged or worn.
- Cracked or damaged hoses: If your air compressor has cracked or damaged hoses, air can escape through these weak points. Inspect the hoses and replace any that are visibly damaged.
- Malfunctioning pressure relief valve: The pressure relief valve is designed to release excess pressure to prevent damage to the equipment. If this valve is faulty or worn out, it may not seal properly and can cause air leakage. Check the pressure relief valve and replace it if necessary.
Fixing Air Leakage:
If you have identified the source of the air leakage, you can take steps to fix the problem. Tighten any loose fittings, replace damaged seals or hoses, and ensure that the pressure relief valve is functioning properly. It’s also a good idea to regularly inspect your air compressor for potential leaks and address them early before they become bigger problems.
DIY Troubleshooting and Solutions
1. Check for Power Supply Issues
If your air compressor is not turning on or operating properly, the first thing to check is the power supply. Make sure that the unit is properly plugged in and that the power source is functioning. Check the circuit breaker or fuse box to ensure that there are no tripped breakers or blown fuses. If everything seems to be in order, use a multimeter to test the outlet and ensure that it is providing the correct voltage.

2. Inspect the Air Filter
A clogged or dirty air filter can cause your air compressor to run inefficiently or not work at all. Remove the air filter and inspect it for dirt, debris, or other obstructions. Clean or replace the filter as needed. Additionally, check for any other obstructions in the air intake or discharge lines and clear them if necessary.
3. Evaluate the Pressure Switch
The pressure switch is responsible for regulating the pressure in your air compressor. If your unit is not reaching the desired pressure or is not shutting off when it reaches the set pressure, the pressure switch may be faulty. Using a multimeter, test the switch for continuity and make sure it is properly adjusted. Replace the pressure switch if necessary.
4. Check for Leaks
Air leaks can significantly affect the performance of your air compressor. Inspect all connections, hoses, and fittings for any signs of leaks. Use a soapy water solution and apply it to the suspected areas. If bubbles form, you have located a leak. Tighten or replace any faulty components to resolve the issue.
5. Troubleshoot the Motor
If your air compressor’s motor is not running or is making unusual noises, it may be due to a motor problem. Check the motor for any visible damage or loose connections. Try cleaning and lubricating the motor to see if this improves its performance. If the motor is still not functioning properly, it may need to be replaced.
In conclusion, troubleshooting and resolving issues with a broken air compressor can be done through various DIY steps. By checking the power supply, inspecting the air filter, evaluating the pressure switch, checking for leaks, and troubleshooting the motor, you can often identify and fix the problem yourself without the need for professional help.
Check for Clogged Air Filters
If your air compressor is not working properly, one of the first things you should check is the air filters. Air filters play a crucial role in preventing dust, dirt, and other particles from entering the compressor’s system.
Inspect the Filters: Start by inspecting the air filters for any signs of clogging. Clogged filters restrict the airflow and reduce the efficiency of your air compressor. Look for a layer of dust or debris accumulated on the filter surface.
Clean the Filters: If you notice any clogging, it is important to clean the air filters. Remove the filters from the compressor and gently tap them against a hard surface to remove loose dirt and dust. You can also use compressed air to blow away stubborn particles. Alternatively, you can wash the filters with water and a mild detergent, making sure to completely dry them before reinserting them into the compressor.
Replace the Filters: In some cases, the air filters may be beyond cleaning and need to be replaced. Check the manufacturer’s instructions to find the right replacement filters for your specific air compressor model. Regularly replacing the filters will help maintain the performance and longevity of your air compressor.
Preventive Measures: To prevent future clogging of the air filters, consider installing a pre-filter or cyclonic separator. These additional filtration systems can help remove larger particles before they reach the main air filters, reducing the frequency of clogging and extending the lifespan of your filters.
Regular Maintenance: Lastly, make it a habit to regularly inspect and clean or replace the air filters of your air compressor. This will ensure that your compressor operates efficiently and minimizes the chances of a breakdown due to clogged filters.
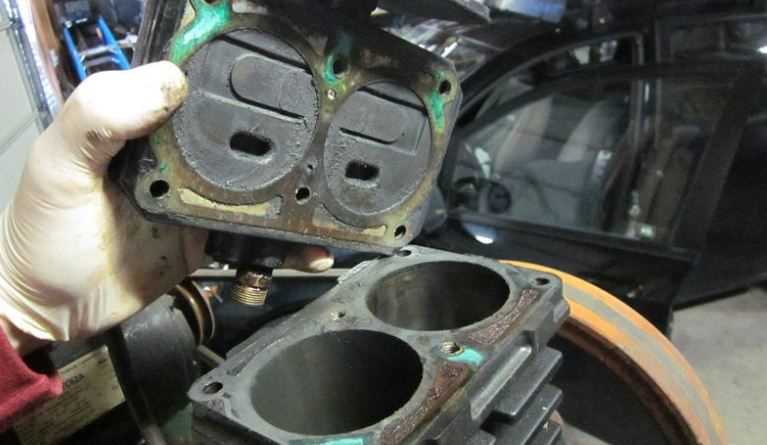
Inspect and Repair Leaks
One common issue that can occur with an air compressor is leaks. Leaks can prevent the compressor from building up adequate pressure, resulting in decreased performance. Therefore, it is important to inspect and repair any leaks as soon as possible.
To begin, carefully examine all the connections and fittings in the air compressor system. Look for any signs of air escaping, such as hissing noises or visible air bubbles. Common areas for leaks include the pressure relief valve, couplings, hoses, and fittings.
If you find a leak, it is crucial to repair it promptly. Start by tightening any loose connections or fittings. If that does not solve the issue, you may need to replace faulty components, such as worn-out gaskets or O-rings. Ensure that all replacements are compatible with your specific air compressor model.
Additionally, consider using an air compressor leak detector to pinpoint the exact location of the leak. These detectors typically involve spraying a soapy solution onto the suspected areas and looking for bubbles that indicate an air leak. This method can help identify even the smallest leaks that may be difficult to spot with the naked eye.
Remember, addressing leaks promptly is essential for maintaining the proper functioning of your air compressor. Regularly inspecting the system and taking necessary repair steps will help ensure optimal performance and prevent further damage.
Clean and Maintain Components
Regular cleaning and maintenance of the components of your air compressor is crucial for ensuring its optimal performance and longevity. Here are some tips on how to clean and maintain various components:
Air Filters
One of the most important components to clean and maintain is the air filter. The air filter ensures that clean air is supplied to the compressor, preventing dust and debris from damaging the internal parts. To clean the air filter, carefully remove it from the compressor and gently tap it to remove any loose particles. If the filter is heavily clogged, it may need to be replaced. Remember to clean or replace the air filter regularly to ensure proper airflow.
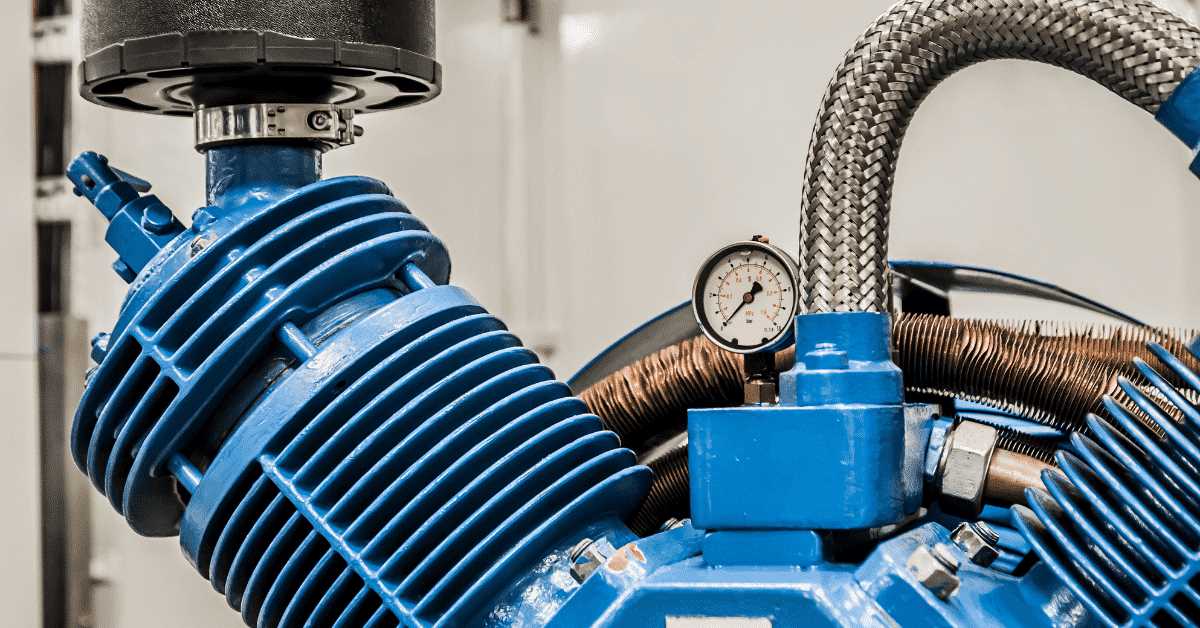
Condenser Coils
The condenser coils in your air compressor are responsible for removing heat from the system. Over time, these coils can become dirty and clogged, reducing their efficiency. To clean the condenser coils, first, disconnect the power to the compressor. Then, use a soft brush or compressed air to remove any dirt or debris from the coils. Be careful not to bend the fins of the coils while cleaning. Regular cleaning of the condenser coils will help maintain their efficiency and prevent overheating of the compressor.
Oil and Lubrication
Proper lubrication is essential for the smooth operation of the air compressor’s moving parts. Check the oil level in the compressor regularly and top it up if needed. Consult the manufacturer’s manual for the recommended type and amount of oil to use. Additionally, clean the oil reservoir and replace the oil filter as per the manufacturer’s instructions. Regular oil changes will help prevent excessive wear and extend the lifespan of the compressor.
Electrical Connections
Inspect the electrical connections of your air compressor regularly to ensure they are tight and free from corrosion. Loose or corroded connections can lead to power issues and potentially damage the compressor. Carefully examine the wiring and terminals. If you notice any signs of corrosion or loose connections, clean them using a wire brush and tighten them securely. Maintaining proper electrical connections will help prevent electrical malfunctions and ensure uninterrupted power supply to the compressor.
In addition to these specific components, it is important to keep the overall working area of the air compressor clean and free from debris. Regularly check for any leaks or unusual noises and address them promptly. By following these cleaning and maintenance practices, you can prolong the life of your air compressor and prevent costly repairs or replacements in the future.
Replace Faulty Pressure Switch
If your air compressor is not building up enough pressure, one possible cause could be a faulty pressure switch. The pressure switch is responsible for monitoring and controlling the air pressure in the compressor tank, and if it is not functioning properly, it can prevent the compressor from reaching the desired pressure level.
If you suspect that the pressure switch is faulty, it is important to replace it as soon as possible to ensure the proper operation of your air compressor. Here are the steps to replace a faulty pressure switch:
- First, make sure to disconnect the power supply to the air compressor to avoid any electrical hazards.
- Locate the pressure switch on your air compressor. It is typically mounted on the compressor tank and connected to the air lines.
- Using a wrench or pliers, loosen the nuts or bolts that secure the pressure switch to the compressor tank.
- Once the pressure switch is loose, disconnect the electrical wires that are connected to it. Make sure to mark or take note of the wire connections for easy reinstallation.
- Remove the old pressure switch from the compressor tank and set it aside.
- Take the new pressure switch and attach it to the compressor tank, making sure to align it properly.
- Reconnect the electrical wires to the new pressure switch, following the markings or notes made earlier.
- Tighten the nuts or bolts to secure the pressure switch to the compressor tank.
- Finally, restore the power supply to the air compressor and test its operation to ensure that the new pressure switch is functioning correctly.
By replacing a faulty pressure switch, you can restore the proper functioning of your air compressor and ensure that it is able to build up the necessary pressure for your various applications. Regular maintenance and inspection of the pressure switch can help prevent potential issues and prolong the lifespan of your air compressor.
FAQ:
My air compressor stopped working suddenly. What could be the problem?
There could be several reasons why your air compressor stopped working suddenly. It could be due to a faulty motor, a blown fuse, a broken pressure switch, or a problem with the electrical connection. It’s best to check each of these components to identify the issue.
How can I diagnose the problem with my air compressor?
To diagnose the problem with your air compressor, you can start by checking the power supply and ensuring it is properly connected. Then, check the fuse and replace it if necessary. If the fuse is not the problem, you can move on to checking the pressure switch and the motor. If you are not comfortable doing these checks yourself, it is recommended to consult a professional.
My air compressor is leaking air. What should I do?
If your air compressor is leaking air, you should first check the connections and tighten them if necessary. If the leaks persist, you may need to replace the faulty parts such as the valve, gaskets, or fittings. It is also possible that there is a problem with the tank itself, in which case it may need to be repaired or replaced.
Can I repair my broken air compressor on my own?
It depends on the extent of the damage and your level of expertise. Minor issues such as replacing a fuse or tightening connections can typically be done by DIYers. However, for more complicated issues like a faulty motor or a broken pressure switch, it is recommended to consult a professional. Attempting to repair complex issues without proper knowledge and experience can lead to further damage or personal injury.
What maintenance tasks should I perform to prevent my air compressor from breaking?
To prevent your air compressor from breaking, it is important to perform regular maintenance. This includes checking and cleaning the air filter, draining the condensation from the tank, checking the oil level (if applicable), and inspecting for any leaks or worn parts. It is also recommended to follow the manufacturer’s guidelines for maintenance and servicing.
If my air compressor is beyond repair, should I replace it or buy a new one?
If your air compressor is beyond repair, the decision to replace it or buy a new one depends on the cost of repairs compared to the cost of a new unit, as well as the age and condition of the existing compressor. In some cases, it may be more cost-effective to replace the broken parts rather than buying a whole new unit. It is recommended to consult a professional for an assessment and advice on the best course of action.
Video:


Meet Harrison Clayton, a distinguished author and home remodeling enthusiast whose expertise in the realm of renovation is second to none. With a passion for transforming houses into inviting homes, Harrison's writing at https://thehuts-eastbourne.co.uk/ brings a breath of fresh inspiration to the world of home improvement. Whether you're looking to revamp a small corner of your abode or embark on a complete home transformation, Harrison's articles provide the essential expertise and creative flair to turn your visions into reality. So, dive into the captivating world of home remodeling with Harrison Clayton and unlock the full potential of your living space with every word he writes.


