How to attach a needle to an air compressor

Attaching a needle to an air compressor is a simple process that can be done in a few easy steps. Whether you need to inflate a sports ball, bicycle tire, or any other type of small inflatable item, having a needle attachment for your air compressor can make the task much easier and more convenient.
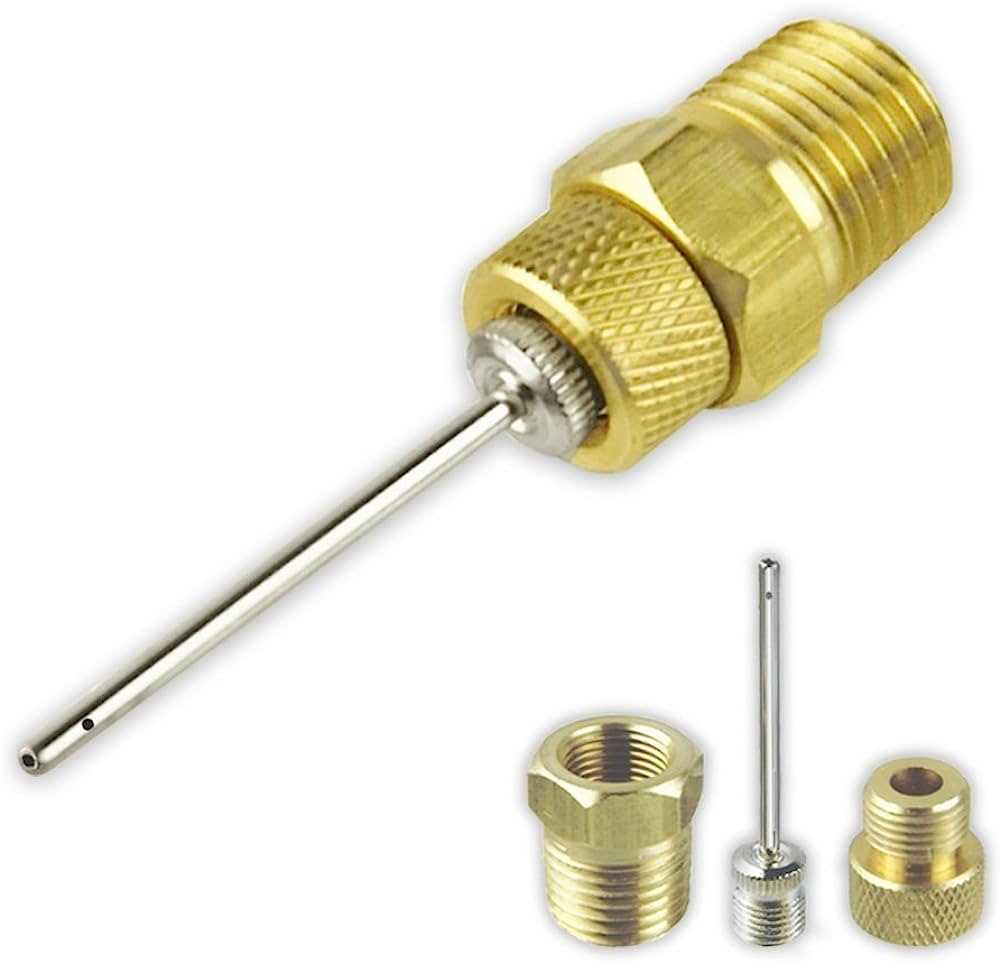
First, gather the necessary materials. You will need an air compressor, a needle attachment, and the item you want to inflate. Make sure the needle attachment is compatible with your air compressor. It should have a threaded end that will screw onto the air compressor’s hose or nozzle.
Next, locate the air compressor’s hose or nozzle. Depending on the model, this may be on the side or the bottom of the compressor. If necessary, remove any protective covers or caps from the hose or nozzle.
Now, take the needle attachment and screw it onto the end of the air compressor’s hose or nozzle. Make sure it is tightened securely. This will ensure a proper seal and prevent air leakage during inflation.
Choosing a Needle for Your Air Compressor

When it comes to attaching a needle to your air compressor, it’s important to select the right needle for the job. There are several factors to consider when choosing a needle, including its size, material, and purpose.
Size
The size of the needle will depend on the task at hand. If you are inflating small items such as sports balls or bicycle tires, a smaller needle may be sufficient. For larger tasks such as inflating car tires or air mattresses, a larger needle may be necessary to ensure efficient inflation.
Material
The material of the needle is another important consideration. Most needles are made of steel, which offers durability and strength. However, there are also needles made of plastic or brass, which may be better suited for certain tasks. Plastic needles are often used for inflating delicate items, as they are less likely to cause damage. Brass needles, on the other hand, offer a higher level of corrosion resistance.
Purpose
Consider the purpose for which you will be using the needle. If you will primarily be inflating sports equipment, such as basketballs or soccer balls, a needle with an air release valve may be beneficial. This valve allows you to control the air flow and prevent over-inflation. Additionally, if you plan to use the needle for more than just inflating, such as cleaning clogged nozzles or applying lubricants, consider a needle with a syringe-like design for increased versatility.
In conclusion, choosing the right needle for your air compressor involves considering factors such as size, material, and purpose. By selecting the appropriate needle, you can ensure optimal performance and efficiency when using your air compressor for various tasks.

Understanding Needle Types
When it comes to attaching a needle to an air compressor, it’s important to understand the different types of needles that are available. The type of needle you choose will depend on the specific task or application you have in mind.
1. Standard Needle

The standard needle is the most common type and features a sharp point for general use. It is typically used for inflation purposes, such as inflating sports balls or bicycle tires. The standard needle is made of durable material and is suitable for most basic inflation tasks.
2. Pin Needle
A pin needle is a specialized type of needle that is designed for precise and delicate tasks. It has a thinner and shorter point compared to a standard needle, making it ideal for applications that require accuracy, such as inflating balloons or air mattresses. The pin needle is also commonly used in medical procedures and crafting projects.
3. Ball Needle
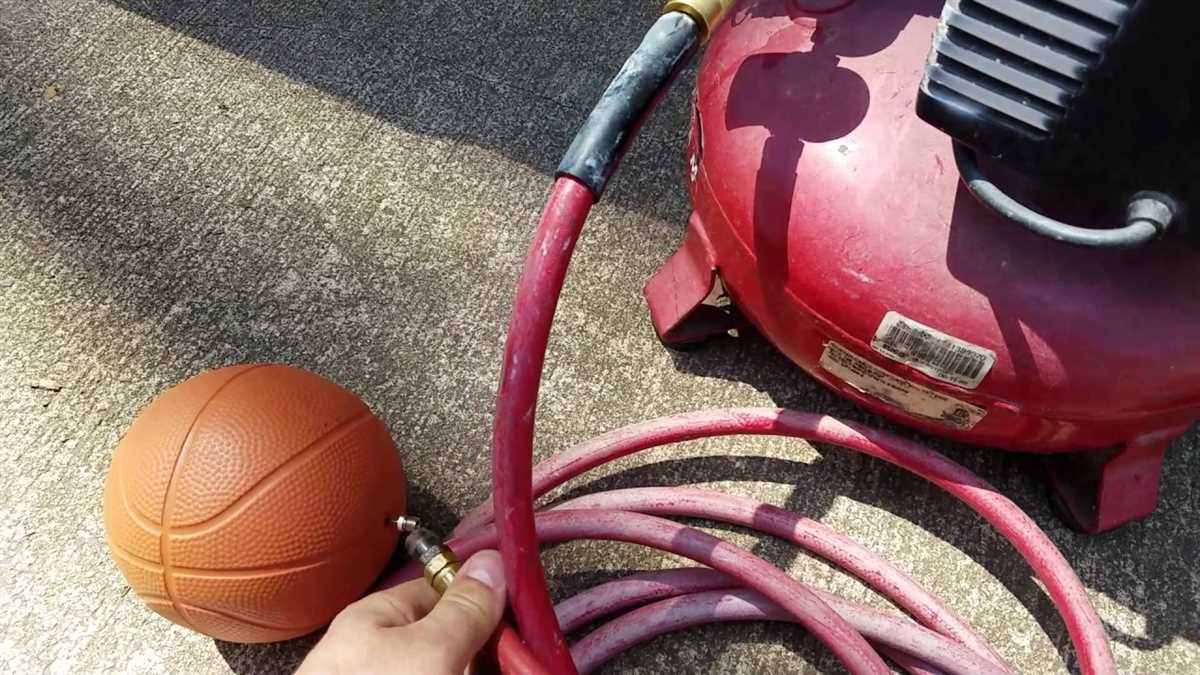
A ball needle is specifically designed for inflating sports balls, such as soccer balls or basketballs. It features a rounded end that allows for easy insertion into the ball’s valve. The ball needle is typically made of durable materials to withstand the higher pressure required for sports balls.
4. Dual-Purpose Needle
A dual-purpose needle is a versatile option that can be used for a variety of tasks. It features a combination of a standard needle and a ball needle on either end. This allows you to switch between the two types of needles effortlessly, making it a convenient choice for different inflation tasks.
In conclusion, understanding the different types of needles available for attaching to an air compressor is essential for selecting the right tool for the job. Whether you need a standard needle for general use, a pin needle for precision work, a ball needle for sports balls, or a dual-purpose needle for versatility, there is a needle type for every inflation need.
Choosing the Right Needle Size
When attaching a needle to an air compressor, it is important to select the correct needle size for the intended task. The needle size determines the amount of airflow and pressure that is directed through the needle, which in turn affects the precision and efficiency of the air compressor.
Different needle sizes are appropriate for different applications, so it’s important to choose carefully.

For projects that require fine detail work, such as painting small models or creating intricate designs, a smaller needle size is generally recommended. A needle size between 0.2mm and 0.4mm is ideal for these types of tasks as it allows for precise control and accuracy.
On the other hand, for larger projects that require faster coverage, such as painting a large canvas or coating a large surface area, a larger needle size is more suitable. A needle size between 0.5mm and 0.8mm allows for a higher volume of airflow and can cover larger areas more quickly.
It’s also important to consider the type of material being used.
For thinner, more watery substances such as watercolors or inks, a smaller needle size is recommended to prevent overspray and achieve a more controlled application. Thicker materials such as acrylic paints or varnishes may require a larger needle size to ensure a steady supply of paint and avoid clogging.
Ultimately, the right needle size depends on the specific project and materials being used. It’s important to experiment and test different needle sizes to find the one that best suits your needs and provides the desired results.

Preparing Your Air Compressor
Before attaching a needle to your air compressor, it’s important to properly prepare the compressor for use. Here are a few steps to follow:
1. Check the compressor oil level
Begin by checking the oil level in your air compressor. Consult the owner’s manual for specific instructions on how to locate and check the oil level. If the oil level is low, fill it up to the recommended level using the recommended type of oil.
2. Inspect the air filter
Next, inspect the air filter of your air compressor. A clogged or dirty air filter can reduce the performance of your compressor. If the air filter appears dirty or clogged, clean or replace it as necessary.
3. Check for any leaks
It’s crucial to check for any leaks in the air compressor system. Inspect all connections, hoses, and fittings for signs of leakage. If any leaks are found, tighten or repair the affected components before proceeding.
4. Ensure proper pressure settings
Before attaching a needle, make sure the air compressor is set to the appropriate pressure. Consult the instructions or the equipment you will be using the needle with to determine the recommended pressure range. Adjust the pressure settings on your air compressor accordingly.
By properly preparing your air compressor, you can ensure its optimal performance and avoid any potential issues when attaching a needle. Following these steps will help you get your compressor ready for the task at hand.
Gathering Necessary Tools
Before you can attach a needle to an air compressor, you will need to gather some necessary tools. Here are a few items you will need:
- Needle – Look for a needle that is compatible with your air compressor. The size of the needle will depend on the type of project you are working on. Make sure the needle is clean and free from any debris or damage.
- Air Compressor – You will need an air compressor to provide the necessary air pressure for your project. Make sure your air compressor is in good working condition and has enough power to meet your needs.
- Air Hose – An air hose is required to connect the needle to the air compressor. Choose a hose that is compatible with your air compressor and has the appropriate length for your project.
- Pressure Regulator – A pressure regulator is an important tool that allows you to control the amount of air pressure being delivered to the needle. This is especially useful if you need to adjust the pressure for different types of projects.
- Safety Glasses – It’s always a good idea to wear safety glasses when working with air compressors. They provide protection for your eyes from any debris that may be generated during the process.
Once you have gathered all these necessary tools, you will be ready to attach the needle to your air compressor and start your project.
Ensuring Proper Air Pressure
When attaching a needle to an air compressor, it is essential to ensure that the proper air pressure is maintained throughout the process. This will not only help to ensure the needle is attached securely, but it will also prevent any potential damage to the compressor or the needle itself.
1. Checking the air pressure: Before attaching the needle, it is important to check the air pressure of the compressor. This can be done using a pressure gauge. Ensure that the pressure is within the recommended range for the task at hand. If the pressure is too high, it can cause the needle to detach forcefully, leading to potential safety hazards.
2. Adjusting the regulator: If the air pressure is not within the desired range, it may be necessary to adjust the regulator on the compressor. The regulator allows you to control the amount of pressure that is released from the compressor. Carefully adjust it to the appropriate level to ensure a safe and secure attachment of the needle.
3. Securing the needle: Once the proper air pressure has been established, it is time to attach the needle to the air compressor. This can be done by carefully inserting the needle into the designated port or connector on the compressor. Ensure that the needle is firmly secured in place, but be cautious not to overtighten it, as this can cause damage to the needle or the compressor.
4. Monitoring the pressure: After attaching the needle, it is crucial to continuously monitor the air pressure throughout the task. This can be done by regularly checking the pressure gauge and making adjustments as necessary. By maintaining the proper air pressure, you can ensure that the needle remains securely attached and that the compressor operates efficiently and effectively.
In conclusion, ensuring proper air pressure is essential when attaching a needle to an air compressor. By checking and adjusting the pressure, securing the needle correctly, and monitoring the pressure throughout the task, you can guarantee a safe and successful attachment process. Remember to always follow the manufacturer’s instructions and guidelines for the specific air compressor and needle being used.
Attaching the Needle to Your Air Compressor
Attaching a needle to your air compressor can be a simple process if you follow the correct steps. Below are detailed instructions on how to properly attach the needle to your air compressor:
Step 1: Gather the necessary materials
Before starting, make sure you have all the necessary materials. You will need an air compressor with a needle attachment, a needle, and any additional accessories such as adapters or connectors. Ensure that the needle is compatible with your air compressor.
Step 2: Turn off the air compressor
Prior to attaching the needle, it is important to turn off the air compressor to ensure safety. Locate the power switch or valve on the air compressor and switch it off.
Step 3: Locate the needle attachment point
Next, locate the needle attachment point on your air compressor. This could be a small port or valve specifically designed for attaching accessories. Consult the user manual or manufacturer’s instructions if you are unsure where to find it.
Step 4: Prepare the needle
Before attaching the needle, make sure it is clean and free from any debris or damage. Inspect the needle tip for any bends or obstructions that could affect its functionality.
Step 5: Attach the needle
Align the needle with the attachment point on the air compressor and gently insert it. Apply firm pressure if necessary to ensure a secure and tight connection between the needle and the air compressor.
Step 6: Test the connection
Once the needle is attached, turn on the air compressor and perform a test to ensure that the needle is securely connected. Listen for any leaks or abnormal sounds. If you notice any issues, check the connection and make any necessary adjustments.
By following these steps, you can easily attach a needle to your air compressor. Remember to always refer to the user manual for specific instructions or consult a professional if you encounter any difficulties or uncertainties.
Locating the Needle Attachment Point
Before you can attach a needle to an air compressor, you need to locate the needle attachment point on the compressor itself. This attachment point is where you will connect the needle to the compressor in order to control the air pressure and flow.
Check the compressor manual: The first step in locating the needle attachment point is to consult the manual that came with your air compressor. The manual should have detailed instructions and diagrams that show the exact location of the attachment point.
Look for a small valve or nozzle: In most cases, the needle attachment point will be a small valve or nozzle located on the side or front of the compressor. It is important to note that the exact location may vary depending on the make and model of your specific compressor.
Check for markings or labels: Some compressors may have markings or labels that indicate the location of the needle attachment point. Look for words such as “needle valve” or “pressure control” that can help you identify the correct spot.
Inspect the compressor body: Take a close look at the body of the compressor and search for any visible signs of the needle attachment point. This could be a small opening or a threaded connection where the needle can be screwed or attached.
Ask for assistance: If you are having trouble locating the needle attachment point, don’t hesitate to ask for assistance. Reach out to the manufacturer’s customer support or consult with an experienced technician who can guide you in the right direction.
Once you have found the needle attachment point, you can proceed with attaching the needle to the air compressor and begin using it for your desired application.
Securing the Needle in Place
Once you have chosen the appropriate needle size for your project and have connected your air compressor, the next step is to secure the needle in place. This ensures that it will not come loose or detach while you are using it.
The first step in securing the needle is to tighten the needle chuck. The chuck is the part of the air compressor that holds the needle in place. To tighten it, twist the chuck clockwise until it is firmly secured.
Next, make sure to check the needle for any damage or wear. If you notice any bent or broken parts, it is important to replace the needle before using it. A damaged needle can cause injury or damage to your project.
Once the needle is secured and in good condition, you can attach it to the air compressor. Align the needle with the chuck and insert it until it is fully seated. Then, tighten the chuck again to ensure a secure connection.
Finally, check the connection to make sure it is tight. Gently tug on the needle to ensure that it is securely attached to the air compressor. If it feels loose or comes out easily, you may need to retighten the chuck or try a different needle size.
FAQ:
What tools do I need to attach a needle to an air compressor?
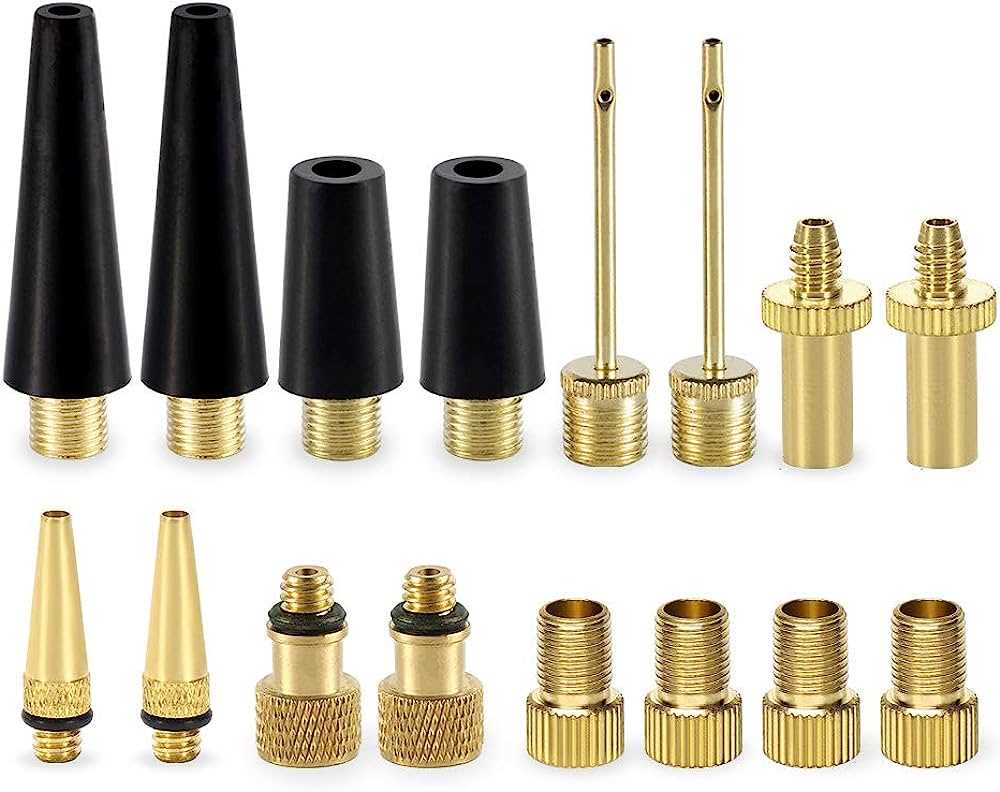
You will need an air compressor, a needle attachment, and appropriate fittings or adapters.
Can I attach any needle to an air compressor?
No, you will need a specialized needle attachment that is compatible with your air compressor.
How do I connect the needle attachment to the air compressor?
You will need to use the appropriate fittings or adapters to connect the needle attachment to the air compressor. The specific method may vary depending on the type and model of your air compressor.
What’s the purpose of attaching a needle to an air compressor?
Attaching a needle to an air compressor allows you to use compressed air to inflate or clean hard-to-reach areas, such as inflating sports balls or blowing out dust from tight spaces.
Are there any safety precautions I should take when attaching a needle to an air compressor?
Yes, it is important to wear safety goggles and gloves when working with compressed air to protect yourself from any debris or compressed air blasts. Additionally, make sure to follow the manufacturer’s instructions for your specific air compressor and needle attachment to ensure proper usage and prevent any accidents.
Video:


Harrison Clayton
Meet Harrison Clayton, a distinguished author and home remodeling enthusiast whose expertise in the realm of renovation is second to none. With a passion for transforming houses into inviting homes, Harrison's writing at https://thehuts-eastbourne.co.uk/ brings a breath of fresh inspiration to the world of home improvement. Whether you're looking to revamp a small corner of your abode or embark on a complete home transformation, Harrison's articles provide the essential expertise and creative flair to turn your visions into reality. So, dive into the captivating world of home remodeling with Harrison Clayton and unlock the full potential of your living space with every word he writes.


