Fixing a Leaky Air Compressor Hose: Simple Steps for Success

When it comes to maintaining your air compressor, one common issue that may arise is a leaky hose. A leak in your air compressor hose can not only be frustrating, but it can also lead to a decrease in performance and efficiency. However, fixing a leaky air compressor hose doesn’t have to be a complicated task. With a few simple steps, you can quickly and easily address the issue and restore the functionality of your air compressor.
The first step in fixing a leaky air compressor hose is to identify the source of the leak. Inspect the hose for any visible cracks, holes, or worn areas. If you find any damage, mark the location with a piece of tape or a marker. It’s also important to check the fittings and connections for any signs of leakage. Tightening loose fittings or replacing damaged ones may be necessary.
Once you have identified the source of the leak, the next step is to clean and prepare the area for repair. Use a clean cloth to wipe away any dirt or debris around the damaged area. This will help ensure a proper seal when you apply the repair solution. It’s also a good idea to wear gloves during this process to protect your hands.
After cleaning the area, you can proceed with the repair. There are several repair solutions available, such as tape, sealant, or a hose repair kit. Choose the solution that best suits your needs and follow the manufacturer’s instructions for application. Make sure to apply the repair solution evenly and smoothly, covering the entire damaged area.
Once the repair solution has been applied, allow it to dry or set according to the manufacturer’s instructions. This step is crucial for ensuring a strong and durable seal. Once the repair is complete, turn on your air compressor and carefully check for any remaining leaks. If you notice any other areas of concern, repeat the steps above to address them.

Fixing a leaky air compressor hose is a simple task that can be accomplished with a few basic tools and supplies. By following these steps, you can quickly resolve the issue and keep your air compressor running smoothly. Remember to regularly inspect your hose for any signs of damage and address any leaks as soon as possible to prevent further issues.
The Importance of a Well-Functioning Air Compressor Hose
An air compressor hose is a crucial component of any pneumatic system. It is responsible for delivering compressed air from the compressor to various tools and equipment, allowing them to function properly. A well-functioning air compressor hose ensures the efficient and reliable operation of the entire system.
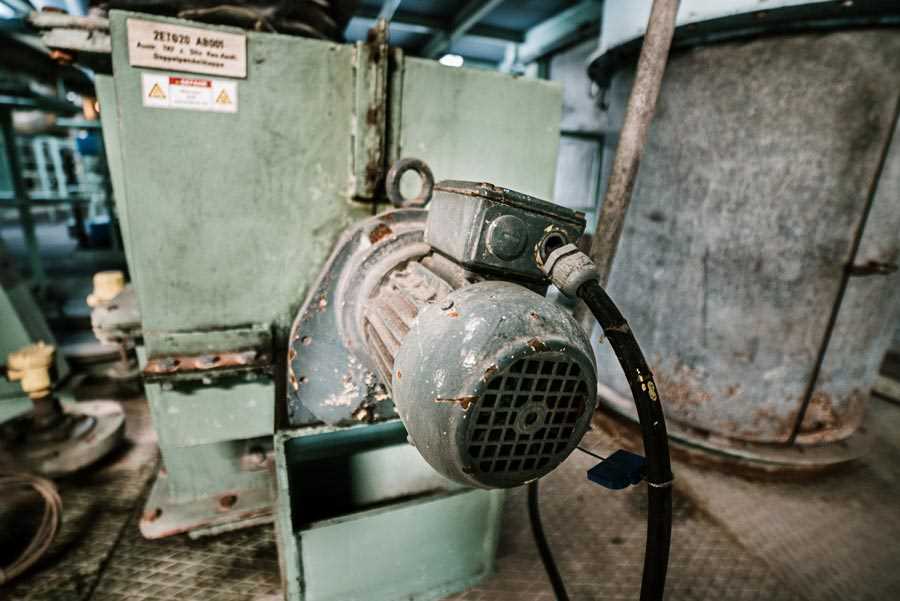
1. Safety: One of the primary reasons why a well-functioning air compressor hose is essential is safety. A leaking or damaged hose can result in air pressure loss, which can lead to a loss of control over the tools or equipment being operated. This can create a dangerous situation, not only for the operator but also for anyone nearby.
2. Performance: Another important aspect of a well-functioning air compressor hose is its impact on performance. A leak in the hose can lead to a significant drop in air pressure, reducing the efficiency and effectiveness of the pneumatic system. This can result in tools and equipment not working as intended or taking longer to complete tasks, ultimately affecting productivity.
3. Cost-savings: Maintaining a well-functioning air compressor hose can also help save money in the long run. Identifying and fixing leaks or other issues early on can prevent further damage and potential breakdowns, saving on costly repairs or replacements. Additionally, a properly functioning hose ensures optimal air flow, reducing energy consumption and extending the lifespan of the compressor.

4. Versatility: A well-maintained air compressor hose allows for greater versatility in a pneumatic system. It enables the use of various tools and equipment that rely on compressed air, whether it be for inflating tires, powering nail guns, or operating machinery. Without a reliable hose, the options for utilizing the system’s full potential are limited.
Overall, investing time and effort in ensuring a well-functioning air compressor hose is essential for the safety, performance, cost-savings, and versatility of a pneumatic system. Regular inspections, maintenance, and promptly addressing any issues that arise are key to keeping the hose in optimal condition and maximizing its lifespan.
Step 1: Identify the Leaky Area
Before you can fix a leaky air compressor hose, you need to first identify the exact area where the leak is occurring. This will help you determine the best method to fix it. Start by visually inspecting the hose for any signs of damage or wear.
Look for any visible holes, cracks, or splits in the hose. These can often be easily spotted with the naked eye. In some cases, the leak may be more subtle, such as a small pinhole or a loose connection. Feel along the hose with your hand to check for any air escaping or use a soapy water solution to create bubbles and locate the leak.
Another common location for leaks is at the fittings or connectors where the hose is attached to the air compressor or other tools. Check these areas carefully and ensure that they are properly tightened. Sometimes, simply tightening a loose fitting can solve the problem.

Once you have identified the leaky area, mark it with a pen or a piece of tape so that you can easily locate it later. This will also help you focus your repair efforts on the specific area that needs attention.
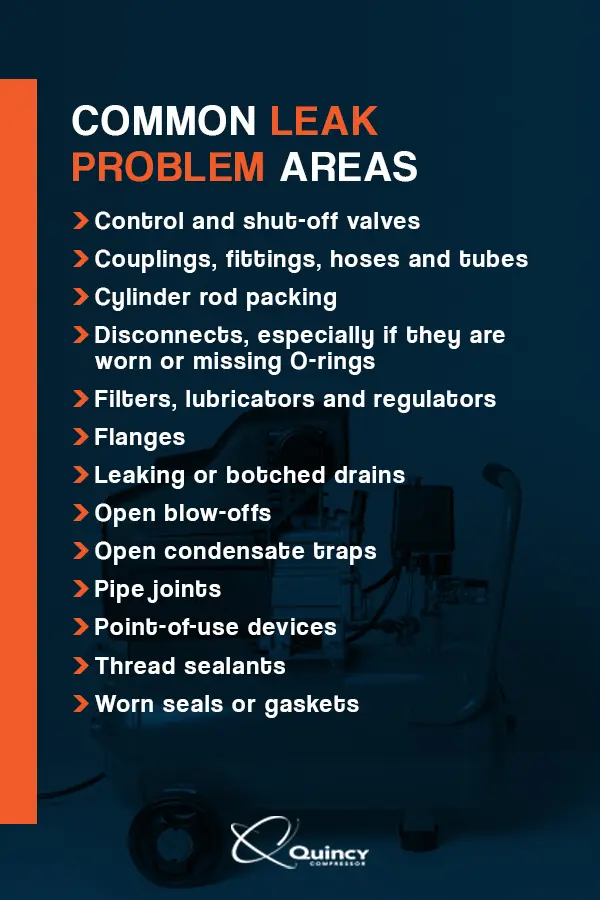
Common Signs of a Leaky Air Compressor Hose
A leaky air compressor hose can significantly decrease the efficiency and effectiveness of your air compressor system. It is important to be able to recognize the signs of a leaky hose so that you can address the issue promptly and prevent any further damage or loss of air pressure. Here are some common signs to look out for:
1. Audible hissing sound
If you hear a continuous hissing sound coming from your air compressor, it is a strong indication that there is a leak in the hose. The hissing sound is caused by the air escaping through the small hole or crack in the hose. This sound can often be heard even from a distance.
2. Reduced air pressure
Another sign of a leaky air compressor hose is a noticeable decrease in air pressure. When there is a leak, air can escape from the hose before reaching its intended destination, resulting in a weaker air flow. This can make it more difficult to use tools and equipment that rely on the air compressor.
3. Physical damage

Inspect the hose for any signs of physical damage such as cracks, holes, or punctures. These can occur due to wear and tear over time or as a result of accidental damage. Physical damage to the hose can lead to leaks and should be addressed immediately to prevent any further deterioration.
4. Moisture or condensation
If you notice moisture, water, or condensation around the hose, it may indicate a leak. Air escaping from a leaky hose can cause the surrounding area to become damp. This can be a clear sign that there is a problem with the hose that needs to be fixed.
5. Increased energy consumption
A leaky air compressor hose can cause the compressor to work harder and use more energy to compensate for the loss of air pressure. If you notice a sudden increase in energy consumption or higher utility bills, it could be due to a leak in the hose. Fixing the leak can help reduce energy waste and save on operating costs.
It is important to address a leaky air compressor hose as soon as possible to maintain the efficiency and functionality of your air compressor system. Regular maintenance and inspections can help identify any potential issues before they become major problems. If you notice any of these signs, it is recommended to consult a professional or take the necessary steps to fix or replace the hose.
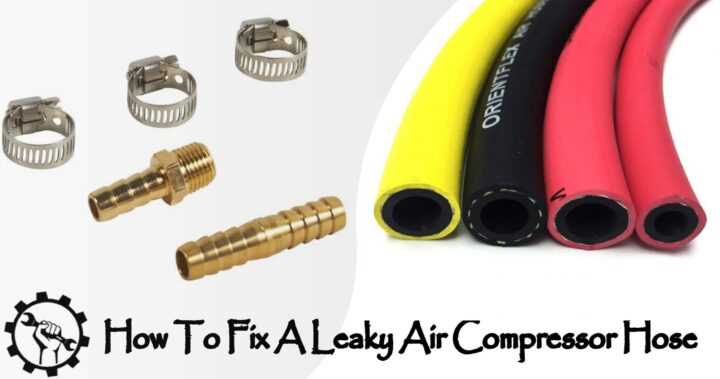
Step 2: Gather the Necessary Tools and Materials
Before you can begin fixing a leaky air compressor hose, it is important to gather all the necessary tools and materials. Having everything on hand will make the process go smoothly and efficiently.

Tools:
- Adjustable wrench
- Pliers
- Teflon tape
- Hose clamps
- Flathead screwdriver
Materials:
- New air compressor hose
- Silicone-based lubricant
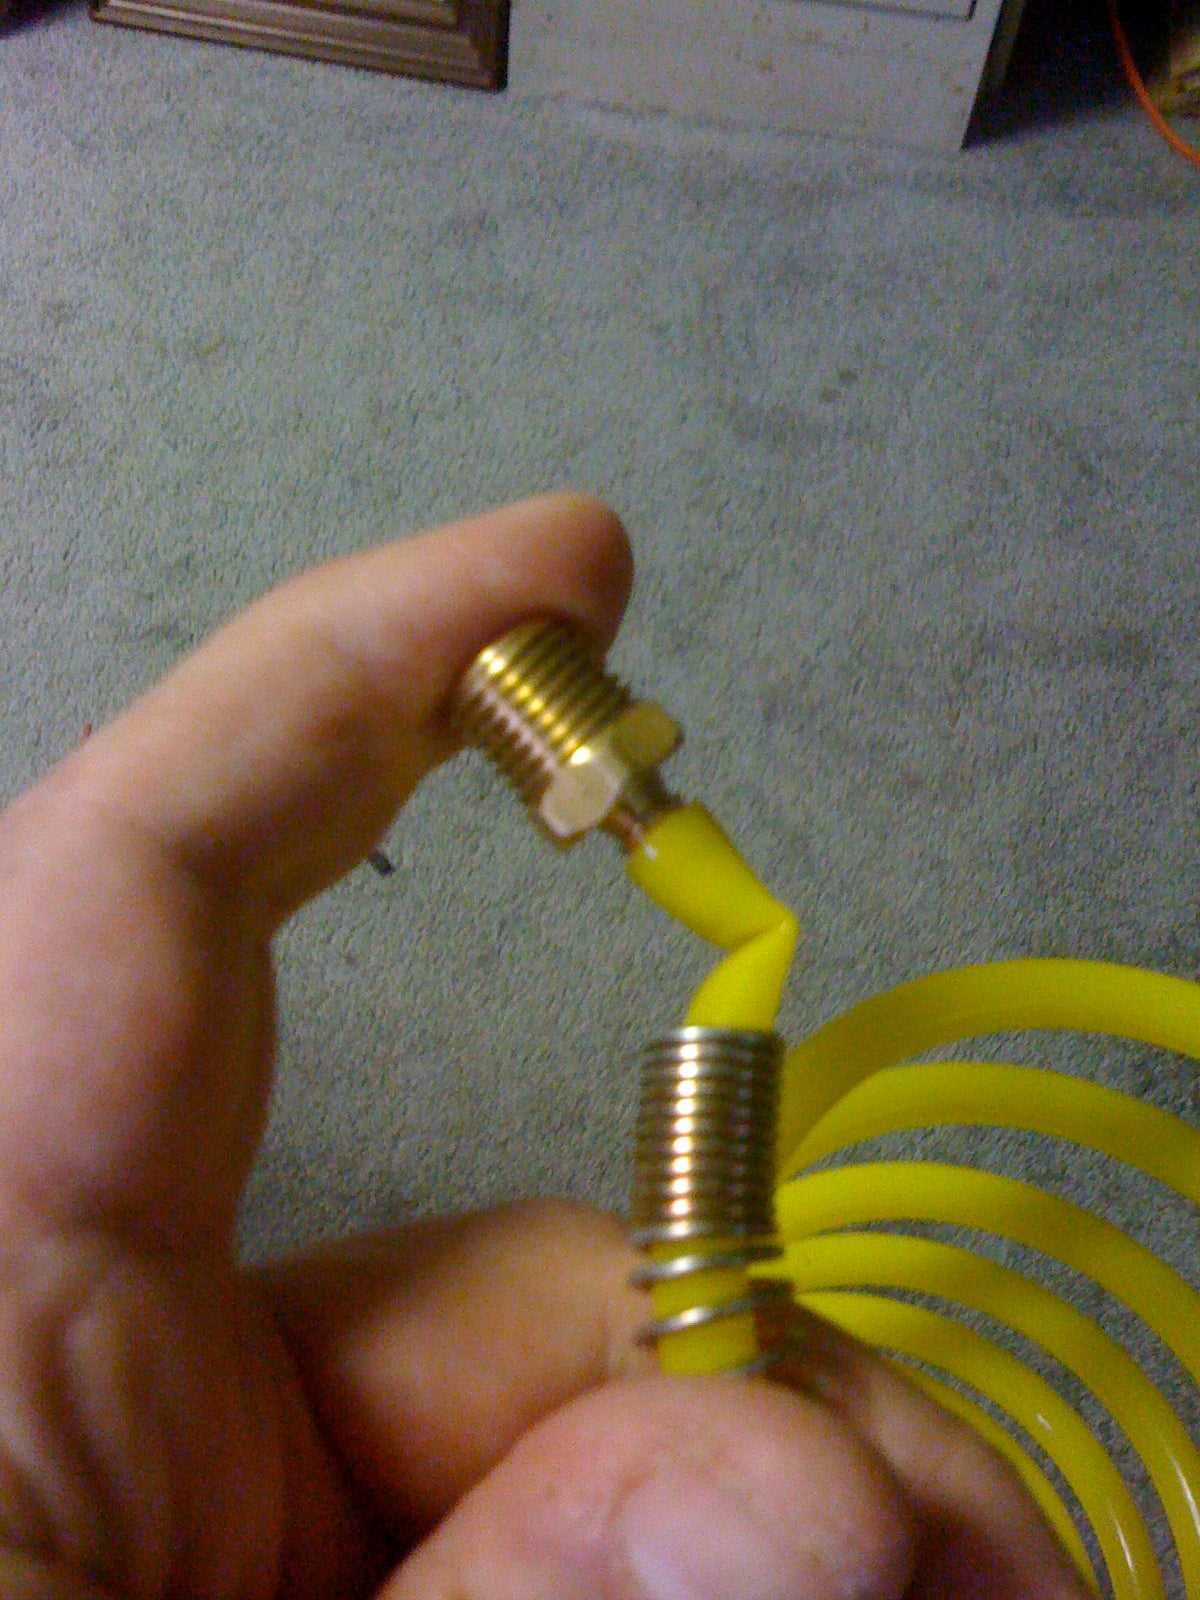
Having an adjustable wrench is essential for loosening and tightening any bolts or fittings on the air compressor hose. Pliers can be useful for gripping and maneuvering components as needed. Teflon tape is necessary to create a tight seal when reattaching any threads or fittings. Hose clamps are important for securing the new hose in place. A flathead screwdriver may be needed to remove any screws or fasteners.
In addition to tools, having a new air compressor hose is crucial for the repair process. Make sure to choose a hose that is compatible with your specific air compressor model. Silicone-based lubricant can also be helpful for ease of installation.
Essential Tools and Materials for Fixing a Leaky Air Compressor Hose
Fixing a leaky air compressor hose requires a few essential tools and materials to ensure a successful repair. Here are the items you will need:
1. Pipe Thread Sealant
Pipe thread sealant, also known as pipe dope, is a crucial material for fixing a leaky air compressor hose. It helps create a tight seal between the fittings to prevent air leaks. Make sure to choose a sealant that is compatible with the type of hose material you are working with.
2. Hose Clamps
Hose clamps are necessary for securing the hose fitting and preventing it from leaking. Choose clamps that are the correct size for your hose and ensure they are made of durable materials, such as stainless steel, to ensure long-lasting effectiveness.
3. Adjustable Wrench
An adjustable wrench is an essential tool for tightening and loosening the fittings on the air compressor hose. It allows you to apply the necessary force to create a secure connection without damaging the fittings or the hose itself.
4. Utility Knife

A utility knife is useful for cutting the hose to the desired length or removing any damaged sections. Make sure to use a sharp blade to ensure clean cuts, which will help create a proper seal and prevent future leaks.
5. Sandpaper or Emery Cloth

Sandpaper or emery cloth is necessary for preparing the surface of the hose and fittings before applying the pipe thread sealant. It helps remove any dirt, rust, or debris that can hinder the effectiveness of the sealant and compromise the repair.
6. Replacement Fittings (if necessary)
If the existing fittings on the air compressor hose are damaged or worn, you may need to replace them. Make sure to choose fittings that are compatible with the hose material and the air compressor’s specifications to ensure a proper fit and prevent future leaks.
By ensuring you have these essential tools and materials on hand, you can confidently tackle any leaky air compressor hose and make a successful repair. Remember to follow the appropriate safety precautions and consult the manufacturer’s instructions if needed.
Step 3: Prepare the Hose for Repair
Before beginning the repair process, it is important to properly prepare the leaky air compressor hose. This will ensure that the repair is effective and long-lasting. Follow these steps to prepare the hose for repair:
1. Identify the location of the leak.
Inspect the hose carefully to locate the exact spot where the leak is occurring. Look for any visible holes, cracks, or damage that could be causing the air to leak. Use a flashlight if needed to get a clear view of the hose.
2. Clean the area surrounding the leak.
Before applying any repair materials, it is crucial to clean the area around the leak. This will ensure that the repair adheres properly to the hose surface. Use a clean cloth or rag to wipe away any dirt, debris, or oil from the surface of the hose.
3. Roughen the surface of the hose.
In order to improve the bonding and adhesion of the repair materials, it is recommended to roughen the surface of the hose. This can be done by lightly sanding the area around the leak using fine-grit sandpaper. Be careful not to sand too aggressively, as this can further damage the hose.
4. Dry the hose thoroughly.
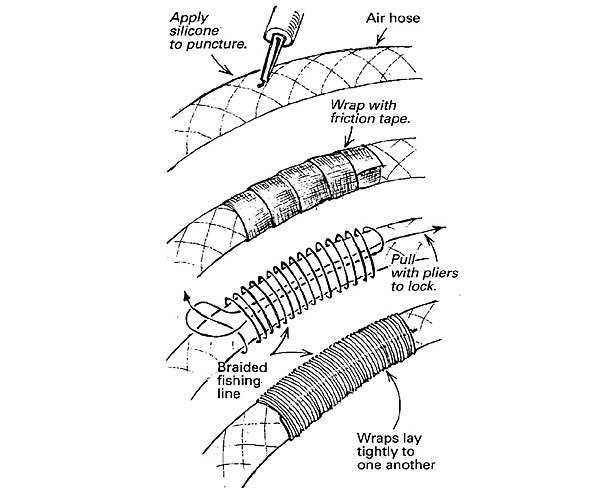
Before proceeding with the repair, ensure that the hose is completely dry. Moisture can interfere with the effectiveness of the repair materials. Use a clean cloth or allow the hose to air dry naturally before moving on to the next step.
By following these preparation steps, you will be well on your way to successfully repairing your leaky air compressor hose. Taking the time to properly prepare the hose will ensure a strong and durable repair that will keep your air compressor running smoothly.
Cleaning and Clearing the Hose for Effective Repair
To fix a leaky air compressor hose, it is crucial to start by cleaning and clearing the hose thoroughly. This step is essential to ensure effective repair and prevent any future leakages.
To begin, disconnect the air compressor from the power source and release any remaining air pressure from the hose. This can be done by opening the release valve on the compressor. Once depressurized, carefully remove the hose from the compressor.
Inspect the hose for any dirt, debris, or blockages that may be causing the leak. Use a cloth or brush to clean the exterior of the hose, removing any dirt or grime. Pay close attention to the ends and fittings of the hose, as these areas are prone to buildup.
If there is any buildup or blockage inside the hose, it will need to be cleared. Insert a flexible rod or wire brush into one end of the hose and gently push it through to the other end. This will effectively remove any obstructions and ensure proper airflow.
Tip: For stubborn blockages, you can soak the hose in a bucket of warm soapy water or use a mild cleaning solution to help loosen and remove any buildup.
Once the hose is cleaned and cleared, rinse it thoroughly with water to remove any excess cleaning solution or debris. Allow the hose to air dry before proceeding with the repair process.
In conclusion, cleaning and clearing the air compressor hose is a crucial step in successfully fixing a leak. By removing any dirt, debris, or blockages, you can ensure that the repair is effective and prevent any future leaks from occurring.
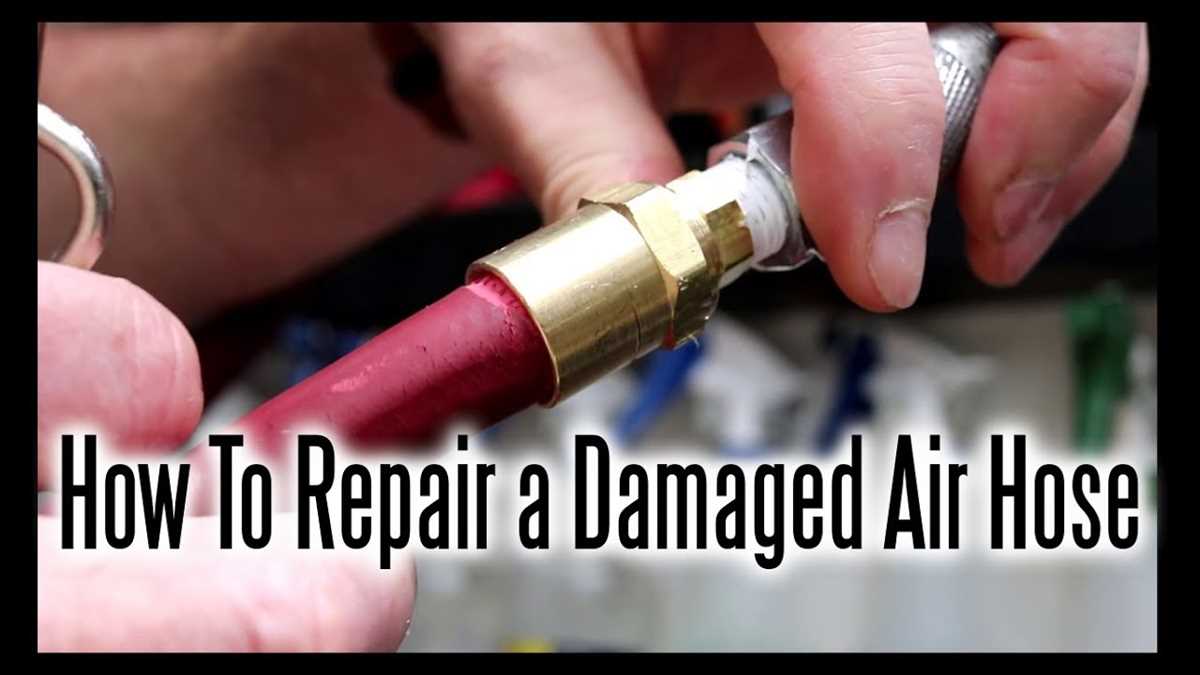
Step 4: Repair the Leaky Area
Once you have identified the area where the air compressor hose is leaking, it’s time to repair it. Follow these simple steps to fix the leak and restore the functionality of your air compressor:
1. Clean the area:
Before starting the repair process, make sure to clean the leaking area using a damp cloth or mild detergent. This will help remove any dirt, grime, or oil that may prevent the repair material from adhering properly.
2. Assess the damage:
Examine the extent of the damage to the air compressor hose. If it is a small hole or puncture, it can usually be repaired using a patch kit or adhesive. However, if the damage is more severe, you may need to consider replacing the entire hose.
3. Apply the repair material:
If the damage is minor, apply the repair material according to the instructions provided with the patch kit or adhesive. This may involve cleaning the area with a solvent, applying a primer, and then applying the repair material. Ensure that the repair material is evenly spread and covers the entire leaking area.
4. Allow time for curing:
After applying the repair material, allow it sufficient time to cure. This may vary depending on the type of adhesive or patch kit used. Follow the recommended curing time provided by the manufacturer to ensure a strong and durable repair.
5. Test for leaks:
Once the repair material has cured, test the air compressor hose for leaks. Reattach the hose to the compressor and turn it on. Check for any signs of air escaping from the previously leaking area. If there are no leaks, the repair is successful. If leaks persist, you may need to reapply the repair material or consider replacing the hose.
By following these steps, you can successfully repair a leaky air compressor hose and ensure optimal performance of your air compressor.
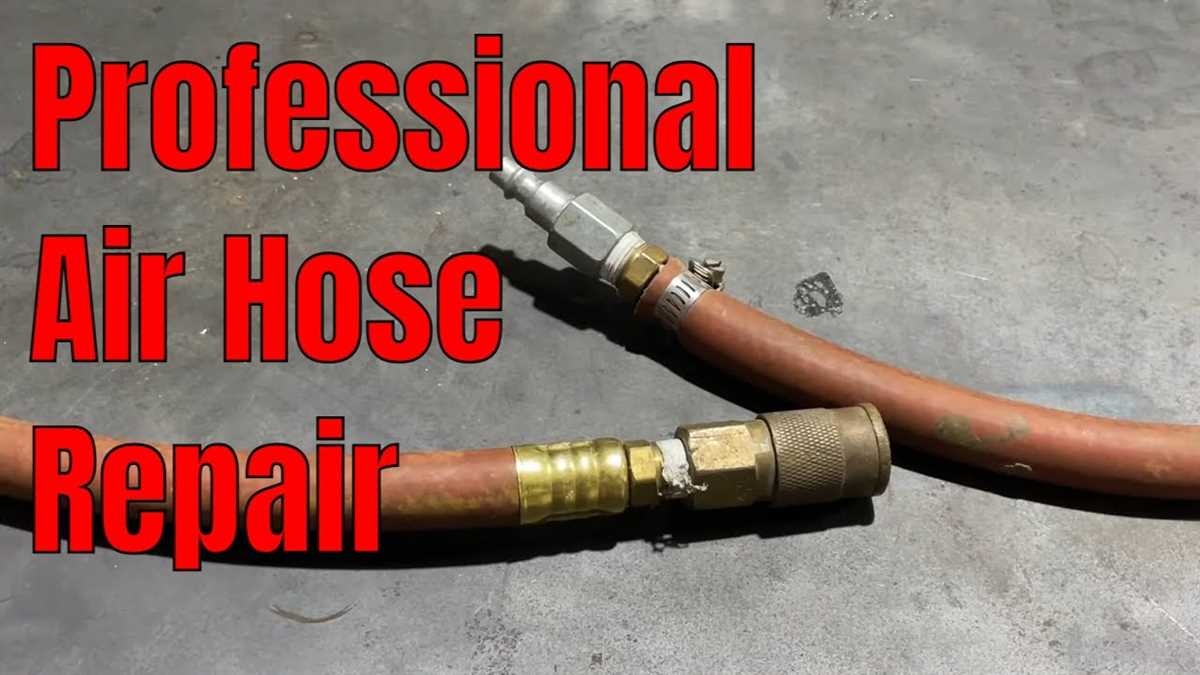
Choosing the Right Repair Method for Your Air Compressor Hose
1. Assess the damage
Before choosing a repair method for your air compressor hose, it’s important to assess the extent of the damage. Inspect the hose for any visible holes, cracks, or leaks. Look for signs of wear and tear, such as frayed or damaged areas. This will help determine the best course of action for repairing the hose.
2. Determine the size and type of hose
Next, identify the size and type of air compressor hose you have. This information is crucial in order to choose the appropriate repair method. Measure the diameter and length of the hose, and take note of the material it is made of. This will help you select the right repair materials and techniques.
3. Consider temporary repairs
If the damage is minor and you need a quick fix, there are temporary repair methods you can try. One option is to use duct tape or electrical tape to cover the hole or leak. This can provide a temporary seal until a more permanent repair can be done. However, keep in mind that these temporary solutions may not hold up well under high pressure or for an extended period of time.
4. Opt for hose repair kits
A more durable and long-lasting solution is to use a hose repair kit. These kits typically include a coupling or connector, as well as clamps or fittings. Choose a kit that matches the size and type of your air compressor hose. Follow the instructions provided with the kit to properly repair the hose and ensure a secure connection.
5. Consider professional repair services
If the damage to your air compressor hose is extensive or if you are unsure of your ability to repair it yourself, it may be best to seek professional repair services. A professional repair technician will have the expertise and specialized tools to properly fix your hose and ensure its optimal performance. This can save you time, effort, and potentially prevent further damage.
In conclusion, when choosing a repair method for your air compressor hose, it’s important to assess the damage, determine the size and type of hose, consider temporary repairs or opt for a hose repair kit, and if needed, seek professional repair services. By taking these steps, you can ensure that your air compressor hose is properly repaired and ready to use.
Step 5: Test and Monitor the Repaired Hose
After completing the repair to your air compressor hose, it is important to properly test and monitor its functionality to ensure that the fix was successful and there are no additional leaks.
Start by reattaching the hose to the air compressor and securing it tightly. Turn on the air compressor and allow it to build up pressure. Listen closely for any sounds of air escaping or hissing, as this could indicate that there is still a leak present. Additionally, visually inspect the hose, checking for any signs of air leakage such as bubbles or hissing.
If you notice any issues or suspect that there may still be a leak, repeat the steps for repairing the hose, ensuring that all connections are secure and the sealing material is properly applied. It may be necessary to exert more force when tightening the connections if the leak persists.
Once you are confident that the repaired hose is no longer leaking, continue to monitor its performance over time. Regularly inspect the hose for any signs of wear or damage, such as cracks or splits. These can weaken the hose and lead to future leaks. If you notice any such damage, it is important to address it promptly to prevent further issues.
Additionally, pay attention to the pressure levels of your air compressor while using the repaired hose. If you notice any fluctuations or drops in pressure, it may indicate that there is still a leak present. In such cases, refer back to the previous steps and check for any areas that may require additional repair or tightening.
By thoroughly testing and monitoring the repaired hose, you can ensure that it is functioning properly and avoid any potential accidents or disruptions in your air compressor’s performance. Regular maintenance and periodic inspections will help to prolong the lifespan of your hose and prevent any future leaks from occurring.
FAQ:
What are the signs of a leaky air compressor hose?
Signs of a leaky air compressor hose include reduced air pressure, hissing or whistling sounds, and visible holes or cracks in the hose.
Can a leaky air compressor hose be fixed?
Yes, a leaky air compressor hose can be fixed. There are several simple steps you can follow to fix the hose and prevent further leaks.
What tools are needed to fix a leaky air compressor hose?
To fix a leaky air compressor hose, you will need a pair of pliers, a hose repair kit, and a screwdriver. These tools will help you remove the damaged portion of the hose and attach a new connector.
How long does it take to fix a leaky air compressor hose?
The time it takes to fix a leaky air compressor hose largely depends on the extent of the damage and your experience with hose repair. However, the process usually takes around 15-30 minutes.
Can I prevent future leaks in my air compressor hose?
Yes, you can prevent future leaks in your air compressor hose by regularly inspecting the hose for signs of wear and tear, avoiding kinks and twists in the hose, and ensuring proper storage.
What should I do if the leak in my air compressor hose is too large to fix?
If the leak in your air compressor hose is too large to fix, it may be best to replace the entire hose. This will ensure a proper seal and prevent further leaks.
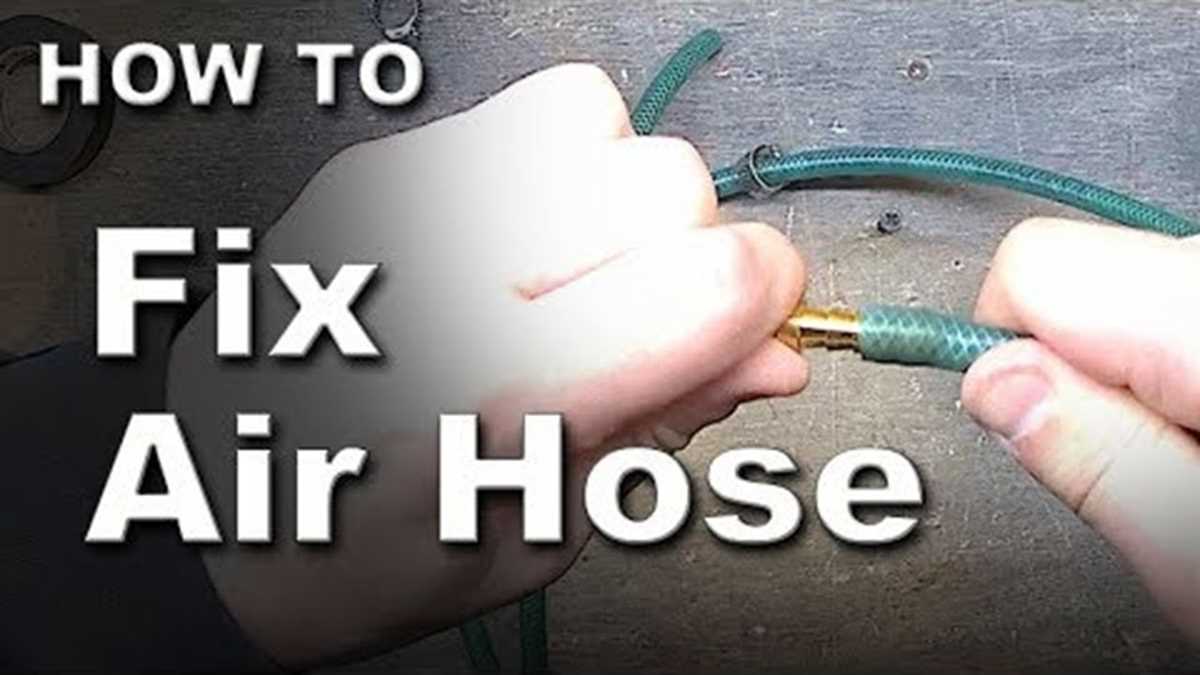
Video:


Meet Harrison Clayton, a distinguished author and home remodeling enthusiast whose expertise in the realm of renovation is second to none. With a passion for transforming houses into inviting homes, Harrison's writing at https://thehuts-eastbourne.co.uk/ brings a breath of fresh inspiration to the world of home improvement. Whether you're looking to revamp a small corner of your abode or embark on a complete home transformation, Harrison's articles provide the essential expertise and creative flair to turn your visions into reality. So, dive into the captivating world of home remodeling with Harrison Clayton and unlock the full potential of your living space with every word he writes.


