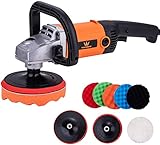
How To Use Electric Polisher On Car

Car enthusiasts know the importance of keeping their vehicles in pristine condition. One of the best ways to achieve that showroom shine is by using an electric polisher. This powerful tool can make a world of difference when it comes to removing scratches, restoring paintwork, and bringing back that glossy finish. However, using an electric polisher on a car requires proper technique and care to avoid any potential damage.
Step 1: Preparation
Before diving into polishing your car, it’s crucial to prepare the surface properly. Start by thoroughly washing and drying the vehicle to remove dirt, dust, and grime. Pay extra attention to areas like wheel arches and lower panels which tend to accumulate more dirt. Next, mask off any areas that you don’t want to be polished, such as rubber trims, plastic parts, and windows. This will protect them from any accidental contact with the polisher.
Step 2: Choosing the right polish
Once the car is clean and prepped, it’s time to choose the right polish for the job. Different polishes are formulated for specific purposes, such as removing swirl marks, oxidation, or fine scratches. Read the labels carefully and select a polish that matches your car’s needs. It’s often recommended to start with a less aggressive polish and move to more abrasive ones if necessary. Remember to always test the polish on a small, inconspicuous area before proceeding to the entire car.

Step 3: Proper technique
When using an electric polisher, it’s important to keep a few things in mind for optimal results. First, start with a low-speed setting to avoid any potential damage to the paintwork. Apply a small amount of polish onto the pad, spreading it evenly across the surface you want to work on. Using gentle, overlapping motions, move the polisher across the car’s body, working on one panel at a time. Keep the polisher flat and avoid applying excessive pressure, as this can lead to swirl marks or burnt paint.
Remember, patience is key when using an electric polisher. Take your time and work methodically to achieve the desired results. If you’re unsure about using a polisher, it’s always a good idea to seek professional advice or assistance. With practice and care, you’ll soon become proficient in using an electric polisher on your car, and your vehicle will shine like never before.
Tips for Using an Electric Polisher on Your Car
Using an electric polisher can greatly improve the appearance of your car’s paintwork. However, it is important to use the polisher correctly to avoid damaging the paint or causing swirl marks. Here are some tips to ensure you get the best results:
1. Choose the Right Polisher
Before you start, make sure you have the right polisher for the job. There are different types of polishers available, such as dual-action and rotary polishers. Dual-action polishers are recommended for beginners as they are safer and easier to control.

Furthermore, consider the pad size and power of the polisher. Larger pad sizes are more efficient for large areas, while smaller pads can be used for tight spots. Additionally, a more powerful polisher can remove defects faster, but it requires more skill to control.
2. Prepare Your Car
Before using the electric polisher, prepare your car properly. Start by washing the car thoroughly to remove any dirt or debris. Next, clay the car’s surface to remove any embedded contaminants. Finally, tape off any areas you want to protect, such as trim or emblems, to avoid accidentally damaging them with the polisher.
3. Use Correct Polishing Technique
When polishing your car, it is important to use the correct technique to avoid causing damage. Hold the polisher with a firm grip and apply light pressure, letting the machine do the work. Always keep the polisher moving, working in small sections at a time. Avoid staying in one spot for too long as this can generate excessive heat and potentially damage the paint.
Additionally, start with a light polish or compound and gradually move to more aggressive ones if necessary. Always follow the manufacturer instructions for the polish or compound you are using.
4. Be Mindful of Speed and Heat
Speed and heat play a crucial role in achieving good results with an electric polisher. Start with a low speed setting and gradually increase it if needed. Higher speeds can generate more heat, which can cause the polish to dry out too quickly or even burn the paint.

It is also important to keep the polisher moving at all times and avoid putting too much pressure on one spot. This will help to distribute the heat evenly and prevent any potential damage.
Remember, practice makes perfect when it comes to using an electric polisher on your car. Start with small areas, experiment with different techniques, and always assess the results to ensure you achieve the desired outcome.
Conclusion
An electric polisher can be a valuable tool for achieving a professional-looking finish on your car’s paintwork. By choosing the right polisher, preparing your car properly, using the correct technique, and paying attention to speed and heat, you can achieve excellent results without causing any damage. So, follow these tips and enjoy the satisfaction of a beautifully polished car.
Preparing Your Car for Polishing
Before you start using an electric polisher on your car, it’s important to properly prepare the vehicle’s surface. This will ensure that you achieve the best results and avoid any damage to the paintwork.
Clean the Car
The first step is to thoroughly clean your car. Use a mild car wash soap and a sponge or microfiber cloth to remove any dirt, dust, and grime from the surface. Pay extra attention to the areas that are prone to buildup, such as the wheels, grille, and lower parts of the car.
Inspect for Damage
After cleaning, take the time to inspect the car’s surface for any scratches, swirl marks, or other imperfections. If you notice any deep scratches or damage, it’s important to address them before proceeding with the polishing process. You may need to use a touch-up paint or seek professional help for such repairs.
Mask the Surrounding Areas
Before you begin polishing, it’s a good idea to mask off any areas that you don’t want the polisher to come into contact with. This includes rubber trim, plastic moldings, and any other sensitive parts that may be damaged by the polishing compound. Use painter’s tape to carefully cover these areas and ensure a clean finish.
Gather the Necessary Tools and Materials
Make sure you have all the tools and materials you will need for the polishing process. This includes an electric polisher with the appropriate pads, a high-quality polishing compound, microfiber towels, and a clean bucket of water to rinse the pads. Having everything ready beforehand will save you time and make the process much smoother.
Test in an Inconspicuous Area
Before you start polishing the entire car, it’s recommended to test the polisher and compound in a small, inconspicuous area. This will allow you to assess the effectiveness of the combination and make any necessary adjustments, such as changing the speed or pressure. Once you are satisfied with the test area, you can proceed with polishing the rest of the car.
By following these steps and adequately preparing your car for polishing, you will ensure that your electric polisher works effectively and safely, leaving your car with a pristine and glossy finish.
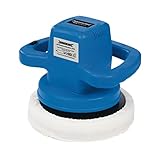
Choosing the Right Polisher and Pads
When it comes to using an electric polisher on your car, selecting the right polisher and pads is crucial for achieving the best results. Here are some factors to consider when making your selection:
1. Type of polisher: There are two primary types of polishers to choose from – dual-action polishers and rotary polishers. Dual-action polishers are beginner-friendly and provide safer, more controlled polishing motions, while rotary polishers are more powerful and suitable for advanced users.
2. Speed settings: Look for a polisher with variable speed settings. This feature allows you to adjust the speed of the machine based on the specific task and type of paint you are working with. Lower speeds are typically used for polishing and waxing, while higher speeds are better for paint correction.
3. Size and weight: Consider the size and weight of the polisher. A lightweight and compact polisher is easier to maneuver and handle, especially when working on smaller or hard-to-reach areas of your car.

4. Quality of pads: Choose polishing pads that are compatible with your polisher. Different pads have different levels of abrasiveness, so consider the type of paint you are working with and the level of correction needed. Foam pads are commonly used for polishing, while microfiber pads are more aggressive and suitable for paint correction.
5. Personal experience: Your level of experience should also influence your choice of polisher and pads. If you are a beginner, it’s best to start with a dual-action polisher and less aggressive pads until you feel more comfortable and confident with the machine.
Remember, always take the time to research and read product reviews to ensure you are investing in a high-quality polisher and pads that will give you the desired results.
Polishing Techniques for a Flawless Finish
Proper polishing techniques are essential for achieving a flawless finish on your car’s exterior. Whether you’re a professional detailer or a DIY enthusiast, using an electric polisher can help you achieve professional-grade results. Here are some key techniques to keep in mind when using an electric polisher:
1. Prepare the Surface
Before you start polishing, it’s important to ensure that the surface of your car is clean and free from any loose dirt or debris. Use a high-quality car wash soap and a microfiber wash mitt to thoroughly clean the surface. Once the surface is clean, dry it thoroughly with a microfiber towel to prevent water spots.

2. Choose the Right Polishing Pad
The polishing pad you choose will depend on the type of paint and the level of correction needed. Foam pads are commonly used for light to moderate correction, while microfiber or wool pads are used for more aggressive correction. Make sure to select the appropriate pad for the job to achieve the best results.
3. Apply the Polish
Apply a small amount of polish onto the pad, spreading it evenly across the surface. It’s important to start with a low speed setting to evenly distribute the polish and avoid splattering. Once the polish is evenly spread, increase the speed gradually to work the polish into the paint. Remember to keep the pad flat and level to prevent any swirl marks.
4. Work in Sections
When polishing, it’s best to work in small sections at a time. This allows you to focus on one area at a time and ensures that you don’t miss any spots. Start with overlapping passes in a back-and-forth or crosshatch motion, applying moderate pressure. Gradually decrease the pressure as you go to achieve a smooth, even finish.
5. Evaluate and Repeat if Necessary
After completing a section, inspect the finish to see if any further correction is needed. If there are still imperfections or swirls, repeat the polishing process using a finer polish and pad combination. It’s important to be patient and take your time to achieve the desired finish.
By following these polishing techniques, you can achieve a flawless finish on your car’s exterior using an electric polisher. Remember to always use caution and start with the least aggressive approach and work your way up if necessary. With practice, you’ll be able to achieve professional results and take pride in your car’s showroom-worthy shine.
Post-Polishing Care and Maintenance
After using an electric polisher on your car, it is important to give proper care and maintenance to ensure the longevity of your vehicle’s finish. Here are some post-polishing tips:
1. Remove Residue
After polishing, it is common to have residue left on the surface of your car. Use a microfiber cloth to gently remove any polish residue or excess product from the paint surface. This will prevent the residue from drying and leaving marks on the paint.
2. Apply a Protective Coating
Once the residue is removed, it is recommended to apply a protective coating to the paint surface. This can be a sealant or wax that will provide a barrier against environmental contaminants, UV rays, and oxidation. Follow the manufacturer’s instructions for the specific coating you choose.
3. Avoid Washing the Car Immediately
It is advisable to wait for at least 24 hours before washing your car after polishing. This allows the protective coating to fully cure and adhere to the paint surface. Washing the car too soon can wash away the coating and negate the benefits of the polishing process.
4. Use a pH-neutral Car Shampoo
When it’s time to wash your car, use a pH-neutral car shampoo designed for automotive paint. Avoid using household detergents or dish soaps as they can be too harsh and strip away the protective coating. Opt for a gentle solution that will effectively clean the car without damaging the finish.
5. Regularly Inspect the Paint Surface
To maintain the polished finish of your car, regularly inspect the paint surface for any signs of damage or contaminants. Check for swirl marks, scratches, bird droppings, tree sap, and other potential hazards. Promptly address any issues to prevent further damage and maintain the appearance of your vehicle.
By following these post-polishing care and maintenance tips, you can extend the life of your car’s polished finish and keep it looking its best.
Questions and answers
What is an electric polisher and why would I need to use it on my car?
An electric polisher is a power tool used to buff and polish surfaces, including car paint. It is used to remove swirl marks, scratches, and other imperfections from the car’s exterior, giving it a smooth and shiny finish.
Can I use any type of polish with an electric polisher?
No, you should only use polishes that are specifically formulated for use with electric polishers. These polishes are designed to work with the movement and speed of the polisher, ensuring optimal results without damaging the car’s paint.

Harrison Clayton
Meet Harrison Clayton, a distinguished author and home remodeling enthusiast whose expertise in the realm of renovation is second to none. With a passion for transforming houses into inviting homes, Harrison's writing at https://thehuts-eastbourne.co.uk/ brings a breath of fresh inspiration to the world of home improvement. Whether you're looking to revamp a small corner of your abode or embark on a complete home transformation, Harrison's articles provide the essential expertise and creative flair to turn your visions into reality. So, dive into the captivating world of home remodeling with Harrison Clayton and unlock the full potential of your living space with every word he writes.


