What Size Wrench is Needed for O2 Sensor Removal?

Replacing or removing an O2 sensor is a common maintenance task for vehicle owners. Whether you are trying to diagnose a faulty sensor or simply replacing an old one, having the right tools is essential. One of the most important tools you’ll need is a wrench that fits the O2 sensor.
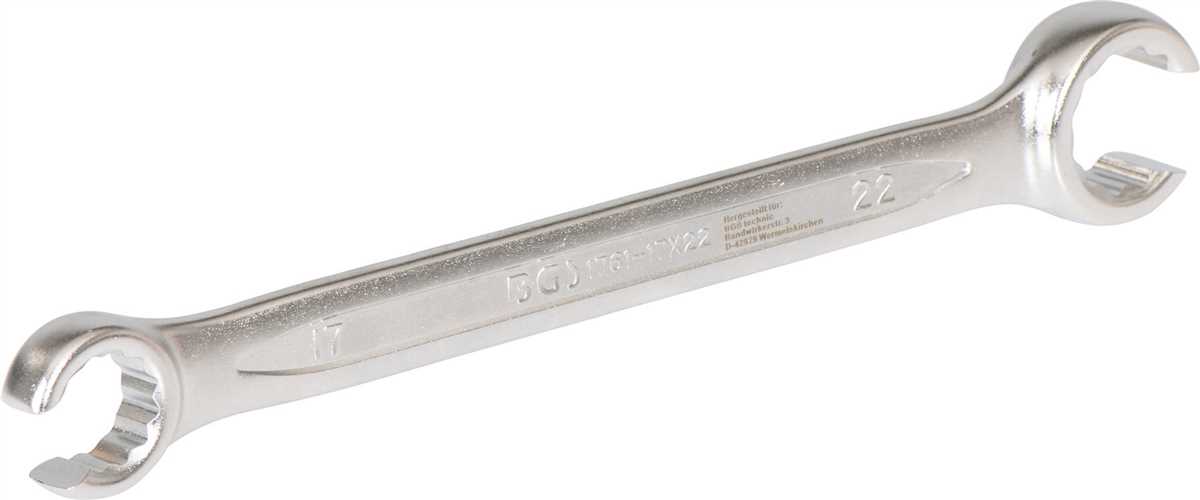
The size of the wrench needed for O2 sensor removal depends on the sensor’s design and location. Most O2 sensors have a hexagonal shape, making them easy to remove with a socket or open-end wrench. The most common sizes for O2 sensors are 7/8-inch (22mm) and 22mm.
Before removing the O2 sensor, it’s important to ensure the engine is cool and the vehicle is on a level surface. To remove the sensor, first disconnect the electrical connector and then loosen the sensor using the appropriate wrench size. It may be necessary to apply some penetrating oil to the sensor to loosen it if it hasn’t been removed in a long time.
Note: Some vehicles may require special tools or adapters due to the location or design of the O2 sensor. Make sure to consult the vehicle’s manual or seek professional advice if you’re unsure about removing the O2 sensor on your specific vehicle.
Once the sensor is loose, carefully unscrew it by hand and remove it from the exhaust system. Inspect the old sensor for any signs of damage or contamination before installing the new one. When installing the new sensor, use the appropriate size wrench to tighten it securely but avoid overtightening, as this can cause damage.
Overall, having the right size wrench is essential for safely and efficiently removing an O2 sensor. By using the correct tools and following proper procedures, you can complete this maintenance task with ease.

Why O2 Sensor Removal is Important
O2 sensor removal is an important part of maintaining the health and performance of your vehicle. The oxygen sensor, also known as the O2 sensor, plays a critical role in monitoring the air-fuel ratio of your engine.
1. Monitoring Engine Performance
The O2 sensor measures the amount of oxygen in the exhaust gases and sends this information to the engine control unit (ECU). The ECU then adjusts the fuel injection and ignition timing to ensure optimal engine performance.
By removing the O2 sensor, you can inspect it for any signs of damage or contamination. A faulty O2 sensor can cause poor fuel economy, reduced engine power, and increased emissions. Regular inspection and replacement of the O2 sensor can prevent these issues and help maintain optimal engine performance.
2. Detecting Engine Problems
Removing the O2 sensor also allows you to check for any engine problems that may affect the sensor’s performance. A clogged catalytic converter, for example, can cause the O2 sensor to fail prematurely. Cleaning or replacing the catalytic converter can help prevent further damage to the O2 sensor and ensure accurate readings.

In addition, a faulty O2 sensor can trigger the check engine light. By removing the O2 sensor and inspecting it, you can determine if the sensor itself is the problem or if there are any other issues that need to be addressed.
3. Improving Fuel Efficiency and Emissions
The O2 sensor plays a crucial role in maintaining the proper air-fuel ratio, which is essential for fuel efficiency and emission control. A malfunctioning O2 sensor can cause the engine to run rich or lean, resulting in decreased fuel efficiency and increased emissions.
Regularly removing and inspecting the O2 sensor allows you to identify any issues that may be affecting its performance. Replacing a faulty O2 sensor can improve fuel efficiency, reduce emissions, and help you save money on fuel costs.
Conclusion
O2 sensor removal is an important part of vehicle maintenance. By inspecting and replacing the O2 sensor when necessary, you can ensure optimal engine performance, detect and address engine problems, and improve fuel efficiency while reducing emissions. It is recommended to consult the vehicle’s manual or seek professional assistance when removing and replacing the O2 sensor.

How to Determine the Correct Wrench Size
When it comes to removing an O2 sensor, it is important to use the correct size wrench to avoid damaging the sensor or the surrounding components. Here are a few steps to help you determine the correct wrench size:
- Check the vehicle’s manual or specification: The first step is to consult your vehicle’s manual or specification to determine the recommended size for removing the O2 sensor. This information can usually be found in the sections related to the exhaust system or O2 sensors.
- Use a wrench size chart: If you don’t have access to the vehicle’s manual or specification, you can use a wrench size chart to find the appropriate wrench size. These charts provide the corresponding wrench size based on the bolt or nut size. Simply match the O2 sensor’s bolt or nut size to the chart, and it will tell you the recommended wrench size.
- Measure the bolt head or nut: If neither the vehicle’s manual nor a wrench size chart is available, you can measure the bolt head or nut directly. This can be done with a caliper or a ruler. Measure the distance across the flat sides of the bolt head or nut to determine its size. Once you have the measurement, you can use a conversion chart or an online tool to find the corresponding wrench size.
It is important to note that O2 sensors can come in different sizes, so the correct wrench size may vary depending on the specific vehicle and sensor. It is always best to consult the vehicle’s manual or specification for accurate information.
Using the correct wrench size when removing an O2 sensor will ensure that the task is performed safely and efficiently, without causing any damage. Remember to handle the sensor with care and follow all safety precautions to prevent injury.
Common Wrench Sizes for O2 Sensor Removal
When it comes to removing an O2 sensor, having the right wrench size is essential to ensure a successful extraction. The size of the wrench needed will vary depending on the make and model of your vehicle, as well as the location of the sensor.
Below are the common wrench sizes that are commonly used for O2 sensor removal:

- 22mm Wrench: This size is the most commonly used for O2 sensors. It is suitable for most vehicles and can be found in many standard wrench sets.
- 7/8″ Wrench: For some vehicles, especially older models, a 7/8″ wrench may be required to remove the O2 sensor. This size is less common but can still be found in many toolsets.
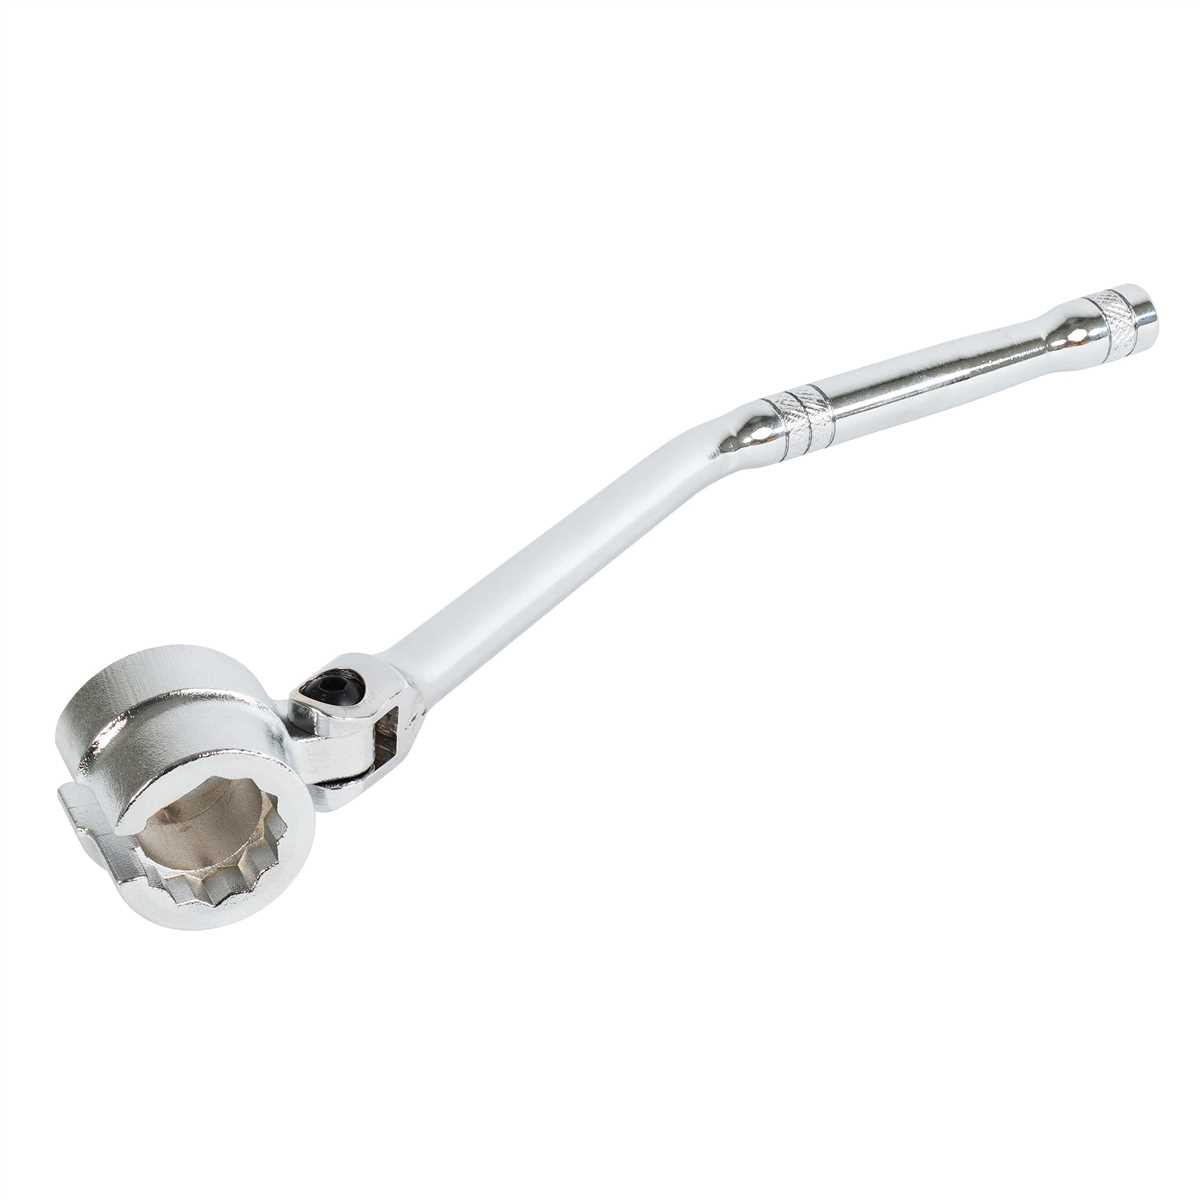
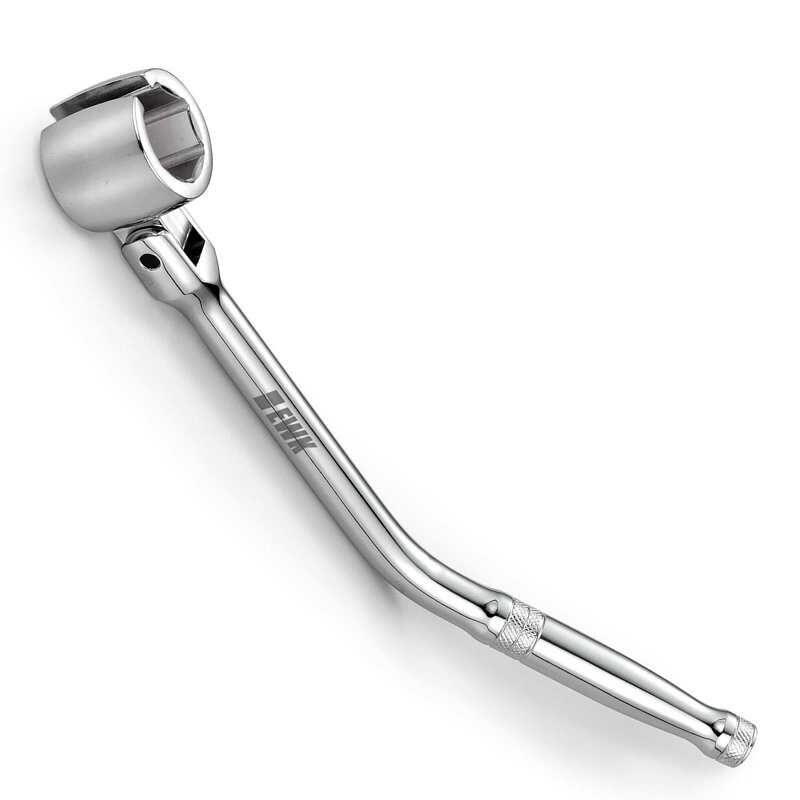
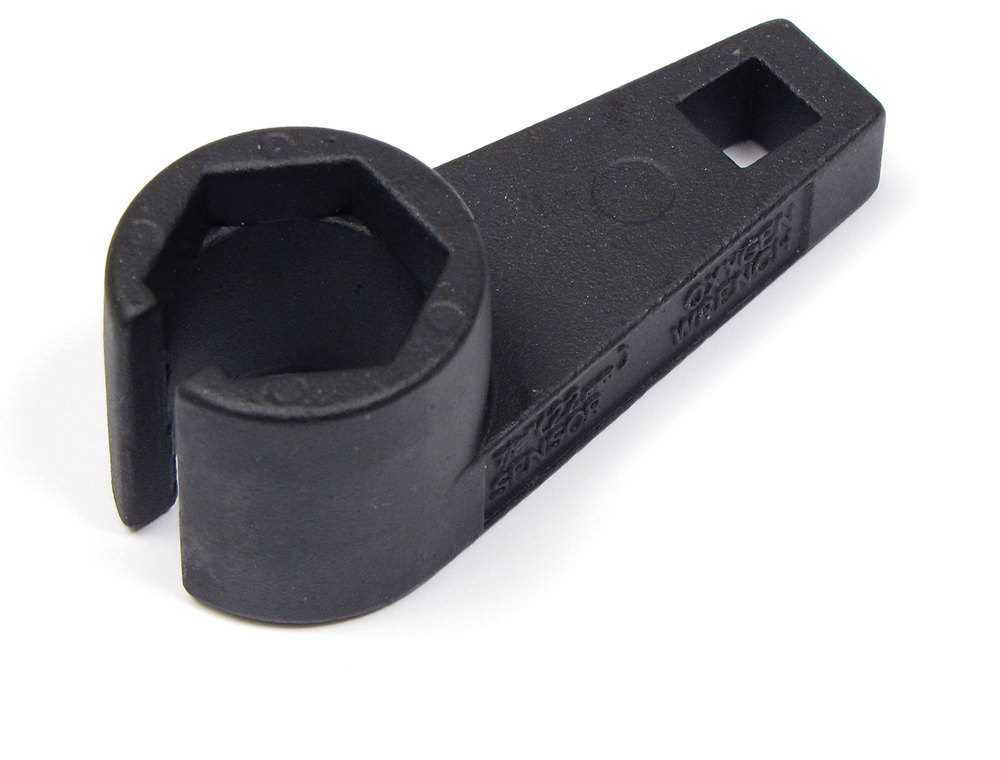
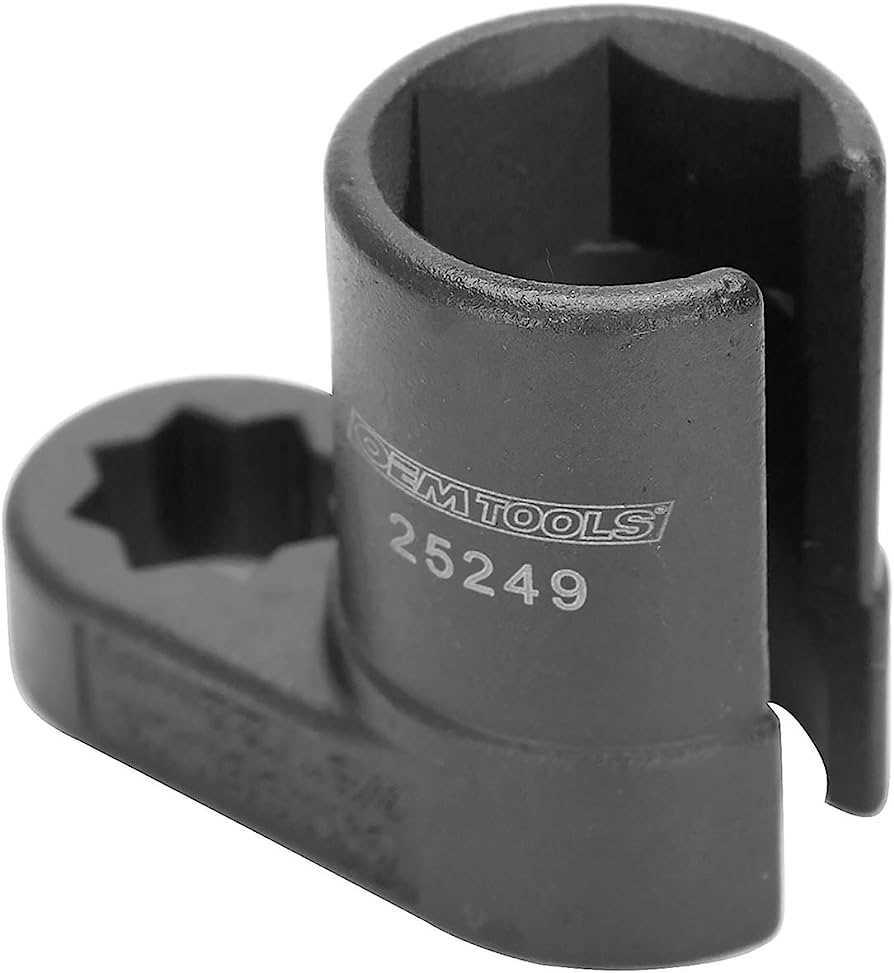
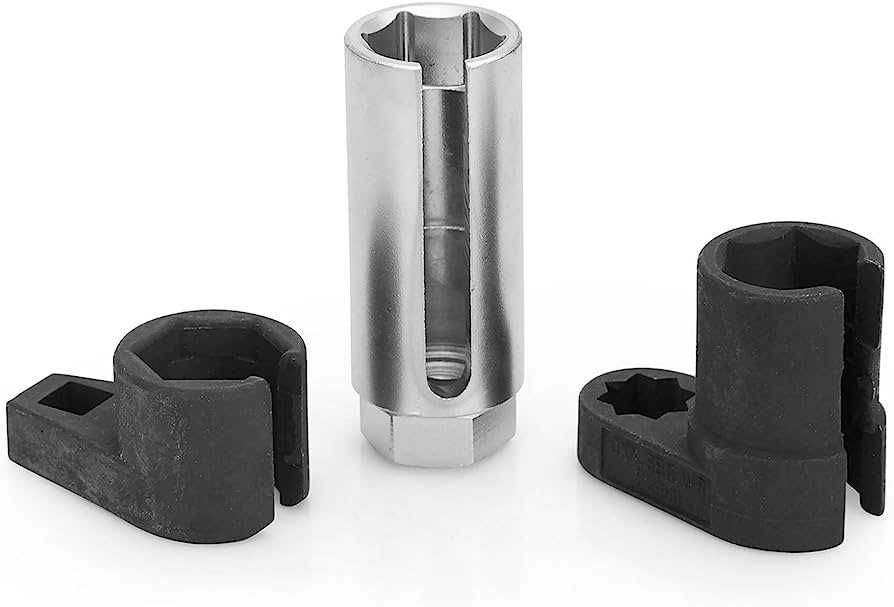
- Specialty Wrench: In rare cases, certain vehicles may require a specialty wrench specifically designed for O2 sensor removal. These specialty wrenches often have unique shapes or angles to access hard-to-reach sensors.
It is recommended to consult your vehicle’s manual or use an online resource to determine the exact wrench size needed for your specific O2 sensor. This will help ensure that you have the correct tool for the job and minimize the risk of damaging the sensor or surrounding components.
Remember to always exercise caution when working with O2 sensors, as they can be delicate and easily damaged. If you are unsure about the removal process, it is recommended to seek assistance from a professional mechanic.
Using Adjustable Wrenches for O2 Sensor Removal
When it comes to removing an O2 sensor, having the right tools can make the job much easier. One tool that can come in handy is an adjustable wrench. Adjustable wrenches are versatile and can be adjusted to fit a range of different sizes, making them a great option for O2 sensor removal.
Choosing the Right Size Adjustable Wrench
Before removing the O2 sensor, you’ll need to determine the size of the sensor’s hexagon base. This can typically be found in the vehicle’s repair manual or by consulting a trusted mechanic. Once you have the size, you can choose an adjustable wrench that can accommodate it.
Adjustable wrenches come in a variety of sizes, with some models offering a maximum opening of up to an inch or more. Look for an adjustable wrench that can open wide enough to fit the hexagon base snugly without any wobbling.

Using the Adjustable Wrench for O2 Sensor Removal
To remove the O2 sensor using an adjustable wrench, follow these steps:
- Ensure the vehicle is parked on a flat and stable surface with the engine turned off.
- Locate the O2 sensor that needs to be removed. This is typically found along the exhaust system.
- Use a wire brush or penetrating oil to clean and lubricate the area around the O2 sensor. This will help loosen any rust or debris.
- Position the adjustable wrench around the hexagon base of the O2 sensor.
- Adjust the wrench to fit the size of the hexagon base snugly, ensuring a secure grip.
- Apply steady and even pressure in a counterclockwise direction to loosen the O2 sensor.
- Once the O2 sensor is loose, continue to unscrew it by hand until it can be completely removed.
It’s important to note that O2 sensors can be fragile, so take care not to apply excessive force or torque during the removal process. If the O2 sensor is stubborn and doesn’t loosen easily, it may be helpful to use a specialized O2 sensor removal tool or seek assistance from a professional mechanic.
Using an adjustable wrench for O2 sensor removal is a cost-effective and convenient option. By following the proper steps and using the right size adjustable wrench, you can safely and effectively remove an O2 sensor from your vehicle.
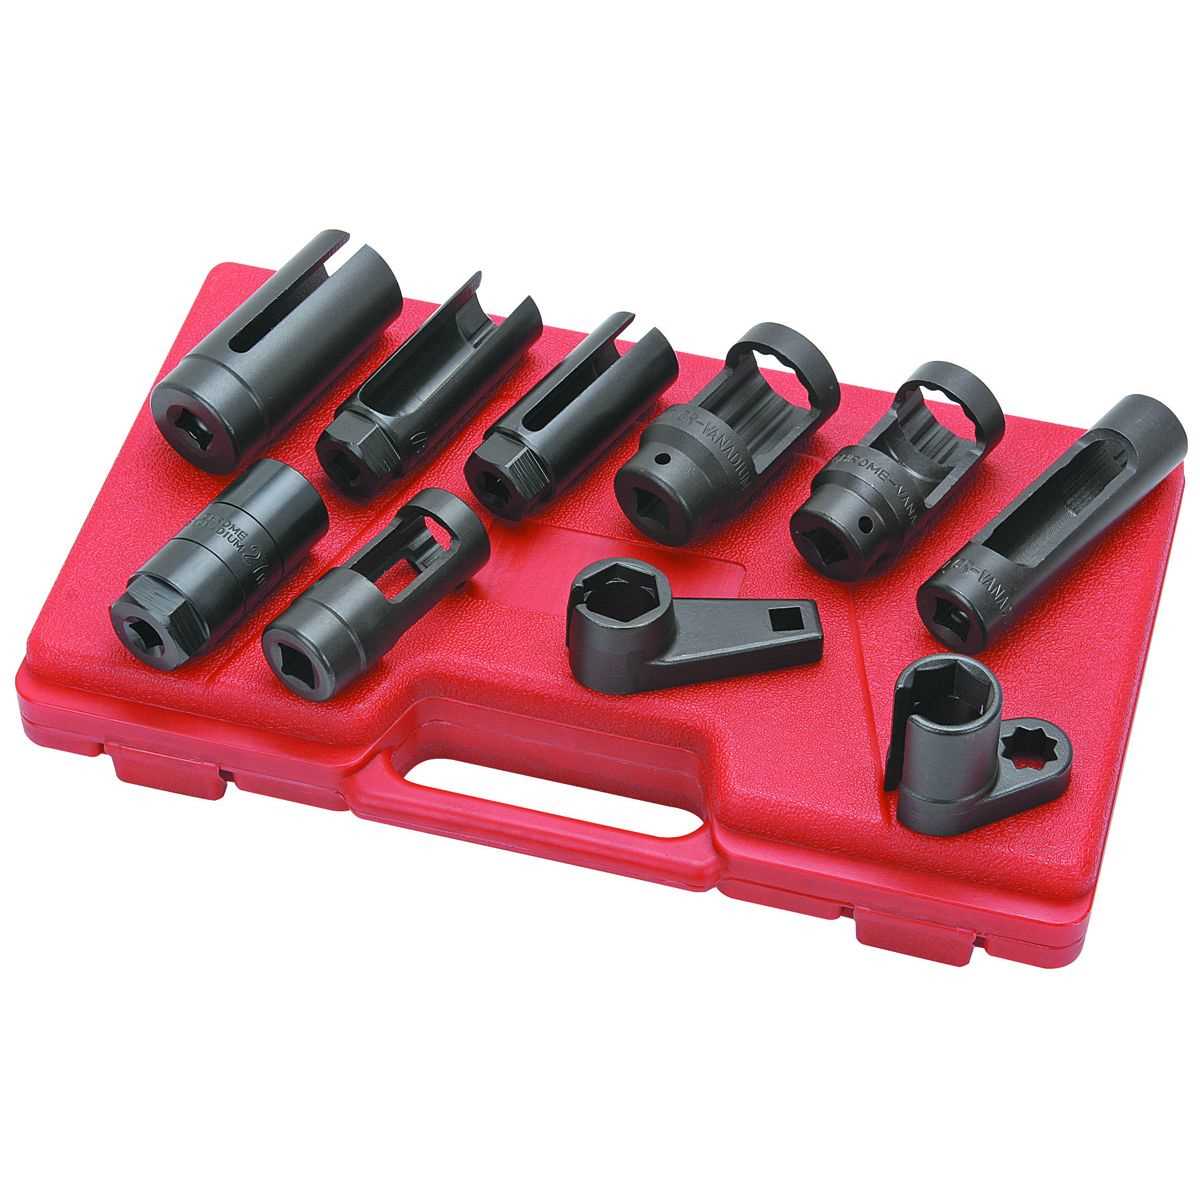
When to Use Specialized O2 Sensor Removal Tools
While a standard wrench can often be used to remove an O2 sensor, there are situations where a specialized tool may be necessary. These tools are designed to make the removal process easier and more efficient, particularly in instances where the sensor has become stuck or corroded.
1. Stuck or Corroded Sensors

If an O2 sensor has been in place for a long time, it can become stuck due to heat and corrosion. In these cases, a specialized O2 sensor removal tool can provide the extra leverage and grip needed to loosen the sensor and remove it without causing damage.
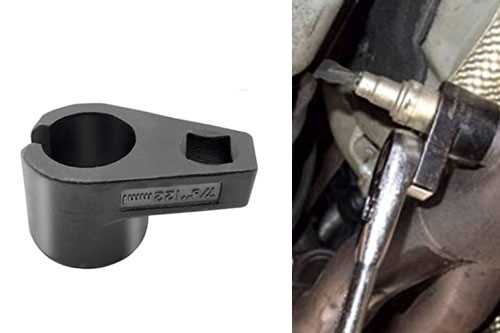
2. Limited Access
In some vehicles, the O2 sensor may be located in a hard-to-reach or tight space. Utilizing a specialized O2 sensor removal tool that is designed for these situations can help reach and remove the sensor without the need for disassembling other components or using excessive force.
3. Rounded or Stripped Sensor
If the hexagonal portion of the O2 sensor becomes rounded or stripped, a standard wrench may not provide enough grip to remove it. Specialized tools, such as O2 sensor sockets or adjustable wrenches, have features that can securely grip the damaged sensor and provide enough torque to remove it.
4. Multiple Sensors
Some vehicles have multiple O2 sensors located in different areas of the exhaust system. These sensors may require different sizes of wrenches or sockets. Using a specialized O2 sensor removal tool with multiple sizes or an adjustable wrench can save time and effort when removing multiple sensors.
5. Professional Use
For automotive professionals or frequent DIY enthusiasts, investing in a specialized O2 sensor removal tool can be beneficial. These tools are designed to provide durability and ease of use, making the process of removing O2 sensors quicker and more efficient, ultimately saving time and effort.
Overall, while a standard wrench can often be used for O2 sensor removal, there are situations where a specialized tool is necessary. Whether it’s due to a stuck or corroded sensor, limited access, a rounded or stripped sensor, multiple sensors, or professional use, a specialized O2 sensor removal tool can make the process easier and more effective.
Tips for Removing Stubborn O2 Sensors
If you’re having trouble removing a stubborn O2 sensor from your vehicle, there are several tips and tricks you can try to make the process easier and more successful. Here are some suggestions to help you get the job done:
1. Penetrating Oil:
Before attempting to remove the O2 sensor, apply a generous amount of penetrating oil to the area where the sensor connects to the exhaust pipe. This will help to loosen any rust or corrosion that may be making the sensor difficult to remove. Allow the oil to soak in for several hours or overnight before attempting to remove the sensor.
2. Heat:
If the O2 sensor still won’t budge after using penetrating oil, you can try applying heat to the sensor. Use a propane torch or heat gun to warm up the area where the sensor connects to the exhaust pipe. Be cautious not to overheat the sensor or surrounding components, as this can cause damage. The heat will help to expand the metal, making it easier to remove the sensor.
3. Breaker Bar or Long-handled Wrench:
Using a standard wrench may not provide enough leverage to remove a stubborn O2 sensor. Instead, try using a breaker bar or a wrench with a long handle. The additional leverage will make it easier to apply the necessary force to break the sensor loose.
4. Anti-Seize Compound:
Before installing a new O2 sensor, coat the threads with an anti-seize compound. This will help prevent the sensor from rusting or seizing in the future, making it easier to remove next time. Be sure to use a compound specifically designed for high-temperature applications.
5. Professional Assistance:
If you’ve tried all of the above tips and still can’t remove the stubborn O2 sensor, it may be time to seek professional assistance. A mechanic or automotive technician will have the knowledge and tools necessary to safely remove the sensor without causing damage to your vehicle.
Remember, when working with O2 sensors or any other components of your vehicle’s exhaust system, it’s important to take proper safety precautions. Always wear protective eyewear and gloves, and make sure the vehicle is parked on a stable surface with the parking brake engaged. If you’re unsure about any steps of the removal process, consult a professional for guidance.
Precautions to Take When Removing O2 Sensors
When removing O2 sensors, there are a few precautions that should be taken to ensure the safety of the person performing the task and prevent any damage to the vehicle or the sensor itself. O2 sensors are sensitive and can be easily damaged if mishandled, so it’s important to follow these precautions:
1. Wear protective gloves and eyewear
Before starting the removal process, make sure to wear gloves and eyewear to protect yourself from any potential injuries. O2 sensors can be located in tight spaces or difficult-to-reach areas, so it’s important to have protection for your hands and eyes.
2. Disconnect the vehicle’s battery
Before removing any O2 sensors, it’s crucial to disconnect the vehicle’s battery. This will prevent any accidental electrical shock or damage to the sensor. Be sure to carefully remove the negative terminal of the battery to avoid any sparks or shorting.
3. Allow the vehicle’s exhaust system to cool down
The exhaust system can get extremely hot, especially after the vehicle has been driven. It’s important to allow the system to cool down for at least 30 minutes before attempting to remove any O2 sensors. This will help prevent burns or injuries caused by the hot components.
4. Use the proper size wrench
Ensure that you have the correct size wrench for your specific O2 sensor, as using the wrong size can result in damage to the sensor or the surrounding components. Consult the vehicle’s manual or a professional mechanic to determine the appropriate size for your O2 sensor.
5. Apply penetrating oil
If the O2 sensor seems stuck or difficult to remove, applying a penetrating oil to the sensor’s threads can help loosen it. Allow the oil to sit for a few minutes before attempting to remove the sensor, and be cautious of any oil dripping onto hot surfaces, as it can cause a fire.
6. Turn slowly and steadily
When removing the O2 sensor, it’s important to turn the wrench slowly and steadily. Avoid applying excessive force or sudden movements, as this can damage the sensor or the threads. If the sensor is still difficult to remove, consider seeking the help of a professional mechanic to avoid any further damage.
By following these precautions, you can safely remove O2 sensors without causing any harm to yourself or your vehicle. Remember to take your time and be cautious during the process to ensure everything goes smoothly.
FAQ
What is an O2 sensor and why is it important to remove it?
An O2 sensor, also known as an oxygen sensor, is a device that measures the amount of oxygen in the exhaust gases of a vehicle. It is an important component of the engine management system as it helps ensure optimal fuel efficiency and reduced emissions. O2 sensors need to be removed for replacement or maintenance purposes.
What size wrench should I use to remove an O2 sensor?
The size of the wrench required to remove an O2 sensor depends on the specific model and make of the vehicle. Generally, a 7/8 inch wrench is commonly used for removing O2 sensors. However, it is recommended to consult the vehicle’s manual or a mechanic to determine the exact size needed for your particular vehicle.
Can I use a socket instead of a wrench to remove an O2 sensor?
Yes, you can use a socket instead of a wrench to remove an O2 sensor. In fact, using a socket can often make the job easier because it provides a better grip and allows for more precise turning. Make sure to use a socket that matches the size of the O2 sensor and ensure it is securely attached before attempting to remove the sensor.
Is it necessary to disconnect the battery before removing an O2 sensor?
It is not always necessary to disconnect the battery before removing an O2 sensor. However, it is recommended as a precautionary measure to prevent accidental electrical shocks or short circuits. Disconnecting the battery will also reset the engine control unit (ECU) and allow for a clean start after the sensor is replaced or maintained.
Are there any special tools required for removing an O2 sensor?
In most cases, no special tools are required for removing an O2 sensor. A wrench or socket of the appropriate size, along with a breaker bar if necessary, should be sufficient. However, it is always a good idea to have a penetrating lubricant on hand, such as WD-40, to help loosen any rust or corrosion that may have built up on the sensor.
How often should O2 sensors be replaced?
The lifespan of an O2 sensor can vary depending on several factors, including the vehicle’s make and model, driving conditions, and the quality of the sensor itself. As a general guideline, it is recommended to replace O2 sensors every 60,000-90,000 miles or every 4-5 years. However, it is important to regularly inspect the sensor and replace it sooner if any signs of malfunction or deterioration are noticed.
Video


Meet Harrison Clayton, a distinguished author and home remodeling enthusiast whose expertise in the realm of renovation is second to none. With a passion for transforming houses into inviting homes, Harrison's writing at https://thehuts-eastbourne.co.uk/ brings a breath of fresh inspiration to the world of home improvement. Whether you're looking to revamp a small corner of your abode or embark on a complete home transformation, Harrison's articles provide the essential expertise and creative flair to turn your visions into reality. So, dive into the captivating world of home remodeling with Harrison Clayton and unlock the full potential of your living space with every word he writes.


