What Size Allen Wrench Do I Need for a Delta Shower Handle?

If you need to adjust or replace the handle on your Delta shower faucet, you may be wondering what size Allen wrench you need. Delta shower handles can be secured with different sizes of Allen wrenches, depending on the model and style of your faucet. It’s important to use the correct size Allen wrench to avoid damaging the handle or the faucet itself.
Delta shower handles are typically secured with either a 2.5mm or 3mm Allen wrench. The specific size required for your handle can usually be found in the owner’s manual or installation instructions that came with your faucet. If you no longer have those documents, you can try searching for the model number of your faucet online to find the appropriate size Allen wrench.
Using the wrong size Allen wrench can strip the screw or round off the edges, making it difficult or impossible to remove the handle. If you’re unsure of the correct size, it’s better to start with a smaller wrench and gradually increase the size until you find the right fit. It’s also a good idea to make sure you’re using a high-quality, properly fitting wrench to avoid any unnecessary damage.
Allen Wrench Size for Delta Shower Handle
Introduction
When it comes to repairing or replacing a Delta shower handle, having the right tools is essential. One of the most common tools needed is an allen wrench, also known as a hex key. The allen wrench is used to remove the set screw that holds the handle in place on the shower valve.
Choosing the Correct Allen Wrench Size
Delta shower handles typically require an allen wrench in a specific size. The size of the allen wrench needed can vary depending on the model of the shower handle. The most common allen wrench sizes used for Delta shower handles are 1/8 inch (3.2 mm), 3/32 inch (2.4 mm), and 5/64 inch (2 mm).

To determine the correct allen wrench size for your Delta shower handle, you can follow these steps:
- Check the handle for any markings or labels that may indicate the size of the allen wrench required. Some Delta shower handles may have the size imprinted on the handle itself.
- If there are no markings, you can try using a 1/8 inch (3.2 mm) allen wrench, as this is the most commonly used size for Delta shower handles. If the wrench does not fit securely into the set screw, you may need to try a smaller size.
- Alternatively, you can consult the user manual or installation instructions for your Delta shower handle. These documents may provide specific information about the allen wrench size required for your particular model.
Important Tips
- Always make sure to turn off the water supply to the shower before attempting any repairs or replacements.
- Use caution when removing the set screw with the allen wrench to avoid stripping the screw or damaging the handle.
- If you are unsure about the size of the allen wrench required or how to safely remove the handle, it is recommended to consult a professional plumber for assistance.
| Allen Wrench Size (inch) | Allen Wrench Size (mm) |
|---|---|
| 1/8 | 3.2 |
| 3/32 | 2.4 |
| 5/64 | 2 |
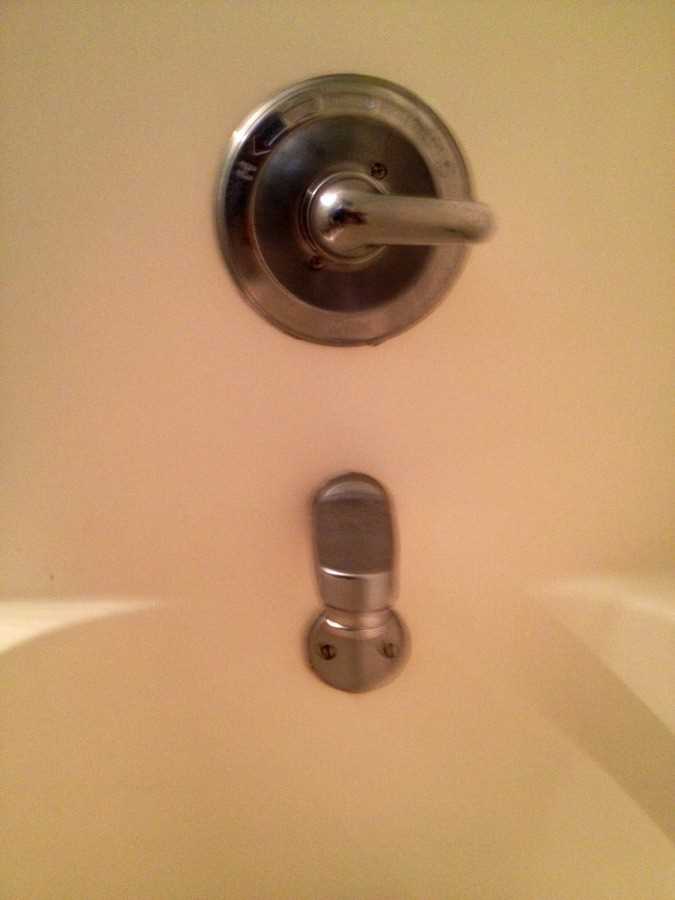
Basics of the Delta Shower Handle
The Delta shower handle is an essential component of the shower system. It allows you to control the flow and temperature of the water, providing a comfortable and enjoyable shower experience. Whether you’re looking to install a new Delta shower handle or replace an existing one, understanding the basics of this component is crucial.
Types of Delta Shower Handles
Delta offers a variety of shower handles to suit different preferences and bathroom decor styles. Some of the common types of Delta shower handles include:
- Single-handled shower handles: These handles have a single lever that you can move up and down or left and right to adjust both the water flow and temperature.
- Double-handled shower handles: These handles have separate knobs or levers for controlling the water temperature and flow. One handle is used to adjust the hot and cold water ratio, while the other controls the flow.
- Lever-style shower handles: These handles have a lever design that provides a sleek and modern look. They are easy to operate and offer precise control over the water flow and temperature.
Installation and Replacement
Installing or replacing a Delta shower handle requires a few basic steps:

- Turn off the water supply to the shower.
- Remove the existing handle by loosening the set screw with an Allen wrench.
- If installing a new handle, follow the manufacturer’s instructions for proper installation.
- Tighten the set screw to secure the new handle in place.
- Turn on the water supply and test the handle for proper functionality.
Maintenance and Care
To keep your Delta shower handle in good condition, follow these maintenance tips:
- Clean the handle regularly with a mild soap and water solution to remove any dirt or grime.
- Avoid using abrasive cleaners or harsh chemicals that can damage the finish of the handle.
- Check the handle for any leaks or drips and address them promptly.
- If you notice any signs of wear or damage, consider replacing the handle to ensure optimal performance.
Conclusion
The Delta shower handle is a vital component of your shower system, providing you with control over the water flow and temperature. Understanding the different types of handles available and the installation and maintenance processes allows you to make informed decisions when choosing and caring for your Delta shower handle.
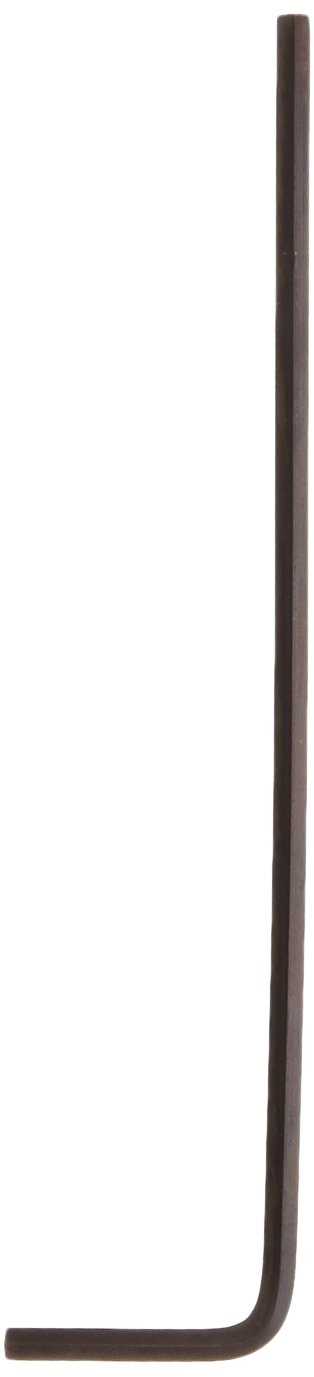
Understanding Allen Wrenches
An Allen wrench, also known as a hex key or hex wrench, is a commonly used tool for tightening or loosening screws and bolts with hexagonal sockets. It is named after the Allen Manufacturing Company, which first patented and popularized the tool in the 1920s. The Allen wrench is widely used in various industries, including automotive, construction, and furniture assembly.
Types of Allen Wrenches
Allen wrenches come in different sizes and shapes to fit various hexagonal socket sizes. The most common types of Allen wrenches include:
-
Fold-up Allen wrench: This type of Allen wrench has multiple arms that fold into the handle, allowing for different sizes to be stored in a compact manner.
-
T-handle Allen wrench: This Allen wrench has a T-shaped handle that offers a more comfortable grip and greater torque for easy application of force.
-
L-shaped Allen wrench: This Allen wrench is shaped like an L and provides a simple and effective design for tightening or loosening screws and bolts.
Measuring Allen Wrench Sizes
The size of an Allen wrench is typically indicated by the measurement of the hexagonal socket it fits into. The two most common systems of measurement used for Allen wrenches are inches (imperial) and millimeters (metric).

When determining the size of Allen wrench you need, you can take the following steps:
-
Inspect the screw or bolt: Look at the screw or bolt that requires an Allen wrench. The size may be indicated on the head of the screw or bolt or on the packaging of the product.
-
Measure the width across opposite flat sides: Use a ruler or caliper to measure the distance across the opposing flat sides of the socket.
-
Consult a size chart: Refer to a size chart to determine the corresponding Allen wrench size for the measured distance. These charts are widely available online or in tool manuals.
Using Allen Wrenches for Delta Shower Handle
To remove or install a Delta shower handle, you typically need an Allen wrench with a size of 1/8 inch or 3/32 inch. It is recommended to refer to the Delta shower handle’s manual or contact Delta customer support to confirm the specific Allen wrench size required for your shower handle model. Using the correct size Allen wrench will ensure proper installation or removal without causing damage to the handle or surrounding components.
Remember to always use Allen wrenches carefully and apply the necessary force without overtightening or stripping the screw or bolt. Misusing or using the wrong size Allen wrench can result in damage to the fastener or the tool itself.
Importance of Correct Wrench Size
Using the correct wrench size is crucial when working with a Delta shower handle. Here are a few reasons why the right wrench size is important:
- Tightening and Loosening: The correct wrench size ensures that you can properly tighten or loosen the various components of the Delta shower handle. Using the wrong size may lead to incomplete tightening or excessive force, which can damage the handle or cause leaks.
- Preventing Stripping: When using an Allen wrench to tighten or loosen screws, using the correct size helps to prevent stripping the screw head. If the wrench is too small or too big, it may not fit properly into the screw, causing damage to the screw head and making it difficult to grip or turn.
- Avoiding Damage: Using the correct wrench size minimizes the risk of damaging the internal mechanisms of the Delta shower handle. Applying excessive force or using the wrong size wrench can cause the handle to become misaligned, leading to leaks or difficulty in operation.
- Efficiency: Using the correct wrench size allows for more efficient and smoother work. It saves time by providing a proper grip on the components, enabling you to quickly and effectively tighten or loosen them without any issues.
It is important to note that different types of Delta shower handles may require different wrench sizes. Therefore, it is recommended to refer to the manufacturer’s instructions or consult a professional if you are unsure about the appropriate wrench size for your specific Delta shower handle.

How to Determine the Size You Need
When trying to determine the size of Allen wrench you will need for a Delta shower handle, you will first want to identify the specific model of your handle. Allen wrenches, or hex keys, come in various sizes, typically ranging from 0.028 inches to 1.574 inches. The most common sizes for shower handle screws are usually 1/8 inch to 3/16 inch.
Here are a few steps you can follow to determine the size of Allen wrench you need:
1. Find the Model Number
The first step is to locate the model number of your Delta shower handle. This can usually be found on a sticker or plate on the handle itself. The model number will help you identify the specific parts and sizes needed for your shower handle.
2. Research the Specifications
Using the model number, you can search online for the specifications of your Delta shower handle. Look for any information related to the screw size or the type of Allen wrench required.
3. Measure the Screw Head

If you are unable to find the specifications online, you can try measuring the screw head directly. Use a ruler or caliper to measure the diameter of the screw head. This measurement will give you an estimation of the size of Allen wrench you need.
4. Try Different Sizes
In some cases, it may be necessary to try out different Allen wrench sizes to determine the correct one. Start with the estimated size based on your measurements and see if it fits into the screw head. If it doesn’t fit, gradually try smaller or larger sizes until you find the one that fits securely.
5. Seek Professional Help
If you are still unsure about the size required or are having trouble identifying the model number, it may be best to seek professional help. Contact a plumber or the manufacturer’s customer service for assistance. They will be able to provide you with the specific size and type of Allen wrench needed for your Delta shower handle.
By following these steps, you will be able to determine the size of Allen wrench you need for your Delta shower handle. Remember to always use the correct size to avoid damaging the screw head and ensure a secure fit for repairing or replacing your shower handle.
Common Allen Wrench Sizes for Delta Shower Handles
If you need to adjust or replace the handle on your Delta shower, you’ll likely need an Allen wrench to remove it. Delta shower handles often require an Allen wrench for installation and removal because they are attached with set screws.
The size of the Allen wrench you’ll need for your Delta shower handle depends on the specific model you have. However, there are a few common sizes that are frequently used with Delta shower handles. These sizes include:
- 3/32-inch Allen wrench
- 1/8-inch Allen wrench
- 5/32-inch Allen wrench
- 3/16-inch Allen wrench
It’s important to note that not all Delta shower handles will require an Allen wrench, as some models may have different mechanisms for installation and removal. Additionally, the specific size of Allen wrench you’ll need may vary depending on the age and style of your Delta shower handle.
To determine the correct size of Allen wrench for your Delta shower handle, you can refer to the instruction manual or documentation that came with your shower. If you no longer have the manual, you can also try contacting Delta customer support for assistance.
Having the correct size of Allen wrench is essential for properly installing or removing your Delta shower handle. Using the wrong size wrench can damage the set screw or cause the handle to become loose or ineffective. It’s always best to use the recommended Allen wrench size to ensure a secure and functional shower handle.
Steps to Remove and Replace a Delta Shower Handle
- Turn off the water supply to your shower. Locate the shut-off valve near your shower and turn it clockwise to close the water supply.
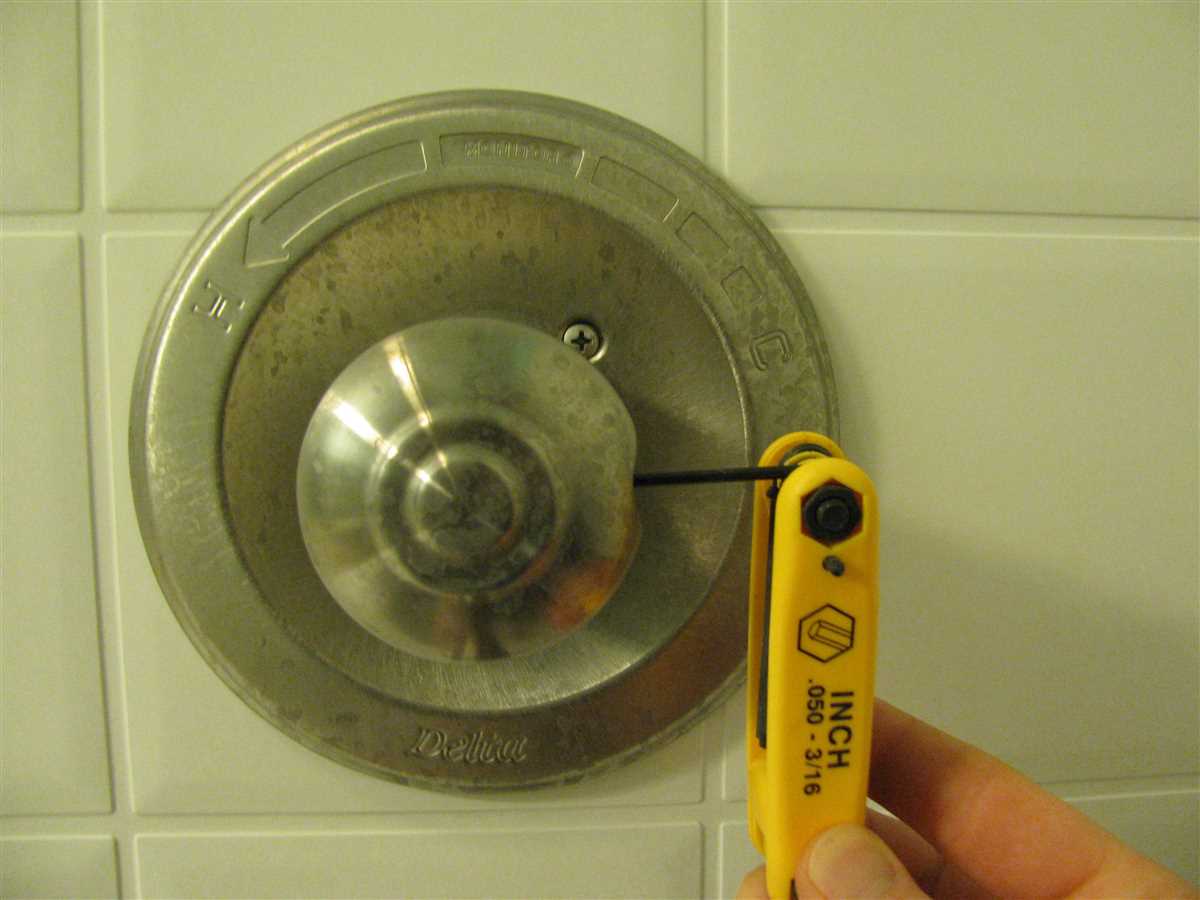
- Use a screwdriver or Allen wrench to remove the set screw located on the underside of the handle. This screw may be hidden under a small plastic cover. Turn the screw counterclockwise to loosen and remove it.
- Gently pull the handle away from the wall to expose the valve cartridge.
- Depending on the model, you may need to use a Philips screwdriver or an adjustable wrench to remove the brass nut or retaining clip that secures the cartridge. Turn the nut counterclockwise or release the clip to remove it.
- Once the nut or clip is removed, carefully pull the cartridge straight out of the valve body. Be cautious not to damage any surrounding plumbing.
- Inspect the cartridge for any signs of damage or wear. If necessary, replace it with a new one by inserting it back into the valve body and securing it with the brass nut or retaining clip.
- Slide the shower handle back onto the valve stem, aligning the set screw hole with the screw hole in the stem. Secure the handle by tightening the set screw with a screwdriver or Allen wrench.
- Turn on the water supply by turning the shut-off valve counterclockwise.
Once you have completed these steps, your Delta shower handle should be successfully removed and replaced. If you are still experiencing issues or have any concerns, it may be best to contact a professional plumber for assistance.
Tips for Proper Installation
1. Gather the Required Tools
Before beginning the installation process, make sure you have all the necessary tools and equipment. Apart from the Allen wrench, you will need a Phillips screwdriver, pliers, an adjustable wrench, and a towel or cloth to protect the shower handle from potential scratches.
2. Identify the Correct Size Allen Wrench
Using the appropriate size Allen wrench is crucial for a successful installation. In the case of a Delta shower handle, the most common sizes are 2.5mm (3/32″), 3mm (1/8″), and 4mm (5/32″). Check the manufacturer’s specifications or consult the user manual to determine the precise size needed for your specific model.
3. Turn off the Water Supply
Prior to disassembling the shower handle, it is essential to turn off the water supply. Locate the shut-off valve for the shower and close it to prevent any leaks or water damage during the installation process. You may need to use pliers or an adjustable wrench to turn the valve.
4. Remove the Existing Handle
Using the Allen wrench, carefully loosen the set screw located on the underside of the shower handle. Once loose, the handle should easily slide off the valve stem. Be sure to place the handle in a safe and secure location to avoid misplacing it.
5. Install the New Handle
Take the new shower handle and align it with the valve stem. Carefully slide it onto the stem until it is securely in place. Ensure that the handle is straight and level, as this will affect the function and aesthetics of the shower.
6. Tighten the Set Screw
Using the Allen wrench, tighten the set screw underneath the handle to ensure it is firmly attached to the valve stem. Be cautious not to overtighten the screw, as this can damage the handle or the stem.
7. Restore the Water Supply
After the new handle is securely installed, turn the shut-off valve back on to restore the water supply. Check for any leaks or drips around the handle, and if necessary, use pliers or an adjustable wrench to ensure the valve is fully open and closed properly.
8. Test the Functionality
Turn on the shower to test the functionality of the new handle. Ensure that both hot and cold water flow smoothly and that turning the handle adjusts the water temperature and pressure as desired. Make any necessary adjustments before completing the installation process.
9. Clean and Maintain
Once the handle is properly installed, clean any fingerprints or smudges from the surface using a soft cloth. Regularly inspect the handle for any signs of wear or damage, and promptly address any issues to maintain the longevity and effectiveness of your Delta shower handle.
10. Consult a Professional if Needed
If you encounter any difficulties during the installation process or are unsure about any steps, it is always best to consult a professional plumber or contact Delta’s customer support for assistance. They can provide guidance and ensure a proper installation.
Frequently Asked Questions
1. What size Allen wrench do I need for a Delta shower handle?
The size of the Allen wrench needed for a Delta shower handle is typically 1/8 inch (3.2mm). However, it is recommended to consult the user manual or product specifications for your specific Delta shower handle as the size may vary.
2. How do I remove a Delta shower handle?
To remove a Delta shower handle, follow these steps:
- Locate the set screw on the underside of the handle.
- Using the appropriate size Allen wrench, loosen the set screw by turning it counterclockwise.
- Once the set screw is loose, gently pull the handle straight outwards to remove it from the valve.
If you encounter any difficulties or are unsure, it is recommended to consult a professional plumber.
3. How do I install a Delta shower handle?
To install a Delta shower handle, follow these steps:
- Slide the handle onto the valve stem, making sure it is aligned correctly.
- Tighten the set screw on the underside of the handle using the appropriate size Allen wrench. Make sure it is secure.
- Test the handle by turning it on and off to ensure it is functioning properly.
If you are unsure or need assistance, it is recommended to consult the product manual or contact a professional plumber for installation guidance.
4. Can I replace a Delta shower handle without calling a plumber?
Yes, it is possible to replace a Delta shower handle without calling a plumber, especially if you have some basic plumbing knowledge and the right tools. Most Delta shower handles can be easily removed and replaced following the instructions provided in the user manual or by following online tutorials. However, if you are unsure or encounter any difficulties, it is always best to consult a professional plumber to ensure proper installation and prevent any damage.
5. Where can I find replacement parts for my Delta shower handle?
You can find replacement parts for your Delta shower handle at various places, including:
- Delta authorized dealers or retailers
- Online plumbing supply stores
- Delta’s official website
Make sure to have the model number or product specifications of your Delta shower handle when searching for replacement parts to ensure compatibility. It is also recommended to consult the user manual or contact Delta customer service for assistance in finding the correct replacement parts.
6. How do I contact Delta customer service?
You can contact Delta customer service by:
- Visiting Delta’s official website and filling out a contact form
- Calling their customer service hotline
- Checking the user manual or packaging of your Delta product for contact information
Delta customer service representatives will be able to assist you with any questions or concerns you may have regarding your Delta shower handle or any other Delta products.
FAQ
What is an Allen wrench?
An Allen wrench, also known as a hex key, is a tool used to tighten or loosen screws with hexagonal sockets.
How do I know what size of Allen wrench I need for a Delta shower handle?
To determine the size of Allen wrench you need for a Delta shower handle, you can refer to the user manual or contact Delta customer support for assistance. They will be able to provide you with the specific size required for your shower handle.
Can I use any size of Allen wrench for a Delta shower handle?
No, you cannot use any size of Allen wrench for a Delta shower handle. Each Delta shower handle may require a specific size of Allen wrench, and using the wrong size can damage the handle or lead to improper installation.
Where can I purchase the correct size of Allen wrench for a Delta shower handle?
You can purchase the correct size of Allen wrench for a Delta shower handle at hardware stores, home improvement stores, or online retailers that specialize in tools and hardware. Make sure to check the specific size required for your Delta shower handle before making a purchase.
Video

Meet Harrison Clayton, a distinguished author and home remodeling enthusiast whose expertise in the realm of renovation is second to none. With a passion for transforming houses into inviting homes, Harrison's writing at https://thehuts-eastbourne.co.uk/ brings a breath of fresh inspiration to the world of home improvement. Whether you're looking to revamp a small corner of your abode or embark on a complete home transformation, Harrison's articles provide the essential expertise and creative flair to turn your visions into reality. So, dive into the captivating world of home remodeling with Harrison Clayton and unlock the full potential of your living space with every word he writes.


