Step-by-Step Guide: How to Use a Spark Plug Wrench

Changing spark plugs is an essential part of maintaining your car’s engine and ensuring it runs smoothly. However, it can be a challenging task if you don’t have the right tools. One tool that every car owner should have is a spark plug wrench. In this step-by-step guide, we will walk you through how to use a spark plug wrench to safely and efficiently change your spark plugs.
Step 1: Choose the right spark plug wrench
Before you begin, make sure you have the correct spark plug wrench for your specific engine. Spark plug wrenches come in various sizes and configurations, so it’s important to choose one that fits your spark plugs snugly. Refer to your car’s manual or consult a mechanic if you’re unsure about the correct spark plug wrench to use.
Step 2: Prepare your car
Park your car in a safe and well-lit area. Engage the parking brake and gather all the necessary tools, including your spark plug wrench, spark plugs, and any other required materials. Make sure the engine is cool before proceeding.

Step 3: Locate the spark plugs
Open the hood of your car and locate the spark plugs. They are typically found on top of the engine and are covered by a rubber or plastic boot. Consult your car’s manual if you’re having trouble finding them. Once you’ve located the spark plugs, inspect them for any signs of damage or wear. If they appear worn out or damaged, it’s time to replace them.
Step 1: Gathering the necessary tools
Before you begin using a spark plug wrench, it’s important to gather all the necessary tools and equipment. Having the right tools will make the process easier and more efficient.
Here is a list of the tools you will need:
- Spark plug wrench
- New spark plugs
- Gloves
- Safety glasses
- Ratchet
- Socket set
- Spark plug gap tool
- Torque wrench
- Anti-seize compound
- Wire brush
Having all these tools ready before you start will save you time and prevent frustration during the process.

Step 2: Preparing your vehicle
Before using a spark plug wrench, it’s important to prepare your vehicle to ensure a safe and efficient process. Follow these steps to get your vehicle ready:
- Park your vehicle on a flat surface: Find a level and stable area to park your vehicle. This will ensure that it doesn’t roll or shift while you are working on it.
- Turn off the engine: Make sure to turn off the engine and allow it to cool down completely. This will prevent any accidental starts or injury during the process.
- Disconnect the battery: Use a wrench or socket set to disconnect the negative battery cable. This will prevent any electrical shocks while working on the spark plugs.
- Locate the spark plug wires: Depending on your vehicle, the spark plug wires may be easily accessible or hidden beneath a plastic cover. Identify their location before proceeding.
- Remove any obstacles: If there are any components obstructing access to the spark plug wires, such as air filter housings or engine covers, remove them carefully.
- Clean the area: Use a clean rag or compressed air to remove any dirt or debris around the spark plug wires. This will prevent any particles from falling into the cylinders when removing the spark plugs.
- Inspect the spark plug wires: Check the condition of the spark plug wires for any signs of damage, such as cracks or tears. If necessary, replace them before continuing.
By following these steps to prepare your vehicle, you will ensure a smooth and safe process when using a spark plug wrench. Once your vehicle is ready, you can proceed to the next step of removing the spark plugs.
Step 3: Locating the spark plugs
Before you can remove the spark plugs, you’ll need to locate them in your vehicle’s engine. The exact location of the spark plugs can vary depending on the make and model of your vehicle, but they are most commonly found on the top or side of the engine.
Follow these steps to locate the spark plugs:

- Open the hood of your vehicle and secure it with the prop rod or hood latch.
- Look for a set of thick wires or hoses that are connected to the engine. These wires or hoses are typically attached to the spark plugs.
- If necessary, refer to your vehicle’s owner’s manual to find a diagram that shows the exact location of the spark plugs.
- Once you have identified the spark plug wires or hoses, follow them to locate the individual spark plugs.
- In some vehicles, you may need to remove a plastic cover or other components to access the spark plugs.
- Take note of the number and arrangement of the spark plugs, as you’ll need this information when installing new ones.
It’s important to exercise caution when working around the engine and electrical components. If you are unsure about locating the spark plugs, consult a professional mechanic or refer to your vehicle’s owner’s manual for guidance.
Step 4: Removing the spark plug wires
Once you have located the spark plug wires, you can proceed to remove them. It’s important to handle the wires with care to avoid damaging them. Follow these steps to remove the spark plug wires:
- Start by identifying the wire that is connected to the first spark plug. Each spark plug wire is typically labeled with a number or letter that corresponds to the cylinder it connects to.
- Grasp the boot firmly and twist it back and forth to break the seal. This will help loosen the wire from the spark plug.
- Once the seal is broken, gently pull the wire straight out. Avoid twisting or pulling on the wire itself, as this can damage the internal conductor.
- Repeat this process for each spark plug wire, working your way from one end of the engine to the other. Keep the wires organized to ensure they are installed correctly when you put everything back together.
It’s worth noting that some vehicles may have a protective cover or loom that holds the spark plug wires in place. In this case, you may need to remove the cover or loom before you can access the wires. Refer to your vehicle’s manual or consult a professional if you’re unsure about the specific steps for your vehicle.
Step 5: Attaching the spark plug wrench
Once you have removed the old spark plug, you are ready to attach the spark plug wrench to install the new one. Here is how you can do it:

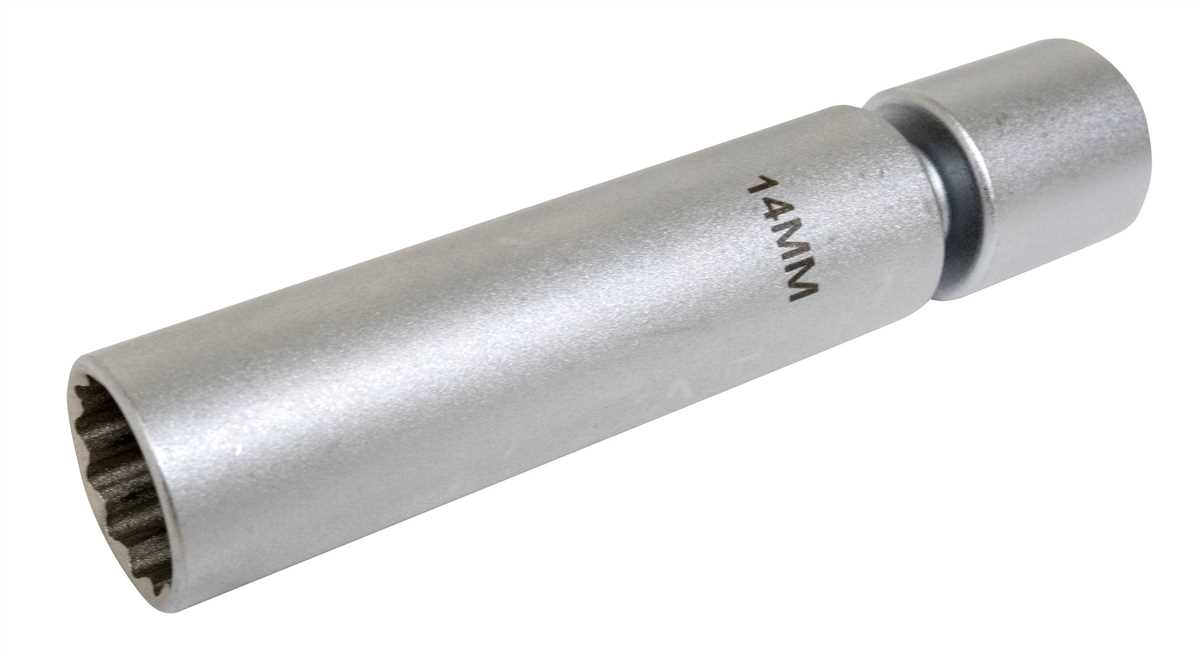
- Select the correct size of the spark plug wrench that matches the new spark plug. Spark plug wrenches come in different sizes, so make sure you choose the one that fits snugly around the hexagonal part of the plug.
- Slide the spark plug wrench onto the hexagonal part of the new spark plug. The wrench should fit securely around the plug without any extra wiggle room.
- Hold the spark plug and wrench together firmly to prevent any slipping or damage to the plug.
- Lower the new spark plug into the spark plug socket or spark plug hole. Make sure it is positioned correctly and aligned with the threads.
- Slowly turn the spark plug wrench in a clockwise direction to tighten the spark plug. Be careful not to overtighten as this can damage the threads or the spark plug itself.
- Once the spark plug is snugly in place, give it a final quarter turn with the wrench to ensure it is properly tightened.
Now that you have successfully attached the spark plug wrench and installed the new spark plug, you are ready to move on to the next step in the process.
Step 6: Loosening the spark plugs
Now that you have all the necessary tools and have prepared your engine, it’s time to start loosening the spark plugs. Follow these steps to complete this task:
- Ensure that the engine is completely cool before you begin.
- Locate the spark plug wires. Typically, they are attached to the spark plugs and run to the ignition coil or distributor.
- Using your spark plug wire pliers or a gentle twisting motion, remove the spark plug wires one at a time. Be careful not to yank or pull excessively, as this could damage the wires.
- Once the spark plug wires are removed, you can access the spark plugs. Use your spark plug socket and wrench to carefully loosen each spark plug counterclockwise. Make sure to keep track of which socket fits each spark plug, as they may vary in size.
- Apply steady pressure to the wrench and turn it slowly to avoid stripping the spark plug threads. If a spark plug is particularly tight, you can use a breaker bar for additional leverage, but be careful not to exert too much force.
- Continue loosening each spark plug until they are all fully loosened. Be sure to keep the spark plugs in a safe and organized place to avoid mixing them up.
By following these steps, you have successfully loosened the spark plugs in your engine. You are now ready to move on to the next step in the spark plug replacement process.
Step 7: Installing new spark plugs
Once you have removed the old spark plugs, it’s time to install the new ones. Follow these steps:
- Begin by applying a small amount of anti-seize compound to the threads of the new spark plug. This will help prevent the plug from seizing in the cylinder head.
- Gently thread the spark plug into the spark plug housing. Make sure to start it by hand to avoid cross-threading.
- Once the spark plug is snug, use your spark plug wrench to tighten it. Be careful not to overtighten, as this can damage the spark plug or cylinder head.
- Repeat steps 1-3 for each of the remaining spark plugs.
- Double-check that all the spark plugs are securely tightened.
Now that you have installed the new spark plugs, you can move on to the next step in the process.

Step 8: Replacing the spark plug wires

Replacing the spark plug wires is an important part of maintaining your vehicle’s ignition system. Over time, the wires can become worn or damaged, leading to decreased performance and potential engine misfires. Here is a step-by-step guide on how to replace the spark plug wires.
- Start by locating the spark plug wires. They are usually connected to the distributor cap or ignition coil at one end and the spark plugs at the other end.
- Before removing the old spark plug wires, it is recommended to work on one wire at a time to avoid mixing them up. This will make the installation of the new wires easier.
- Gently twist the spark plug wire boot at the distributor cap or ignition coil to break the seal. Be careful not to pull on the wire itself, as this can damage the connection.
- After breaking the seal, firmly pull the spark plug wire off the distributor cap or ignition coil. If the wire is difficult to remove, you can use a spark plug wire removal tool or a pair of pliers with insulated handles to grip the boot and wiggle it back and forth while pulling.
- Once the old spark plug wire is removed, compare it to the new wire to ensure you have the correct replacement.
- Apply a small amount of dielectric grease to the inside of the spark plug wire boot. This will help create a waterproof seal and aid in the removal of the wire in the future.
- Insert the new spark plug wire onto the distributor cap or ignition coil until it clicks into place. Make sure it is fully seated and secure.
- Repeat the process for each spark plug wire, one at a time, until all the wires have been replaced.
- Once all the new spark plug wires are installed, check their connections to ensure they are secure. Gently tug on each wire to make sure it is properly seated.
Replacing the spark plug wires can help restore your vehicle’s ignition system’s performance and prevent potential engine issues. It is recommended to consult your vehicle’s manual for any specific instructions or precautions before attempting this task.
FAQ
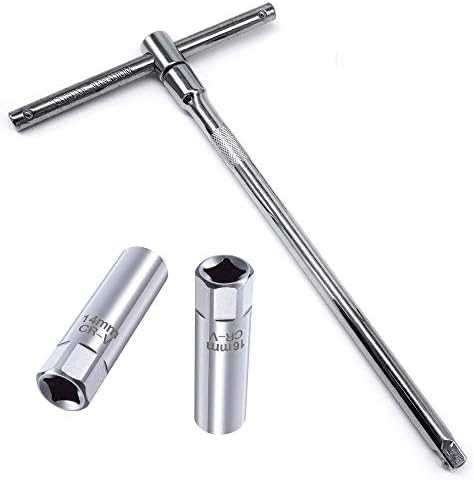
What is a spark plug wrench?
A spark plug wrench is a special tool used to remove and install spark plugs in vehicles or machinery.
Why do I need a spark plug wrench?
You need a spark plug wrench to easily and safely remove and install spark plugs in your vehicle or machinery. Using the right tool ensures proper and secure installation of spark plugs.

How do I choose the right spark plug wrench?
To choose the right spark plug wrench, you need to consider the size and type of spark plugs in your vehicle or machinery. Check the manufacturer’s specifications or consult a professional for the correct tool size.
Can I use a regular wrench instead of a spark plug wrench?
While it is possible to use a regular wrench, it is recommended to use a spark plug wrench. A spark plug wrench is specifically designed for spark plugs, making it easier and safer to use. It also helps prevent damage to the spark plug or engine.
Are there any safety precautions I should take when using a spark plug wrench?
Yes, there are some safety precautions to take when using a spark plug wrench. Ensure the engine is cool before working on the spark plugs to avoid burns. Disconnect the spark plug wire to prevent accidental ignition. Use caution when applying force to prevent hand or finger injuries.
Do I need any additional tools to use a spark plug wrench?
In addition to a spark plug wrench, you may need a socket wrench or extension bar to reach the spark plugs in certain vehicles or machinery. It is also recommended to have anti-seize lubricant and a torque wrench for proper installation.

Video


Harrison Clayton
Meet Harrison Clayton, a distinguished author and home remodeling enthusiast whose expertise in the realm of renovation is second to none. With a passion for transforming houses into inviting homes, Harrison's writing at https://thehuts-eastbourne.co.uk/ brings a breath of fresh inspiration to the world of home improvement. Whether you're looking to revamp a small corner of your abode or embark on a complete home transformation, Harrison's articles provide the essential expertise and creative flair to turn your visions into reality. So, dive into the captivating world of home remodeling with Harrison Clayton and unlock the full potential of your living space with every word he writes.


