Step-by-step guide: How to remove a socket from an impact wrench

Removing a socket from an impact wrench may seem like a simple task, but it can be a bit tricky if you don’t know the right steps to follow. Whether you’re a professional mechanic or a DIY enthusiast, learning how to properly remove a socket from an impact wrench is important to ensure the safety of yourself and your tools.
First, it’s crucial to understand that an impact wrench is a powerful tool that applies a high amount of torque to loosen or tighten fasteners. It is commonly used in automotive repair and maintenance, as well as in construction and other applications that require heavy-duty fastening.
To remove a socket from an impact wrench, follow these step-by-step instructions:
- Step 1: Make sure the impact wrench is turned off and unplugged. Safety should always be your top priority when working with power tools.
- Step 2: Using a combination wrench or a socket wrench, loosen the retaining bolt or nut that secures the socket to the impact wrench. This bolt or nut is typically located at the end of the impact wrench where the socket attaches.
- Step 3: Once the retaining bolt or nut is loosened, you can remove it completely using a wrench or a pair of pliers. Be careful not to drop or lose the bolt or nut.
- Step 4: With the retaining bolt or nut removed, gently pull the socket away from the impact wrench. If the socket is stuck, you can use a rubber mallet or a block of wood to tap it loose.
- Step 5: Once the socket is removed, inspect it for any signs of wear or damage. If the socket is damaged, it should be replaced before further use.
By following these steps, you can safely and effectively remove a socket from an impact wrench. Remember to always exercise caution and wear appropriate protective gear when working with power tools.
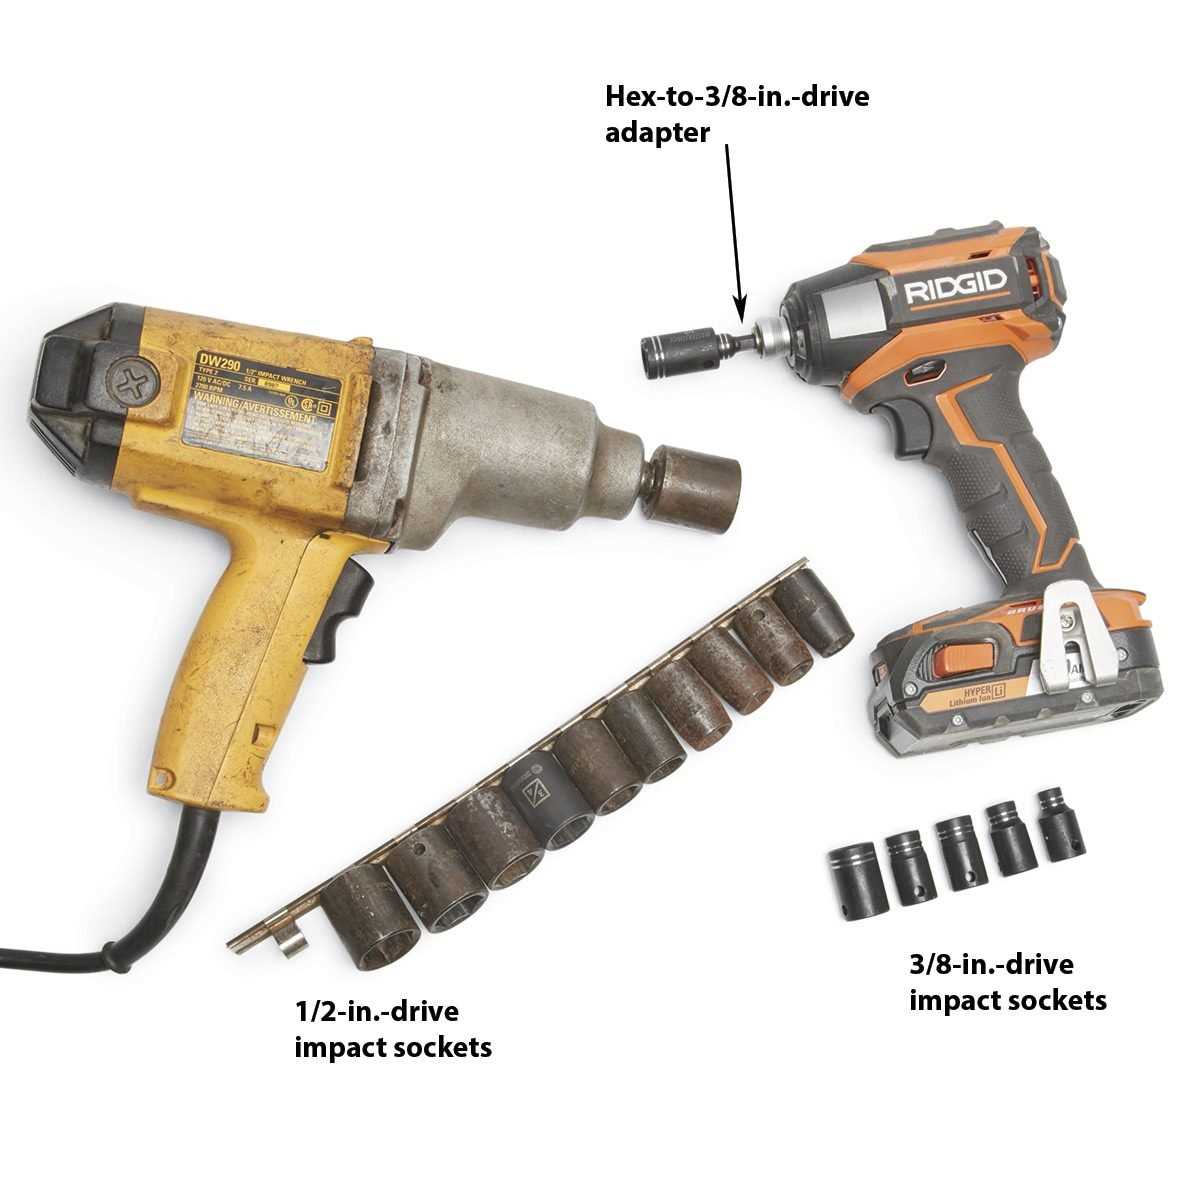
Gather the necessary tools
Before you begin the process of removing a socket from an impact wrench, it’s important to gather all the necessary tools. Having the right tools on hand will make the process much smoother and prevent any unnecessary delays.

Here are the tools you will need:
- Socket set: This is a set of sockets of different sizes that will allow you to remove different types of bolts and nuts. Make sure you have the right size socket for the task at hand.
- Impact wrench: This is the tool you will use to remove the socket. It’s important to have a high-quality impact wrench that is powerful enough to handle the job.
- Extension bar: An extension bar is a long metal rod that extends the reach of your impact wrench. It is useful for accessing tight spaces.
- Swivel adapter: A swivel adapter is a tool that allows your impact wrench to move in different directions, making it easier to remove sockets from hard-to-reach areas.
- Safety goggles: It’s important to protect your eyes from any flying debris or sparks that may occur during the socket removal process. Safety goggles will keep your eyes safe.
- Work gloves: To protect your hands and provide a better grip, it’s a good idea to wear work gloves while removing a socket from an impact wrench.
Having these tools ready ahead of time will ensure that you have everything you need to remove a socket from an impact wrench efficiently and safely.
Make sure the impact wrench is turned off
Before attempting to remove a socket from an impact wrench, it is crucial to ensure that the tool is completely turned off. This step is vital to prevent any accidental activation of the wrench, which could potentially lead to injury.
- Locate the power switch on the impact wrench and make sure it is in the “off” position.
- If the impact wrench is corded, unplug it from the power source to guarantee that there is no electricity flowing to the tool.
- If the impact wrench is battery-powered, remove the battery to disable the tool.
- Take a moment to double-check that the wrench is truly turned off before proceeding to the next steps.
By ensuring that the impact wrench is turned off, you minimize the risk of accidental activation and create a safer environment for removing the socket.

Locate the retaining pin or ring
Before removing the socket from an impact wrench, you need to locate the retaining pin or ring that holds the socket in place. This pin or ring is designed to prevent the socket from accidentally coming off while in use, ensuring safety and proper operation of the tool.
Depending on the model of your impact wrench, the retaining pin or ring may be located in different positions. Some impact wrenches have a retaining pin that needs to be pulled out, while others have a retaining ring that needs to be rotated or pushed in. Consult the user manual of your specific impact wrench to identify the exact location and method of removing the retaining pin or ring.
If your impact wrench has a retaining pin, it is usually located on the side of the socket housing. Use a small flathead screwdriver or a similar tool to carefully pull the retaining pin out. Be gentle to avoid damaging the pin or the housing of the impact wrench.
If your impact wrench has a retaining ring, it is typically located at the front of the socket housing. Look for a small ring that can be rotated or pushed in. Use your fingers or a pair of pliers to rotate the ring counterclockwise or push it in, depending on the specific design of your impact wrench.
Once you have located the retaining pin or ring, ensure that it is fully disengaged or removed. This will allow you to proceed with removing the socket from the impact wrench.

Note: Always refer to the user manual of your impact wrench for specific instructions on how to locate and remove the retaining pin or ring. Following the manufacturer’s guidelines will help ensure the safe and proper use of your impact wrench.
Use a punch or screwdriver to remove the retaining pin or ring
To remove the retaining pin or ring on your impact wrench, you will need to use a punch or screwdriver. This pin or ring holds the socket in place and prevents it from falling off during use. Follow these steps to remove it:
- Ensure that the impact wrench is turned off and disconnected from the power source.
- Inspect the socket and locate the retaining pin or ring. It is usually located on the side of the socket, near the square drive.
- Choose a punch or screwdriver that fits snugly into the hole or notch on the retaining pin or ring.
- Insert the punch or screwdriver into the hole or notch and apply pressure to one side of the pin or ring.
- Rotate the punch or screwdriver to push the pin or ring out of its groove.
- Continue applying pressure and rotating until the pin or ring is completely dislodged.
- Once the pin or ring is removed, the socket should slide off the square drive of the impact wrench.
Be careful when removing the pin or ring, as it may be under tension or spring-loaded. Keep your fingers clear of any movable parts to avoid injury.
If you encounter any difficulties or the retaining pin or ring is stubbornly stuck, you may need to apply some penetrating oil or use pliers to get a better grip on the pin or ring for removal.

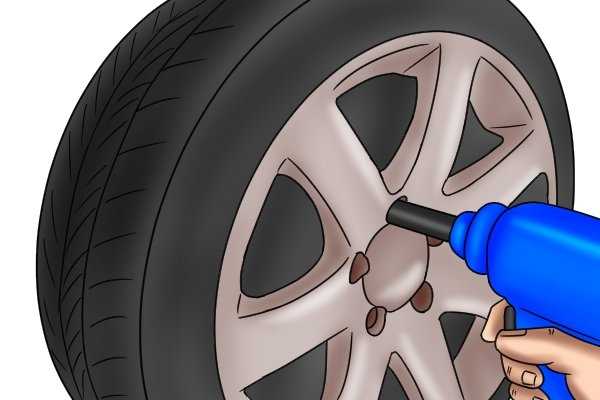
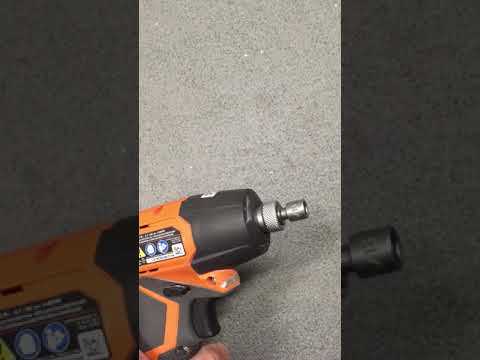
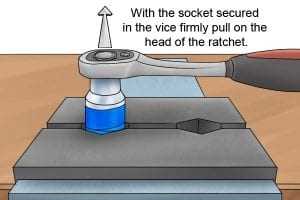
Slide the socket off the impact wrench
To remove the socket from your impact wrench, follow these steps:
- Make sure the impact wrench is turned off and disconnected from any power source.
- Hold the impact wrench firmly in one hand, making sure you have a secure grip on the tool.
- With your other hand, grasp the socket firmly by its base.
- Gently wiggle the socket to loosen it from the impact wrench.
- Slide the socket off the end of the impact wrench.
- If the socket is tightly stuck, you can try tapping the back of the socket gently with a rubber mallet to loosen it.
- Once the socket is removed, inspect it for any damage or wear. It’s a good idea to clean the socket and lubricate it before reusing it to ensure optimum performance and longevity.
That’s it! You have successfully slid the socket off your impact wrench. Now you can replace it with a different socket or store it for future use.
Inspect the socket and impact wrench for any damage
Before removing a socket from an impact wrench, it is important to inspect both the socket and the wrench for any signs of damage. This will help ensure safe and effective use of the tools and prevent any accidents or injuries. Here are some steps to follow when inspecting the socket and impact wrench:
- Check the socket:
- Examine the socket for any cracks, chips, or other visible damage.
- Look for any signs of wear or discoloration on the socket.
- Ensure that the socket is the correct size and type for the task at hand.
- Inspect the impact wrench:
- Check the housing of the impact wrench for any cracks or dents.
- Make sure that all buttons and switches are functioning properly.
- Check the cord or air hose for any cuts, frays, or other damage.
- Inspect the trigger mechanism for any signs of wear or malfunction.
It is important to note that using a damaged socket or impact wrench can lead to unsafe operation and potential damage to the tool or workpiece. If any damage is found during the inspection, it is recommended to replace the damaged part before proceeding with any work.

Clean the socket and impact wrench
After removing the socket from the impact wrench, it is important to clean both the socket and the impact wrench to maintain their optimal performance. Here are the steps to clean them:
Cleaning the socket:
- Inspect the socket for any build-up of dust, debris, or grease.
- If there is any visible dirt on the socket, use a brush to remove it.
- Wipe the exterior of the socket with a clean cloth to remove any remaining residue.
- If the socket is greasy, soak it in a degreasing solution for a few minutes.
- Scrub the socket gently using a toothbrush or a small brush to remove the grease.
- Rinse the socket with clean water to remove any degreasing solution residue.
- Dry the socket with a clean cloth or let it air dry completely before reassembly.
Cleaning the impact wrench:
- Disconnect the impact wrench from any power source to ensure safety.
- Wipe the exterior of the impact wrench with a clean, dry cloth to remove any dirt or dust.
- If there is any debris stuck in the wrench mechanism, use a brush to remove it.
- If the impact wrench is greasy or has residue, use a degreasing solution to clean it.
- Apply the degreasing solution to a cloth and wipe the impact wrench thoroughly.
- Use a toothbrush or a small brush to reach into crevices and remove any remaining dirt or grease.
- Rinse the impact wrench with clean water to remove any degreasing solution residue.
- Dry the impact wrench with a clean cloth or let it air dry completely before reassembly.
By regularly cleaning the socket and impact wrench, you can ensure their longevity and optimal performance. Remember to always follow the manufacturer’s instructions for cleaning and maintenance.

Reassemble the impact wrench and test it
Once you have successfully removed the socket from your impact wrench, it is time to reassemble the tool and make sure it is working properly. Follow these steps to reassemble the impact wrench:
- Gather the parts: Collect all the components you took apart during the disassembly process. This may include the socket, the detent pin, the retaining ring, and any other parts you removed.
- Inspect and clean: Before reassembling, carefully inspect all the parts for any damage or wear. Clean any dirt or debris that may have accumulated on the components.
- Insert the socket: Place the socket onto the square drive of the impact wrench. Make sure it is securely in place.
- Install the detent pin: If your impact wrench has a detent pin, insert it into the hole on the square drive. The detent pin helps hold the socket in place.
- Attach the retaining ring: If your impact wrench uses a retaining ring, install it over the socket. Use the appropriate tools, such as snap ring pliers, to secure the retaining ring in place.
- Secure any other components: If you removed any other parts during the disassembly process, make sure to reattach them in their proper places. Refer to the manufacturer’s instructions or a service manual for guidance.
Once you have reassembled the impact wrench, it is important to test it before using it. Here’s how you can test your tool:
- Power on the impact wrench: Make sure the tool is properly connected to a power source or that the battery is charged.
- Select an appropriate setting: Set the impact wrench to an appropriate torque setting for the task you want to perform. Refer to the manufacturer’s instructions for guidance.
- Test the tool: Press the trigger or switch to activate the impact wrench. Listen for any unusual sounds or vibrations. Apply gentle pressure against a suitable surface to check if the impact wrench is delivering the expected power and torque.
- Make adjustments if necessary: If the impact wrench is not functioning correctly, double-check the assembly to ensure all components are properly installed. Consult the manufacturer’s instructions or a service manual for troubleshooting steps.
By following these steps to reassemble and test your impact wrench, you can ensure that it is ready to be used for your next project. Remember to always prioritize safety and consult the manufacturer’s instructions or seek professional assistance if needed.
FAQ
What tools do I need to remove a socket from an impact wrench?
To remove a socket from an impact wrench, you will need a few tools. These include a socket set, a ratchet, an extension bar, a hammer, and a pair of pliers or a wrench.

Can I remove a socket from an impact wrench without any tools?
No, you cannot remove a socket from an impact wrench without any tools. You will need the appropriate tools, such as a socket set and a ratchet, to properly remove the socket from the impact wrench.
Is it difficult to remove a socket from an impact wrench?
Removing a socket from an impact wrench is generally a straightforward process and should not be too difficult. As long as you have the necessary tools and follow the proper steps, you should be able to remove the socket without much trouble. However, if the socket is stuck or there are any complications, it may require more effort and time to remove it.
Video


Meet Harrison Clayton, a distinguished author and home remodeling enthusiast whose expertise in the realm of renovation is second to none. With a passion for transforming houses into inviting homes, Harrison's writing at https://thehuts-eastbourne.co.uk/ brings a breath of fresh inspiration to the world of home improvement. Whether you're looking to revamp a small corner of your abode or embark on a complete home transformation, Harrison's articles provide the essential expertise and creative flair to turn your visions into reality. So, dive into the captivating world of home remodeling with Harrison Clayton and unlock the full potential of your living space with every word he writes.


