Step-by-Step Guide: How to Calibrate Your Snap-on Torque Wrench

Keeping your tools in proper working condition is essential for any professional mechanic or handy person. One tool that requires regular calibration is the torque wrench. A torque wrench is used to accurately apply a specific amount of force to a fastener, ensuring that it is tightened to the correct torque value. Over time, torque wrenches may lose their accuracy, which can lead to incorrect torque settings and potential damage to your work. That’s why it’s important to regularly calibrate your torque wrench to ensure accurate and reliable performance.
To calibrate your Snap-on torque wrench, you will need a few tools and a willingness to follow a step-by-step process. This guide will walk you through the calibration process, from gathering the necessary materials to verifying the accuracy of your torque wrench. By following these steps, you can ensure that your torque wrench is calibrated correctly and ready for any project.
First, you will need to gather the materials necessary for calibration. You will need a torque wrench calibration tool, which is a device designed specifically for testing the accuracy of torque wrenches. These calibration tools are available for purchase or may be available for rental from a tool supplier. Additionally, you will need a reliable and accurate torque wrench to compare against the one you are calibrating. Having a torque wrench with a known accuracy will allow you to verify the calibration of your Snap-on torque wrench.
Once you have gathered the necessary materials, you can begin the calibration process. Start by setting up a safe and suitable workspace where you can perform the calibration. It’s important to have a clean and level surface to work on, as any inconsistencies can affect the calibration results. Ensure that you have adequate lighting and ventilation in your workspace to promote safe and accurate calibration. Additionally, make sure you have read and understood all safety precautions and instructions provided by the torque wrench manufacturer and the calibration tool manufacturer.
Section 1: Prepare Your Tools
Before you begin calibrating your Snap-on torque wrench, make sure you have the following tools handy:

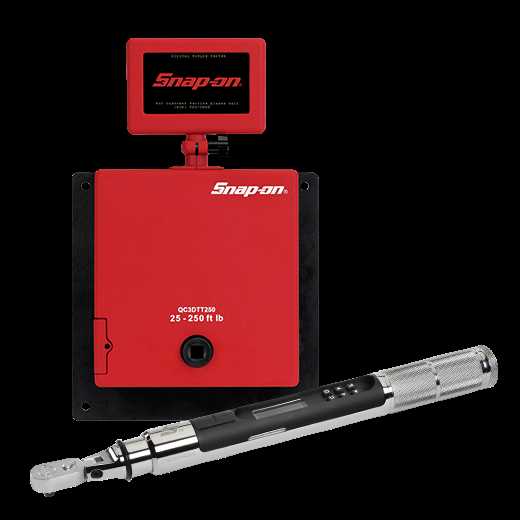
- A torque wrench calibration tester
- A set of open-end wrenches or socket set
- A calibrated reference torque wrench (preferably from a reputable calibration lab)
- A clean and level work surface
- A torque wrench adjustment manual (provided with your Snap-on torque wrench)
- A torque value chart or specification sheet for the specific torque you want to calibrate
The torque wrench calibration tester is necessary to verify the accuracy of your Snap-on torque wrench. The open-end wrenches or socket set will be used to adjust the torque settings on your wrench. The calibrated reference torque wrench will serve as a benchmark for comparison during the calibration process.
Having a clean and level work surface is important to ensure accurate and consistent measurements. Any uneven surfaces or debris can affect the results of your calibration.
The torque wrench adjustment manual is provided by Snap-on and contains detailed instructions on how to properly adjust the torque settings on your specific wrench model. It is essential to have this manual on hand to ensure you follow the correct steps.
The torque value chart or specification sheet is necessary to determine the target torque for the calibration. This information can be found in the manual for the specific project or can be obtained from the manufacturer’s website or customer support.
Gather Necessary Equipment
Before calibrating your Snap-on torque wrench, make sure you have the following equipment:

- Calibration Standard: A known and accurate torque measurement device is required to compare the readings of your torque wrench. This can be a torque tester or a certified calibration device.
- Socket and Extension: Choose the correct size socket and extension that matches the head of your torque wrench. Make sure they are clean and free of any debris.
- Torque Wrench Calibration Tool: Some torque wrenches may require a specialized calibration tool to make the necessary adjustments. Check the user manual or contact Snap-on for specific requirements.
- Adjustment Tools: You may need various tools like screwdrivers or wrenches to make adjustments to your torque wrench during the calibration process.
- Personal Protective Equipment (PPE): Safety glasses and gloves are recommended to protect yourself during the calibration process.
- Clean Workspace: Ensure you have a clean and clutter-free workspace to perform the calibration. This will prevent any accidental damage to your equipment and provide a clear area to work in.
Ensure Proper Working Conditions
Before calibrating your Snap-on torque wrench, it is important to ensure that you are working in the proper conditions. This will help to ensure accurate results and prevent any potential safety hazards.
1. Select a Suitable Workspace
- Choose a clean and well-lit work area.
- Make sure the workspace is free from clutter and any potential obstructions.
- Ensure that the area is level and stable, providing a solid foundation for your calibration process.
2. Maintain Optimal Temperature
- Avoid calibrating your torque wrench in extreme temperatures or in direct sunlight, as this can affect the accuracy of the measurements.
- Ensure that the temperature in the workspace is within the recommended range for your specific torque wrench model.
3. Check the Torque Wrench Condition
- Inspect the torque wrench for any visible damage or wear.
- Ensure that all components, such as the handle, ratchet, and indicator, are functioning properly.
- If you notice any defects or issues, consider having the torque wrench inspected and repaired by a qualified professional before calibrating.
4. Prepare Necessary Tools and Equipment
- Gather all the required tools and equipment for the calibration process, as specified in the torque wrench user manual.
- Ensure that you have the necessary calibration weights or devices, as well as any additional accessories.
- Verify that all tools and equipment are in good working condition and properly calibrated.
By ensuring proper working conditions, you will be able to calibrate your Snap-on torque wrench accurately and safely. This will help to maintain its performance and prolong its lifespan, ensuring precise torque measurements in your future applications.
Section 2: Perform Preliminary Checks
Before calibrating your Snap-on torque wrench, it is important to perform some preliminary checks to ensure accurate calibration results. These checks will help you identify any issues or problems that might affect the calibration process.
Step 1: Check Visual Condition
Inspect the torque wrench for any signs of damage or wear. Ensure that all the components, such as the handle, scale, and ratchet, are in good working condition. Look for any cracks, dents, or signs of corrosion.
Note: If you find any visible damages, it is recommended to have your torque wrench repaired or replaced before proceeding with calibration.

Step 2: Check for Loose Fasteners
Tighten all the fasteners, such as screws and bolts, on the torque wrench. Loose fasteners can affect the accuracy of the calibration process. Use an appropriate tool, such as a screwdriver or wrench, to ensure that all fasteners are securely tightened.
Step 3: Clean the Torque Wrench
Make sure the torque wrench is clean and free from dirt, debris, or any substances that may affect its performance. Use a cloth or brush to remove any dirt or residue from the wrench’s surfaces. Additionally, you can use a mild detergent or cleaning solution to clean the torque wrench if necessary.
Step 4: Lubricate Moving Parts
Apply a small amount of lubricant, such as oil or grease, to the moving parts of the torque wrench. This will help ensure smooth operation during the calibration process and improve the overall performance of the wrench.
Step 5: Check for Proper Calibration Tools
Verify that you have the appropriate calibration tools required for your Snap-on torque wrench. These tools may include a torque tester, calibration standards, and any other accessories recommended by the manufacturer.

Step 6: Check Calibration Interval
Check the recommended calibration interval for your torque wrench. Calibrations should be performed regularly to maintain the accuracy and reliability of the wrench. If your torque wrench is due for calibration, make sure to proceed with the calibration process.
By following these preliminary checks, you can ensure that your Snap-on torque wrench is in good condition and ready for calibration. These steps will help ensure accurate results and improve the overall performance of your torque wrench.
Inspect Torque Wrench for Damage
Before calibrating your Snap-on torque wrench, it is important to inspect it for any signs of damage. A damaged torque wrench can provide inaccurate readings and compromise the safety of your work.
Here are the steps to inspect your torque wrench for damage:

- Visually examine the torque wrench for any signs of physical damage such as dents, cracks, or bent components. If you notice any of these issues, do not attempt to calibrate or use the torque wrench.
- Check the handle and grip of the torque wrench. Make sure it is securely attached and does not have any loose components. A loose handle can affect the accuracy of the torque readings.
- Inspect the torque scale on the wrench. Ensure that it is clear and easy to read. If the scale is worn out or illegible, it may be difficult to set the desired torque value accurately.
- Verify that the ratchet mechanism is smooth and functions properly. Test the ratchet by applying pressure and observing if it engages and disengages smoothly. A faulty ratchet can affect the torque readings and may require repair or replacement.
- Check the calibration label or sticker on the torque wrench. Ensure that it is legible and not expired. If the calibration label is missing or past its expiration date, the torque wrench may need to be recalibrated.
Note: If you encounter any damage or issues during the inspection, it is recommended to contact the manufacturer or a qualified technician for further assistance. Using a damaged torque wrench can lead to inaccurate results and potentially cause damage or injury.
By thoroughly inspecting your torque wrench for any damage, you can ensure that it is in proper working condition before proceeding with the calibration process.
Test Torque Wrench Accuracy
Once you have completed the calibration process for your Snap-on torque wrench, it is important to test its accuracy to ensure that it is measuring torque correctly. Here is a step-by-step guide on how to test the accuracy of your torque wrench:
Materials Needed:
- A known reference torque wrench
- A torque calibration tool or device
- A torque verification tool or device
Steps to Test Torque Wrench Accuracy:
- Select a test point on the torque calibration tool or device that matches the range of your torque wrench.
- Set your torque wrench to the desired torque value for the test.
- Apply torque to the calibration tool or device using your torque wrench.
- Use the torque verification tool or device to measure the applied torque and compare it to the torque value set on your wrench.
- If the measured torque is within the acceptable range of the set torque value, your torque wrench is accurate. If not, it may need to be recalibrated.
Tips and Considerations:
- It is recommended to perform this test at various torque values within the range of your torque wrench to ensure its accuracy throughout its range.
- Make sure to follow the manufacturer’s instructions for using the torque calibration and verification tools or devices.
- Repeat this test periodically to ensure the ongoing accuracy of your torque wrench.
- If you find that your torque wrench is consistently inaccurate, it may be necessary to send it in for professional calibration or repair.
By following these steps and regularly testing the accuracy of your Snap-on torque wrench, you can ensure that it is providing reliable and precise torque measurements for your projects.
Section 3: Adjust Torque Wrench Settings
Step 1: Identify the Adjustment Mechanism
Before adjusting the torque wrench, it is important to identify the adjustment mechanism. Different torque wrench models may have different adjustment mechanisms, such as a twist-lock collar or a micrometer-style adjustment knob. Refer to the user manual or manufacturer’s instructions to locate the specific adjustment mechanism for your torque wrench.
Step 2: Set the Desired Torque Value
Once you have identified the adjustment mechanism, set the desired torque value. This value should be based on the specifications provided by the manufacturer or the requirements of the task you are working on. Use the appropriate units of measurement, such as foot-pounds or Newton-meters, and ensure that the torque value is within the range of your torque wrench.
Step 3: Unlock the Adjustment Mechanism
If your torque wrench has a twist-lock collar, rotate it counterclockwise to unlock the adjustment mechanism. For torque wrenches with a micrometer-style adjustment knob, locate the locking lever or button and press or slide it to unlock the adjustment mechanism. Refer to the user manual or manufacturer’s instructions for specific instructions on unlocking the adjustment mechanism.
Step 4: Adjust the Torque Setting
With the adjustment mechanism unlocked, you can now adjust the torque setting. For a twist-lock collar, hold the torque wrench handle firmly and rotate the collar clockwise or counterclockwise to increase or decrease the torque value respectively. For a micrometer-style adjustment knob, turn the knob clockwise or counterclockwise to increase or decrease the torque value. Pay attention to the torque scale or markings on the torque wrench to set the desired torque value accurately.
Step 5: Lock the Adjustment Mechanism
After adjusting the torque setting, lock the adjustment mechanism to prevent any unintentional changes. If your torque wrench has a twist-lock collar, rotate it clockwise to lock the adjustment mechanism. For torque wrenches with a micrometer-style adjustment knob, slide or press the locking lever or button to secure the adjustment mechanism. Ensure that the adjustment mechanism is locked securely to maintain the accuracy of the torque wrench.
Step 6: Verify the Torque Setting

Once the adjustment mechanism is locked, it is essential to verify the torque setting. Use a torque tester or a calibrated torque wrench to confirm that the torque wrench is now set to the desired torque value. Apply the torque wrench to a calibration device or tool and check if the measured torque matches the set value. Repeat the adjustment process if necessary to achieve the desired torque setting accurately.
Step 7: Document the Torque Setting
Finally, document the torque setting for future reference. This step is especially important if you frequently use the torque wrench or if multiple users share the tool. Record the torque value, the date of calibration, and any other relevant information in a logbook or maintenance record. This documentation helps ensure that the torque wrench remains calibrated and can be easily tracked for accuracy.
Identify Torque Specifications
Before you start calibrating your Snap-on torque wrench, it’s essential to identify the torque specifications you’ll be working with. Torque specifications can be found in various sources, such as the equipment manual, manufacturer’s specifications, or engineering guidelines. Here are the steps to follow:
- Refer to the equipment manual: If you’re working with a specific piece of equipment, consult the equipment manual for the torque specifications. The manual typically provides a table or a list of torque values for different fasteners or components.
- Check manufacturer’s specifications: If the equipment manual doesn’t provide the torque specifications, you can usually find them in the manufacturer’s specifications. Visit the manufacturer’s website or contact their customer support for the required torque values.
- Consult engineering guidelines: In some cases, engineering guidelines or industry standards may determine the torque specifications. These guidelines are commonly used in industries like automotive, aerospace, or construction. Check if there are any specific engineering guidelines related to the equipment or fasteners you’re working with.
It’s crucial to use the correct torque specifications to ensure the accuracy and safety of your work. Using incorrect torque values may result in under or over-tightened fasteners, leading to equipment failure, damage, or even safety hazards. Take the time to identify the proper torque specifications before proceeding with the calibration process.
Adjust Torque Wrench to Desired Setting

Once you have verified the accuracy of your Snap-on torque wrench, you may need to adjust it to your desired torque setting for your specific job or application. Here are the steps to follow:
- Identify the torque adjustment mechanism: Depending on the model of your Snap-on torque wrench, the torque adjustment mechanism may be located on the handle or near the head of the wrench. Refer to the manufacturer’s instructions or user manual for the specific location.
- Loosen the torque adjustment mechanism: Use the appropriate tool or method to loosen the torque adjustment mechanism. This may involve turning a dial, sliding a lever, or using a hex key to loosen a screw. Ensure that the mechanism is fully loosened so that it can be adjusted freely.
- Set the desired torque: Using the torque specifications required for your job or application, set the desired torque by turning the adjustment mechanism clockwise or counterclockwise. Some torque wrenches may have markings or indicators to help you set the precise torque value.
- Tighten the torque adjustment mechanism: Once you have set the desired torque, tighten the torque adjustment mechanism to secure the setting. This may involve turning a dial, sliding a lever back into place, or tightening a screw with a hex key. Ensure that the mechanism is securely tightened to prevent any accidental changes to the torque setting.
- Verify the torque setting: To ensure that the torque wrench is properly adjusted to the desired setting, you can use a torque tester or a calibrated torque wrench to compare the readings. Apply the torque wrench to a calibration device and check if the torque reading matches the desired setting. Make any necessary adjustments if the readings do not match.
By following these steps, you can easily adjust your Snap-on torque wrench to your desired torque setting. Always refer to the manufacturer’s instructions or user manual for your specific torque wrench model for the most accurate and detailed instructions.
Section 4: Perform Calibration Test

After preparing your Snap-on torque wrench for calibration, it’s time to perform the actual calibration test. This step is crucial to ensure the accuracy of your torque wrench and maintain its reliability. Follow the steps below to perform the calibration test:
- Attach the torque tester or torque analyzer to the square drive of your torque wrench.
- Make sure the torque tester is properly calibrated and set to the desired torque value.
- Select an appropriate torque value to test your wrench against. This value should be within the torque range of your wrench.
- Hold the torque wrench securely using the appropriate gripping area.
- Apply the torque to the tester in a smooth, consistent manner.
- Observe and record the torque value displayed on the torque tester.
- Compare the recorded torque value with the target torque value.
If the recorded torque value is within an acceptable range of the target torque value, your torque wrench is considered calibrated. However, if the recorded torque value deviates significantly from the target torque value, your torque wrench may require adjustment or repair.
It is recommended to perform multiple calibration tests at different torque values to ensure the accuracy of your torque wrench across its entire range. Keep a record of the calibration results for future reference.
FAQ
Why is it important to calibrate a torque wrench?
Calibrating a torque wrench is important because it ensures that it is providing accurate torque readings. If a torque wrench is not calibrated, it may over-tighten or under-tighten bolts, which can result in damage to the bolt or the part being fastened.
How often should I calibrate my torque wrench?
The frequency of torque wrench calibration depends on its usage. For professional technicians who use the torque wrench daily, it is recommended to calibrate it every three to six months. For occasional users, it is recommended to calibrate the torque wrench once a year.
Can I calibrate my torque wrench at home?
It is possible to calibrate a torque wrench at home, but it is recommended to have it calibrated by a professional calibration service for accurate results. However, if you have a calibration kit and the necessary knowledge, you can attempt to calibrate it yourself. Just make sure to follow the manufacturer’s instructions carefully.
What tools do I need to calibrate a Snap-on torque wrench?
To calibrate a Snap-on torque wrench, you will need a torque tester or calibration machine, a calculator, a calibration kit (which includes a set of calibrated weights), and a socket or adapter that matches the size of your torque wrench.
What should I do if my torque wrench fails calibration?
If your torque wrench fails calibration, it is recommended to have it repaired or replaced. Continued use of a torque wrench that is not properly calibrated can lead to inaccurate torque readings and potential damage to fasteners or parts.
Can I use a torque wrench that is not calibrated?
Using a torque wrench that is not calibrated is not recommended. Without calibration, the torque readings provided by the wrench may not be accurate, which can lead to under-tightening or over-tightening of bolts. This can result in damage to the bolt or the part being fastened. It is important to ensure that your torque wrench is calibrated regularly for reliable and accurate torque measurements.
Video


Harrison Clayton
Meet Harrison Clayton, a distinguished author and home remodeling enthusiast whose expertise in the realm of renovation is second to none. With a passion for transforming houses into inviting homes, Harrison's writing at https://thehuts-eastbourne.co.uk/ brings a breath of fresh inspiration to the world of home improvement. Whether you're looking to revamp a small corner of your abode or embark on a complete home transformation, Harrison's articles provide the essential expertise and creative flair to turn your visions into reality. So, dive into the captivating world of home remodeling with Harrison Clayton and unlock the full potential of your living space with every word he writes.


