Step-by-Step Guide: How to Attach a Socket to an Impact Wrench

When it comes to using an impact wrench, one of the most important steps is attaching the socket. The socket is the tool that connects to the impact wrench and allows you to tighten or loosen nuts and bolts with ease. If you’re new to using an impact wrench or just need a refresher, this step-by-step guide will walk you through the process of attaching a socket to an impact wrench.
Step 1: Choose the Right Socket Size
Before attaching the socket to your impact wrench, it’s crucial to choose the right size socket for your job. Sockets come in a variety of sizes, usually measured in inches or millimeters. To determine the correct size, check the size markings on the nut or bolt you’ll be working with, and select a socket that matches. Using the wrong size socket can lead to stripped nuts or bolts and potential damage to your impact wrench.
Step 2: Insert the Socket
Once you have the correct socket size, it’s time to attach it to the impact wrench. To do this, simply line up the square drive of the socket with the square drive of the impact wrench. Apply gentle pressure and push the socket onto the drive until it clicks or locks into place. It’s important to ensure a secure fit to prevent the socket from slipping off during use.

Step 3: Test the Socket
After attaching the socket, it’s a good idea to test the connection before using the impact wrench. Give the socket a slight tug to make sure it’s securely attached and won’t come loose while in use. Additionally, rotate the socket a few times to confirm that it moves freely without any obstruction. If you notice any issues, double-check the fit and attachment of the socket to ensure it’s properly secured.
By following these step-by-step instructions, you’ll be able to attach a socket to an impact wrench with confidence. Remember to always choose the correct socket size, securely insert the socket onto the impact wrench, and test the connection before use. With the socket properly attached, you’ll be ready to tackle any fastening job with your impact wrench.
Step 1: Gather the necessary tools
Before you can attach a socket to an impact wrench, make sure you have the following tools on hand:
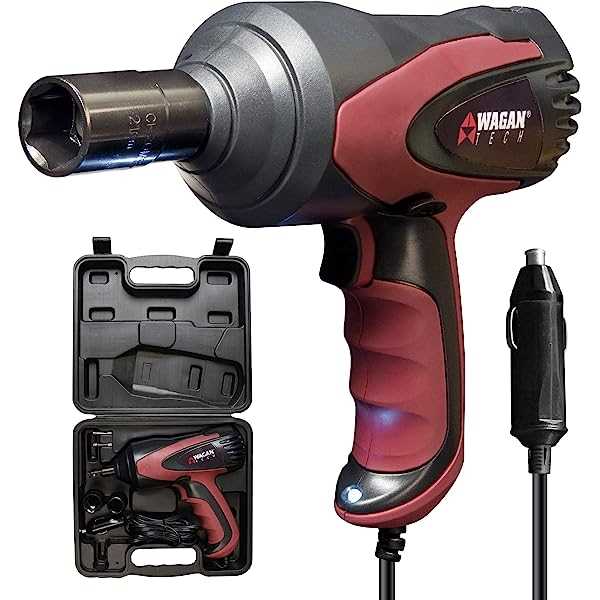
- Impact wrench
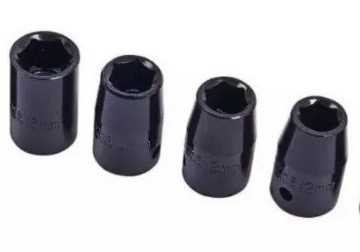
- Socket set
- Extension bar (optional, depending on the depth of the fastener)
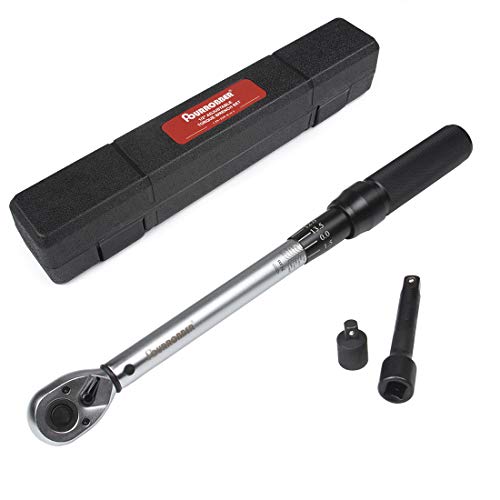
- Torque wrench (optional, for tightening the fastener to a specific torque)
An impact wrench is a powerful tool that is commonly used in automotive and construction industries to tighten or loosen fasteners with high torque. It is important to choose the appropriate size of socket to match the size of the fastener you will be working with. Socket sets typically come in a variety of sizes, so make sure you have the correct size socket for your specific task.

An extension bar may be necessary if the fastener you are working with is in a tight or hard-to-reach space. This will help you extend the reach of your impact wrench and socket.
A torque wrench is optional, but if you want to ensure that the fastener is tightened to a specific torque, it is a useful tool to have. This is especially important for tasks that require precise torque specifications, such as working on engines or assembling heavy machinery.
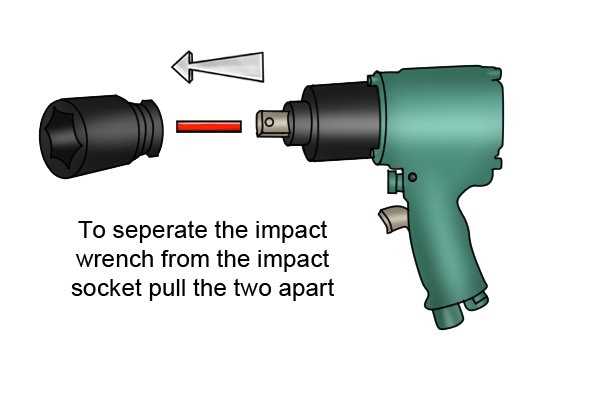
Step 2: Locate the square drive on the impact wrench
Once you have selected the appropriate socket for your job, the next step is to locate the square drive on the impact wrench. The square drive is the part of the wrench that the socket will attach to.
Most impact wrenches have a square drive located at the end of the tool. It is typically a standard size, such as 1/2 inch or 3/8 inch, although it can vary depending on the model. The square drive is designed to fit the corresponding square hole in the socket.
To locate the square drive, examine the end of the impact wrench. Look for a square-shaped recess or opening. It may be labeled with the drive size, or it may be indicated by markings or symbols. The square drive is usually surrounded by a collar or detent pin, which helps to secure the socket in place.

It is important to note that some impact wrenches have a detent pin system, which requires an additional step to secure the socket. If your impact wrench has a detent pin, you will need to locate it and ensure that it aligns with the corresponding hole in the socket. This will help to prevent the socket from becoming detached during use.
Once you have located the square drive and any detent pin, you are ready to proceed to the next step in attaching the socket to the impact wrench.
Step 3: Select the correct size socket
Once you have determined the type of socket you need for your impact wrench, it’s important to choose the correct size socket for the job. Using the wrong size socket can result in damage to both the socket and the impact wrench.
Here are the steps to selecting the correct size socket:
- Check the manual: Refer to the manual of your impact wrench to find out what size socket is recommended for the specific task you are performing.
- Measure the fastener: If you don’t have the manual or it doesn’t specify the socket size, you can measure the size of the fastener using a caliper or a ruler. Make sure to measure the diameter of the fastener in either inches or millimeters.
- Match the socket size: Once you have the measurement of the fastener, match it to the appropriate socket size. Most sockets are labeled with their size, so it should be easy to find the right one.
It’s important to note that sockets come in standard (SAE) and metric sizes. Make sure to use the correct type of socket based on the units of measurement you used to measure the fastener.

If you’re unsure about the size, it’s always better to choose a socket that is slightly smaller rather than larger. A loose socket can slip and cause damage, while a tight socket can be difficult to remove.
By following these steps and selecting the correct size socket, you can ensure a secure and efficient attachment of your socket to the impact wrench.
Step 4: Place the socket onto the square drive

Now that you have chosen the appropriate socket for your project, it’s time to attach it to the impact wrench. Follow these steps to properly place the socket onto the square drive:
- Ensure the impact wrench is in the off position. This will prevent any accidental activation while you’re attaching the socket.
- Hold the socket between your thumb and fingers. Position it so that the opening of the socket is facing up towards you.
- Locate the square drive on the impact wrench. This is the square-shaped opening at the end of the wrench where the socket will be inserted.
- Align the square drive with the opening of the socket. Gently press the socket onto the square drive until it fits securely.
It’s important to make sure the socket is securely attached to the square drive before using the impact wrench. This will prevent the socket from coming loose during operation, which could lead to injury or damage to your workpiece.

Step 5: Ensure the socket is securely attached
Once you have attached the socket to the impact wrench, it is important to ensure that it is securely attached. This will help prevent any accidents or injuries during use.
- Check the fit: First, make sure that the socket fits snugly onto the wrench. It should not be loose or wobbly.
- Tighten the socket: Use the appropriate method to tighten the socket onto the impact wrench. This may involve twisting it by hand or using a wrench to secure it in place. Ensure that it is tightened properly to ensure a secure fit.
- Test the stability: Once the socket is attached, give it a gentle tug to test its stability. It should not come off easily. If it feels loose, double-check the tightening method and make any necessary adjustments.
- Inspect for proper alignment: Take a moment to inspect the alignment of the socket on the impact wrench. It should be straight and aligned properly. If it appears skewed or misaligned, remove the socket and reattach it, ensuring proper alignment.
Remember, a securely attached socket is essential for safe and effective use of an impact wrench. Take the extra time to double-check its attachment before using the tool.
Step 6: Test the socket attachment
Once you have securely attached the socket to the impact wrench, it is important to test the attachment to ensure it is properly connected and functioning correctly. Follow these steps to test the socket attachment:
- Make sure the impact wrench is turned off and unplugged from any power source. Safety is always the top priority.
- Select the appropriate setting on the impact wrench for the task at hand. This could be a forward or reverse motion, depending on whether you need to tighten or loosen a fastener.
- Choose a fastener or bolt that matches the size of the socket you have attached. This will help you accurately test the attachment while avoiding any unnecessary damage.
- Place the socket over the fastener and make sure it fits securely. It should feel snug and not wobble or slip around.
- Tighten or loosen the fastener using the impact wrench. Apply steady pressure and observe the socket attachment as it engages with the fastener.
- If the socket attachment holds up well during the test and effectively completes the task, it is a good indication that it is properly attached and functioning correctly.
- If you notice any issues, such as the socket slipping or not properly engaging with the fastener, stop using the impact wrench and reattach the socket to ensure it is securely fitted.
Remember to always read the manufacturer’s instructions and safety guidelines before operating any power tools. Testing the socket attachment will help ensure your impact wrench performs optimally and provides safe and effective results.

Step 7: Use the impact wrench with the socket
Now that you have attached the socket to the impact wrench, it’s time to put it to use. Follow these steps to safely and effectively use the impact wrench with the socket:
- Make sure the socket is secure on the impact wrench by giving it a gentle tug.
- Position the socket onto the nut or bolt you want to loosen or tighten.
- Hold the impact wrench firmly with both hands.
- Apply pressure in the direction you want the nut or bolt to turn.
- Trigger the impact wrench by pressing the power button or lever.
- Allow the impact wrench to do the work, avoiding excessive force or overtightening.
- Continue using the impact wrench until the nut or bolt is loosened or tightened to your desired level.
- Release the power button or lever to stop the impact wrench.
- Remove the impact wrench from the nut or bolt.
It’s important to remember that the impact wrench is a powerful tool, so always exercise caution and wear appropriate protective gear, such as gloves and safety goggles. Additionally, ensure that you are using the correct socket size for your specific task to avoid damaging the tool or the fastener.
Step 8: Properly store the impact wrench and socket
Proper storage of your impact wrench and socket is essential to maintain their efficiency and longevity. Follow these steps to ensure you store them correctly:

- Clean the tools: Before storing, make sure to clean the impact wrench and socket thoroughly. Remove any dirt, dust, or oil residue using a clean cloth or brush. This step prevents the accumulation of debris and ensures the tools are ready for use in the future.
- Inspect for any damage: Carefully examine the impact wrench and socket for any signs of damage or wear. Check for cracks, chips, or worn-out parts. If you notice any issues, it is important to address them before storage or consult a professional for repair.
- Organize the tools: Find a designated area or toolbox to store your impact wrench and socket. Keeping them together prevents misplacement and makes it easier to access them when needed.
- Protective case or pouch: Consider using a protective case or pouch specifically designed for impact wrenches and sockets. These cases provide extra protection against impacts, dust, and moisture. Make sure to choose a case that fits your tools properly.
- Secure cords and hoses: If your impact wrench has cords or hoses, make sure to secure them properly. Avoid tangling or twisting, as these actions can lead to damage or reduce their lifespan. You can use Velcro straps or cable ties to keep them in place.
- Avoid extreme temperatures: Store your impact wrench and socket in an area with consistent temperature and humidity levels. Avoid exposing them to extreme heat or cold, as this can degrade the materials and affect their performance.
- Maintain cleanliness: Regularly wipe down your impact wrench and socket to remove any dust or dirt that may have accumulated during storage. This step helps to prevent any potential damage caused by debris or rust.
- Follow manufacturer recommendations: Always refer to the manufacturer’s instructions for specific storage recommendations. Different models and brands may have unique requirements, so it is important to follow their guidelines to ensure optimal storage conditions.
By properly storing your impact wrench and socket, you can protect them from damage and ensure they remain in good working condition for a long time. This step will save you money in the long run and help you avoid any unnecessary tool repairs or replacements.
FAQ
What is an impact wrench?
An impact wrench is a power tool that is used to tighten or loosen bolts and nuts. It uses a rotational movement combined with a series of hammer blows to generate high torque.
Why would I want to attach a socket to an impact wrench?
You would want to attach a socket to an impact wrench to increase its versatility. By attaching different sockets, you can easily change the size and type of fasteners you can work on.
Can any socket be attached to an impact wrench?
No, not any socket can be attached to an impact wrench. You need to use impact sockets specifically designed to withstand the high torque generated by an impact wrench.
What materials and tools will I need to attach a socket to an impact wrench?
To attach a socket to an impact wrench, you will need an impact wrench, impact sockets, a socket adapter if needed, and possibly a torque wrench to ensure the socket is properly tightened.
What is the process of attaching a socket to an impact wrench?
The process of attaching a socket to an impact wrench involves selecting the appropriate impact socket, inserting it onto the anvil of the impact wrench, and making sure it is securely locked in place.
Are there any safety precautions I should take when attaching a socket to an impact wrench?
Yes, there are several safety precautions you should take when attaching a socket to an impact wrench. These include wearing proper protective gear, making sure the impact wrench is turned off and unplugged before attaching the socket, and double-checking that the socket is properly secured before using the impact wrench.
Video


Meet Harrison Clayton, a distinguished author and home remodeling enthusiast whose expertise in the realm of renovation is second to none. With a passion for transforming houses into inviting homes, Harrison's writing at https://thehuts-eastbourne.co.uk/ brings a breath of fresh inspiration to the world of home improvement. Whether you're looking to revamp a small corner of your abode or embark on a complete home transformation, Harrison's articles provide the essential expertise and creative flair to turn your visions into reality. So, dive into the captivating world of home remodeling with Harrison Clayton and unlock the full potential of your living space with every word he writes.