Step-by-Step Guide: How to Assemble a Socket Wrench Easily

Assembling a socket wrench may seem like a daunting task, especially if you have never done it before. However, with the right tools and a little bit of guidance, it can be a simple and straightforward process. In this step-by-step guide, we will walk you through the process of assembling a socket wrench, from start to finish.
Step 1: Gather all the necessary tools and materials. To assemble a socket wrench, you will need a socket wrench handle, a socket, and a socket wrench extension. Make sure you have the correct size socket and extension for the job you will be working on.
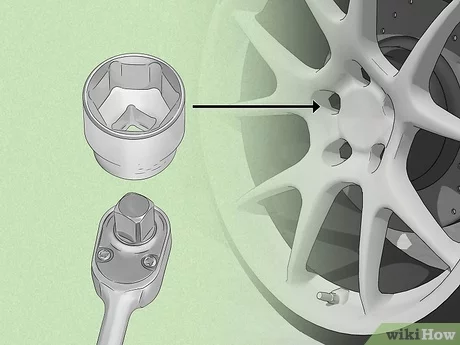
Step 2: Attach the socket to the socket wrench handle. Most socket wrenches have a square drive on the handle that the socket fits onto. Slide the square drive of the handle into the square hole on the socket until it clicks into place. Give it a gentle tug to make sure it is securely attached.
Step 3: If you need additional length or reach, attach the socket wrench extension. The extension usually has a square drive on one end that fits onto the handle, and a different style drive on the other end that the socket fits onto. Attach the extension by sliding the square drive onto the handle and the socket onto the opposite end of the extension.
With these three simple steps, you can easily assemble a socket wrench and be ready to tackle your next DIY project. Remember to always use the correct size socket and handle for the job, and never force a socket onto a handle if it doesn’t fit properly. Happy wrenching!

Step-by-Step Guide: Assembling a Socket Wrench Easily
Step 1: Gather the Tools
Before you begin assembling your socket wrench, make sure you have all the necessary tools. You will need:
- A socket wrench handle
- Sockets in various sizes
- An extension bar
- A ratchet mechanism
Step 2: Attach the Extension Bar
Take the extension bar and insert it into the socket wrench handle. Make sure it is securely in place before moving on to the next step.
Step 3: Insert the Socket
Select the appropriate size socket for your task. Slide the socket over the extension bar until it clicks into place. Ensure that it fits snugly to prevent any wobbling or slipping during use.
Step 4: Attach the Ratchet Mechanism
Locate the ratchet mechanism and align it with the socket wrench handle. Insert the ratchet mechanism into the socket wrench handle, ensuring that it is properly lined up. Push it in until you hear a click, indicating that it is securely attached.
Step 5: Test the Socket Wrench


Once you have assembled the socket wrench, give it a test by turning the ratchet mechanism. Ensure that it moves smoothly and without any resistance. If there are any issues, double-check the assembly to ensure all parts are properly attached.
Step 6: Disassembly (Optional)
If you need to disassemble the socket wrench, simply follow the above steps in reverse order. Start by removing the ratchet mechanism, then the socket, extension bar, and finally the handle.
Now that you know how to assemble a socket wrench easily, you can confidently use it for your various repair and maintenance tasks.
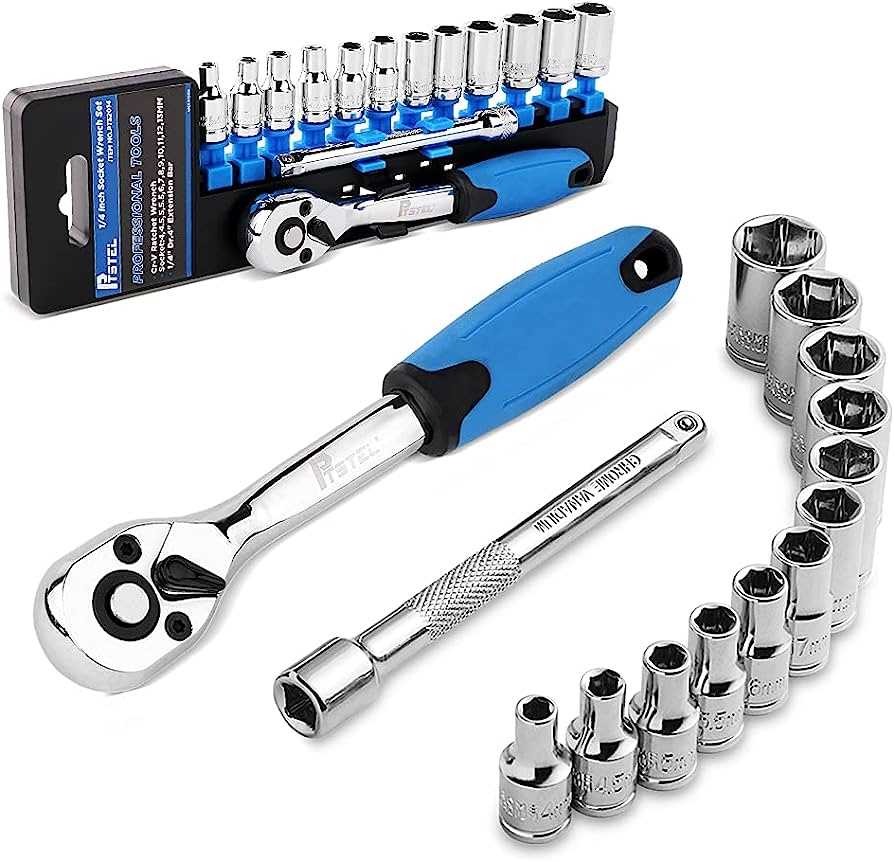
Gather the Necessary Tools and Parts
Before you start assembling a socket wrench, make sure you have all the necessary tools and parts. Having everything you need on hand will help you complete the assembly process smoothly and efficiently.
Tools:

- Socket wrench handle
- Socket wrench head
- Socket attachments of different sizes
- Extension bar
- Ratchet mechanism
- Allen keys (if required)
- Screwdrivers (if required)
Parts:
- Socket wrench handle
- Socket wrench head
- Socket attachments
- Extension bar
- Ratchet mechanism
- Accessories (such as a carrying case or storage tray)
Make sure all the parts are in good condition, without any signs of damage or wear. Check the sizes of the socket attachments to ensure they meet your specific needs. Additionally, if your socket wrench requires any additional parts or accessories, gather them as well.
Tips:
- Keep all the tools and parts organized in a clean and well-lit work area.
- Inspect the tools and parts before assembling to avoid any mishaps or accidents.
- If any of the tools or parts are missing or damaged, replace them before proceeding with the assembly.
Once you have gathered all the necessary tools and parts, you are ready to proceed with the assembly of your socket wrench. Follow the step-by-step guide to ensure a successful and efficient assembly process.
Identify the Different Components of a Socket Wrench
A socket wrench is a versatile tool that is commonly used for tightening or loosening bolts and nuts. It consists of several components that work together to provide effective torque. Here are the main components of a socket wrench:

Socket:
- A socket is a cylindrical attachment that fits onto the handle of the wrench. It is designed to securely hold different sizes and types of bolts and nuts.
- Sockets come in various sizes, expressed in metric or standard units, and can be interchanged depending on the size of the fastener being worked on.
Handle:
- The handle is the main body of the socket wrench. It provides the leverage required to apply torque to the socket and fastener.
- The handle is often made of metal or durable plastic material and may have a rubberized grip for better comfort and control.
Ratchet Mechanism:
- The ratchet mechanism is an essential part of a socket wrench that allows for both clockwise and counterclockwise rotation without the need to remove and reposition the socket.
- It consists of a ratchet gear and a pawl. The gear has teeth that engage with the pawl, which prevents backward movement when torque is applied in the desired direction.
Switch or Lever:
- A switch or lever is typically located on the handle of the socket wrench and is used to control the direction of rotation.
- By flipping the switch or moving the lever, you can easily change between clockwise and counterclockwise rotation.
Extension Bar (optional):
- An extension bar is an optional accessory that can be added between the socket and the handle.
- The extension bar extends the reach of the socket wrench, allowing you to access bolts or nuts in hard-to-reach areas.
Understanding the different components of a socket wrench is crucial to using it effectively for various tasks. By knowing how each component functions, you will be able to assemble and use the socket wrench correctly for your specific needs.
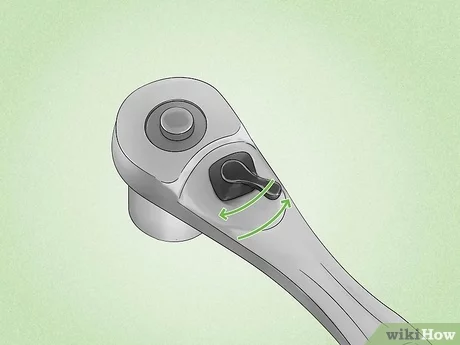
Attach the Handle to the Socket
Once you have all the necessary parts for your socket wrench assembly, it’s time to attach the handle to the socket. This step is crucial as it ensures the socket and handle are securely connected, allowing you to effectively apply torque and loosen or tighten nuts and bolts.
Tools and Materials Needed
- Socket wrench handle
- Socket
- Retaining pin (if applicable)
Instructions
- Take your socket wrench handle and locate the square drive hole at the end of the handle.
- Insert the square drive end of the socket into the square drive hole on the handle.
- If your socket and handle have a retaining pin mechanism, make sure the holes on both pieces align.
- If using a retaining pin, insert it through the aligned holes to lock the socket onto the handle.
- Give the socket a gentle tug to ensure that it’s securely attached to the handle.
Tips and Considerations
- If your socket wrench handle and socket have a quick-release mechanism, you can simply slide the socket onto the handle and engage the mechanism to lock it in place.
- Make sure to use the appropriate size socket for the job. Using the wrong size may result in the socket slipping or damaging the bolt or nut.
- If your socket wrench handle and socket do not have a retaining pin or quick-release mechanism, ensure that the fit between the handle and socket is snug.
Once you have successfully attached the handle to the socket, your socket wrench assembly is complete. You are now ready to use your socket wrench to tackle various DIY projects or professional tasks that require the application of torque to remove or tighten fasteners.
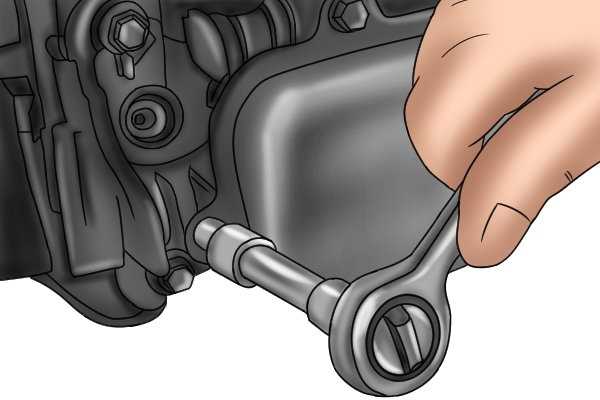
Secure the Socket into the Ratchet
Once you have selected the appropriate socket size for your project, the next step is to secure it into the ratchet. This will allow you to easily and securely tighten or loosen nuts and bolts.

To securely attach the socket to the ratchet, follow these steps:
- Position the socket with the drive end facing toward the ratchet.
- Insert the square drive end of the ratchet into the socket until it locks into place.
- Apply light pressure to ensure the socket is securely attached to the ratchet.
Make sure the socket is fully seated onto the ratchet to prevent it from slipping or becoming dislodged during use.
Pro tip: Some ratchets have a quick-release feature that allows for easier and faster socket changes. To use this feature, simply push the socket release button located on the ratchet handle. This will disengage the socket and allow you to quickly swap it out for a different size.
Once the socket is securely attached to the ratchet, you are ready to use the socket wrench to tackle your project.
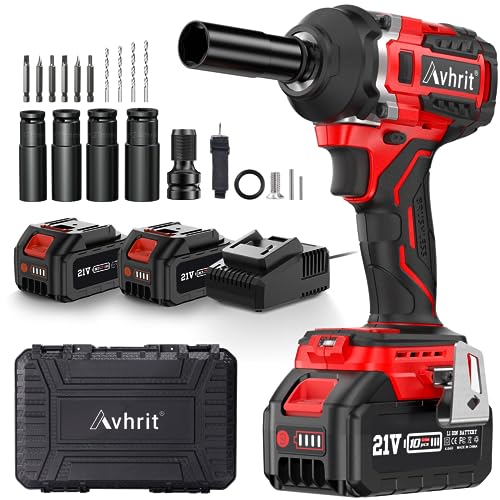
Adjust the Ratchet Mechanism
The ratchet mechanism is an important part of a socket wrench as it allows the user to easily tighten or loosen bolts and nuts. Adjusting the ratchet mechanism on a socket wrench is a simple process that can be done in a few easy steps.
Step 1: Locate the Direction Switch
On most socket wrenches, the direction switch is located on the head of the wrench. It is usually a small lever or button that can be easily moved with the thumb or finger.
Step 2: Set the Direction
To adjust the ratchet mechanism, first determine whether you need the wrench to tighten or loosen a fastener. Once you have determined the direction, simply move the direction switch accordingly. For tightening, set it to the “clockwise” direction, and for loosening, set it to the “counterclockwise” direction.
Step 3: Test the Ratchet Mechanism

After adjusting the direction switch, it’s important to test the ratchet mechanism to ensure it is functioning correctly. Attach a socket to the wrench and use it to tighten or loosen a bolt or nut. The ratchet mechanism should engage and allow you to rotate the fastener in the desired direction, while preventing backward movement.
Note: If the ratchet mechanism is not functioning properly, check for any debris, dirt, or rust that may be hindering its movement. Cleaning and lubricating the mechanism can help improve its performance.
Conclusion
By following these simple steps, you can easily adjust the ratchet mechanism on a socket wrench. This will ensure that you have the correct direction set for your specific task, allowing you to efficiently tighten or loosen bolts and nuts.
Test the Assembled Socket Wrench
After assembling your socket wrench, you should always test it before using it for any task. Testing the assembled socket wrench will ensure that it is functioning correctly and is ready to be used for any repairs or projects you have.
Here are the steps to test the assembled socket wrench:
- Choose the proper socket: Select the socket that matches the size of the bolt or nut you will be working with. This is important to ensure a proper fit and prevent any slipping or damage.
- Attach the socket to the wrench: Insert the square drive end of the socket into the square drive hole of the wrench. Make sure it is securely attached and there is no looseness.
- Turn the bolt or nut: Place the socket onto the bolt or nut and apply gentle pressure in the direction you need to turn it. If the socket is properly attached, it should grip the bolt or nut firmly and allow you to turn it smoothly.
- Check for any wobbling or slipping: While turning the bolt or nut, pay attention to any wobbling or slipping. If you experience any of these issues, double-check the attachment and make sure it is properly secured.
- Test with different sizes: Repeat the above steps with different-sized sockets to ensure the assembled socket wrench can handle a variety of sizes. This will help you determine if the wrench is versatile and suitable for different tasks.
By testing the assembled socket wrench, you can have peace of mind knowing that it is ready for use and will perform as expected. If you encounter any issues during the testing process, disassemble the socket wrench and check for any errors or defects before trying again.
Proper Care and Maintenance of Socket Wrenches
Proper care and maintenance of socket wrenches is essential to ensure their longevity and reliable performance. By following a few simple steps, you can keep your socket wrenches in top condition and extend their lifespan.
Clean Regularly
After each use, it is important to clean your socket wrenches to remove any dirt, debris, or grease that may have accumulated. Use a brush or a soft cloth to wipe off the surface of the wrench, paying special attention to the moving parts. Avoid using harsh solvents or cleaners that may damage the wrench.
Inspect for Damage
Regularly inspect your socket wrenches for any signs of damage or wear. Look for cracks, bent or broken parts, and signs of corrosion. If you notice any issues, it is important to address them promptly to prevent further damage. Replace any damaged or worn parts to ensure the safe and proper functioning of the wrench.
Lubricate Moving Parts
To keep the moving parts of your socket wrenches functioning smoothly, lubrication is key. Apply a small amount of lubricating oil to the ratchet mechanism and other moving parts. Be sure to use a lubricant that is specifically designed for tools and avoid using WD-40 or other general-purpose lubricants.
Store Properly
When not in use, store your socket wrenches in a clean, dry place. Avoid exposing them to extreme temperatures or humidity, as these conditions can accelerate corrosion and damage the wrenches. Use a tool chest, toolbox, or a dedicated tool storage system to keep your socket wrenches organized and protected.
Regular Maintenance
Performing regular maintenance on your socket wrenches can help prevent issues before they arise. Check for loose fasteners, tighten any loose parts, and ensure the wrench is properly calibrated. Additionally, keep the handles clean and free of any oils or greases that may make them slippery.
Protective Measures
In certain environments or applications, it may be necessary to take extra protective measures. For example, if you are working with corrosive substances or in wet conditions, consider using a corrosion-resistant socket wrench or coating the wrench with a protective layer. Additionally, always wear appropriate personal protective equipment (PPE) to further protect the wrench and yourself from potential hazards.
Professional Servicing
If you are unsure about how to properly care for or repair your socket wrenches, it is best to seek professional servicing. A trained technician will have the knowledge and expertise to diagnose any issues and perform necessary repairs or adjustments. This can help prevent any further damage and ensure the safe and efficient use of your socket wrenches.
| Clean regularly: | Remove dirt and debris to prevent accumulation. |
| Inspect for damage: | Regularly check for cracks, bent or broken parts, and corrosion. |
| Lubricate moving parts: | Apply oil to keep the wrench functioning smoothly. |
| Store properly: | Keep wrenches in a clean, dry place away from extreme conditions. |
| Regular maintenance: | Check for loose parts and ensure proper calibration. |
| Protective measures: | Consider corrosion-resistant options and wear appropriate PPE. |
| Professional servicing: | Seek professional help for repairs or adjustments. |
FAQ
What is a socket wrench?
A socket wrench is a type of hand tool used for tightening and loosening nuts and bolts. It consists of a handle and a socket, which is a hollow cylindrical attachment that fits over the nut or bolt head.
Why would I need to assemble a socket wrench?
You may need to assemble a socket wrench if you have a set of socket wrench components that came disassembled or if you are customizing your socket wrench with different handle or socket attachments.
What tools do I need to assemble a socket wrench?
You will need the handle of the socket wrench, one or more socket attachments, and potentially a small wrench or adjustable wrench to tighten the socket onto the handle. Optionally, you may need a rubber mallet or hammer to tap the socket onto the handle.
Video


Meet Harrison Clayton, a distinguished author and home remodeling enthusiast whose expertise in the realm of renovation is second to none. With a passion for transforming houses into inviting homes, Harrison's writing at https://thehuts-eastbourne.co.uk/ brings a breath of fresh inspiration to the world of home improvement. Whether you're looking to revamp a small corner of your abode or embark on a complete home transformation, Harrison's articles provide the essential expertise and creative flair to turn your visions into reality. So, dive into the captivating world of home remodeling with Harrison Clayton and unlock the full potential of your living space with every word he writes.