Quick and Easy Method: Removing Cylinder from Office Chair without Pipe Wrench

Have you ever found yourself in a situation where the cylinder of your office chair needs to be removed, but you don’t have a pipe wrench? Don’t worry, we’ve got you covered! In this article, we will share a quick and easy method to remove the cylinder from your office chair without the need for any specialized tools.
Before we dive into the method, let’s start with a brief explanation of why you might need to remove the cylinder. Over time, office chair cylinders can become stuck or damaged, making it difficult to adjust the height of the chair. In such cases, removing the cylinder is necessary to either repair or replace it.
Traditionally, a pipe wrench is used to loosen and remove the cylinder from the chair base. However, not everyone has a pipe wrench readily available. Fortunately, there is an alternative method that only requires a few household items.
To begin, you will need a pair of pliers and a rubber mallet or a hammer with a rubber mallet head. Start by gripping the top section of the cylinder with the pliers and applying steady pressure in a counterclockwise direction. This will loosen the cylinder from the base. Once it is loosened, use the rubber mallet or hammer with a rubber mallet head to tap the cylinder gently from the base, alternating sides, until it is completely detached.
Explanation
In this article, we will explain a quick and easy method to remove the cylinder from an office chair without using a pipe wrench. The cylinder is the central part of an office chair that allows it to rotate and adjust in height. Sometimes, due to wear and tear or other reasons, the cylinder may need to be replaced or repaired.

To remove the cylinder, you will need a few common household tools:
- A pair of pliers
- A hammer
- A flathead screwdriver
- A cloth or towel
Start by flipping the chair upside down so that the wheels are facing upwards. This will give you better access to the cylinder and make the process easier.
Next, locate the plastic skirt that surrounds the bottom part of the chair. This skirt covers the base of the cylinder and needs to be removed to access the cylinder.
Use the pliers to grip the plastic skirt firmly and twist it counterclockwise. Apply some force but be careful not to damage the skirt. With enough force, the skirt should come loose and can be easily removed.
Once the skirt is removed, you will see a metal clip that holds the cylinder in place. Use the flathead screwdriver to pry the metal clip upwards. Be mindful not to damage the clip or any other parts of the chair.
With the metal clip raised, use the pliers to grip the cylinder firmly and gently pull it upwards. It may require some effort, but with patience, the cylinder should come out of the chair.
If the cylinder is stubborn and won’t come out easily, you can try tapping it gently with a hammer. Wrap the cloth or towel around the top of the cylinder to protect it from any damage, then tap the cylinder with the hammer. The repeated tapping should help loosen the cylinder and make it easier to remove.
Once the cylinder is removed, you can inspect it for any damage or wear. If necessary, you can either replace the cylinder or proceed with any repairs needed.
Remember to take caution while working on the chair and use the proper tools. If you encounter any difficulties or are unsure about the process, it is recommended to seek professional assistance.
Importance

The process of removing a cylinder from an office chair without a pipe wrench is a quick and easy method that can save you time and money. It is important to know how to do this because office chairs often need to be adjusted or repaired, and having the ability to remove the cylinder yourself can prevent the need to hire a professional or purchase expensive tools. Additionally, knowing how to remove the cylinder can help extend the lifespan of your office chair by allowing you to easily replace worn or damaged parts.
By following this quick and easy method, you can avoid the frustration of dealing with a stuck or broken cylinder and continue to enjoy the comfort and functionality of your office chair. This method can be particularly useful in office environments where multiple chairs may need regular adjustment or repair.
The step-by-step instructions provided in this guide will empower you with the knowledge and confidence to remove the cylinder from your office chair without the need for a pipe wrench. With just a few basic tools and a little bit of patience, you can successfully complete this task and have your office chair back in working order in no time.
Overall, knowing how to remove the cylinder from an office chair without a pipe wrench is a valuable skill that can save you time and money, extend the lifespan of your chair, and provide you with the ability to make necessary adjustments and repairs on your own. By following this method, you can be confident in your ability to maintain and fix your office chair whenever necessary.
Tools required
- A rubber mallet or hammer
- A scrap piece of wood or cardboard to protect the chair
- A flathead screwdriver or pry bar
- A pair of pliers or vice grips
- A towel or cloth to clean the cylinder
These tools are essential for safely and effectively removing the cylinder from your office chair. Make sure to have them on hand before starting the process.
List of tools
- Box wrench
- Adjustable wrench
- Screwdriver set
- Pliers
- Hammer
- Vice grips
- Allen wrench set
- Socket set
- Wire cutters
- Utility knife
- Rubber mallet
- Clamps
- Hacksaw
- Tape measure
- Level
- Drill
- Safety glasses
- Gloves
- Ear protection
Safety precautions
- Wear safety goggles to protect your eyes from dust and debris.
- Wear gloves to protect your hands from sharp edges or metal fragments.
- Make sure the office chair is on a stable surface to prevent it from tipping over.
- Do not apply excessive force when removing the cylinder as it may cause damage or injury.
- Use proper lifting techniques to prevent strains or injuries to your back.
- Keep children and pets away from the work area to avoid accidents.
- Do not use any tools that are damaged or in poor condition as they may cause accidents or injuries.
- Ensure that the area around the office chair is well-lit to avoid tripping or falling.
- If you are unsure or uncomfortable with removing the cylinder, seek professional assistance.
Step-by-step guide
1. Gather the necessary tools
Before you begin the process of removing the cylinder from your office chair, make sure you have the following tools:
- Adjustable wrench or pipe wrench
- Rubber mallet or hammer
- Flat-head screwdriver
- Old towel or cloth
2. Prepare your workspace
Choose a well-lit and open area for your workspace. Cover the floor with an old towel or cloth to protect it from any damage during the process.
3. Examine the chair
Take a close look at your office chair to determine how the cylinder is attached. Typically, there will be a plate or a pin securing the cylinder to the seat base.
4. Remove the plate or pin

Using an adjustable wrench or pipe wrench, grip the plate or pin firmly and turn counterclockwise to loosen it. If the plate or pin is stuck, you can tap it lightly with a rubber mallet or hammer to help loosen it.
5. Disconnect the cylinder
Once the plate or pin is loose, the cylinder should lift easily out of the seat base. If it is still stuck, you can gently rock or twist the cylinder to help release it.
6. Inspect and clean
Take a moment to inspect the cylinder for any signs of damage or wear. If necessary, clean the cylinder using a cloth or a mild cleaning agent to remove any dirt or debris.
7. Reinstall or replace
If the cylinder is still in good condition, you can reinstall it back into the seat base by reversing the steps above. If it is damaged or not functioning properly, you may need to replace it with a new cylinder.
8. Test the chair
After reinstalling or replacing the cylinder, give the chair a test to ensure that it is secure and functioning properly. Adjust the height and tilt to your liking and make sure everything is working smoothly.
9. Dispose of the old cylinder responsibly
If you had to replace the cylinder, make sure to dispose of the old one responsibly. Check your local recycling or waste disposal guidelines for the proper way to handle it.
Step 1: Initial preparation
Before removing the cylinder from your office chair, it is important to gather the necessary tools and ensure that you have a clear workspace. Here are the initial steps to follow:
- Clear the area around your chair: Remove any obstacles or objects that may be in the way of accessing the cylinder.
- Gather the required tools: You will need a rubber mallet and a towel or cloth to protect the chair’s base and prevent any damage.
- Inspect the chair: Take a close look at the chair to identify any screws, bolts, or other fasteners that may be securing the cylinder in place. Make a mental note of their locations.
- Prepare a stable working surface: If the chair is on wheels, place it on a stable surface like a workbench or table. This will provide more stability and make it easier to work on.
- Put on protective gear: Consider wearing gloves and safety glasses to protect your hands and eyes from any potential hazards.
Once you have completed these initial preparations, you will be ready to move on to the next step of the cylinder removal process.
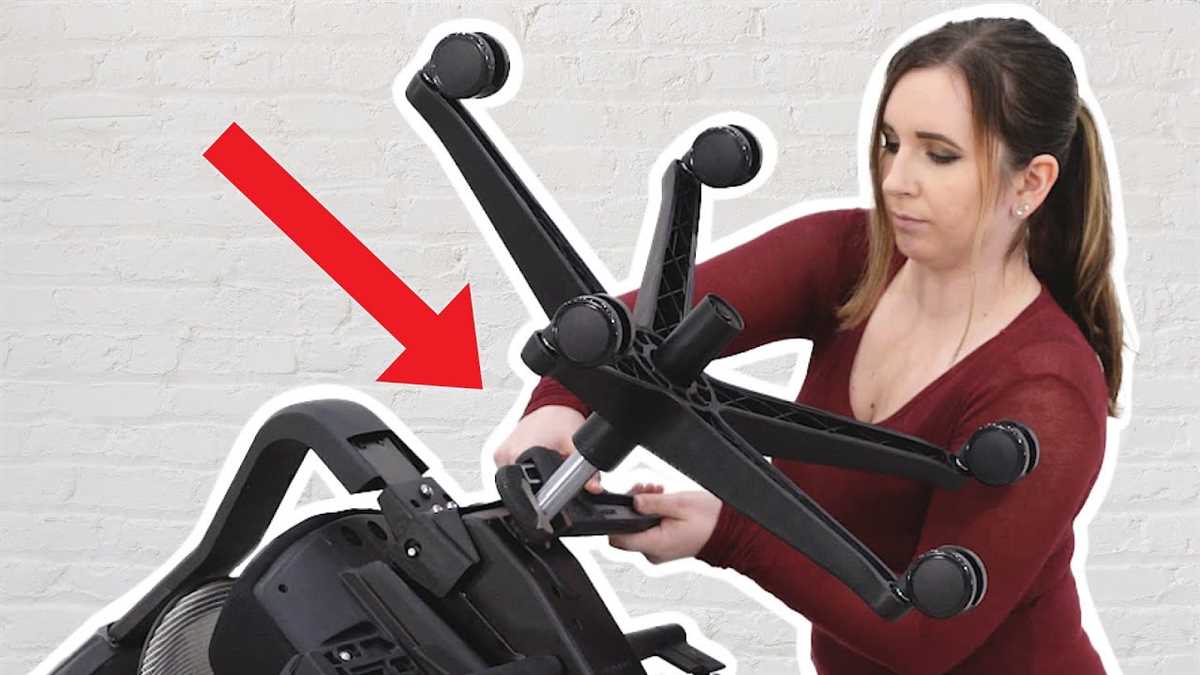
Step 2: Removing the base
Once the cylinder is removed, the next step is to remove the base of the office chair. The base is the part that connects the cylinder to the wheels of the chair.
Follow the steps below to remove the base:
- Flip the chair over so that the wheels are facing up.
- Look for a clip or latch that is holding the base in place. It is usually located near the center of the base.
- Use a screwdriver or a pair of pliers to release the clip or latch.
- Once the clip or latch is released, gently pull the base away from the cylinder.
- If the base is stubborn, you can try tapping it gently with a mallet or a hammer to loosen it.
Once the base is removed, you can proceed to the next step of the cylinder removal process.
Step 3: Detaching the cylinder

Once you have removed the base and the wheels, you will need to detach the cylinder from the seat of the chair. This will allow you to replace or repair the cylinder as needed.
Here are the steps to detach the cylinder:
- Flip the chair upside down so that the seat is facing the floor.
- Locate the mechanism that connects the seat to the cylinder. This is usually a metal bracket or a plastic ring.
- Use a screwdriver or a pair of pliers to remove any screws or fasteners that are securing the mechanism.
- Once the mechanism is loosened, gently pull the seat away from the cylinder. Be careful not to exert too much force, as this could damage the chair.
- Continue pulling until the cylinder is completely detached from the seat.
At this point, you should have successfully removed the cylinder from the office chair. You can now proceed with replacing or repairing the cylinder as needed.
Step 4: Finishing touches
Once you have successfully removed the cylinder from your office chair, there are a few finishing touches you can apply to ensure everything is in order.
Clean the components
Take a moment to clean the removed cylinder and any other components of the chair that may have accumulated dust or dirt during the removal process. Use a cloth or a mild cleaning solution to wipe away any debris.
Inspect for damage
Inspect the removed cylinder and the chair’s mechanism for any signs of damage or wear. Look for cracks, dents, or other issues that may affect the chair’s functionality. If you notice any significant damage, consider replacing the cylinder or seeking professional help.
Apply lubrication (optional)
If you want to ensure smooth movement and prevent squeaking, you can apply lubrication to the removed cylinder’s contact points or any other areas that require it. Be sure to choose a suitable lubricant for your chair’s materials, such as silicone-based lubricants.
Reassemble the chair
Once you have completed the necessary cleaning and inspections, you can reassemble the chair by following the steps in reverse order. Make sure all components are properly aligned and tightened to ensure stability.
Test the chair
Before using the chair again, sit on it and test its stability and movement. Make any necessary adjustments if the chair feels unstable or if there are any issues with its functionality.
By following these finishing touches, you can ensure that your office chair is ready to use again after successfully removing the cylinder without a pipe wrench.
FAQ
Is it possible to remove the cylinder from an office chair without using a pipe wrench?
Yes, it is possible to remove the cylinder from an office chair without using a pipe wrench. In fact, there is a quick and easy method to do so.
What tools do I need to remove the cylinder from an office chair without a pipe wrench?
You will need pliers to remove the clip that holds the cylinder in place. Additionally, having a screwdriver may be helpful to pry off the clip if it is difficult to remove.
Will removing the cylinder from an office chair without a pipe wrench damage the chair?
No, removing the cylinder from an office chair without a pipe wrench should not damage the chair if done correctly. However, it is important to be careful when using tools to avoid scratching or causing any other damage to the chair.
How long does it usually take to remove the cylinder from an office chair without a pipe wrench?
The process of removing the cylinder from an office chair without a pipe wrench should only take a few minutes if done correctly. However, the actual time may vary depending on the chair and how easy or difficult the clip is to remove.
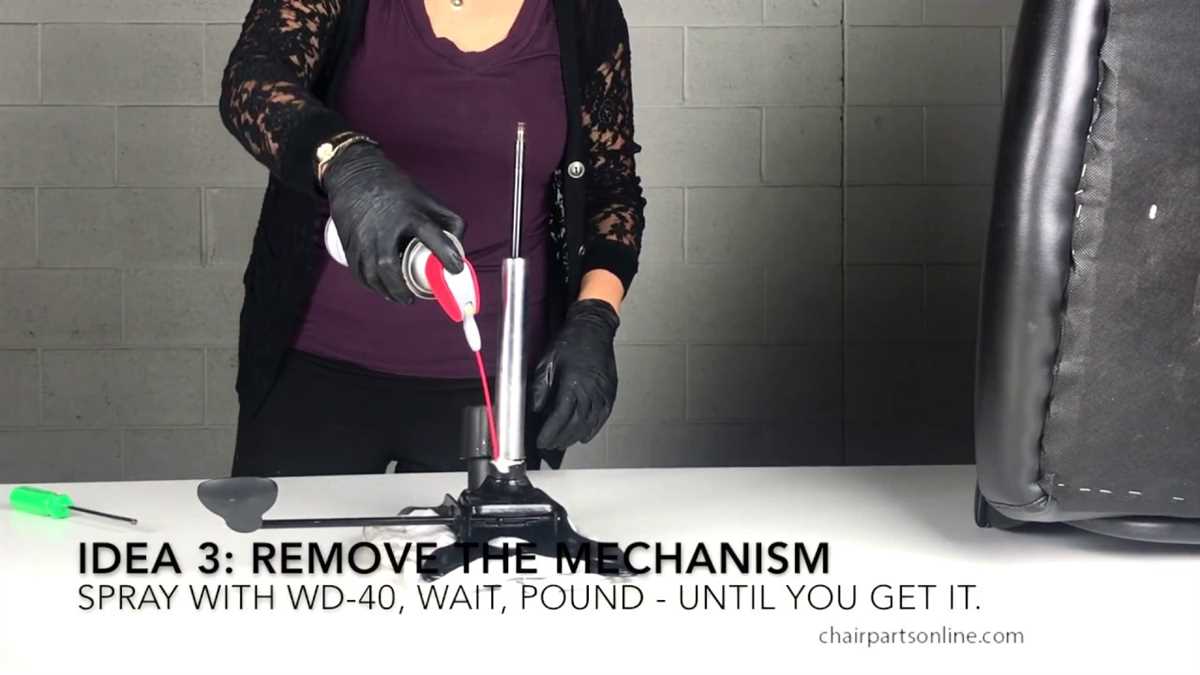
Are there any alternative methods to remove the cylinder from an office chair without a pipe wrench?
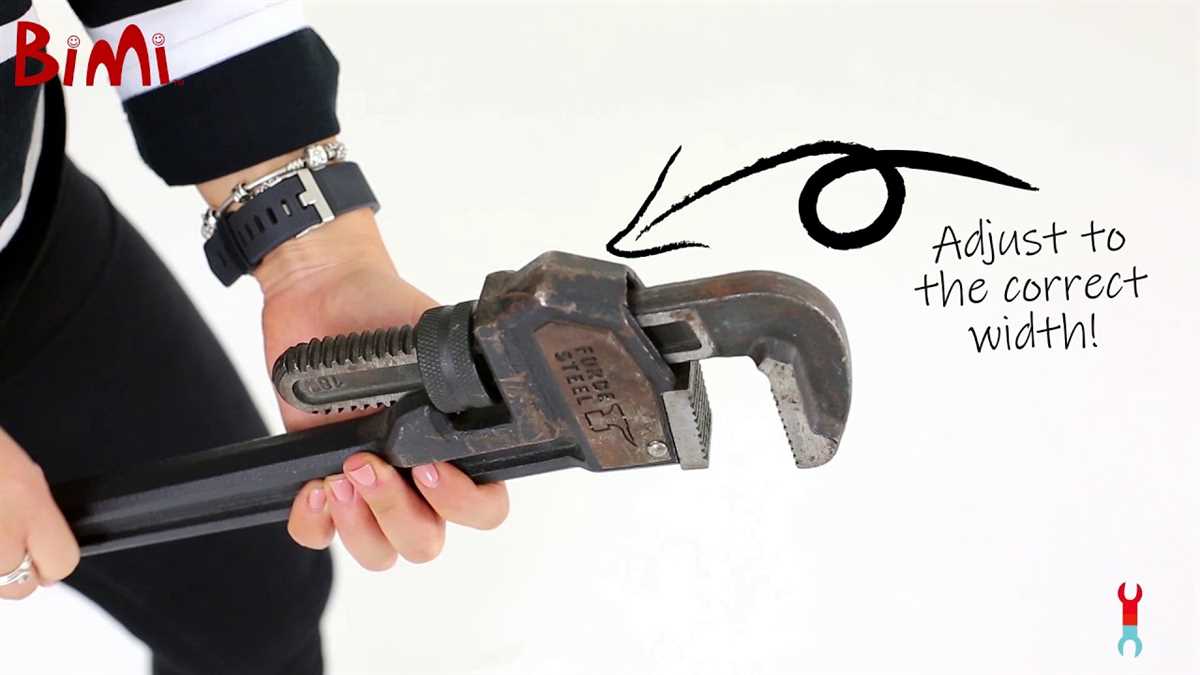
Yes, there are alternative methods to remove the cylinder from an office chair without a pipe wrench. One method involves using a rubber mallet to gently tap the cylinder out of the chair. Another method involves using a strap wrench to grip and rotate the cylinder until it can be pulled out of the chair.
Video

How long to boil a ham shank

Harrison Clayton
Meet Harrison Clayton, a distinguished author and home remodeling enthusiast whose expertise in the realm of renovation is second to none. With a passion for transforming houses into inviting homes, Harrison's writing at https://thehuts-eastbourne.co.uk/ brings a breath of fresh inspiration to the world of home improvement. Whether you're looking to revamp a small corner of your abode or embark on a complete home transformation, Harrison's articles provide the essential expertise and creative flair to turn your visions into reality. So, dive into the captivating world of home remodeling with Harrison Clayton and unlock the full potential of your living space with every word he writes.