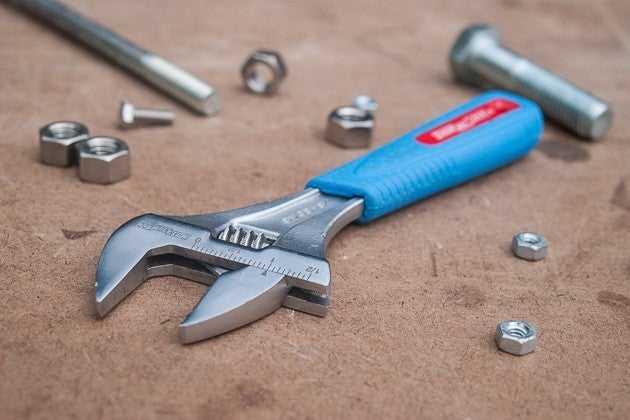
Proper Position for Tightening a Nut with an Adjustable Wrench

When it comes to tightening a nut with an adjustable wrench, knowing the proper position can make the difference between a secure fit and a loose connection. The adjustable wrench, also known as a crescent wrench, is a versatile tool that can be used for a variety of tasks, including tightening or loosening nuts and bolts. However, to ensure that the wrench is used effectively and efficiently, it is important to understand the correct positioning technique.
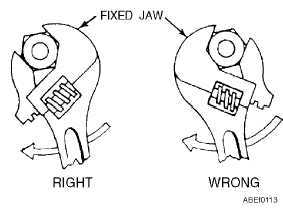
First and foremost, it is crucial to grip the adjustable wrench correctly. Place the thumb on one side of the handle and wrap the other fingers around the opposite side. This grip provides stability and control, allowing you to exert the necessary force without losing your grasp on the wrench. Additionally, make sure that the jaws of the wrench are properly aligned with the nut.
Next, position the wrench so that the movable jaw is on the side opposite to the direction in which you want to turn the nut. This allows you to apply force in the most effective manner, maximizing your leverage and minimizing the risk of slipping or damaging the nut. Remember to hold the wrench handle firmly and keep your hand away from the moving parts to avoid any potential injuries.
Finally, start turning the wrench in the desired direction to tighten the nut. Apply steady pressure, using your arm and shoulder muscles rather than just your wrist, to ensure a secure fit. If necessary, you can use your other hand to hold the wrench handle for additional support and control. Once the nut is tightened, check for any signs of movement or looseness, and make any necessary adjustments.
In conclusion, properly positioning the adjustable wrench when tightening a nut is essential for achieving a secure and reliable connection. By using the correct grip, aligning the jaws correctly, and applying steady pressure, you can ensure that the nut is tightened effectively without risk of slipping or damaging the nut. Taking the time to learn and practice the proper technique will result in more efficient and successful work with your adjustable wrench.

Importance of Proper Position
Ensuring Safety
Proper position is crucial when tightening a nut with an adjustable wrench as it ensures safety. By placing the wrench in the correct position, you minimize the risk of slipping or losing control over the tool, which can lead to accidents or injuries. It is important to follow the proper technique to prevent any harm to yourself or others.
Avoiding Damage
The correct position for tightening a nut with an adjustable wrench also helps to avoid damage. When the wrench is positioned correctly, it allows for a better grip, preventing any slippage or rounding off of the nut. This is particularly important when dealing with nuts made of softer materials, such as brass or aluminum, which are more prone to damage. By applying the right amount of pressure in the proper position, you can effectively tighten the nut without causing any harm.
Optimizing Efficiency
Proper position not only ensures safety and prevents damage but also optimizes efficiency. By using the adjustable wrench in the correct position, you can apply more leverage, making it easier to tighten the nut. This means you can finish the task more quickly and effectively, saving both time and effort. Additionally, the proper position allows for better control over the tool, allowing you to adjust the tightness with precision.
Preventing Strain
Tightening a nut with an adjustable wrench in the proper position also helps prevent strain on your body. When you use the wrench in the correct position, it distributes the force more evenly, reducing the strain on your hand, wrist, and arm. This is particularly important when working on larger or tighter nuts, as excessive strain can lead to fatigue, discomfort, or even repetitive strain injuries. By taking the time to position the wrench correctly, you can minimize the strain on your body and work more comfortably.

| Benefits | Description |
|---|---|
| Safety | Minimizes the risk of accidents or injuries. |
| Avoids Damage | Prevents slipping or rounding off of the nut. |
| Efficiency | Increases leverage and allows for better control. |
| Strain Prevention | Reduces strain on hand, wrist, and arm. |
Why Position Matters
Ensuring Proper Tightening
The position in which you hold the adjustable wrench while tightening a nut can greatly affect the outcome of the task. By understanding why position matters, you can ensure that you achieve the proper tightening and avoid any unnecessary damage or accidents.
Applying Even Pressure
One of the main reasons why position matters is because it allows you to apply even pressure on the nut. When you apply pressure at an angle or in an uneven manner, you risk stripping the threads or damaging the nut and bolt. By holding the adjustable wrench in the correct position, you can exert an even force, allowing for a secure and tight connection.
Preventing Slippage
Another benefit of positioning the wrench correctly is that it helps prevent slippage. If you hold the wrench at an angle or use excessive force, there is a higher chance of the wrench slipping off the nut. This not only poses a safety hazard but can also damage the surrounding area or cause injury. By positioning the wrench properly, you can minimize the risk of slippage and ensure a secure grip on the nut.
Increasing Efficiency
Proper positioning of the adjustable wrench can also increase efficiency in tightening the nut. By holding the wrench at the optimal angle and distance, you can exert the most force with minimal effort. This can save you time and energy, making the task more efficient and streamlined.

Preventing Wear and Tear
When you hold the adjustable wrench in the correct position, you also minimize the wear and tear on the tool itself. Using the wrench at odd angles or with excessive force can cause it to wear out quickly, potentially leading to malfunction or breakage. By using the wrench in the proper position, you ensure that it functions optimally and lasts longer.
Conclusion
Position matters when tightening a nut with an adjustable wrench because it ensures proper tightening, applies even pressure, prevents slippage, increases efficiency, and prevents unnecessary wear and tear. By taking the time to position the wrench correctly, you can achieve the desired results and extend the lifespan of your tools.
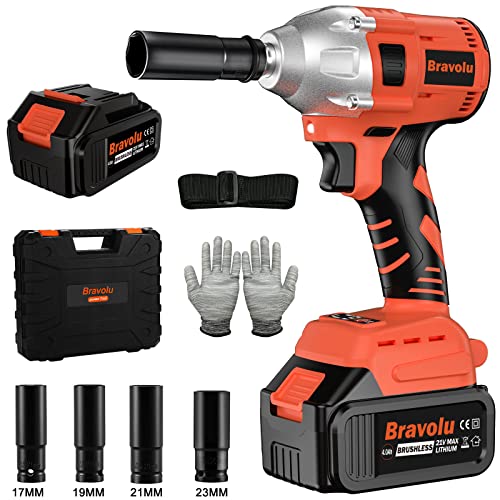
Tools You Need


When tightening a nut with an adjustable wrench, there are a few tools that you will need to ensure a proper position and avoid any damage to the nut or the wrench. These tools include:
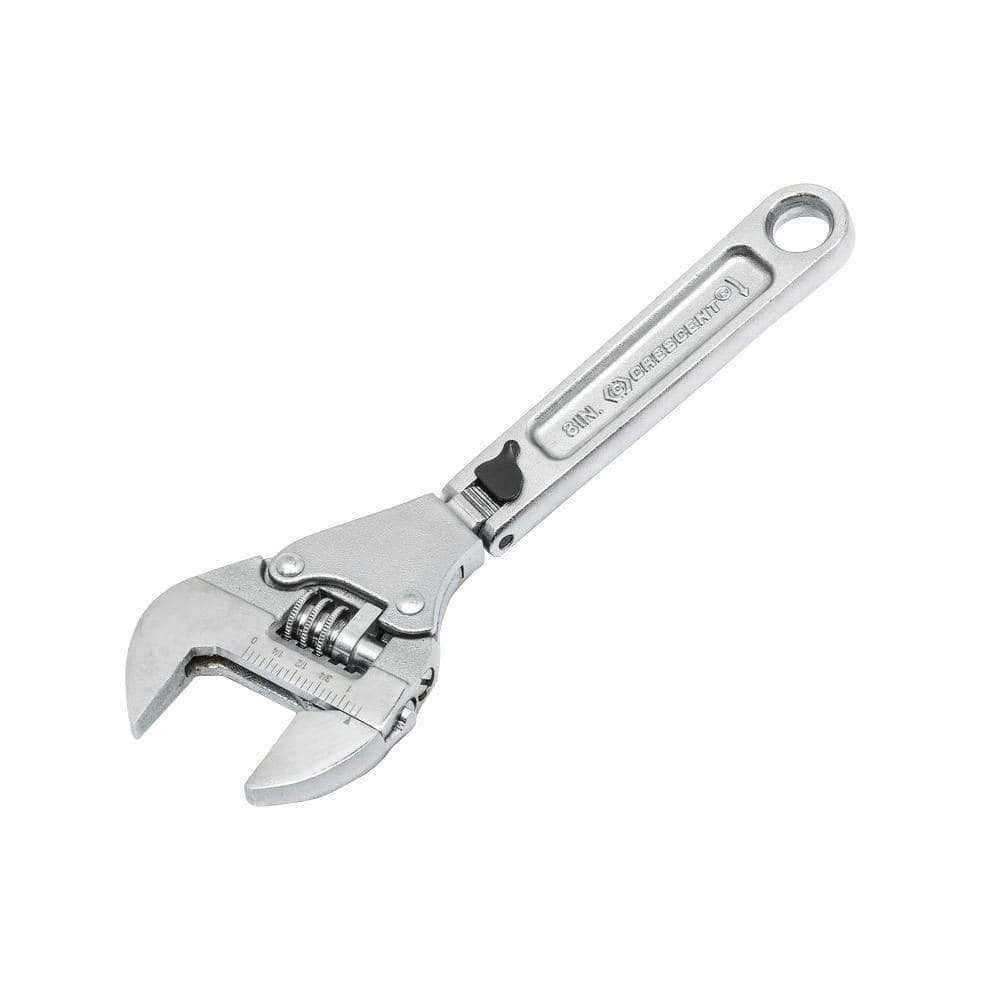
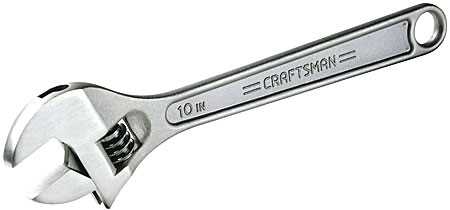
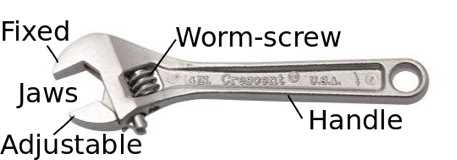
- Adjustable wrench: This is the main tool you will need for tightening the nut. It has a movable jaw that can be adjusted to fit different sizes of nuts.
- Protective gloves: It is always a good idea to wear protective gloves to prevent any injuries to your hands while using the wrench.
- Clean cloth: Having a clean cloth nearby can be useful for wiping off any dirt or debris from the nut before tightening.
- Lubricant: In some cases, using a lubricant can make it easier to tighten the nut. This can be especially helpful if the nut is rusted or difficult to turn.
- Adjustable pliers: If the nut is too tight or difficult to turn with the adjustable wrench alone, you may need to use adjustable pliers to provide extra leverage.
- Flashlight: In situations where the nut is located in a tight or hard-to-reach area, having a flashlight can help you see and position the wrench properly.
Using an Adjustable Wrench
An adjustable wrench is a versatile tool that is used to tighten or loosen nuts and bolts of various sizes. It is an essential tool for any DIY enthusiast or professional mechanic. Here are some tips on how to properly use an adjustable wrench:
1. Choose the right size adjustable wrench
Adjustable wrenches come in different sizes to accommodate various nuts and bolts. Before starting the task, make sure to select an adjustable wrench that fits the size of the nut you are working on. Using the wrong size wrench can lead to damage and may cause injuries.
2. Position the wrench correctly
To get a good grip on the nut, position the adjustable wrench so that the movable jaw is on the side of the nut that needs to be turned. The stationary jaw should be on the opposite side of the nut. This will allow you to apply maximum force when turning the wrench.
3. Adjust the wrench to the correct size
Before using the adjustable wrench, adjust it to the correct size by sliding the movable jaw towards the stationary jaw. Make sure it is snugly fitted around the nut to avoid slipping or causing damage.

4. Apply steady pressure
When tightening or loosening a nut, apply steady and firm pressure on the handle of the adjustable wrench. Avoid using excessive force as it can cause the wrench to slip, which may result in injuries or damage to the nut.
5. Check for tightness
After tightening the nut, check the tightness by giving it a gentle tug or using an appropriate torque wrench. Make sure the nut is securely fastened, but avoid overtightening as it can lead to stripping or breaking.
6. Clean and store properly
After using the adjustable wrench, clean it with a cloth to remove any dirt or debris. Store it in a dry and secure place to prevent rusting and ensure its longevity.
By following these tips, you can effectively use an adjustable wrench and confidently tackle various projects that require tightening or loosening nuts and bolts.
Correct Holding Technique
When using an adjustable wrench to tighten a nut, it is essential to use the proper holding technique to ensure a secure and safe connection. The following steps outline the correct holding technique to employ when using an adjustable wrench:
- Select the appropriate wrench size: Before attempting to tighten a nut, be sure to choose the correct size of the adjustable wrench. Using a wrench that is too small or too large can result in slipping or damaging the nut and surrounding components.
- Position the wrench: Place the adjustable wrench on the nut so that the jaws are in the proper position. The jaws of the wrench should fit around the nut snugly, with minimal play. Make sure the jaws are fully engaged and aligned with the sides of the nut.
- Hold the wrench firmly: Once the wrench is properly positioned, grip the handle firmly with your hand. Make sure your grip is secure and comfortable to avoid slippage or loss of control while tightening the nut.
- Apply pressure in the correct direction: To tighten the nut, apply force in the direction that turns the nut clockwise. This typically involves pushing the adjustable wrench handle away from your body. Apply pressure evenly and gradually to avoid sudden movements or overexertion.
- Check for tightness: After applying sufficient pressure, check the tightness of the nut. If the nut is still loose, continue to tighten it using the same holding technique. Be cautious not to overtighten the nut, as this can cause damage or strip the threads.
By following these steps and using the correct holding technique, you can ensure that the nut is securely tightened using an adjustable wrench. Remember to always use caution and prioritize safety when working with tools and fasteners.
Proper Hand Placement
When using an adjustable wrench to tighten a nut, it is important to have proper hand placement for maximum control and efficiency. The following guidelines will help you achieve the correct hand position:
- Hold the wrench firmly: Grip the handle of the wrench firmly with your dominant hand. Make sure your hand is positioned near the end of the handle for better leverage.
- Position your other hand correctly: Place your non-dominant hand on the fixed jaw of the wrench. This will provide stability and prevent the wrench from slipping off the nut.
- Keep your fingers clear: Ensure that your fingers are clear from any moving parts of the wrench. Avoid placing your fingers in the path of the adjustable jaw to prevent injuries.
- Use your body weight: Instead of relying solely on your arm strength, use your body weight to apply pressure when turning the wrench. This will help you exert more force without straining your muscles.
- Position the wrench at the correct angle: Align the wrench parallel to the nut you are tightening. This will allow for a better grip and prevent slipping.
Remember, practicing proper hand placement when tightening a nut with an adjustable wrench not only improves your control and efficiency but also reduces the risk of injuries. Always prioritize safety when working with tools.
Anchoring the Nut
When tightening a nut with an adjustable wrench, it’s important to properly anchor the nut to prevent it from rotating. This will ensure that the wrench can exert maximum force on the nut and prevent the wrench from slipping off.
To anchor the nut, follow these steps:
- Place the adjustable wrench over the nut, ensuring that the jaws of the wrench are securely gripping the flat sides of the nut.
- Hold the wrench handle with your dominant hand and position it in a way that allows you to exert force in the desired direction. This will depend on the angle and orientation of the nut.
- Use your other hand to hold the object or surface the nut is attached to. This will help stabilize the nut and prevent it from rotating as you tighten it.
It’s important to note that the object or surface you’re holding should be sturdy and capable of withstanding the force you’ll be applying with the wrench. If possible, use a vice or clamp to secure the object in place.
By properly anchoring the nut, you’ll ensure that the wrench can do its job effectively and minimize the risk of accidents or injuries.
Securing the Workpiece
To properly tighten a nut with an adjustable wrench, it’s important to secure the workpiece in place. This ensures stability during the tightening process and prevents any accidents or damage.
1. Use a Workbench or Vice
If available, place your workpiece on a sturdy workbench or secure it in a vice. This will provide a solid foundation and prevent the workpiece from moving or slipping when applying force with the wrench.
2. Use Clamps or Magnets
If you don’t have a workbench or vice, you can use clamps or magnets to secure the workpiece to a stable surface. Place the clamps or magnets strategically to hold the workpiece in place, ensuring that it doesn’t move during the tightening process.
3. Hold the Workpiece with Your Hand
If the workpiece is small or irregularly shaped, you can hold it firmly with one hand while using the wrench with the other hand. Make sure to hold it securely, but be cautious not to place your hand in a position where it can get hurt if the wrench slips or if excessive force is applied.
4. Use Blocking or Bracing
If necessary, use blocking or bracing techniques to prevent movement of the workpiece. This can be achieved by using additional pieces of wood or supporting structures to stabilize the workpiece and keep it in place.
5. Secure Loose Parts
Before tightening the nut, make sure to secure any loose parts or components that could move or rotate during the tightening process. This can be done using screws, clamps, or other fastening methods to ensure that the workpiece remains stable.
By properly securing the workpiece, you can ensure that the nut is tightened accurately and safely with an adjustable wrench, minimizing the risk of accidents or damage to the workpiece.
Applying the Right Amount of Force
When tightening a nut with an adjustable wrench, it is important to apply the right amount of force. Applying too much force can strip the nut or damage the threads, while applying too little force may result in a loose connection.
1. Use your hand to start tightening
Before using the adjustable wrench, it is a good practice to start tightening the nut by hand. This allows you to feel the resistance and determine how tight the nut needs to be. Using your hand also helps to ensure that the wrench is properly aligned with the nut.
2. Use the adjustable wrench to tighten
Once the nut is hand-tightened, you can use the adjustable wrench to further tighten it. Place the wrench on the flats of the nut, ensuring a secure grip. Align the wrench perpendicular to the nut to maximize the torque applied.
Note: It is important to position the wrench properly to avoid slipping and causing injury.
3. Apply gradual and controlled force
Instead of applying force all at once, it is recommended to apply gradual and controlled force. This allows you to monitor the tightening process and make adjustments if needed. Avoid sudden jerks or excessive force, as it can lead to over-tightening or damage to the nut.
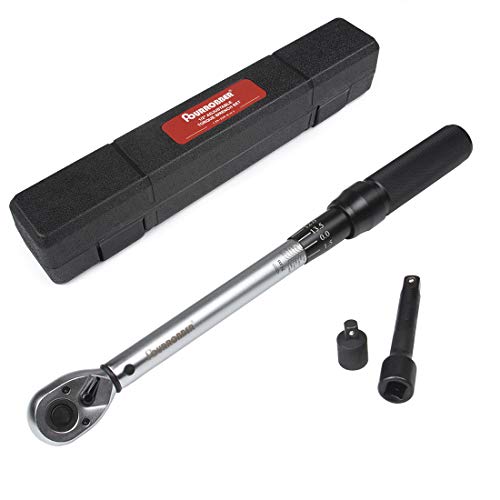
4. Consider using a torque wrench
If you need to tighten the nut to a specific torque specification, consider using a torque wrench. A torque wrench allows you to apply a predetermined amount of force accurately. This is particularly important in applications where precise torque is required, such as automotive or machinery repair.
Note: Always refer to the manufacturer’s guidelines or specifications for the appropriate torque settings.
5. Check for tightness
After tightening the nut, it is essential to check for tightness. Gently try to rotate the nut using your hand or a wrench. If the nut does not rotate or rotates with minimal movement, it is adequately tightened. However, if the nut rotates too easily, it may need further tightening.
Remember: It’s better to slightly under-tighten the nut and check for tightness again, rather than over-tightening and potentially causing damage or stripping the nut.
Conclusion
By applying the right amount of force when tightening a nut with an adjustable wrench, you can ensure a secure and reliable connection. Remember to start tightening by hand, use gradual and controlled force, consider using a torque wrench when necessary, and always check for tightness. These practices will help prevent damage and ensure the longevity of your connections.
Avoid Over-tightening
When tightening a nut with an adjustable wrench, it is important to avoid over-tightening. Over-tightening can lead to several problems, including:
- Damage to the Nut: Applying excessive force can cause the nut to strip or become damaged, making it difficult to loosen or remove in the future.
- Damage to the Bolt or Stud: Over-tightening can also damage the bolt or stud that the nut is fastened to. This can result in the need for costly repairs or replacement parts.
- Uneven Pressure Distribution: Over-tightening can result in uneven pressure distribution across the joint or connection. This can lead to leaks, cracks, or failures in the assembly.
- Risk of Breaking Tools: Applying excessive force can also put unnecessary strain on the adjustable wrench, leading to it breaking or slipping. This not only poses a safety risk but can also damage other components or equipment.
To avoid over-tightening, follow these tips:
- Use the correct size wrench for the nut to ensure a proper fit.
- Apply gradual pressure and tighten the nut in small increments, checking the tightness regularly.
- Stop tightening once the nut is snug and secure. Avoid using excessive force.
- If you are unsure about the appropriate torque or tightness, refer to the manufacturer’s specifications or seek professional advice.
By avoiding over-tightening, you can ensure the longevity and reliability of the nut and its surrounding components.
FAQ
What is the proper position for tightening a nut with an adjustable wrench?
The proper position for tightening a nut with an adjustable wrench is to ensure that the wrench is fully engaged with the flats of the nut. This means that the jaws of the wrench should be parallel to the flats of the nut, and the wrench should be positioned so that it is applying force directly along the axis of the nut.
Why is it important to ensure the wrench is fully engaged with the flats of the nut?
It is important to ensure the wrench is fully engaged with the flats of the nut because this provides the best grip and minimizes the risk of slipping or rounding off the edges of the nut. If the wrench is not properly aligned with the nut, it can lead to damaged or stripped threads, making it difficult to tighten or loosen the nut properly.
What happens if the wrench slips while tightening a nut?
If the wrench slips while tightening a nut, it can cause damage to the nut, the bolt, or the surrounding material. It can also lead to injury if your hand slips off the wrench and makes contact with another object. It is important to ensure that the wrench is properly adjusted and fully engaged with the nut to prevent slipping.
Can an adjustable wrench be used to tighten nuts of any size?
Yes, an adjustable wrench can be used to tighten nuts of various sizes. The jaws of the wrench can be adjusted to fit different nut sizes by turning the knurled adjustment wheel at the base of the handle. However, it is important to choose the right-sized wrench for the nut to ensure a proper fit and to prevent damage to the nut or the wrench.
Is there a specific technique for tightening nuts with an adjustable wrench?
Yes, there is a specific technique for tightening nuts with an adjustable wrench. The wrench should be positioned so that it is applying force directly along the axis of the nut. The jaws of the wrench should be parallel to the flats of the nut and fully engaged with them. It is important to use smooth, controlled movements when tightening the nut to avoid over-tightening or damaging the nut or the wrench.
What should I do if the nut won’t tighten with an adjustable wrench?
If the nut won’t tighten with an adjustable wrench, there are a few things you can try. First, make sure that the wrench is properly adjusted and fully engaged with the flats of the nut. If the wrench slips or doesn’t grip the nut properly, you may need to try a different wrench size or consider using a different tool, such as a socket wrench or a torque wrench. If the nut still won’t tighten, there may be an issue with the threads or the bolt itself, and it may need to be replaced.
Are there any alternatives to using an adjustable wrench for tightening nuts?
Yes, there are alternatives to using an adjustable wrench for tightening nuts. Some common alternatives include using a socket wrench, which provides a more secure grip and allows for greater torque, or using a wrench specifically designed for a particular nut size. Other alternatives include using pliers or a pipe wrench, although these may not provide as secure of a grip and may be more likely to damage the nut or surrounding material.
Video

Meet Harrison Clayton, a distinguished author and home remodeling enthusiast whose expertise in the realm of renovation is second to none. With a passion for transforming houses into inviting homes, Harrison's writing at https://thehuts-eastbourne.co.uk/ brings a breath of fresh inspiration to the world of home improvement. Whether you're looking to revamp a small corner of your abode or embark on a complete home transformation, Harrison's articles provide the essential expertise and creative flair to turn your visions into reality. So, dive into the captivating world of home remodeling with Harrison Clayton and unlock the full potential of your living space with every word he writes.