How to Tighten an Oil Filter Without a Wrench – Easy Step-by-Step Guide

Changing the oil in your car is an important part of regular maintenance, but what do you do if you don’t have a wrench to tighten the oil filter? Don’t worry, you can still tighten the oil filter without a wrench by following these easy steps.
Step 1: Start by locating the oil filter on your vehicle. It’s usually located near the engine and looks like a small cylindrical canister with ridges on the top.
Step 2: Once you’ve located the oil filter, use your hand to grip the ridges on the top and begin turning it in a clockwise direction. The oil filter should come off easily with just your hand, but if it’s too tight, you can use a clean cloth or rubber gloves for better grip.
Step 3: After removing the old oil filter, inspect the gasket that sits between the filter and the engine. Make sure it’s in good condition and not stuck to the engine. If it’s damaged or stuck, you’ll need to replace it before installing the new filter.
Step 4: Take your new oil filter and apply a small amount of fresh oil to the gasket. This will help create a tight seal and prevent leaks.

Step 5: Once the gasket is oiled, carefully thread the new oil filter onto the engine by hand. Make sure it’s lined up properly and then turn it in a counterclockwise direction until it feels snug.
Step 6: Finally, use your hand to give the oil filter a final quarter turn in a clockwise direction to ensure it’s securely tightened. Be careful not to overtighten, as this can cause damage to the filter or the engine.
Remember, it’s important to regularly check and change your oil filter to keep your engine running smoothly. By following these simple steps, you can tighten an oil filter without a wrench and keep your car in top condition.
Prepare Your Tools and Workspace
Before you begin tightening an oil filter without a wrench, it’s important to gather all the necessary tools and prepare your workspace. Here are the tools you’ll need:

- Oil filter
- Disposable gloves
- Clean rags
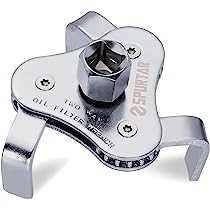
- Oil filter wrench (optional)
Having all the tools ready beforehand will make the process smoother and more efficient.
Step 1: Find a Suitable Workspace
You’ll want to work in a well-ventilated area with enough room to move around comfortably. It’s best to do this task outdoors or in a garage with ample space to avoid any spills or accidents.
Step 2: Gather the Necessary Tools
Make sure you have all the tools listed above within reach. This includes an oil filter, disposable gloves, clean rags, and an oil filter wrench (if available).
Step 3: Wear Disposable Gloves
Protect your hands by wearing a pair of disposable gloves. This will help prevent any oil or dirt from coming into direct contact with your skin.

Step 4: Prepare the Oil Filter
Inspect the oil filter and ensure it is the correct size and type for your vehicle. It’s also a good idea to lightly coat the gasket of the new oil filter with a small amount of fresh oil. This will help create a good seal when you install it.
Step 5: Have Clean Rags Handy

Keep a few clean rags nearby to wipe up any spills or excess oil during the process. Having these rags ready will help keep your workspace clean and prevent any accidents.
By following these steps and preparing your tools and workspace beforehand, you’ll be ready to tighten an oil filter without a wrench. This will make the task easier and ensure a properly sealed oil filter.
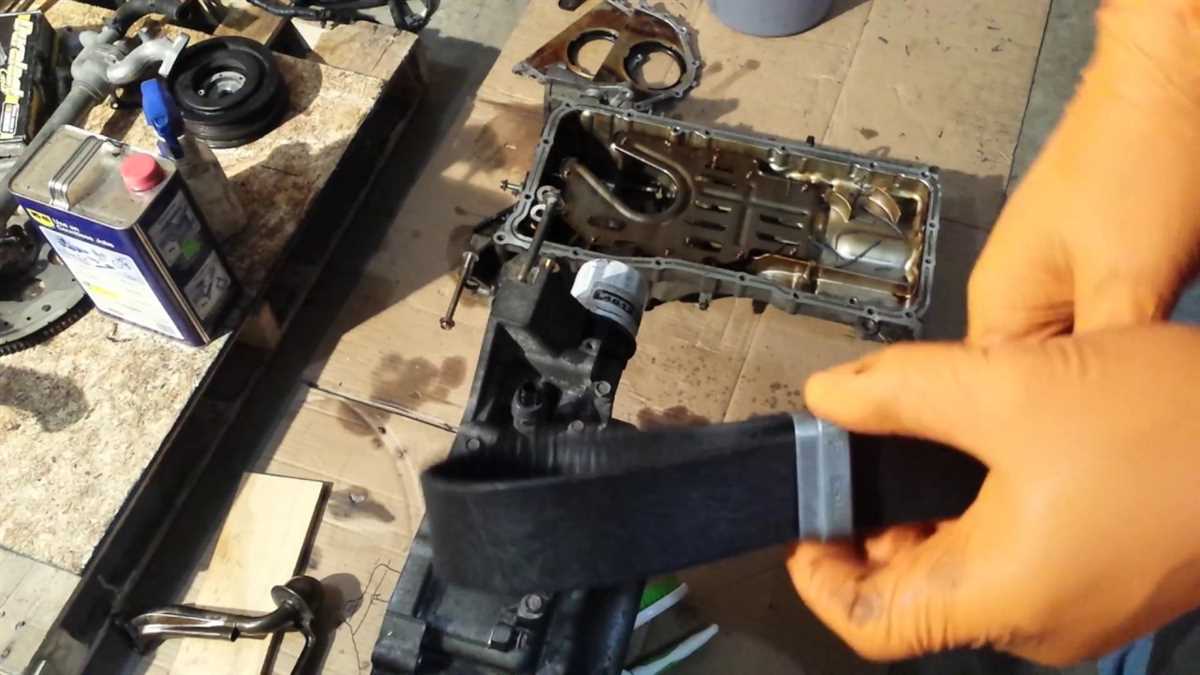
Locate the Oil Filter
Before you can tighten the oil filter without a wrench, you first need to locate it. The oil filter is typically located on the side or bottom of the engine block. It may be easier to locate the oil filter by referring to the owner’s manual or consulting with a mechanic.

Here are some general steps to help you locate the oil filter:
- Open the hood of your vehicle and secure it in place.
- Locate the engine block. It is usually the largest component under the hood and is often labeled.
- Examine the sides and bottom of the engine block for a cylindrical or oval-shaped metal or plastic filter housing. This is the oil filter.
- If you are having trouble finding the oil filter, you can also follow the oil lines from the oil pan, which will lead you to the filter.
Once you have located the oil filter, you can move on to tightening it without a wrench.
Assess the Filter’s Tightness
Before attempting to tighten an oil filter without a wrench, it’s important to assess the filter’s current tightness. This will help determine how much force is required to tighten it further.
Follow these steps to assess the tightness of the oil filter:
- Inspect the oil filter visually. Look for any signs of oil leakage around the filter or the area where it’s attached to the engine.
- Using your hand, try to turn the oil filter counterclockwise (left) to loosen it. If the filter easily moves or turns with little resistance, it indicates that it’s not tightly secured.
- If the filter does not move or turns with difficulty, it suggests that it’s already securely tightened. In such cases, it’s advisable not to attempt to tighten it further, as it can lead to damage or even an oil leak.
In general, oil filters are usually tightened to a specific torque specification recommended by the vehicle manufacturer. If you’re unsure about the correct torque, it’s best to consult the vehicle’s manual or contact a professional mechanic for guidance.

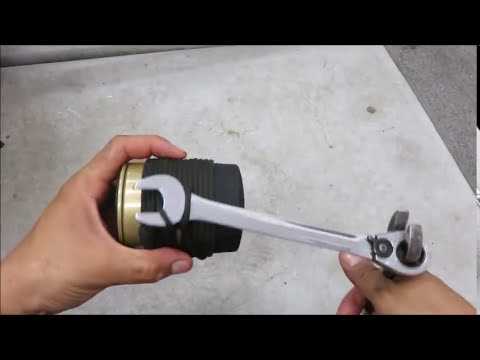
Use a Cloth or Rubber Glove for Extra Grip
If you find that your oil filter is too tight to remove by hand, you can use a cloth or rubber glove to get a better grip. This will help you loosen the filter without having to use a wrench.
To use a cloth or rubber glove, simply wrap it around the oil filter and twist it counterclockwise. The extra grip provided by the glove will make it easier to apply the necessary force to loosen the filter.
Make sure that the cloth or rubber glove is clean and free from any oil or debris. This will prevent it from slipping and ensure a secure grip on the filter.
When using a cloth or rubber glove, it’s important to be cautious and not exert too much force, as this can damage the filter or cause it to break. Apply steady pressure and adjust the angle of your grip if necessary to loosen the filter gradually.
If you still find it difficult to loosen the filter with a cloth or rubber glove, you may need to use an oil filter wrench or seek assistance from a professional mechanic.
Hand-Tighten the Filter with Force
Once you’ve removed the old oil filter, it’s time to install the new one. Here’s how to hand-tighten the filter with force:
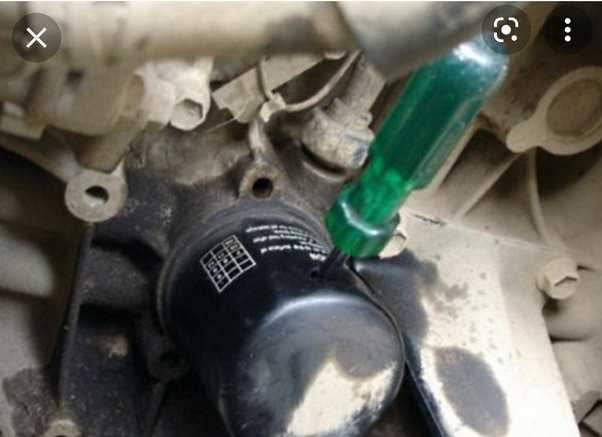
- Take your new oil filter and lubricate the rubber gasket with a thin layer of oil to ensure a proper seal.
- Align the threads of the oil filter with the threads on the oil filter mount.
- Using your hand, start turning the filter clockwise to thread it onto the mount. Make sure to apply firm pressure while turning.
- Continue tightening the filter until the gasket makes contact with the mount. At this point, it should be snug and properly seated.
- Using a filter wrench or a rag, give the filter an additional 1/4 to 1/2 turn to secure it tightly.
It is important not to overtighten the oil filter, as this can cause damage to the gasket or the filter mount. On the other hand, if the filter is not tightened enough, it may loosen over time and lead to an oil leak. Applying the right amount of force is crucial to ensure a proper seal without causing any damage.
Remember to always refer to your vehicle’s owner’s manual for specific instructions and torque specifications for tightening the oil filter. Different vehicles may have different requirements, so it’s important to follow the manufacturer’s recommendations.
Check for Leaks
After tightening the oil filter, it is important to check for any leaks. This step is crucial as a loose or improperly sealed oil filter can result in oil leakage and engine damage. Here are a few steps to follow to check for leaks:
- Wipe the area clean: Use a clean rag or paper towels to wipe away any oil residue or dirt around the oil filter and the surrounding area.
- Start the engine: Start the engine and let it run for a few minutes to allow the oil to circulate.
- Inspect the oil filter: Carefully examine the oil filter for any signs of leakage. Look for oil seepage around the filter, drips, or any wetness on the surface.
- Check the oil pressure warning light: Keep an eye on the oil pressure warning light on your dashboard. If the light stays lit or turns on after starting the engine, it may indicate a leak.
If you notice any leaks or signs of leakage, it is important to address the issue immediately. Shut off the engine and carefully tighten the oil filter further if necessary. If the leak persists, the oil filter may need to be replaced.
Regularly checking for leaks is an essential maintenance task that ensures the longevity and performance of your engine. It is recommended to check for leaks after every oil change or when you notice any oil spots or drips on the ground beneath your vehicle.
Test the Filter’s Tightness
Once you have tightened the oil filter as much as you can by hand, it is important to test its tightness. This step ensures that there are no leaks or potential issues with the filter.
Follow these steps to test the filter’s tightness:
- Use a clean cloth to wipe any excess oil or dirt from the oil filter and surrounding area.
- Inspect the filter for any signs of damage or cracks. If you notice any issues, replace the filter immediately.
- Place a clean piece of cardboard or paper underneath the oil filter. This will help you quickly identify any leaks.
- Start the engine and let it run for a few minutes. Pay attention to any signs of oil leakage.
- Turn off the engine and check the oil filter for any visible signs of leaking. Be sure to look around the base and the connection points.
- If you notice any leaks, you will need to tighten the oil filter further. Use an oil filter wrench for added torque.
- If there are no leaks, carefully remove the cardboard or paper from underneath the filter.
It is important to regularly check the oil filter’s tightness, especially after changing the oil. This ensures that the filter is securely tightened and prevents any potential leaks that could cause engine damage.
Clean Up and Dispose of Waste Properly
After you have successfully tightened the oil filter without a wrench, it’s important to clean up any spills and dispose of waste properly. This will help prevent any environmental contamination and keep your workspace clean and safe.
Cleaning Up Spills
If you notice any oil spills during the oil filter tightening process, it’s important to clean them up immediately. Use an absorbent material such as rags or kitty litter to soak up the oil. Gently blot the spill until all the oil is absorbed. Be careful not to spread the oil around or push it into the ground. Once the oil is absorbed, dispose of the soiled material in a sealed bag or container to prevent any further contamination.
Disposing of Waste Oil and Filters
Never dispose of waste oil or oil filters in regular trash bins or pour them down the drain. Improper disposal can harm the environment and is often illegal. Instead, follow these proper disposal methods:
- Take the used oil and oil filter to a recycling center or a local auto parts store that accepts used oil. These facilities have specialized processes for recycling or reusing the oil and filters.
- Use a suitable container to transport the used oil to the recycling center or auto parts store. Make sure the container is sealed tightly to prevent any leaks or spills during transportation.
- Some municipalities offer curbside pickup of used oil and oil filters. Check with your local waste management department to see if this service is available in your area.
Properly Storing Oil
If you plan on reusing the oil in the future, it’s important to store it properly to maintain its quality. Follow these guidelines:
- Use a clean, airtight container for storing the oil.
- Store the container in a cool, dry place away from any sources of heat or ignition.
- Keep the container out of the reach of children and pets.
- Label the container with the type of oil and the date it was used.
By following these steps, you can ensure that you clean up any spills and dispose of waste properly after tightening an oil filter without a wrench. This will help protect the environment and keep your workspace safe and clean.
FAQ
Is it possible to tighten an oil filter without a wrench?
Yes, it is possible to tighten an oil filter without a wrench. There are various methods you can use to tighten it by hand.
What tools do I need to tighten an oil filter without a wrench?
You don’t necessarily need any specific tools to tighten an oil filter without a wrench. However, having a rubber glove or towel can provide extra grip.
What are the steps to tighten an oil filter without a wrench?
First, locate the oil filter and make sure the engine is cool. Then, get a firm grip on the oil filter with your hand or a rubber glove/towel. Rotate it clockwise until you feel resistance, then tighten it an additional 3/4 to 1 full turn.
Is it important to tighten the oil filter properly?
Yes, it is important to tighten the oil filter properly to prevent leaks and ensure a secure seal. However, be careful not to overtighten it, as it can make it difficult to remove during your next oil change.
Can I use a wrench to tighten the oil filter?
While it is possible to use a wrench to tighten the oil filter, it is not recommended. Using a wrench can overtighten the filter and make it difficult to remove. Hand-tightening is typically sufficient.
Are there any potential risks of not tightening the oil filter properly?
Not tightening the oil filter properly can lead to leaks, which can cause oil to spray or drip onto hot engine parts. This can result in damage to the engine and potentially pose a fire hazard. It is important to ensure the filter is tightened securely.
Video


Meet Harrison Clayton, a distinguished author and home remodeling enthusiast whose expertise in the realm of renovation is second to none. With a passion for transforming houses into inviting homes, Harrison's writing at https://thehuts-eastbourne.co.uk/ brings a breath of fresh inspiration to the world of home improvement. Whether you're looking to revamp a small corner of your abode or embark on a complete home transformation, Harrison's articles provide the essential expertise and creative flair to turn your visions into reality. So, dive into the captivating world of home remodeling with Harrison Clayton and unlock the full potential of your living space with every word he writes.


