How to Remove Shower Head Without Wrench – Easy DIY Guide

If you’re looking to remove your shower head but don’t have a wrench on hand, don’t worry! There are several easy and effective methods you can use to remove your shower head without the need for any special tools. Whether you’re looking to replace a worn-out shower head or simply clean it, this step-by-step guide will walk you through the process.
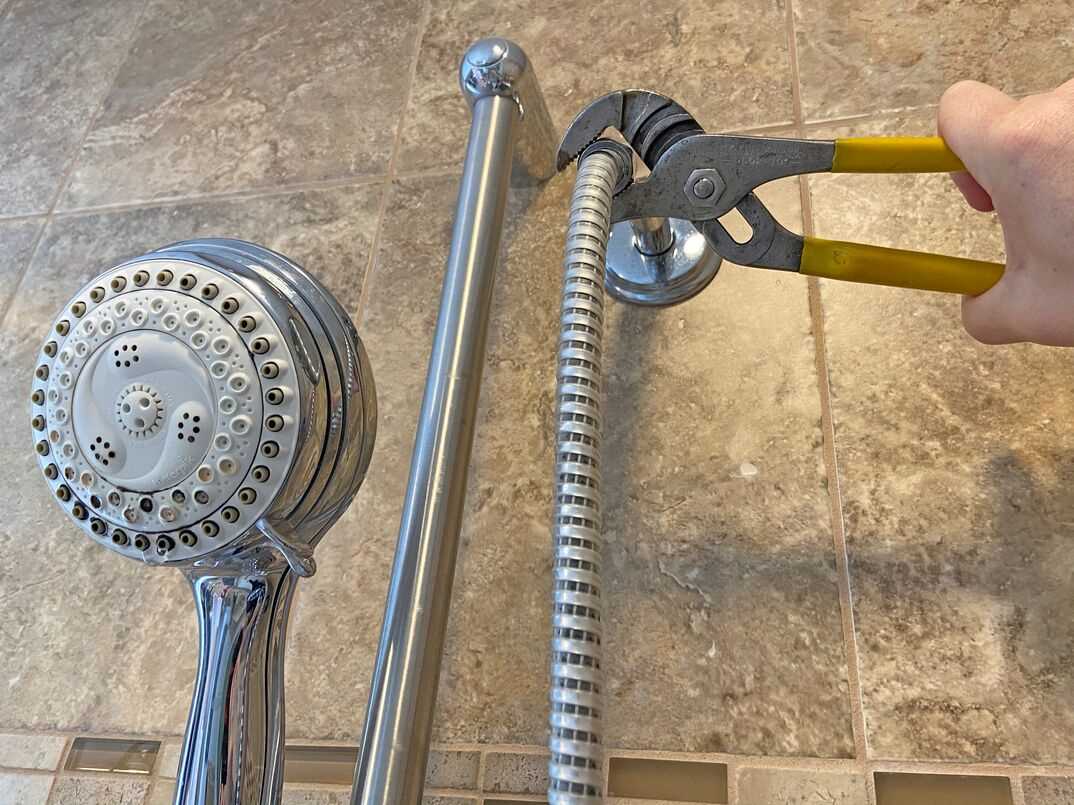
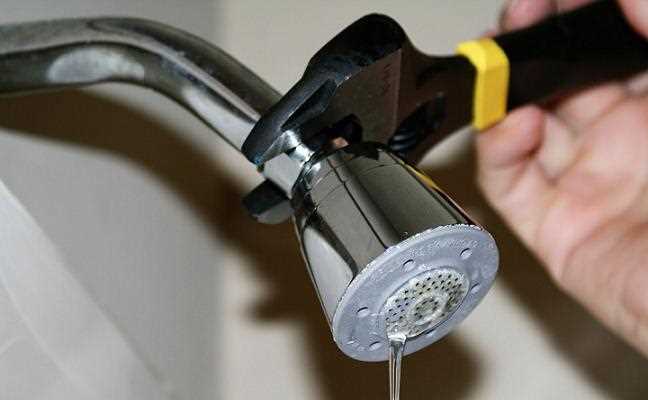
One simple method involves using a pair of pliers or adjustable wrench to grip the shower head firmly. Carefully turn the shower head counterclockwise until it loosens and can be removed by hand. Be sure to use a cloth or towel to protect the shower head from any scratches during the process. This method is great if you have a pair of pliers or an adjustable wrench readily available.
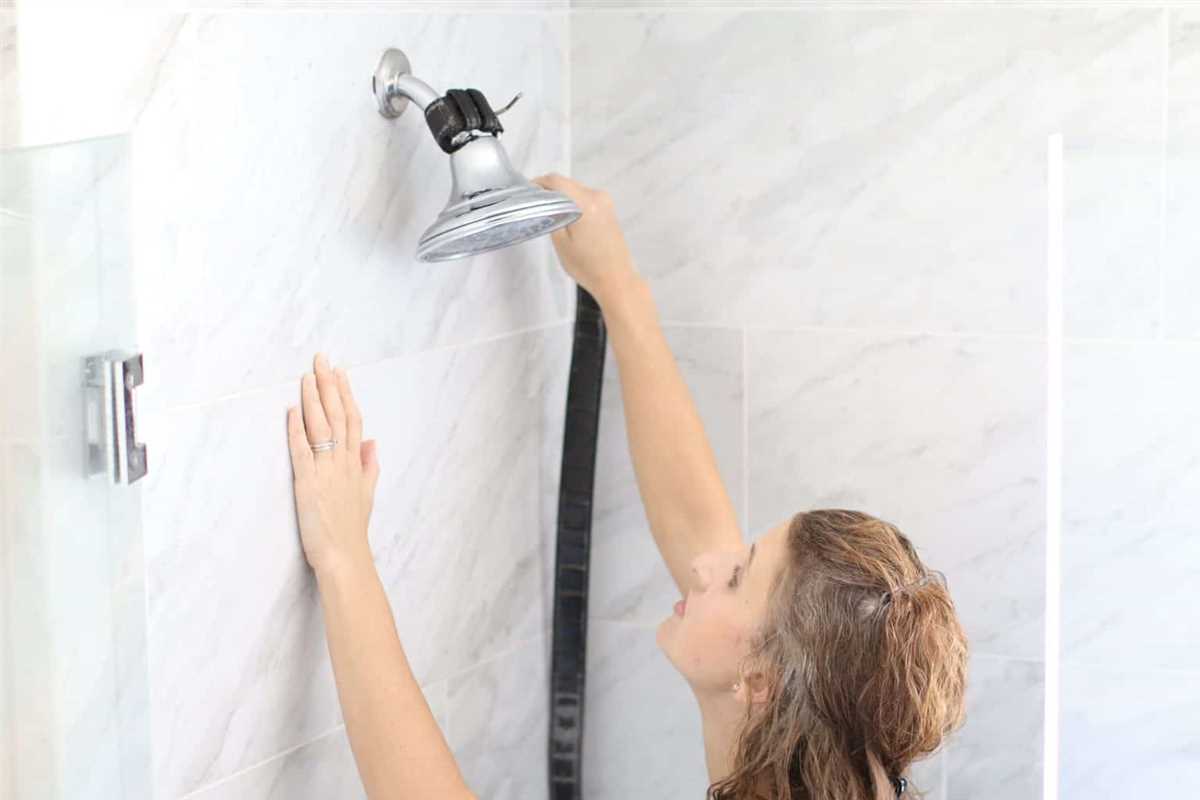
Alternatively, you can also try using a rubber or silicone jar opener or a rubber glove to grip the shower head. This will provide a better grip and make it easier to turn and loosen the shower head. Simply place the rubber jar opener or the rubber glove over the shower head, grip it firmly, and turn counterclockwise. This method is useful if you don’t have pliers or an adjustable wrench on hand.
Another option is to use a strap wrench, which is a specialized tool designed for removing stubborn objects like shower heads. Simply wrap the strap wrench around the shower head, adjust the strap to the appropriate size, and turn counterclockwise. The strap wrench provides a powerful grip without causing damage to the shower head. This method is ideal if you have a strap wrench available or are willing to purchase one.
With these easy and accessible methods, removing your shower head without a wrench is a breeze. No matter which method you choose, always remember to turn the shower head counterclockwise to loosen it. Once removed, you can clean or replace the shower head as needed. Remember to turn off the water supply before starting the process to avoid any accidents or leaks. Happy DIY-ing!

The Importance of Removing the Shower Head
Removing the shower head is an important task that should be done regularly to ensure the proper functioning of your shower. Here are a few reasons why it is important to remove the shower head:
-
Maintenance: Removing the shower head allows you to clean it thoroughly and remove any mineral deposits or buildup that may have accumulated over time. This maintenance is essential for keeping your shower head clean and preventing clogs or reduced water flow.
-
Improving water pressure: Over time, mineral deposits and other debris can build up in the shower head and restrict the flow of water. By regularly removing and cleaning the shower head, you can help restore water pressure and ensure a satisfying shower experience.
-
Preventing leaks: A shower head that is not properly attached can cause leaks or drips, wasting water and increasing your water bill. By removing the shower head carefully and reattaching it securely, you can prevent any potential leaks and conserve water.
-
Replacing or upgrading: Removing the shower head allows you to easily replace it with a new one or upgrade to a different model. This can be a simple way to improve your shower experience or add new features such as adjustable settings or a rainfall shower head.
In summary, removing the shower head is an important maintenance task that helps keep your shower clean, improves water pressure, prevents leaks, and allows for replacements or upgrades. By following the proper steps and using the right tools, you can easily remove the shower head and ensure the continued functionality of your shower.
Why Do You Need to Remove the Shower Head?
Removing the shower head may seem like a daunting task, but there are many reasons why you may need to do it.
1. Cleaning and Maintenance:
Over time, mineral deposits and debris can build up inside the shower head, causing reduced water flow and pressure. By removing the shower head, you can easily clean and maintain it, ensuring optimal performance and a refreshing shower experience.
2. Upgrading or Replacing:
If you want to upgrade or replace your shower head, removing the old one is essential. Whether you’re looking for a new design, a water-saving model, or a handheld option, removing the existing shower head is the first step in the installation process.

3. Repairing or Fixing:

In some cases, the shower head may develop leaks or other issues that require repairs. By removing the shower head, you can inspect it closely and identify any problems. This allows you to fix the issue or replace faulty parts, saving you the cost of hiring a plumber.
4. Deep Cleaning the Shower:
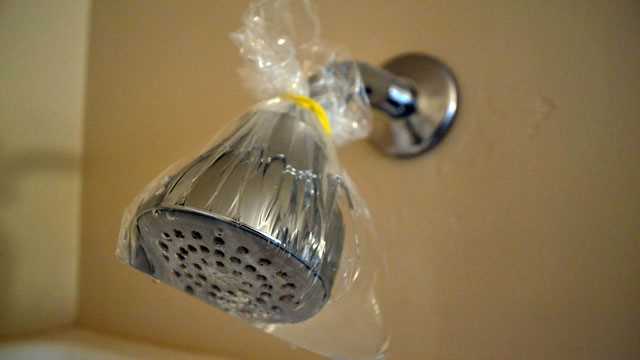
When cleaning your shower, it’s important to clean all the components, including the shower head. However, it can be difficult to thoroughly clean the shower head while it’s still attached. By removing it, you can soak it in a cleaning solution or scrub away any grime, ensuring a sparkling clean shower.
Remember, whether you’re cleaning, upgrading, or repairing, removing the shower head is an essential step. Following the proper techniques and using the right tools will help you achieve the desired results without causing any damage.
Benefits of Removing the Shower Head
Removing the shower head can provide several benefits for homeowners. Whether you are replacing an old, inefficient shower head or need to clean or repair it, taking it off can be a straightforward process with the right tools and techniques.

Improved Water Flow
One of the main benefits of removing the shower head is to improve water flow. Over time, mineral deposits and debris can clog the shower head, leading to reduced water pressure. By removing the shower head and cleaning it thoroughly, you can restore the water flow to its optimal level and enjoy a more satisfying shower experience.
Easier Cleaning
Shower heads are prone to buildup of grime, soap scum, and mold, which can not only affect water flow but also compromise hygiene. By removing the shower head, you can easily access all the nooks and crannies, making it easier to clean and ensure that it remains free from bacteria and mold.
Efficient Water Usage
Older shower heads may not be as water-efficient as newer models. Removing an old shower head and replacing it with a more water-efficient option can help you conserve water and reduce your utility bills. Many modern shower heads come with features such as adjustable water flow and aerating options, allowing you to customize your shower experience while also saving water.
Repair and Replacement
Sometimes, removing the shower head may be necessary for repair or replacement purposes. If you notice leaks, cracks, or other issues with your shower head, removing it can provide easier access for repairs. Additionally, if you are upgrading your bathroom or simply want to change the aesthetic, removing the shower head allows you to replace it with a new one that matches your style and preferences.
Opportunity for Upgrades

Removing the shower head opens up the opportunity to upgrade your showering experience. You can explore different types of shower heads, such as handheld or rain shower heads, that offer unique features and more luxurious bathing experiences. This can enhance the overall ambiance and functionality of your bathroom.
In conclusion, removing the shower head can have several benefits, including improved water flow, easier cleaning, efficient water usage, repair and replacement opportunities, and the ability to upgrade your showering experience. Whether you are looking to enhance water pressure, fix a problem, or simply want a change, removing the shower head is a simple DIY task that can yield significant benefits.
Tools and Materials Needed
- Adjustable pliers or a wrench
- Masking tape
- Teflon tape
- Bucket
- Cloth or towel
- Step ladder or stool
Before starting the process of removing a shower head without a wrench, make sure you have the following tools and materials ready:
- Adjustable pliers or a wrench: These will help you apply enough force to loosen the shower head.
- Masking tape: This is used to protect the shower head from scratches or damages during the removal process.
- Teflon tape: You will need this to reseal the shower head after removing it.
- Bucket: Place a bucket underneath the shower head to catch any water that may spill during the removal.
- Cloth or towel: Use this to wipe off any excess water or to provide a better grip when removing the shower head.
- Step ladder or stool: Depending on the height of your shower head, you may need a step ladder or stool to reach it comfortably.
Gathering these tools and materials beforehand will make the process of removing your shower head without a wrench much easier and more convenient.
Essential Tools for Removing the Shower Head
Before you begin removing the shower head, it’s important to gather the necessary tools to ensure a smooth and successful removal process. Here are the essential tools you’ll need:

- Adjustable wrench: An adjustable wrench is a versatile tool that can be adjusted to fit different sizes of nuts and bolts. It will come in handy for removing the shower head.
- Plumber’s tape: Plumber’s tape, also known as Teflon tape, is an essential item for creating a watertight seal when reattaching the shower head. This tape helps prevent leaks and ensures a secure fit.
- Soft cloth or rag: Having a soft cloth or rag nearby is useful for wiping away any excess water or debris that may be present around the shower head.
- Bucket or container: To catch any water that may drip during the removal process, have a bucket or container ready to prevent any mess or water damage.
- Step ladder or stool: Depending on the height of your shower head, you may need a step ladder or stool to reach and comfortably remove the shower head.
By having these essential tools on hand, you’ll be well-prepared to tackle the task of removing your shower head without a wrench.
Additional Materials for a Smooth Removal Process
- A pair of gloves: Gloves will protect your hands from any sharp edges or potential injuries during the removal process.
- A cloth or rag: Use a cloth or rag to protect the shower head from scratches or damage as you remove it.
- Teflon tape: Teflon tape is a handy material that helps create a tight seal when reattaching the shower head. Apply it to the threads of the shower arm before installing the new shower head.
- An adjustable wrench: Although the main focus of this guide is how to remove a shower head without a wrench, having an adjustable wrench on hand can provide additional leverage and make the removal process easier.
- A pipe wrench or pliers: If the shower head is stuck and difficult to remove, a pipe wrench or pliers can provide the extra grip needed to loosen it.
- A bucket or towel: Place a bucket or towel underneath the shower head to catch any water that may spill during the removal process.
- A ladder or step stool: If the shower head is located high up, a ladder or step stool may be necessary to reach it safely.
Having these additional materials will ensure a smoother and more efficient shower head removal process, making your DIY project a success.
Step-by-Step Guide
1. Gather the necessary tools
Before starting the process of removing a shower head without a wrench, it is important to gather all necessary tools. These tools include:
- Adjustable pliers
- Thin cloth or rubber glove
- Teflon tape
2. Turn off the water supply
Locate the water shut-off valve for the shower and turn it off to prevent any water flow during the removal process. This valve is usually located near the shower or in the basement.
3. Protect the shower head
To avoid any damage to the shower head, wrap a thin cloth or put on a rubber glove around it. This will provide a protective layer and prevent any scratches or dents.
4. Loosen the shower head
Using the adjustable pliers, grip the shower head firmly around its base. Begin turning it counterclockwise to loosen it from the shower arm. Apply steady pressure and be careful not to damage the shower arm or any surrounding tiles or fixtures.
5. Remove the shower head
Continue turning the shower head counterclockwise until it is completely unthreaded from the shower arm. Once removed, set it aside in a safe place.
6. Clean the shower arm
Inspect the shower arm for any debris or mineral buildup. Use a cloth or brush to clean it thoroughly before proceeding.
7. Apply Teflon tape
To ensure a tight seal when reinstalling the shower head, wrap a few layers of Teflon tape around the threads of the shower arm. This will prevent any leaks when the shower head is reattached.
8. Reattach the shower head
Hold the removed shower head and align its threads with the newly taped threads on the shower arm. Begin turning it clockwise to tighten it onto the shower arm. Use the adjustable pliers if necessary to provide extra leverage to ensure a secure fit.
9. Turn on the water supply
Once the shower head is securely reattached, turn on the water supply by reopening the shut-off valve. Check for any leaks around the shower head and make sure the water flows properly.
Step 1: Turn Off the Water Supply
Before removing the shower head, it is crucial to turn off the water supply to prevent any accidental leakage or water damage. Follow these steps to turn off the water supply:
- Locate the water shut-off valve: The water shut-off valve is typically located near the shower area. It may be located on the wall, floor, or behind an access panel. Look for a valve handle or knob.
- Turn off the water: Once you have located the shut-off valve, turn it clockwise until it is fully closed. This will stop the water flow to the shower head.
- Test the water supply: To confirm that the water supply is shut off, turn on the shower faucet and see if any water comes out. If the water flow stops, you have successfully turned off the water supply. If water continues to flow, make sure that you have turned the valve completely closed.
It is essential to turn off the water supply before removing the shower head to avoid any potential water damage and ensure a safe removal process.
Step 2: Prepare the Work Area
Before you begin removing the shower head, it’s important to prepare the work area to prevent any accidents or damage.
Gather the necessary tools
Make sure you have all the tools you will need for the job. This includes a towel or rag, pliers or an adjustable wrench, Teflon tape, and a bucket or bowl.
Turn off the water supply
Locate the water shut-off valve for your shower and turn it off. This will prevent any water from flowing while you are removing the shower head.
Protect the shower fittings
Wrap a towel or rag around the shower arm, the pipe that the shower head is attached to. This will protect the fittings from being scratched or damaged while you are working.
Place a bucket or bowl underneath
Position a bucket or bowl underneath the shower head to collect any water that may drip out once you remove it. This will help keep your work area clean and prevent water damage.
Use Teflon tape
If you have Teflon tape, wrap it around the threaded part of the shower arm. This will provide a watertight seal when you reattach the shower head.
Once you have prepared the work area, you are ready to move on to the next step, which is actually removing the shower head.
Step 3: Loosen the Shower Head
Once you have turned off the water supply and detached the shower hose, it’s time to loosen the shower head from its place. Follow these simple steps:
- Put on a pair of gloves to protect your hands from any sharp edges or hot surfaces.
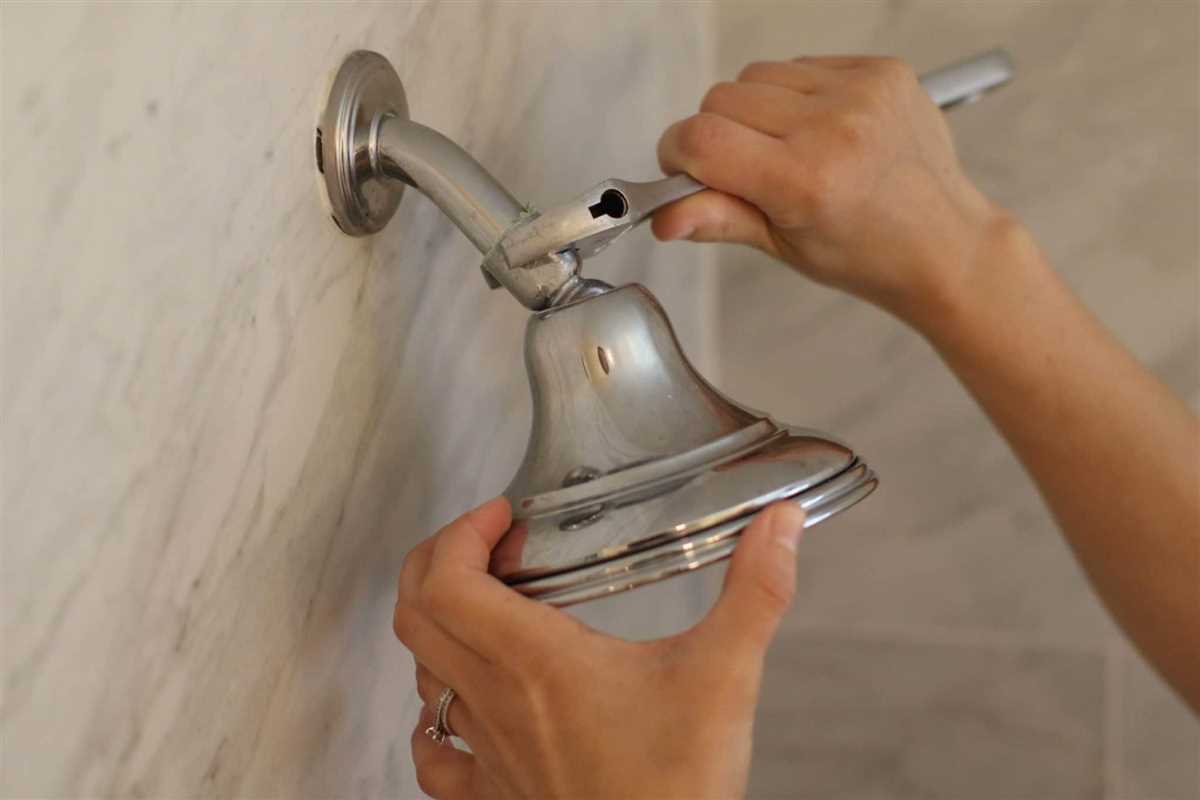
- Check if there is a small screw securing the shower head in place. If so, use a screwdriver to remove it.
- If there is no screw, use an adjustable wrench or pliers to grip the shower head firmly.
- Turn the shower head counterclockwise to loosen it. Apply steady pressure until it starts to come loose.
- If the shower head is not budging, you can try using a pipe wrench or a strap wrench for extra leverage.
- Continue turning the shower head counterclockwise until it is completely loosened.
At this point, the shower head should be free and you can easily remove it by unscrewing it with your hands. If the shower head is still stuck, you may need to apply some penetrating oil to help loosen it or seek professional help.
Now that the shower head is loosened, you can proceed to the next step of removing it completely.
FAQ
Is it possible to remove a shower head without using a wrench?
Yes, it is possible to remove a shower head without using a wrench. There are a few different methods you can try, such as using pliers, a strap wrench, or even just your hands if the shower head is not too tight.
What tools do I need to remove a shower head without a wrench?
You can use a pair of pliers, a strap wrench, or even just your hands to remove a shower head without a wrench. Pliers and a strap wrench can provide extra grip and leverage to help loosen the shower head.
Can I remove a shower head by hand?
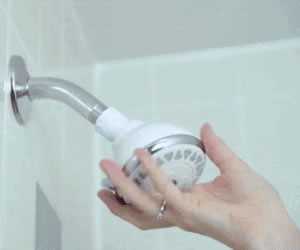
Yes, you can remove a shower head by hand if it is not too tight. Simply twist the shower head counterclockwise to loosen it, and then continue unscrewing it until it is fully removed.
What should I do if the shower head is stuck and I can’t remove it without a wrench?
If the shower head is stuck and you can’t remove it without a wrench, you can try using pliers or a strap wrench for extra leverage and grip. Alternatively, you can try using a lubricant, such as WD-40, to help loosen the shower head.
Are there any risks of damaging the shower head or the plumbing when removing it without a wrench?
There is a risk of damaging the shower head or the plumbing if excessive force is applied or if the wrong tools are used. It is important to use caution and take your time when removing a shower head without a wrench to avoid any potential damage.
What are some alternative methods for removing a shower head without a wrench?
In addition to using pliers or a strap wrench, you can also try using a rubber glove or a rubber band for extra grip. Simply wrap the rubber glove or band around the shower head and use it to provide more traction when twisting and unscrewing the shower head.
Video

Meet Harrison Clayton, a distinguished author and home remodeling enthusiast whose expertise in the realm of renovation is second to none. With a passion for transforming houses into inviting homes, Harrison's writing at https://thehuts-eastbourne.co.uk/ brings a breath of fresh inspiration to the world of home improvement. Whether you're looking to revamp a small corner of your abode or embark on a complete home transformation, Harrison's articles provide the essential expertise and creative flair to turn your visions into reality. So, dive into the captivating world of home remodeling with Harrison Clayton and unlock the full potential of your living space with every word he writes.