How to Remove Oil Filter Cap Without a Wrench – Easy Steps

Removing an oil filter cap without a wrench can be a daunting task, especially if you don’t have access to the right tools. However, there are several simple and effective methods that can help you remove the cap with ease. In this article, we will explore a few of these methods to ensure that you can complete the task without any hassle.
Method 1: Using a Rubber Band
If you don’t have a wrench, a simple rubber band can be a great alternative. Start by wrapping the rubber band tightly around the oil filter cap. The rubber band will provide additional grip and traction, making it easier to twist and remove the cap. Make sure the rubber band is tight enough so that it doesn’t slip off while you apply pressure. Once the rubber band is in place, turn the cap counterclockwise to loosen and remove it.
Method 2: Using a Screwdriver
If you have a screwdriver on hand, you can use it to remove the oil filter cap. Insert the blade of the screwdriver into one of the three notches on the cap. Hold the screwdriver firmly and use it as a lever to apply force in the counterclockwise direction. The leverage provided by the screwdriver will make it easier to loosen and remove the cap. However, be careful not to damage the filter cap or the surrounding components with the screwdriver.

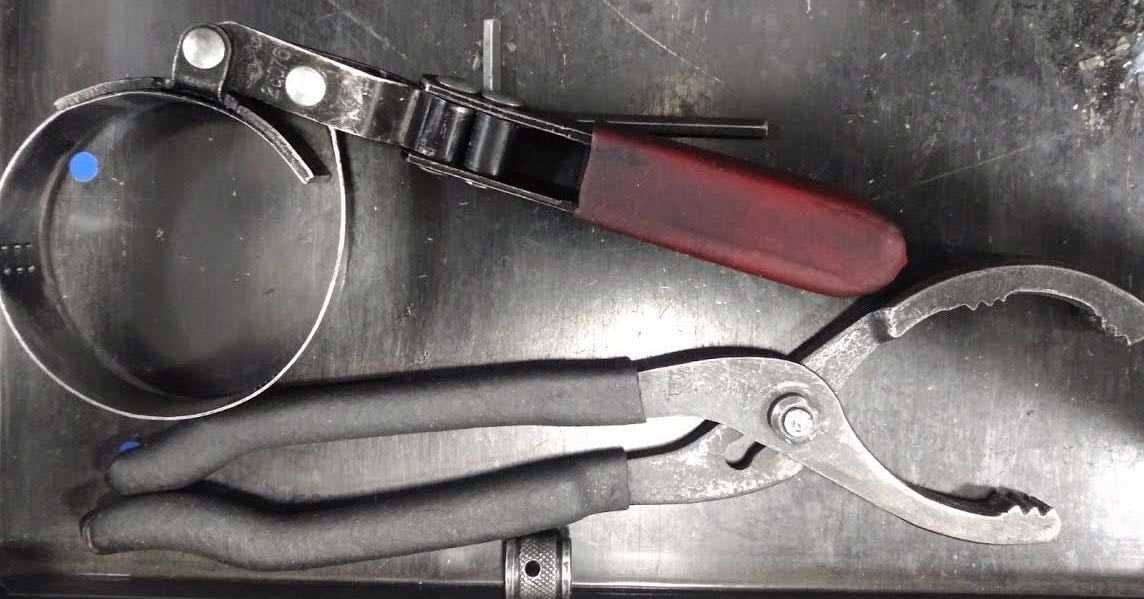
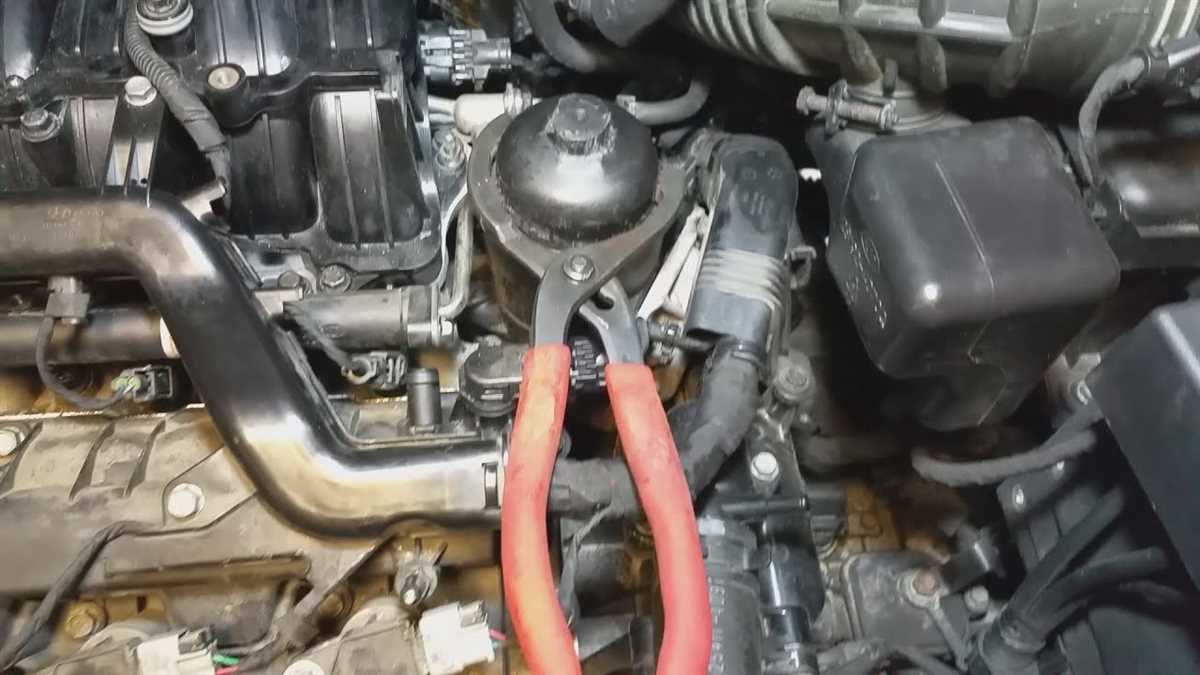
Method 3: Using a Pair of Pliers
In the absence of a wrench, a pair of pliers can be a suitable substitute. Gently grip the oil filter cap with the pliers and make sure to apply even pressure. Turn the cap counterclockwise to loosen it. Pliers with a non-slip surface or teeth will provide better grip and prevent the pliers from slipping off. Again, exercise caution to avoid damaging the cap or any surrounding parts with the pliers.
Remember, it’s essential to use caution and be mindful of the surroundings when attempting to remove an oil filter without a wrench. If you encounter any resistance or difficulties, it may be best to seek professional assistance to prevent any damage to your vehicle.
In conclusion, removing an oil filter cap without a wrench is possible with a few simple tools and techniques. Whether using a rubber band, screwdriver, or pair of pliers, these methods can help you accomplish the task hassle-free. However, always exercise caution and be aware of your vehicle’s unique requirements to avoid any damage.
Step 1: Prepare the necessary tools
Before attempting to remove an oil filter cap without a wrench, it is important to have the right tools on hand. Here are the tools you will need:

- Rubber glove: This will help provide a better grip on the oil filter cap and prevent your hand from slipping.
- Oil filter wrench alternative: Instead of using a traditional oil filter wrench, you can use a rubber strap wrench or a belt wrench to remove the cap.
- Empty container: Have an empty container ready to catch any oil that may spill during the process.
- Clean cloth: It is always a good idea to have a clean cloth nearby to wipe away any residual oil or dirt.
Once you have gathered these tools, you will be ready to proceed with the next steps of removing the oil filter cap without a wrench.
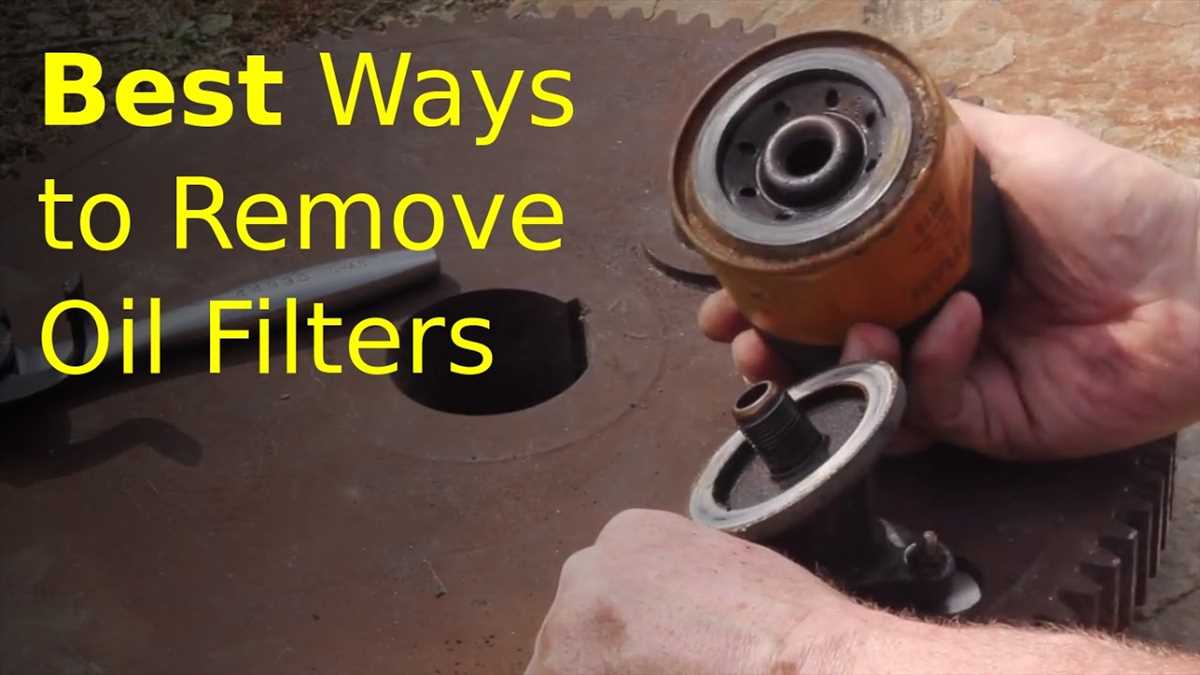
Step 2: Locate the oil filter cap
Before you can remove the oil filter cap, you need to locate it. The oil filter cap is typically located near the bottom of the engine, in the vicinity of the oil pan. It is a round or cylindrical object that is usually made of metal.
To find the oil filter cap, you can refer to your vehicle’s owner’s manual for specific instructions and diagrams. The manual will provide you with the exact location of the oil filter cap in your vehicle.
If you don’t have access to the owner’s manual, you can also visually inspect the engine. Look for a cylindrical object that is connected to the engine block by a large nut or bolt. The oil filter cap may have some branding or labeling on it, such as the manufacturer’s logo or the word “oil” printed on it.

Additionally, you can look for the oil filter cap by locating the oil filter itself. The oil filter is typically located near the oil pan and is connected to the engine by a pipe or hose. The oil filter cap is usually located on top of the oil filter.
Once you have located the oil filter cap, you are ready to move on to the next step of the process.
Step 3: Clean the area around the cap

Before attempting to remove the oil filter cap, it is important to ensure that the area around the cap is clean. This will help prevent any dirt or debris from falling into the oil system once the cap is removed.
To clean the area around the cap, follow these steps:

- Gather a clean cloth or paper towel.
- Dampen the cloth or paper towel with a small amount of degreaser or soapy water.
- Gently wipe the area around the oil filter cap, ensuring that any dirt or grime is removed.
- Inspect the area to ensure it is clean and free from any residue.
By taking the time to clean the area around the oil filter cap, you can help ensure a smooth and hassle-free removal process.
Step 4: Use a rubber glove for grip
If you don’t have a rubber strap wrench or an oil filter wrench, don’t worry! You can still remove the oil filter cap using a simple rubber glove. Here’s how:
- Put on a clean rubber glove.
- Wrap your hand around the oil filter cap, making sure the glove has a firm grip.
- Apply pressure and turn the cap counterclockwise to loosen it.
- Continue unscrewing the cap until it comes off completely.
A rubber glove provides extra grip and friction, making it easier to loosen and remove the oil filter cap. Just make sure you have a good grip on the cap and apply steady pressure while turning it. If the cap is still difficult to remove, you can try using a towel or cloth for added grip.
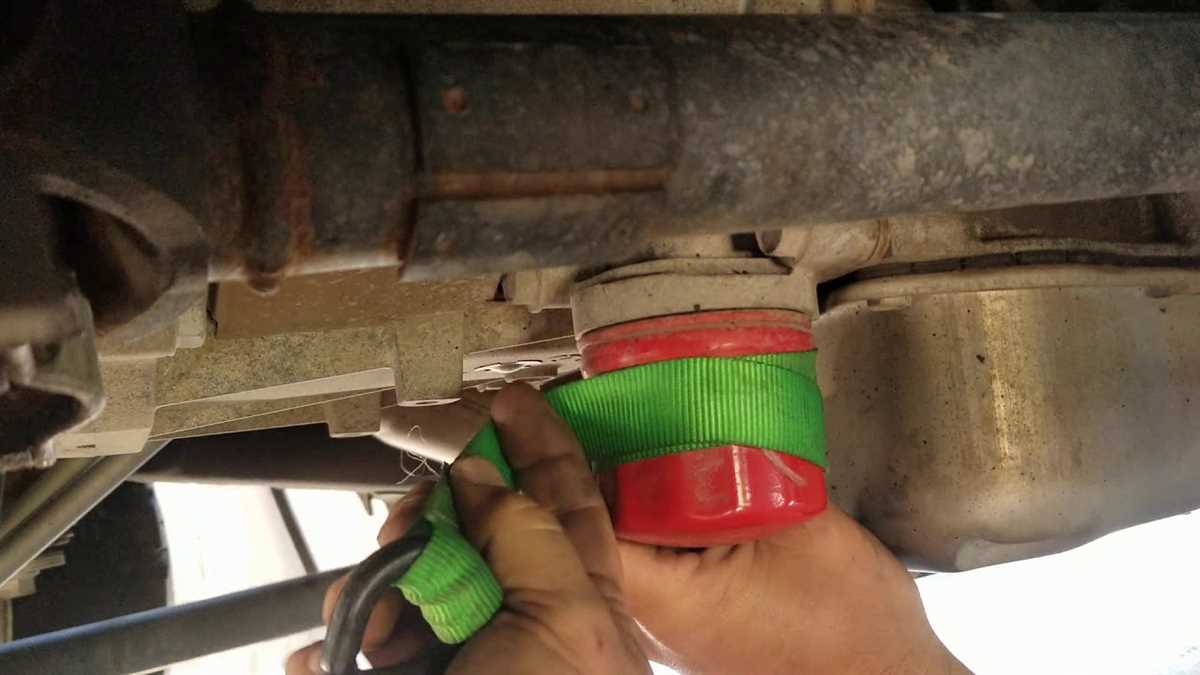
Step 5: Use a rubber band or belt for extra leverage

If you are still having trouble removing the oil filter cap without a wrench, you can try using a rubber band or a belt to provide extra leverage. This method can help you get a better grip on the cap and make it easier to loosen.
Here’s how to use a rubber band or belt:
- Wrap a rubber band or a belt tightly around the oil filter cap. Make sure it’s secure and won’t slip off during the process.
- Hold onto the rubber band or belt and try to turn the cap counterclockwise to loosen it. The added grip provided by the rubber band or belt should make it easier to apply enough force to remove the cap.
- Continue turning the cap until it is completely loose. Once it’s loose, you can remove the rubber band or belt and unscrew the cap by hand.
Note: Be careful not to overtighten the oil filter cap when reinstalling it. It should be tightened according to the manufacturer’s specifications to ensure a proper seal.
Using a rubber band or belt can be a simple and effective way to remove the oil filter cap without a wrench. Give it a try if you’re having difficulty with the previous steps, and you should be able to remove the cap with ease.
Step 6: Apply pressure and turn counterclockwise
Once you have a firm grip on the oil filter cap, you will need to apply pressure and turn it counterclockwise to loosen it. Remember to use your non-dominant hand to stabilize the filter housing while turning it with your dominant hand.
Begin by applying downward pressure on the cap while simultaneously turning it counterclockwise. The pressure will help create enough friction to break the seal and allow you to loosen the cap.
It is important to note that the cap may be tight due to previous oil changes or the use of a wrench. In such cases, you may need to use more force to turn the cap.
Be cautious not to apply too much force as it may cause the cap to break or damage the filter housing. Use gradual force and increase it if necessary until the cap starts to turn.
Once the cap starts to turn, continue to apply pressure while rotating it counterclockwise until it is completely loose. You can then remove the cap by pulling it upwards.
If you are still having trouble turning the cap, you can try using a rubber glove or a piece of cloth to improve your grip. These materials can provide better traction and make it easier to turn the cap.
Remember to never use excessive force or use tools like pliers or wrenches to remove the oil filter cap, as it may cause damage to the filter housing or lead to leaks.
Step 7: Remove the oil filter cap
-
Using your hand, grip the oil filter cap firmly and turn it counterclockwise to loosen it.
-
If the cap is too tight to remove by hand, you can use a non-slip material, such as a rubber jar opener, to provide a better grip.
-
Continue turning the oil filter cap counterclockwise until it can be easily lifted off the engine.
-
Place the oil filter cap in a clean and safe location, away from any dirt or debris.
Step 8: Clean and replace the cap and filter

Now that you have successfully removed the oil filter cap, it’s time to clean and replace both the cap and the filter. Follow the steps below to complete this process:
- Inspect the oil filter cap and the filter for any signs of damage or wear. If you notice any cracks or leaks, it’s advisable to replace them.
- Use a clean cloth or paper towel to wipe off any debris or oil residue from the cap and filter. Ensure they are completely clean before moving on to the next step.
- Apply a thin layer of fresh oil to the rubber gasket on the new oil filter.
- Insert the new oil filter into the filter housing and hand-tighten it until it’s snug. Be careful not to overtighten it, as it can cause leaks.
- Take the cleaned oil filter cap and place it back onto the filter housing. Line up the tabs on the cap with the slots on the housing.
- Push down firmly on the cap while twisting it counterclockwise to tighten it. Ensure that the cap is securely fastened.
- Double-check that everything is properly installed and tightened.
Congratulations! You have successfully cleaned and replaced the oil filter cap and filter. Now you can move on to the next steps in the oil changing process.
FAQ
What can I do if I don’t have a wrench to remove the oil filter cap?
If you don’t have a wrench, there are a few alternative methods you can try. One option is to use a rubber strap wrench, which can provide enough grip to loosen the cap. Another option is to use a pair of pliers or channel locks to turn the cap counterclockwise. If these methods don’t work, you could also try using a screwdriver and gently tapping it with a hammer to loosen the cap.
Is it possible to remove the oil filter cap without any tools?
While it may be difficult to remove the oil filter cap without any tools, it is not impossible. One method you can try is using a pair of rubber gloves to provide extra grip while turning the cap. Another option is to use a thick cloth or towel to wrap around the cap and provide extra traction. Keep in mind that these methods may require more strength and effort compared to using a proper wrench or tool.
Can I use a different type of wrench to remove the oil filter cap?
Yes, you can use a different type of wrench to remove the oil filter cap if you don’t have the specific one. One option is to use an adjustable wrench, which can be adjusted to fit the size of the cap. Another option is to use a socket wrench with the correct size socket for the cap. Just make sure that the wrench or socket is securely fitted to the cap to prevent any slipping or damage.
Are there any household items I can use to remove the oil filter cap?
Yes, there are several household items that can be used to remove the oil filter cap if you don’t have a wrench. One option is to use a pair of locking pliers, such as Vise-Grips, to grip and turn the cap. Another option is to use a large pair of channel locks or water pump pliers. Additionally, you could try using a large adjustable wrench or even a pipe wrench if you have one available.
What should I do if the oil filter cap is stuck and won’t budge?
If the oil filter cap is stuck and won’t budge, there are a few things you can try. First, make sure you are turning the cap in the correct direction, which is usually counterclockwise to loosen. If it still won’t move, you can try using some penetrating oil, such as WD-40, around the cap to help loosen any stuck parts. Additionally, tapping the cap gently with a hammer can sometimes help break free any corrosion or debris that may be causing it to stick.
Is it necessary to remove the oil filter cap during an oil change?
In most cases, it is necessary to remove the oil filter cap during an oil change. This is because the oil filter is typically located inside the cap and needs to be replaced along with the old oil. Removing the cap allows you to access and remove the old oil filter, and then install a new one before adding fresh oil. However, it’s always a good idea to consult your vehicle’s owner manual for specific instructions and guidelines regarding your oil change procedure.
Video


Meet Harrison Clayton, a distinguished author and home remodeling enthusiast whose expertise in the realm of renovation is second to none. With a passion for transforming houses into inviting homes, Harrison's writing at https://thehuts-eastbourne.co.uk/ brings a breath of fresh inspiration to the world of home improvement. Whether you're looking to revamp a small corner of your abode or embark on a complete home transformation, Harrison's articles provide the essential expertise and creative flair to turn your visions into reality. So, dive into the captivating world of home remodeling with Harrison Clayton and unlock the full potential of your living space with every word he writes.