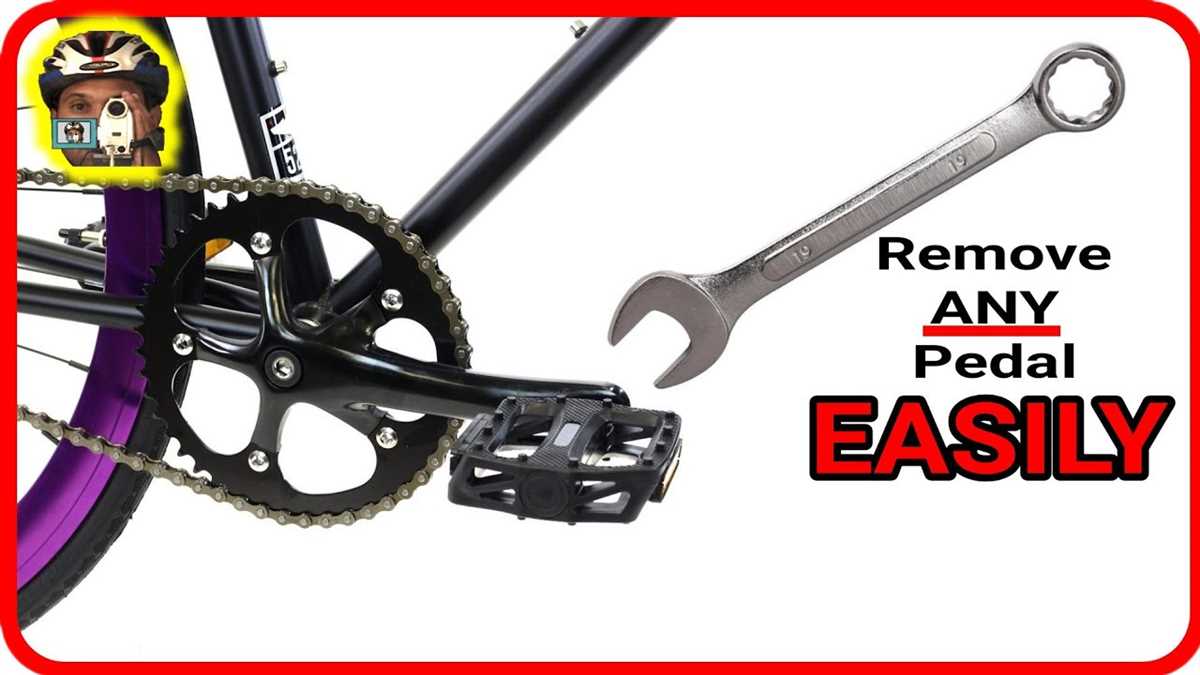
How to Remove Bike Pedals with an Allen Wrench | Step-by-Step Guide

Removing bike pedals may seem like a daunting task, but with the right tools and techniques, it can be a straightforward process. One common tool that you can use to remove bike pedals is an Allen wrench, also known as a hex key. This versatile tool is often used for a wide range of tasks, including bike maintenance and repairs.
Using an Allen wrench to remove bike pedals is a convenient option as it eliminates the need for additional tools. However, it’s important to note that not all bike pedals can be removed using an Allen wrench. Most modern bike pedals have a 6mm or 8mm Allen wrench fitting, but some older pedals may require a different tool.
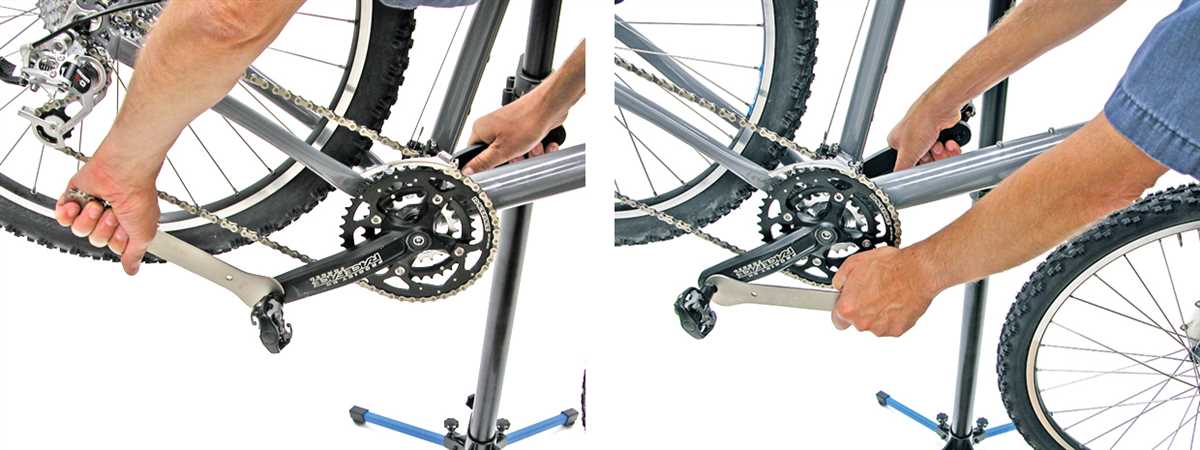
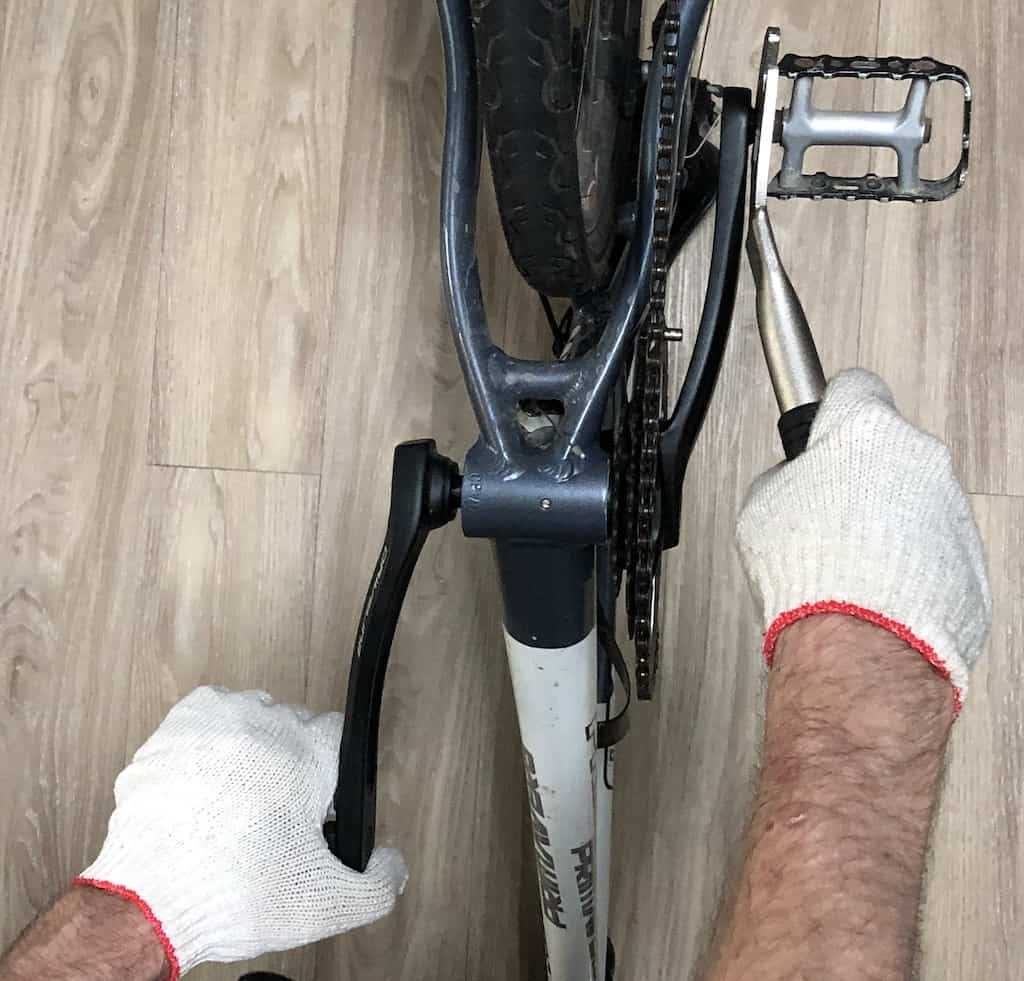
To begin the process of removing bike pedals with an Allen wrench, start by identifying the correct size of the Allen wrench needed. Once you have the right size, position the Allen wrench into the pedal spindle’s hexagonal fitting. Be sure to hold onto the opposite side of the pedal to prevent it from rotating as you turn the wrench.
Next, using a firm grip on the Allen wrench, turn it counterclockwise to loosen the pedal. Depending on the pedal’s condition and how tightly it is attached, you may need to apply more force or use a longer Allen wrench for additional leverage. After loosening the pedal, continue turning it counterclockwise until it is fully detached from the crank arm.
Step 1: Gather the necessary tools
To remove bike pedals with an allen wrench, you will need to have the following tools on hand:

- An allen wrench or hex key set
- A pedal wrench (optional, but helpful)
- A rag or towel
- A lubricant such as WD-40 or bike-specific lubricant
Having these tools ready will make the process of removing your bike pedals much easier and ensure that you have everything you need to complete the task.
Step 2: Position the bike properly
Before attempting to remove the bike pedals, it’s important to position the bike properly to ensure stability and ease of access. Follow these steps to position your bike:
- Find a flat and stable surface to place your bike on. This will prevent the bike from toppling over while you’re working on it.
- If possible, elevate the bike so that the pedals are at a comfortable height. This can be done by using a bike work stand or by propping the bike against a wall or sturdy object.
- Make sure the bike is securely supported and won’t move or shift while you’re working on it. You can use straps or bungee cords to secure the bike if necessary.
- Position the bike in a way that allows easy access to the pedals. This may mean turning the bike around or adjusting its position slightly to align the pedals in a way that is comfortable for you to work on.
Once your bike is properly positioned and secured, you can proceed to the next step of removing the pedals using an Allen wrench.
Step 3: Locate the pedal flats

Once you have the proper Allen wrench or pedal wrench, it’s time to locate the pedal flats. The pedal flats are the part of the pedal where you can apply pressure to remove it from the crank arm.
To locate the pedal flats, you’ll need to look at the sides of the pedals. The pedal flats are the wide, flat surfaces on each side of the pedal. They often have small markings or notches to indicate where you should apply pressure.
It’s important to locate the pedal flats before attempting to remove the pedal, as this is where you’ll need to position your wrench to apply pressure in the correct direction.
Take a close look at both pedals, and identify the pedal flats on each side. They should be parallel to the crank arm, and you’ll need to apply pressure perpendicular to these flats to loosen the pedal.
Step 4: Insert the Allen wrench into the pedal
Once you have determined the size of the Allen wrench needed for your bike pedals, you can now insert it into the pedal. Follow these steps to properly insert the Allen wrench:

- Hold the Allen wrench in your dominant hand with a firm grip.
- Position the Allen wrench so that it is perpendicular to the pedal, aligning the long end of the wrench with the pedal’s axle.
- Insert the short end of the Allen wrench into the hexagonal-shaped hole on the pedal.
- Make sure the Allen wrench is fully inserted into the hole and is securely positioned.
It’s important to ensure that the Allen wrench is properly inserted into the pedal before applying any force to avoid slipping or damaging the wrench or the pedal.
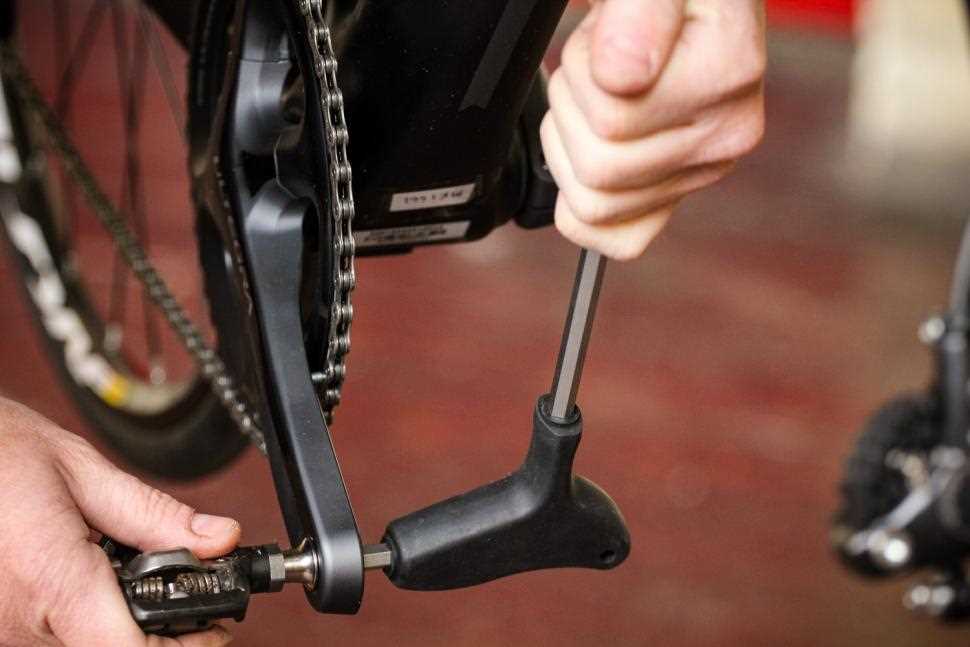
Step 5: Turn the Allen wrench counterclockwise
Once you have inserted the Allen wrench into the pedal spindle, it’s time to start loosening the pedal. To do this, you need to turn the Allen wrench counterclockwise.
Hold the pedal securely with one hand to prevent it from spinning as you turn the Allen wrench. This will ensure that you have better control and make the process easier.
Apply steady pressure and turn the Allen wrench counterclockwise. The initial resistance will gradually give way, and you’ll feel the pedal becoming looser as you continue to turn.

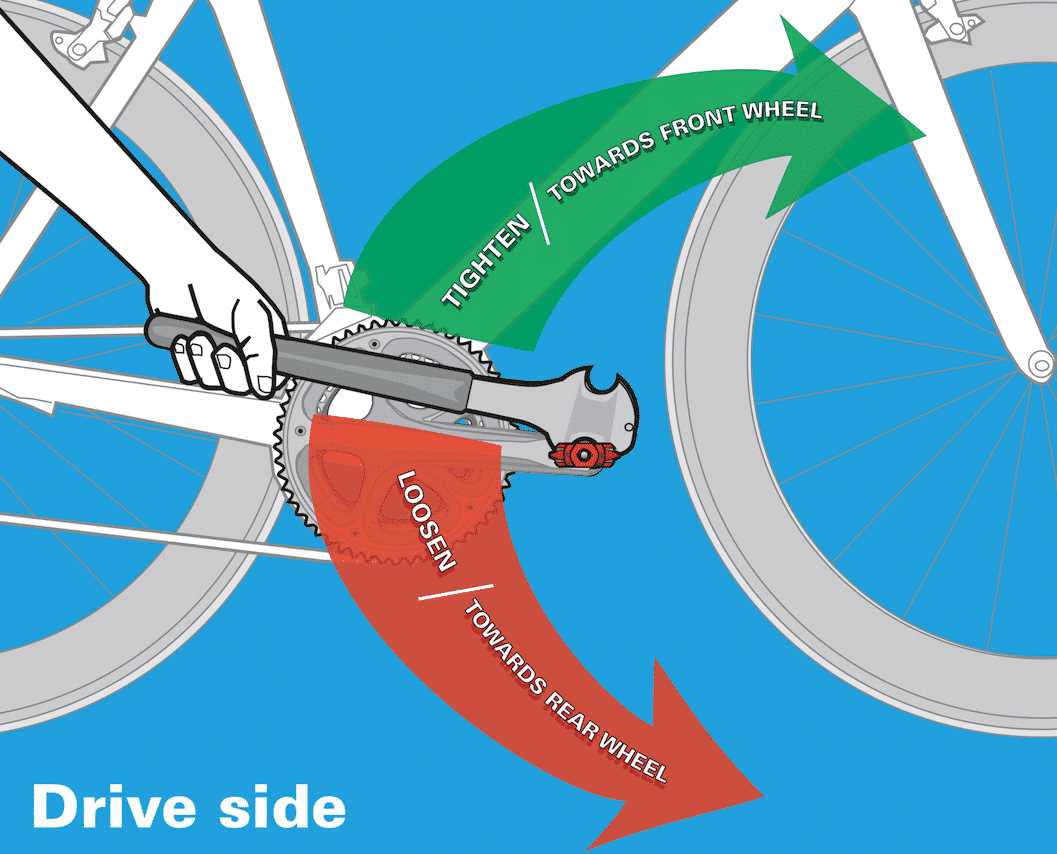
Keep turning until the pedal is completely loose and can be easily removed from the crank arm. It’s important to note that the left pedal has reverse threads, so you’ll need to turn it clockwise to loosen it.
If you encounter any resistance or difficulty while turning the Allen wrench, try spraying a small amount of lubricant onto the pedal spindle. This can help loosen any stubborn threads and make the removal process smoother.
Once the pedal is loose, you can continue to unscrew it completely by hand. Turn the pedal counterclockwise until it is fully detached from the crank arm.
Repeat the same steps for the other pedal until both pedals are completely removed from the bike. Remember to turn the Allen wrench counterclockwise for the right pedal and clockwise for the left pedal.
At this point, you have successfully removed the bike pedals using an Allen wrench. You can now proceed with any maintenance or repairs that require the pedals to be removed, or simply replace them if necessary.

Step 6: Repeat the process for the other pedal
Once you have successfully removed one pedal using the Allen wrench, it is time to repeat the process for the other pedal. Make sure you have securely tightened the non-drive side pedal before moving on to the drive side pedal.
Here are the steps to follow:
- Position yourself on the non-drive side of the bike.
- Locate the Allen wrench and place it securely onto the drive side pedal.
- Apply force in a counterclockwise direction to loosen the drive side pedal.
- Once the pedal is loose, continue unscrewing it with your hand until it is completely removed from the crank arm.
Remember to be cautious and apply steady force while removing the drive side pedal to avoid any damage or injury.
Once both pedals have been removed, you can proceed with any maintenance or replacement procedures necessary.
Step 7: Check if the pedals are removed
After using the Allen wrench to loosen the pedals, it’s important to check if they are fully removed from the crank arms. Here are the steps to check if the pedals are removed:
- Inspect the crank arms: Look closely at the crank arms on both sides of the bike. The cranks should be empty without any pedals attached.
- Feel for any resistance: Gently touch the crank arms and rotate them to check for any resistance. If the cranks rotate freely, it indicates that the pedals have been successfully removed.
- Compare with the previous position: Compare the current state of the bike with how it looked before removing the pedals. If the pedals are no longer present, it means they have been successfully removed.
It’s important to double-check if the pedals are removed to ensure that the bike is in a safe condition for riding or performing any maintenance tasks. If the pedals are still attached, repeat the steps to loosen and remove them properly.
Step 8: Reinstall the pedals if necessary
Once you have removed the bike pedals using an Allen wrench, you may need to reinstall them. This step is only necessary if you had removed the pedals for maintenance or replacement purposes.
Follow the steps below to reinstall the bike pedals:
- Make sure you have the correct pedal for each side. The right pedal is typically marked with an “R” or has a right-hand thread, while the left pedal is marked with an “L” or has a left-hand thread.
- Apply a small amount of bicycle grease or anti-seize compound to the threads of each pedal. This will help prevent them from seizing or getting stuck in the future.
- Align the pedal threads with the crank arm threads. The right pedal should be installed on the right crank arm, and the left pedal should be installed on the left crank arm.
- Using your hands, turn the pedals clockwise to start threading them into the crank arms. Make sure you thread them in as far as they will go by hand.
- Once the pedals are threaded in as far as they will go by hand, use the Allen wrench to tighten them further. Hold the crank arm steady with one hand while you use the Allen wrench to turn the pedal spindle clockwise.
- Tighten the pedals snugly, but be careful not to overtighten them, as this could damage the threads.
- Repeat the process for the other pedal, making sure to install it on the correct crank arm.
After reinstalling the pedals, give them a quick test by rotating them with your hands to ensure they rotate smoothly and securely. If they feel loose or wobbly, use the Allen wrench to tighten them further.
Congratulations! You have successfully reinstalled the bike pedals using an Allen wrench. Now you can go ahead and enjoy your ride!
FAQ
What tools do I need to remove bike pedals with an Allen wrench?
To remove bike pedals with an Allen wrench, you will need an Allen wrench set, preferably with a 5mm or 6mm size wrench.
Do I need to remove the chain before removing the pedals?
No, you do not need to remove the chain before removing the pedals. The chain is not connected to the pedals, so it can stay in place.
Can I remove the pedals without using an Allen wrench?
No, an Allen wrench is the most common tool used to remove bike pedals. It provides a secure grip on the pedal spindle, making it easier to loosen and remove them.
Is it difficult to remove bike pedals with an Allen wrench?
Removing bike pedals with an Allen wrench can vary in difficulty depending on factors such as the tightness of the pedals and the condition of the threads. However, with the right technique and tools, it can be a relatively simple task.
Why would I need to remove bike pedals with an Allen wrench?
There are several reasons why you might need to remove bike pedals with an Allen wrench. Some common reasons include replacing worn-out pedals, upgrading to different pedal types, or packing the bike for transport.
Video


Meet Harrison Clayton, a distinguished author and home remodeling enthusiast whose expertise in the realm of renovation is second to none. With a passion for transforming houses into inviting homes, Harrison's writing at https://thehuts-eastbourne.co.uk/ brings a breath of fresh inspiration to the world of home improvement. Whether you're looking to revamp a small corner of your abode or embark on a complete home transformation, Harrison's articles provide the essential expertise and creative flair to turn your visions into reality. So, dive into the captivating world of home remodeling with Harrison Clayton and unlock the full potential of your living space with every word he writes.


