How to Remove a Spanner Nut without a Spanner Wrench – Easy Tips and Tricks

Removing a spanner nut can be a challenging task, especially if you don’t have a spanner wrench. However, with a few easy tips and tricks, you can successfully remove a spanner nut without the need for a specialized tool.
Tip 1: Use a Pair of Channel Locks
If you don’t have a spanner wrench, you can use a pair of channel locks to remove the spanner nut. Channel locks are adjustable pliers that can grip onto the nut securely. Simply adjust the channel locks to fit the spanner nut and use them to turn the nut counterclockwise to loosen and remove it.
Tip 2: Utilize a Hammer and Chisel
Another method to remove a spanner nut is by using a hammer and chisel. Place the chisel against the edge of the spanner nut and gently tap it with the hammer. This will create enough force to loosen the nut. Once loosened, you can use a pair of pliers or your fingers to turn and remove the nut.

Tip 3: Try Using a Screwdriver and Hammer
If you don’t have channel locks or a chisel, you can use a screwdriver and a hammer as an alternative method to remove a spanner nut. Place the flathead screwdriver against one of the slots on the spanner nut and gently tap it with the hammer. This will create enough force to loosen the nut. Once loosened, you can use the screwdriver to turn and remove the nut.
Remember to exercise caution when using tools to remove a spanner nut, as excessive force or improper handling can cause damage to the nut or surrounding components. If you’re unsure or uncomfortable with the process, it’s always best to consult a professional for assistance.
Why Removing a Spanner Nut is Important
A spanner nut is a type of fastener that is used to secure different parts of an assembly. It is typically found in various mechanical and electrical systems, including plumbing, automotive, and industrial applications. Removing a spanner nut is an important task for various reasons:
1. Maintenance and Repair:
Removing a spanner nut is often necessary for performing maintenance and repair tasks on the assembly. Whether it is replacing a faulty component, cleaning, or inspecting the system, removing the spanner nut allows easy access to the parts that require attention.

2. Upgrades and Modifications:
When upgrading or modifying an assembly, removing a spanner nut is often the first step. It allows for the removal of the existing component or part that needs to be replaced or upgraded. By removing the spanner nut, one can easily swap out the old part with a new one.
3. Troubleshooting:
Removing a spanner nut can be essential for troubleshooting purposes. When trying to identify the cause of a malfunction or an issue within an assembly, accessing different components may be necessary. Removing the spanner nut allows for the removal of specific parts that may need to be examined or tested.
4. Cleaning and Maintenance:
Regular cleaning and maintenance are essential for the optimal functioning of any assembly. Removing the spanner nut grants access to the interior components, making it easier to clean and maintain the system. This helps to remove dirt, debris, and any other contaminants that might affect the performance or longevity of the assembly.
5. Replacement:
In some cases, a spanner nut may need to be removed in order to replace the entire assembly. This could be due to wear and tear, damage, or simply upgrading to a newer model. Removing the spanner nut allows for the safe removal and replacement of the entire assembly, ensuring proper functionality.
In conclusion, removing a spanner nut is important for various reasons, including maintenance and repair, upgrades and modifications, troubleshooting, cleaning and maintenance, and replacement. Whether you are a DIY enthusiast or a professional, understanding how to remove a spanner nut without a spanner wrench can be incredibly useful in various situations.

Understanding the Function of a Spanner Nut
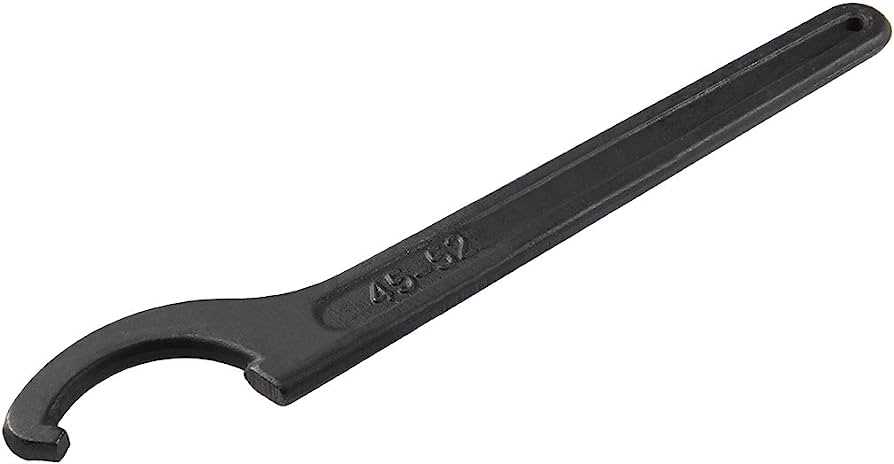
A spanner nut is a specialized type of fastener that is commonly used in various mechanical applications. It is designed to securely fasten two or more components together, providing stability and preventing them from becoming loose or separating. The name “spanner nut” comes from the fact that it is often used in conjunction with a spanner wrench to tighten or loosen it.
Key Functions
1. Fastening Components: The primary function of a spanner nut is to fasten two or more components together. It creates a secure connection that withstands movement and vibrations, keeping the components in place.
2. Preventing Loosening: Spanner nuts are designed with special threads that resist loosening. This helps maintain the integrity of the connection even in high vibration or dynamic environments.
3. Adjustability: Another key function of a spanner nut is its adjustability. By using a spanner wrench or other compatible tool, the nut can be tightened or loosened to achieve the desired level of tightness or adjustment.
Types of Spanner Nuts
Spanner nuts come in various designs and sizes to suit different applications. Some commonly used types include:

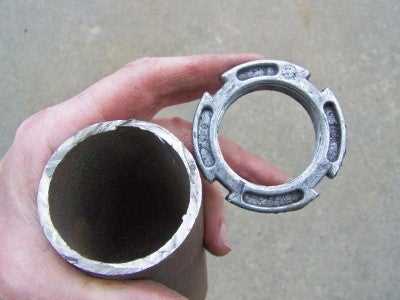
- Round Spanner Nut: This type of spanner nut has a round shape and is commonly used for securing bearings or other components that require high axial loads.
- Hex Spanner Nut: Hex spanner nuts have a hexagonal shape and are often used in plumbing or automotive applications where a tight seal is required.
- Slotted Spanner Nut: Slotted spanner nuts have slots cut into the sides, allowing for easy adjustment with a screwdriver or other flat tool.
Common Applications
Spanner nuts are widely used in various industries and applications, including:
- Mechanical engineering
- Automotive industry
- Plumbing and piping systems
- Industrial machinery
- Electrical equipment
Conclusion
Understanding the function of a spanner nut is essential for anyone working with mechanical systems. Whether you need to fasten components together or adjust the tightness of a connection, spanner nuts provide a reliable and adjustable solution. By using the appropriate tools and following proper techniques, you can effectively work with spanner nuts in various applications.
When and Why You Might Need to Remove a Spanner Nut
Spanner nuts are commonly used in various applications to secure and tighten components together. However, there are situations where you might need to remove a spanner nut. Here are some common scenarios:
1. Repairing or replacing a damaged component
If a component secured by a spanner nut gets damaged or malfunctions, you may need to remove the nut to repair or replace the faulty part. This could include items such as plumbing fixtures, automotive parts, or machinery components.

2. Maintenance or cleaning purposes
Regular maintenance or cleaning may require the removal of spanner nuts. For example, if you need to clean or replace a filter in an appliance or machine, you may need to remove the spanner nut to access the internal parts.
3. Upgrading or modifying equipment
When upgrading or modifying equipment, it may be necessary to remove a spanner nut to disassemble certain parts. This could be the case when adding new features, replacing outdated components, or making adjustments to improve performance.
4. Installing new components
When installing new components, such as a new faucet or light fixture, you may need to remove the existing spanner nut to properly secure the new part in place. This ensures a secure connection and prevents any leaks or instability.
5. Emergency situations
In emergency situations or urgent repairs, you may not have access to a spanner wrench. In these cases, knowing alternative methods to remove a spanner nut can be incredibly helpful to quickly resolve the issue and prevent further damage.
It is important to note that removing a spanner nut without the proper tools or techniques can be challenging and may risk damaging the nut or surrounding components. If you are unsure or uncomfortable with the removal process, it is recommended to seek professional assistance or consult the manufacturer’s instructions.
Tools and Materials You’ll Need
- Adjustable wrench: This tool will be used to grip and turn the spanner nut. It can be adjusted to fit different sizes of nuts.
- Locking pliers: These pliers have a built-in locking mechanism that allows them to securely grip the spanner nut while applying pressure.
- Screwdriver: A flat-head or Phillips screwdriver may be needed to remove any screws or fasteners that are holding the spanner nut in place.
- Hammer: A hammer may be required to tap the spanner nut if it is stuck or difficult to loosen.
- Socket wrench set: If the spanner nut is hexagonal or square in shape, a socket wrench set with the appropriate size socket may be needed to loosen it.
- Penetrating oil: This oil can be sprayed or applied to the spanner nut to help loosen rusted or seized nuts.
- Clean cloth or rag: This will be used to wipe away any dirt, grease, or debris that may be on or around the spanner nut.
- Safety goggles and gloves: It is important to protect your eyes and hands while working with tools.
Having these tools and materials on hand will make the process of removing a spanner nut without a spanner wrench much easier and safer. It is always a good idea to gather all necessary tools before starting the task to avoid any unnecessary delays or frustrations.
Alternate Tools for Removing a Spanner Nut
While a spanner wrench is the most common tool used to remove a spanner nut, there are alternative tools that can be used in case you don’t have one at hand. Here are a few alternate tools and techniques that you can try:
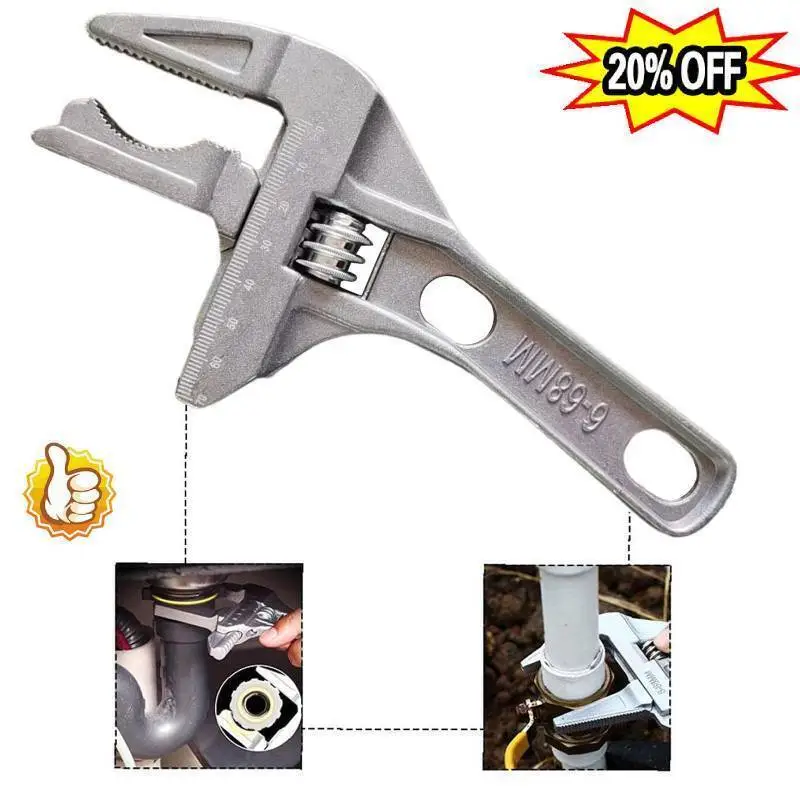
1. Adjustable Wrench
An adjustable wrench can often be used as a substitute for a spanner wrench. Choose a wrench that has serrated jaws to provide a better grip on the spanner nut. Adjust the wrench to fit the size of the nut and apply firm pressure to turn it counterclockwise.
2. Pipe Wrench
A pipe wrench can also be used to remove a spanner nut. This tool has sharp, adjustable jaws that can be locked onto the nut. Make sure to choose a pipe wrench that fits the size of the nut and then rotate it counterclockwise to loosen and remove the nut.
3. Locking Pliers
Locking pliers, also known as Vise-Grips, can be used as an alternative to a spanner wrench. These pliers have adjustable jaws that can securely grip the spanner nut and provide enough torque to loosen it. Lock the pliers onto the nut, then turn counterclockwise to remove the nut.
4. Hammer and Chisel
If none of the above tools are available, you can try using a hammer and chisel to remove the spanner nut. Position the chisel against one of the notches on the nut and strike it firmly with the hammer. Repeat this process for each notch until the nut starts to loosen. Once it’s loose enough, you can use pliers or an adjustable wrench to remove it completely.
Remember to use caution when using alternate tools, as they may not provide as secure of a grip as a proper spanner wrench. It’s important to apply steady pressure and avoid stripping or damaging the nut or surrounding components.
Recommended Safety Equipment
- Safety glasses: It is important to protect your eyes from any potential hazards or debris that may be released during the process of removing a spanner nut. Safety glasses will provide a barrier between your eyes and any flying particles.
- Gloves: Wearing gloves will not only protect your hands from any sharp edges or rough surfaces, but it will also provide better grip and control while removing the spanner nut. Look for gloves that are durable and provide a good grip.
- Protective clothing: Depending on the specific situation and the tools being used, it may be necessary to wear protective clothing. This could include long-sleeved shirts, long pants, or coveralls to protect your body from potential injuries or damage.
- Ear protection: If you are working in a noisy environment or using tools that produce loud noises, it is important to protect your ears. Ear protection, such as earplugs or earmuffs, can help reduce the risk of hearing damage.
- Dust mask: In some cases, removing a spanner nut may produce dust or debris that can be harmful if inhaled. Wearing a dust mask will help filter out any particles and protect your respiratory system.
- Proper footwear: It is essential to wear closed-toe shoes or boots that provide proper support and protection to your feet. This will help prevent any injuries caused by heavy objects falling or sharp objects stepping on your feet.
Step-by-Step Guide to Remove a Spanner Nut
If you need to remove a spanner nut but don’t have a spanner wrench, don’t worry! We’ve got you covered with this step-by-step guide on how to remove a spanner nut without a spanner wrench.
Things you’ll need:
- A pair of pliers
- A hammer
- A large screwdriver
Step 1: Assess the situation
Before you begin, take a moment to assess the spanner nut you need to remove. Determine its size and shape to help select the appropriate tools.
Step 2: Prepare the pliers
Take the pair of pliers and adjust them to the appropriate size. Make sure the jaws of the pliers are wide enough to grip the spanner nut securely.
Step 3: Grasp the spanner nut
Using the pliers, firmly grip the spanner nut. Make sure you have a good grip and that the pliers are securely attached to the nut.
Step 4: Apply pressure
While holding the pliers in place, use the large screwdriver as a lever. Insert the screwdriver into one of the holes or notches on the spanner nut. Apply pressure in a counterclockwise direction to loosen the nut.
Step 5: Tap with a hammer
If the spanner nut is still difficult to remove, you can try tapping it gently with a hammer. This can help loosen the nut and make it easier to remove.
Step 6: Repeat if necessary
If the spanner nut is still not coming off, repeat steps 3-5. Applying steady pressure and tapping with a hammer should eventually loosen the nut.
Step 7: Remove the spanner nut
Once the spanner nut is loose, continue turning it counterclockwise with the pliers until it is completely removed. Congrats, you have successfully removed the spanner nut without a spanner wrench!
Remember, always exercise caution when using tools, and if you encounter any difficulties or if the spanner nut seems stuck, it’s best to consult a professional for assistance.
Preparing the Work Area
Before attempting to remove a spanner nut without a spanner wrench, it is important to properly prepare the work area to ensure safety and effectiveness. Here are some steps to follow:
- Gather the necessary tools: Although a spanner wrench is typically used to remove a spanner nut, there are alternative tools that can be used. Make sure you have a suitable replacement tool, such as a pair of locking pliers, an adjustable wrench, or a hammer and chisel.
- Clear the surrounding area: Remove any items that may obstruct your access to the spanner nut. This includes tools, debris, or other objects that may get in the way during the removal process.
- Protect the work surface: Place a protective covering, such as a towel or a piece of cardboard, over the work surface to prevent any damage to the surface or the nut itself.
- Secure the object: If the spanner nut is attached to a larger object, such as a pipe or a piece of machinery, make sure the object is securely fastened or stabilized to avoid any movement or accidents during the removal process.
- Put on appropriate safety gear: It is essential to protect yourself during any type of repair work. Wear safety goggles or glasses to protect your eyes, and gloves to prevent any injuries or discomfort.
By following these steps and properly preparing the work area, you can ensure a safe and efficient process of removing a spanner nut without a spanner wrench.
Loosening the Spanner Nut
Removing a spanner nut without a spanner wrench may seem difficult, but with the right tips and tricks, it can be easily done. Follow the steps below to loosen the spanner nut:
Step 1: Safety first
Before attempting to remove the spanner nut, make sure to disconnect any power supply or turn off the equipment to ensure your safety.
Step 2: Prepare the tools
Gather the necessary tools, including a pair of pliers, a rubber mallet, a towel or cloth, and a flathead screwdriver.
Step 3: Position the pliers
Using the pliers, grip the spanner nut firmly. Make sure the pliers are positioned correctly to avoid slipping.
Step 4: Turn the spanner nut
Apply steady pressure to the pliers and turn the spanner nut counterclockwise. If the nut is stuck, tap it gently with the rubber mallet to loosen it.
Step 5: Use a screwdriver
If the spanner nut is still difficult to remove, insert a flathead screwdriver into one of the notches on the nut. Use the screwdriver as leverage to help turn the nut.
Step 6: Remove the spanner nut
Continue turning the spanner nut until it is fully loosened. Once loose, remove the nut from the equipment.
Step 7: Clean and inspect
After removing the spanner nut, take the time to clean any dirt or debris from the threads and inspect the nut and equipment for any damage.
Following these steps will help you remove a spanner nut without a spanner wrench. Remember to exercise caution and take your time to prevent any accidents or damage to the equipment.
Removing the Spanner Nut
The spanner nut is a small but essential component in various mechanical systems. It is used to secure different parts together, such as bearings, pulleys, and locking mechanisms. However, removing a spanner nut can be challenging, especially if you don’t have a spanner wrench at your disposal. Fortunately, there are several easy tips and tricks you can use to remove a spanner nut without a specialized tool.
1. Adjustable Pliers
One method to remove a spanner nut without a spanner wrench is by using adjustable pliers. These pliers have jaws that can be adjusted to grip different sizes of nuts, allowing you to grip the spanner nut firmly. Make sure to position the pliers properly, ensuring that you have a good grip on the nut. Apply steady pressure in a counterclockwise direction to loosen and remove the spanner nut.
2. Hammer and Chisel
If you don’t have adjustable pliers, another option is to use a hammer and chisel. Place the chisel against one of the notches on the spanner nut. Use the hammer to tap on the chisel, creating a small notch or groove. Repeat this process for several notches around the nut. Once you have created enough notches, use the chisel to turn the spanner nut counterclockwise and remove it.
3. Two Screwdrivers
If you have two screwdrivers of the appropriate size, you can use them to remove a spanner nut. Position the screwdrivers on opposite sides of the spanner nut, ensuring that they are aligned with the notches. Apply equal force to both screwdrivers in a counterclockwise direction to loosen and remove the nut. This method may require some patience and finesse, but it can be effective in removing a spanner nut without a spanner wrench.
4. Oil or Lubricant
Applying oil or lubricant to the spanner nut can help loosen it and make it easier to remove. Allow the oil or lubricant to penetrate the threads of the nut by applying it generously around the edges. Give it some time to work its way into the nut before attempting to remove it. The lubrication will reduce friction and make it easier to turn the nut counterclockwise with the aid of pliers, a chisel, or screwdrivers.
5. Heat
If none of the previous methods work, you can try applying heat to the spanner nut. Use a heat gun or a blowtorch to heat the nut for a few seconds. Be cautious not to overheat or damage any surrounding components. The heat will help expand the metal, making it easier to loosen the nut. Once the nut is heated, you can use pliers, a chisel, or screwdrivers to turn it counterclockwise and remove it.
Remember to take necessary precautions, such as wearing appropriate safety gear and working in a well-ventilated area, when using heat or any other method to remove a spanner nut without a spanner wrench. If you encounter any difficulties or are unsure about the process, it is advisable to seek assistance from a professional or consult the equipment’s user manual.
FAQ
What is a spanner nut and why would I need to remove it?
A spanner nut is a specialized nut with small notches or teeth around its circumference. It is typically used to secure a component onto a shaft, such as a blade on a lawnmower or a wheel on a car. You might need to remove a spanner nut to replace a worn-out component or to perform maintenance on a machine.
What can I use instead of a spanner wrench to remove a spanner nut?
If you don’t have a spanner wrench, there are several alternative tools and techniques you can try. One option is to use a pair of pliers to grip the spanner nut and turn it counterclockwise. You can also try using a hammer and chisel to create notches in the spanner nut and then use a screwdriver to turn it. Another option is to use a pipe wrench or an adjustable wrench to grip the spanner nut and turn it.
Are there any other tricks I can use to remove a spanner nut without a specialized tool?
Yes, there are a few more tricks you can try. One option is to use a rubber band or a rag to improve your grip on the spanner nut. You can wrap the rubber band or rag around the nut to get a better hold. Another trick is to heat the nut with a torch or a heat gun. This can help to expand the metal and make it easier to loosen. Finally, you can try using a penetrating oil or a lubricant to loosen the nut. Spray or apply the oil onto the nut and let it sit for a few minutes before attempting to turn it.
What precautions should I take when attempting to remove a spanner nut without a proper tool?
When attempting to remove a spanner nut without the right tool, it’s important to take some precautions to avoid injury or damage. Make sure to wear work gloves to protect your hands and provide a better grip. Use caution and apply steady force when trying to loosen the nut, being careful not to strip or damage the nut or the surrounding components. If you encounter excessive resistance, it’s best to stop and seek the proper tool or professional assistance.
Video


Meet Harrison Clayton, a distinguished author and home remodeling enthusiast whose expertise in the realm of renovation is second to none. With a passion for transforming houses into inviting homes, Harrison's writing at https://thehuts-eastbourne.co.uk/ brings a breath of fresh inspiration to the world of home improvement. Whether you're looking to revamp a small corner of your abode or embark on a complete home transformation, Harrison's articles provide the essential expertise and creative flair to turn your visions into reality. So, dive into the captivating world of home remodeling with Harrison Clayton and unlock the full potential of your living space with every word he writes.