How to Remove a Castle Nut without a Wrench – Easy Step-by-Step Guide

If you find yourself needing to remove a castle nut but don’t have a wrench on hand, don’t worry! There are alternative methods you can use to safely and effectively remove a castle nut without a wrench. Whether you’re working on a home improvement project or making repairs to your car, this easy step-by-step guide will show you how to remove a castle nut using simple tools you probably already have in your toolbox.
First, it’s important to understand what a castle nut is and why it’s used. A castle nut is a type of fastener that is typically used in automotive, construction, and industrial applications. It is designed to secure a bolt or rod in place while allowing for easy disassembly. The castle nut gets its name from its unique shape, which resembles the turrets of a castle. It has slots or notches on the top that can be aligned with a cotter pin or safety wire to prevent the nut from coming loose.
To remove a castle nut without a wrench, you can use a pair of pliers or adjustable wrench to grip the nut. Start by positioning the pliers or adjustable wrench around the nut, making sure to get a firm grip. Then, turn the pliers or adjustable wrench counterclockwise to loosen the nut. Be sure to apply steady pressure and avoid using too much force, as this can damage the nut or the surrounding components.
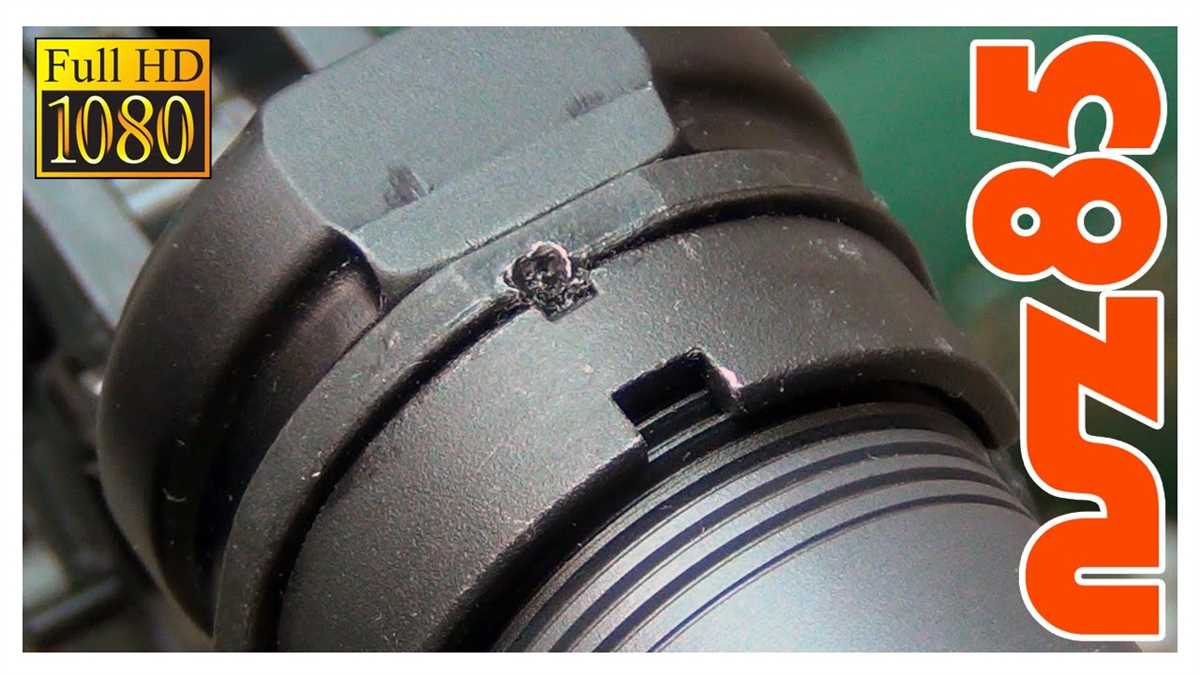
If the castle nut is stuck or stubborn, you can try using a hammer and chisel to create a slight notch on the edge of the nut. This will help provide a better grip for the pliers or wrench. Gently tap the chisel with the hammer to create the notch, being careful not to strike too hard or damage the threads of the nut. Once the notch is created, use the pliers or wrench to loosen the nut as described earlier.
Remember, safety is always important when working with tools. Make sure to wear appropriate protective gear, such as gloves and safety glasses, and always exercise caution when using hand tools. If you’re unsure about how to safely remove a castle nut, it’s best to consult a professional or seek guidance from a knowledgeable person.
By following these simple steps, you can remove a castle nut without a wrench and complete your project more easily. Whether you’re a DIY enthusiast or a professional, having the ability to use alternative methods to remove a castle nut can come in handy in various situations. So next time you’re faced with a stubborn castle nut and don’t have a wrench, don’t fret – you now have the knowledge and tools to get the job done!

Preparing for the Task
Before starting the task of removing a castle nut without a wrench, it is important to gather all the necessary tools and materials. This will ensure that the process goes smoothly and efficiently. Here is a list of things you will need:
- Safety gear: It is crucial to put on safety goggles and gloves to protect yourself from any potential injuries during the task.
- A suitable replacement tool: Since you don’t have a wrench, you need to find an alternative tool that can provide enough leverage to remove the castle nut. Some common options include pliers, a socket and ratchet set, or a crescent wrench.
- Penetrating oil: In case the castle nut is stuck due to rust or corrosion, it is helpful to have a penetrating oil such as WD-40 to loosen it. Spray the oil onto the nut and let it sit for a few minutes before attempting to remove it.
- A hammer: Sometimes, gentle tapping with a hammer can help loosen a tightly secured castle nut. However, be cautious not to damage the surrounding components.
- A clean workspace: It is important to have a clean and well-lit area to work in. This will ensure that you can see what you are doing and avoid any accidents or mistakes.
Once you have all these items ready, you can proceed with the task of removing the castle nut without a wrench.
Gathering the Necessary Tools
- A pair of pliers
- A hammer
- A metal file or a grinder
- A small chisel
- A flathead screwdriver
- Some penetrating oil or lubricant
- A clean rag
Before starting the process of removing a castle nut without a wrench, it’s important to gather all the necessary tools. Here is a list of tools that you will need:
- A pair of pliers: Pliers will be used to hold the castle nut in place while you remove it.
- A hammer: A hammer will be used to strike the end of the chisel or screwdriver to loosen the castle nut.
- A metal file or a grinder: If the castle nut is rusted or corroded, you may need to file or grind it down to remove it easily.
- A small chisel: The chisel will be used to create a groove in the castle nut, which will allow you to use a screwdriver or pliers for removal.
- A flathead screwdriver: A flathead screwdriver can be used to remove the castle nut by applying torque to it.
- Some penetrating oil or lubricant: If the castle nut is stubborn and difficult to remove, applying some penetrating oil or lubricant can help loosen it.
- A clean rag: You can use a clean rag to wipe away any excess oil or debris during the removal process.
Make sure to have all these tools handy before you begin removing the castle nut without a wrench. It’s important to have the right tools to ensure a smooth and successful removal process.

Ensuring Safety

Removing a castle nut without a wrench can be a challenging task, but it’s important to prioritize safety during the process. Here are some essential safety precautions to follow:
- Wear safety goggles or glasses to protect your eyes from any potential hazards.
- Make sure you are working in a well-ventilated area to avoid inhaling any dust or fumes.
- Use a pair of heavy-duty gloves to protect your hands from injuries or burns.
- Ensure stability by working on a flat and secure surface.
- Before proceeding, make sure that the object or equipment you are working on is securely immobilized or supported to prevent any accidental movement.
In addition to these general safety precautions, there are a few specific safety considerations to keep in mind when removing a castle nut without a wrench:
- Ensure that the object is properly supported and balanced to prevent it from falling or toppling over while you are applying force to remove the castle nut.
- Consider using a stabilizing tool or clamp to hold the object in place securely.
- Always work in a controlled manner and avoid applying excessive force, as it may cause damage to the object or result in injury.
- If you encounter any difficulties or if the castle nut is not loosening, consider seeking assistance from a professional or someone with expertise in the field.
By following these safety precautions, you can minimize the risk of accidents or injuries while successfully removing a castle nut without a wrench.
Identifying the Type of Castle Nut
Before attempting to remove a castle nut without a wrench, it is important to correctly identify the type of castle nut you are working with. This will help you determine the best method to remove it.

There are two main types of castle nuts:
- Slotted Castle Nut: This type of castle nut has slots or grooves on one end, allowing for the insertion of a cotter pin or safety wire. The slots are typically aligned with one of the nut’s flat sides.
- Drilled Castle Nut: This type of castle nut has one or more holes drilled through the nut, perpendicular to the threaded shaft. These holes are designed to accommodate a cotter pin or safety wire.
To identify the type of castle nut you have, look carefully at the end of the nut. If you see slots or grooves, it is a slotted castle nut. If you see holes drilled through the nut, it is a drilled castle nut.
| Slotted Castle Nut | Drilled Castle Nut |
|---|---|
 |
 |
It is important to correctly identify the type of castle nut because the removal method may vary depending on the type. Slotted castle nuts are generally easier to remove without a wrench, as you can use pliers or a wrench-like tool to turn the nut. Drilled castle nuts may require a specialized tool or additional steps for removal.
Loosening the Nut
To remove a castle nut without a wrench, you will need to follow these step-by-step instructions:
-
Gather the necessary tools:
- Adjustable pliers
- Hammer
- Screwdriver
-
Inspect the castle nut:
- Make sure the castle nut is not damaged or corroded.
- If it is damaged, consider replacing it with a new one.
-
Position the adjustable pliers:
- Hold the castle nut firmly with the pliers.
- Ensure that the pliers are gripping the nut securely.
-
Apply force:
- Use the hammer to gently tap the end of the adjustable pliers.
- This will help to loosen the nut.
-
Continue tapping:
- Keep tapping the pliers until the castle nut is completely loosened.
- Be careful not to hit the pliers too hard, as this can damage the nut or surrounding components.
-
Remove the nut:
- Once the nut is loose, use the screwdriver to unscrew it the rest of the way.
- Turn the nut counterclockwise to remove it from the bolt or shaft.
By following these steps, you should be able to successfully remove a castle nut without a wrench. Remember to exercise caution and take your time to avoid causing any damage to the nut or surrounding components.

Removing the Nut
To remove the castle nut without a wrench, follow these simple steps:
- Ensure you have the necessary safety equipment on, such as gloves and safety glasses.
- Use a pair of pliers or vise grips to secure the stud or bolt that the castle nut is attached to.
- Using a hammer, tap the edge of the castle nut in a counterclockwise direction to loosen it.
- If the nut is stubborn and won’t budge, you can try using a punch or chisel to create a small notch on one of the slots of the castle nut.
- Insert a flathead screwdriver or a similar tool into the notch and use it as a leverage point to turn the castle nut counterclockwise.
- Continue to turn the castle nut until it is completely removed from the stud or bolt.
It’s important to use caution and not apply excessive force when removing the castle nut, as this can damage the surrounding components or cause injury.
Once the castle nut is removed, you can proceed with any necessary repairs or maintenance tasks.
Inspecting for Damage

Before attempting to remove a castle nut without a wrench, it’s important to inspect it for any damage. A damaged castle nut may not only be difficult to remove, but it can also indicate underlying issues with the hardware it is securing.
Here are the steps to inspect a castle nut for damage:
- Visually examine the castle nut for any signs of wear and tear, such as cracks, dents, or rust. These can weaken the nut and make it more difficult to remove.
- Check the threading on the nut. If the threads are stripped or damaged, it may be necessary to replace the nut.
- Inspect the cotter pin holes on the castle nut. Ensure that they are not elongated or damaged, as this can affect the nut’s ability to secure the hardware.
- If the castle nut is part of a larger assembly, such as a suspension system or steering component, check the surrounding components for damage. Look for any signs of leakage, misalignment, or excessive play, as these can be indications of larger issues.
It’s important to address any damage or issues discovered during the inspection before attempting to remove the castle nut. If the nut is damaged beyond repair or the surrounding components show signs of significant wear, it may be necessary to consult a professional mechanic or technician for further assistance.
Inspecting for damage is an essential step to ensure the safe removal of a castle nut without a wrench. By taking the time to thoroughly inspect the nut and surrounding components, you can identify any potential problems and address them appropriately.
Reassembling the Nut or Replacing if Necessary
Once you have successfully removed the castle nut, you may need to reassemble it or replace it with a new one. Here are the steps to follow:
If reassembling the nut:
- Clean the threads of the castle nut and the corresponding bolt or stud to remove any dirt or debris.
- Apply a small amount of thread locker to the threads of the bolt or stud.
- Slide the castle nut onto the bolt or stud, making sure it aligns with the cotter pin hole.
- Insert a new cotter pin through the hole in the bolt or stud and bend the ends to secure it in place.
- Ensure that the castle nut is tightened to the proper torque specification. Refer to the manufacturer’s guidelines for the specific torque value.
If replacing the nut:
- Measure the size and thread pitch of your existing castle nut.
- Obtain a replacement castle nut that matches the measurements of the original nut.
- Clean the threads of the bolt or stud to remove any dirt or debris.
- Apply a small amount of thread locker to the threads of the bolt or stud.
- Slide the new castle nut onto the bolt or stud, making sure it aligns with the cotter pin hole.
- Insert a new cotter pin through the hole in the bolt or stud and bend the ends to secure it in place.
- Ensure that the new castle nut is tightened to the proper torque specification. Refer to the manufacturer’s guidelines for the specific torque value.
Remember, it is important to follow the manufacturer’s instructions and specifications when reassembling or replacing castle nuts to ensure proper functioning and safety.
FAQ
What is a castle nut and why would I need to remove it?
A castle nut is a nut with slots on one end, resembling the turrets of a castle, that is used to secure a bolt or a threaded rod in place. You might need to remove a castle nut for various reasons, such as replacing a part, performing maintenance, or making adjustments.
What tools do I need to remove a castle nut without a wrench?
If you don’t have a wrench, you can still remove a castle nut using a few alternative tools. You will need pliers, a screwdriver or punch, and a hammer. These tools will help you loosen and remove the castle nut without a wrench.
Can I damage the castle nut while removing it without a wrench?
While it is possible to damage the castle nut if you apply excessive force or use improper tools, following the step-by-step guide mentioned in the article will minimize the risk. By using the correct tools and applying controlled force, you should be able to remove the castle nut without causing any damage.
Is it possible to remove a castle nut without any tools?
It is highly unlikely to remove a castle nut without any tools. The castle nut is designed to be tightened securely, and without the use of tools, it can be quite challenging to loosen and remove. It is recommended to use the appropriate tools mentioned in the article to safely remove the castle nut.
Are there any safety precautions I should take while removing a castle nut without a wrench?
Yes, there are a few safety precautions you should keep in mind while removing a castle nut without a wrench. Make sure to wear protective gloves to prevent injury to your hands. Additionally, be cautious of flying debris or particles that may result from using a hammer and screwdriver or punch. If possible, work in a well-lit and well-ventilated area to ensure safe removal of the castle nut.
Can I use this method to remove other types of nuts?
The method mentioned in the article can be applied to remove other types of nuts as well, especially if they have similar slots or grooves for manual removal. However, it is important to note that different nuts may require different tools or techniques for removal, so it’s best to refer to specific instructions or guidelines for each type of nut you encounter.
Video


Meet Harrison Clayton, a distinguished author and home remodeling enthusiast whose expertise in the realm of renovation is second to none. With a passion for transforming houses into inviting homes, Harrison's writing at https://thehuts-eastbourne.co.uk/ brings a breath of fresh inspiration to the world of home improvement. Whether you're looking to revamp a small corner of your abode or embark on a complete home transformation, Harrison's articles provide the essential expertise and creative flair to turn your visions into reality. So, dive into the captivating world of home remodeling with Harrison Clayton and unlock the full potential of your living space with every word he writes.


